This post may contain affiliate links. Please read our disclosure policy.
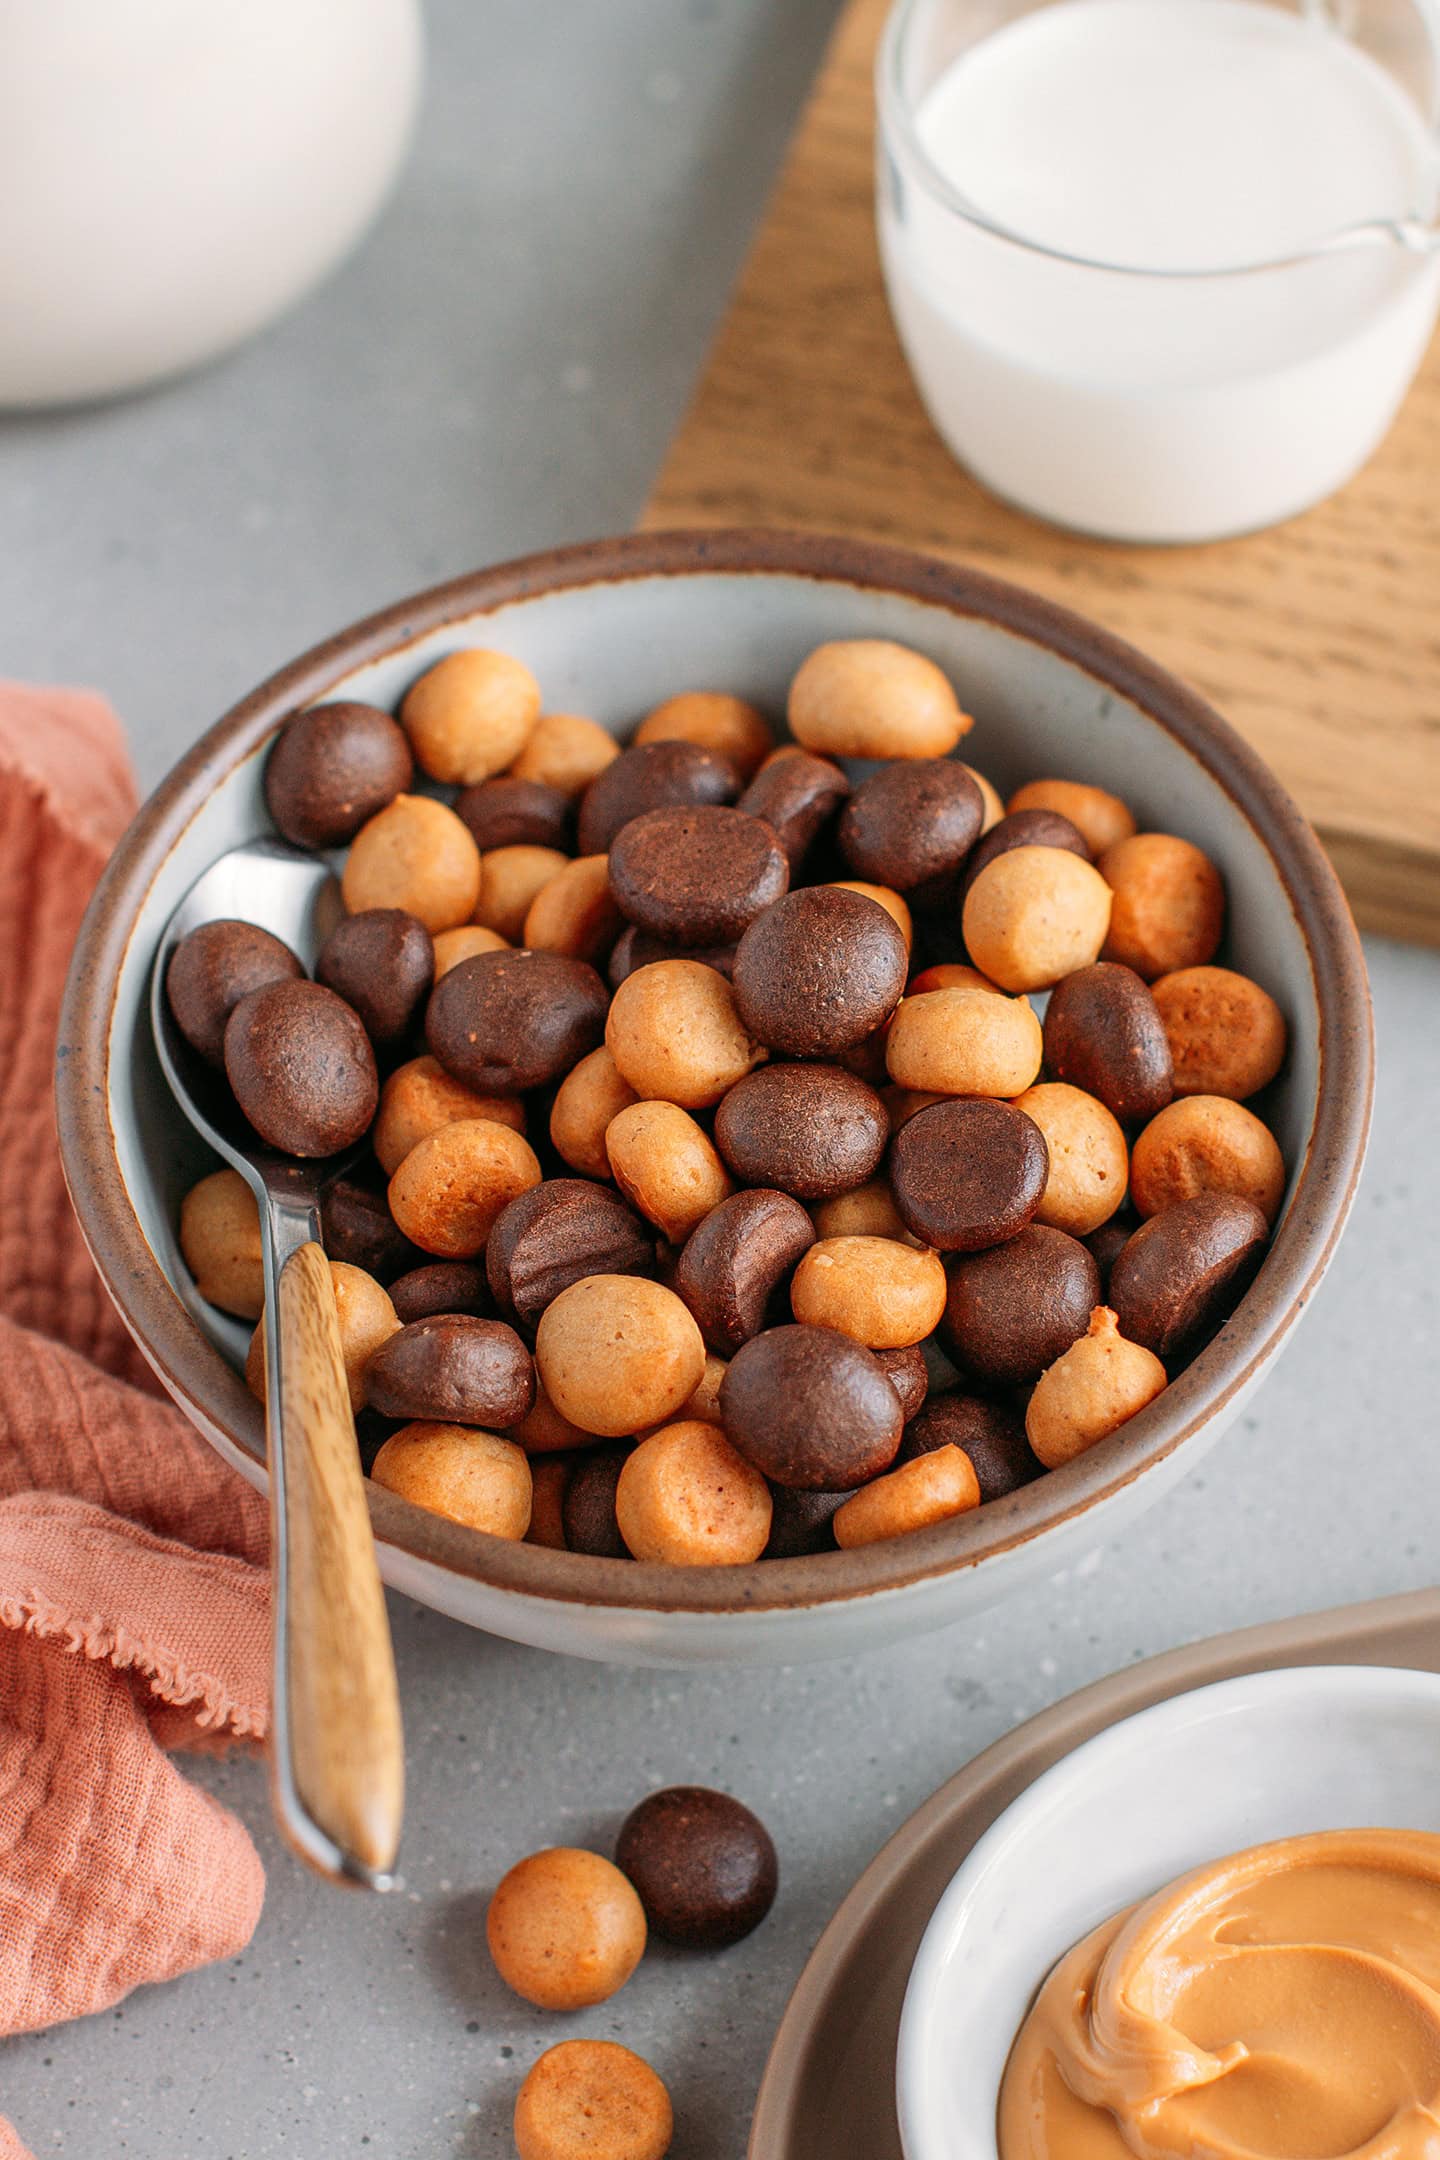
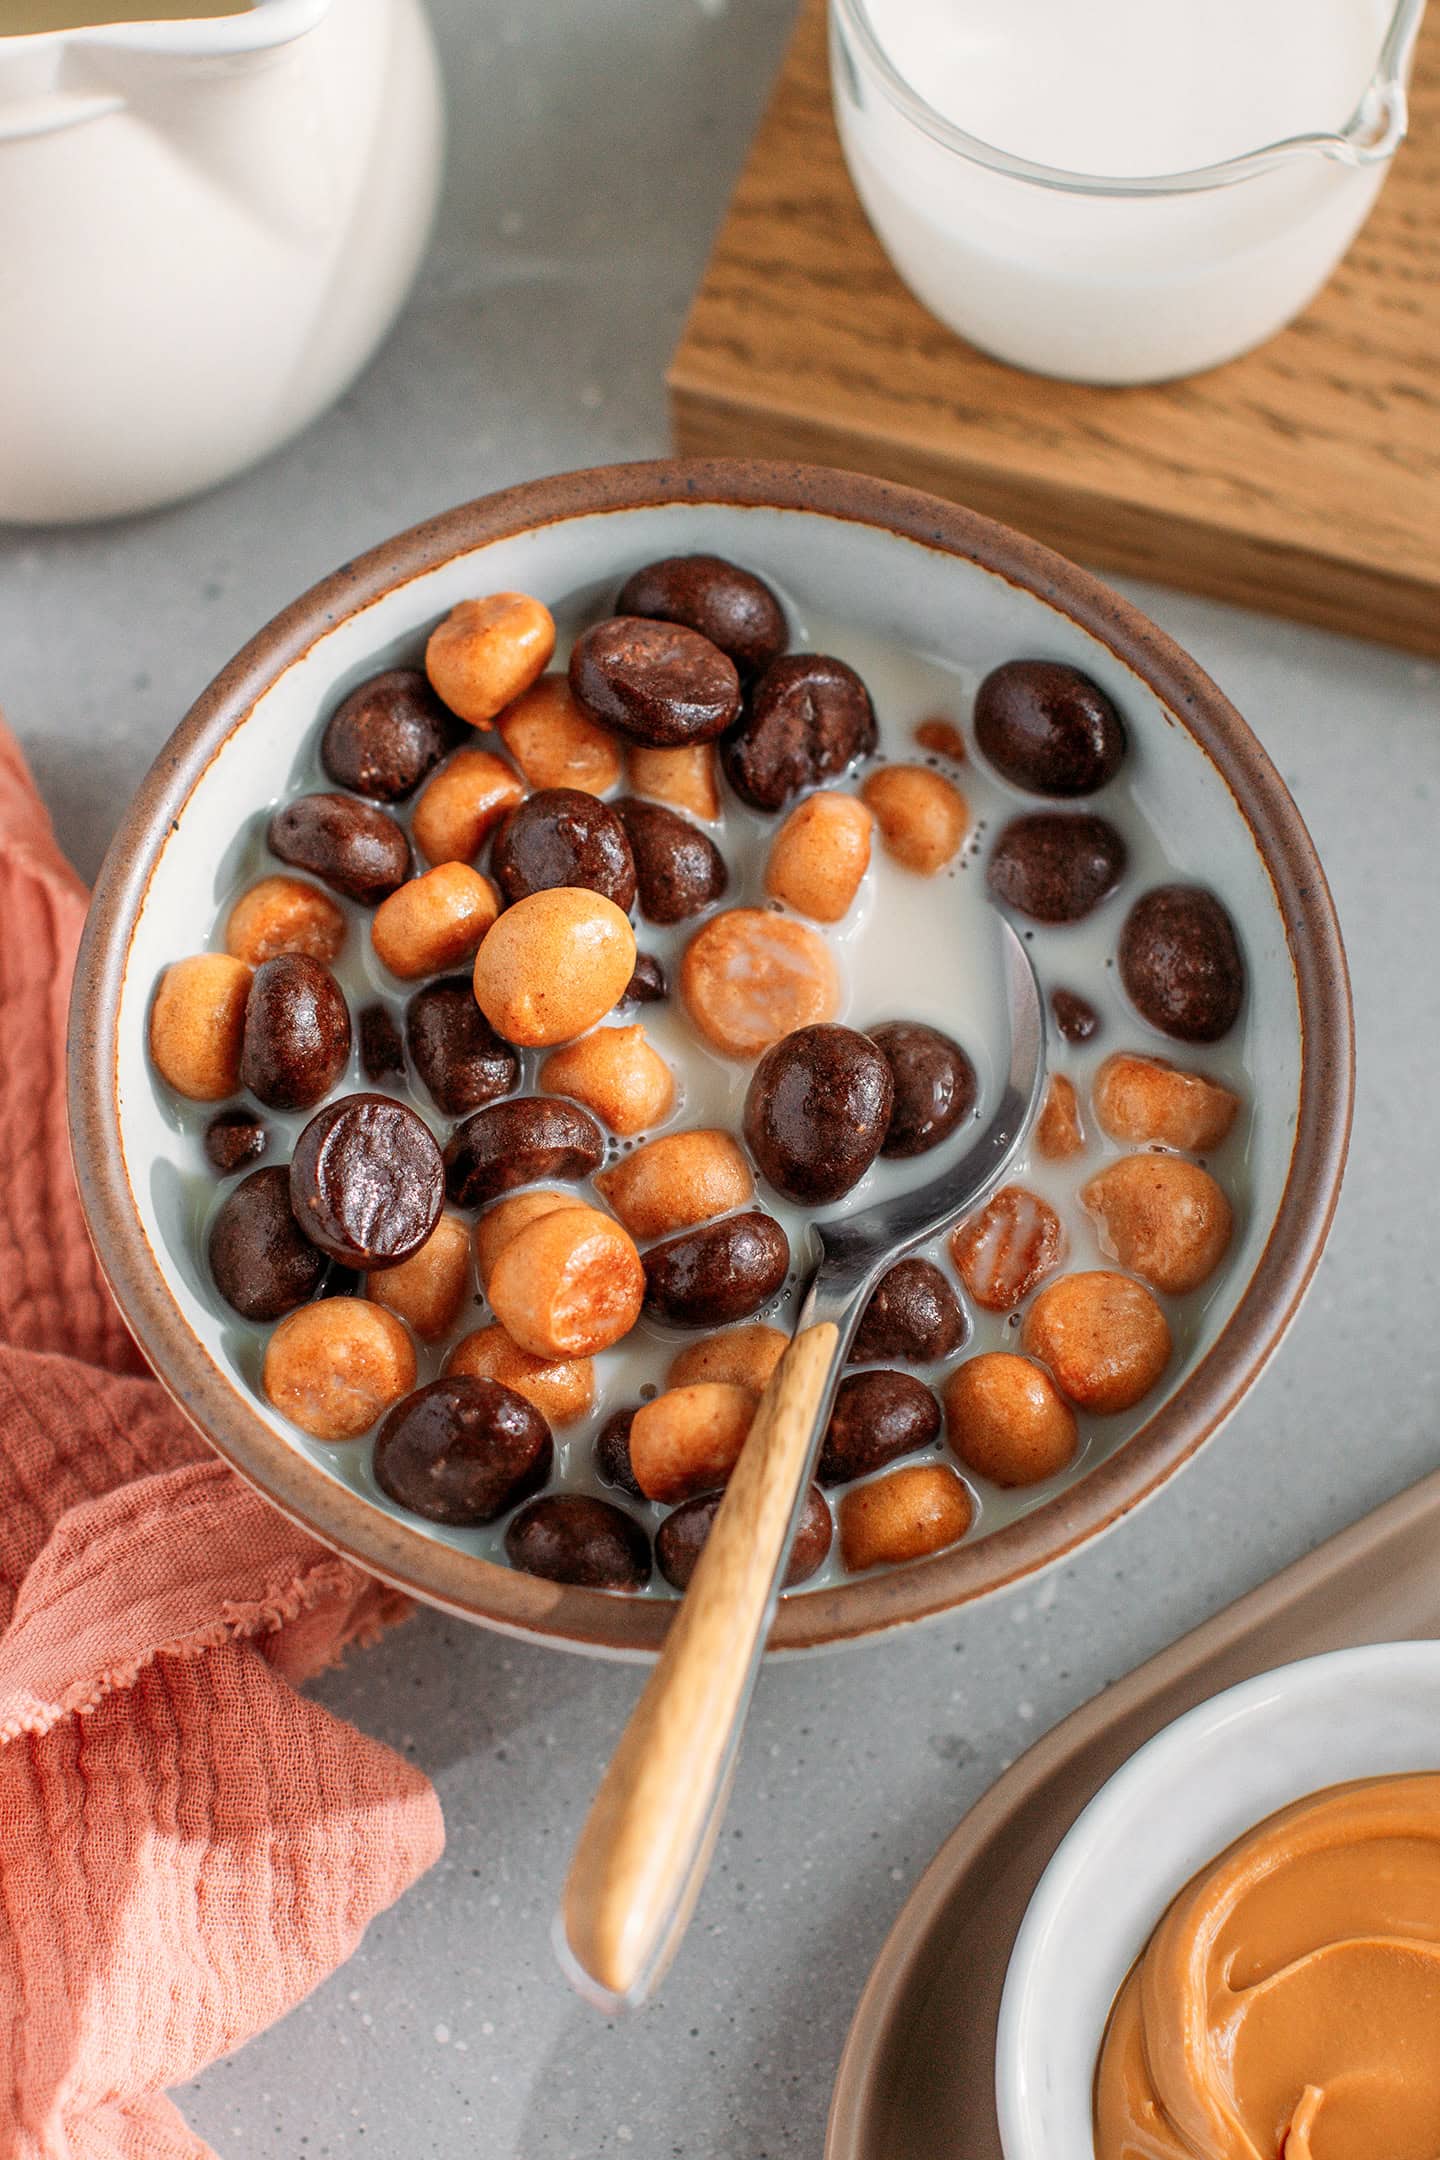
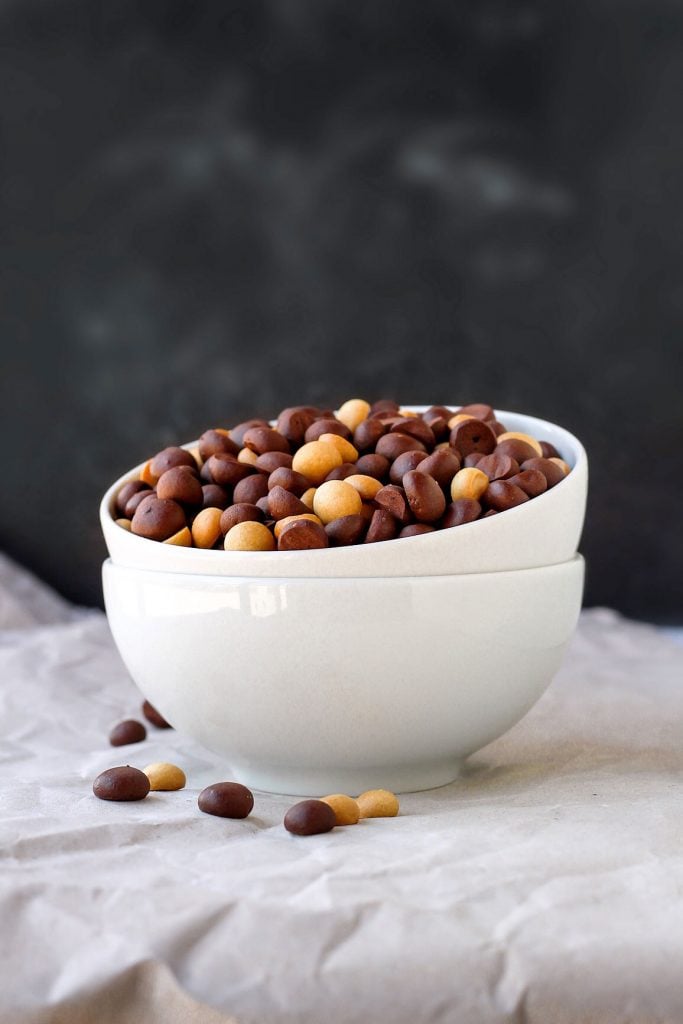
Forget about Reese’s Puffs and try this homemade chocolate peanut butter cereal! It’s super crunchy, not overly sweet, and made with just 9 ingredients. Enjoy it with cold or warm milk, stir it into yogurt, or sprinkle it over ice cream!
Love cereal? Love chocolate + peanut butter? Then you’re going to love this chocolate peanut butter cereal!
Making your own cereal might sound wild, but it’s actually pretty easy and healthier than most of the stuff you can find at the supermarket.
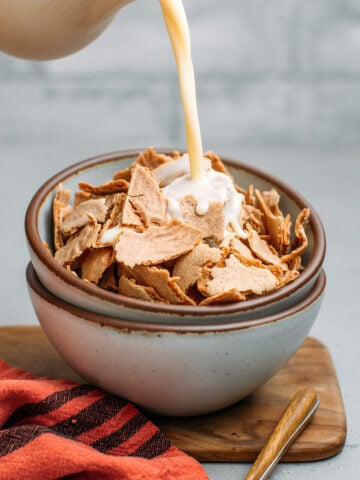
I’m not new to making cereal, having previously made cinnamon cereal. But even though I love cinnamon, I wanted a chocolate version. And let’s be real, chocolate isn’t complete without peanut butter as it’s hands down the best combo ever!
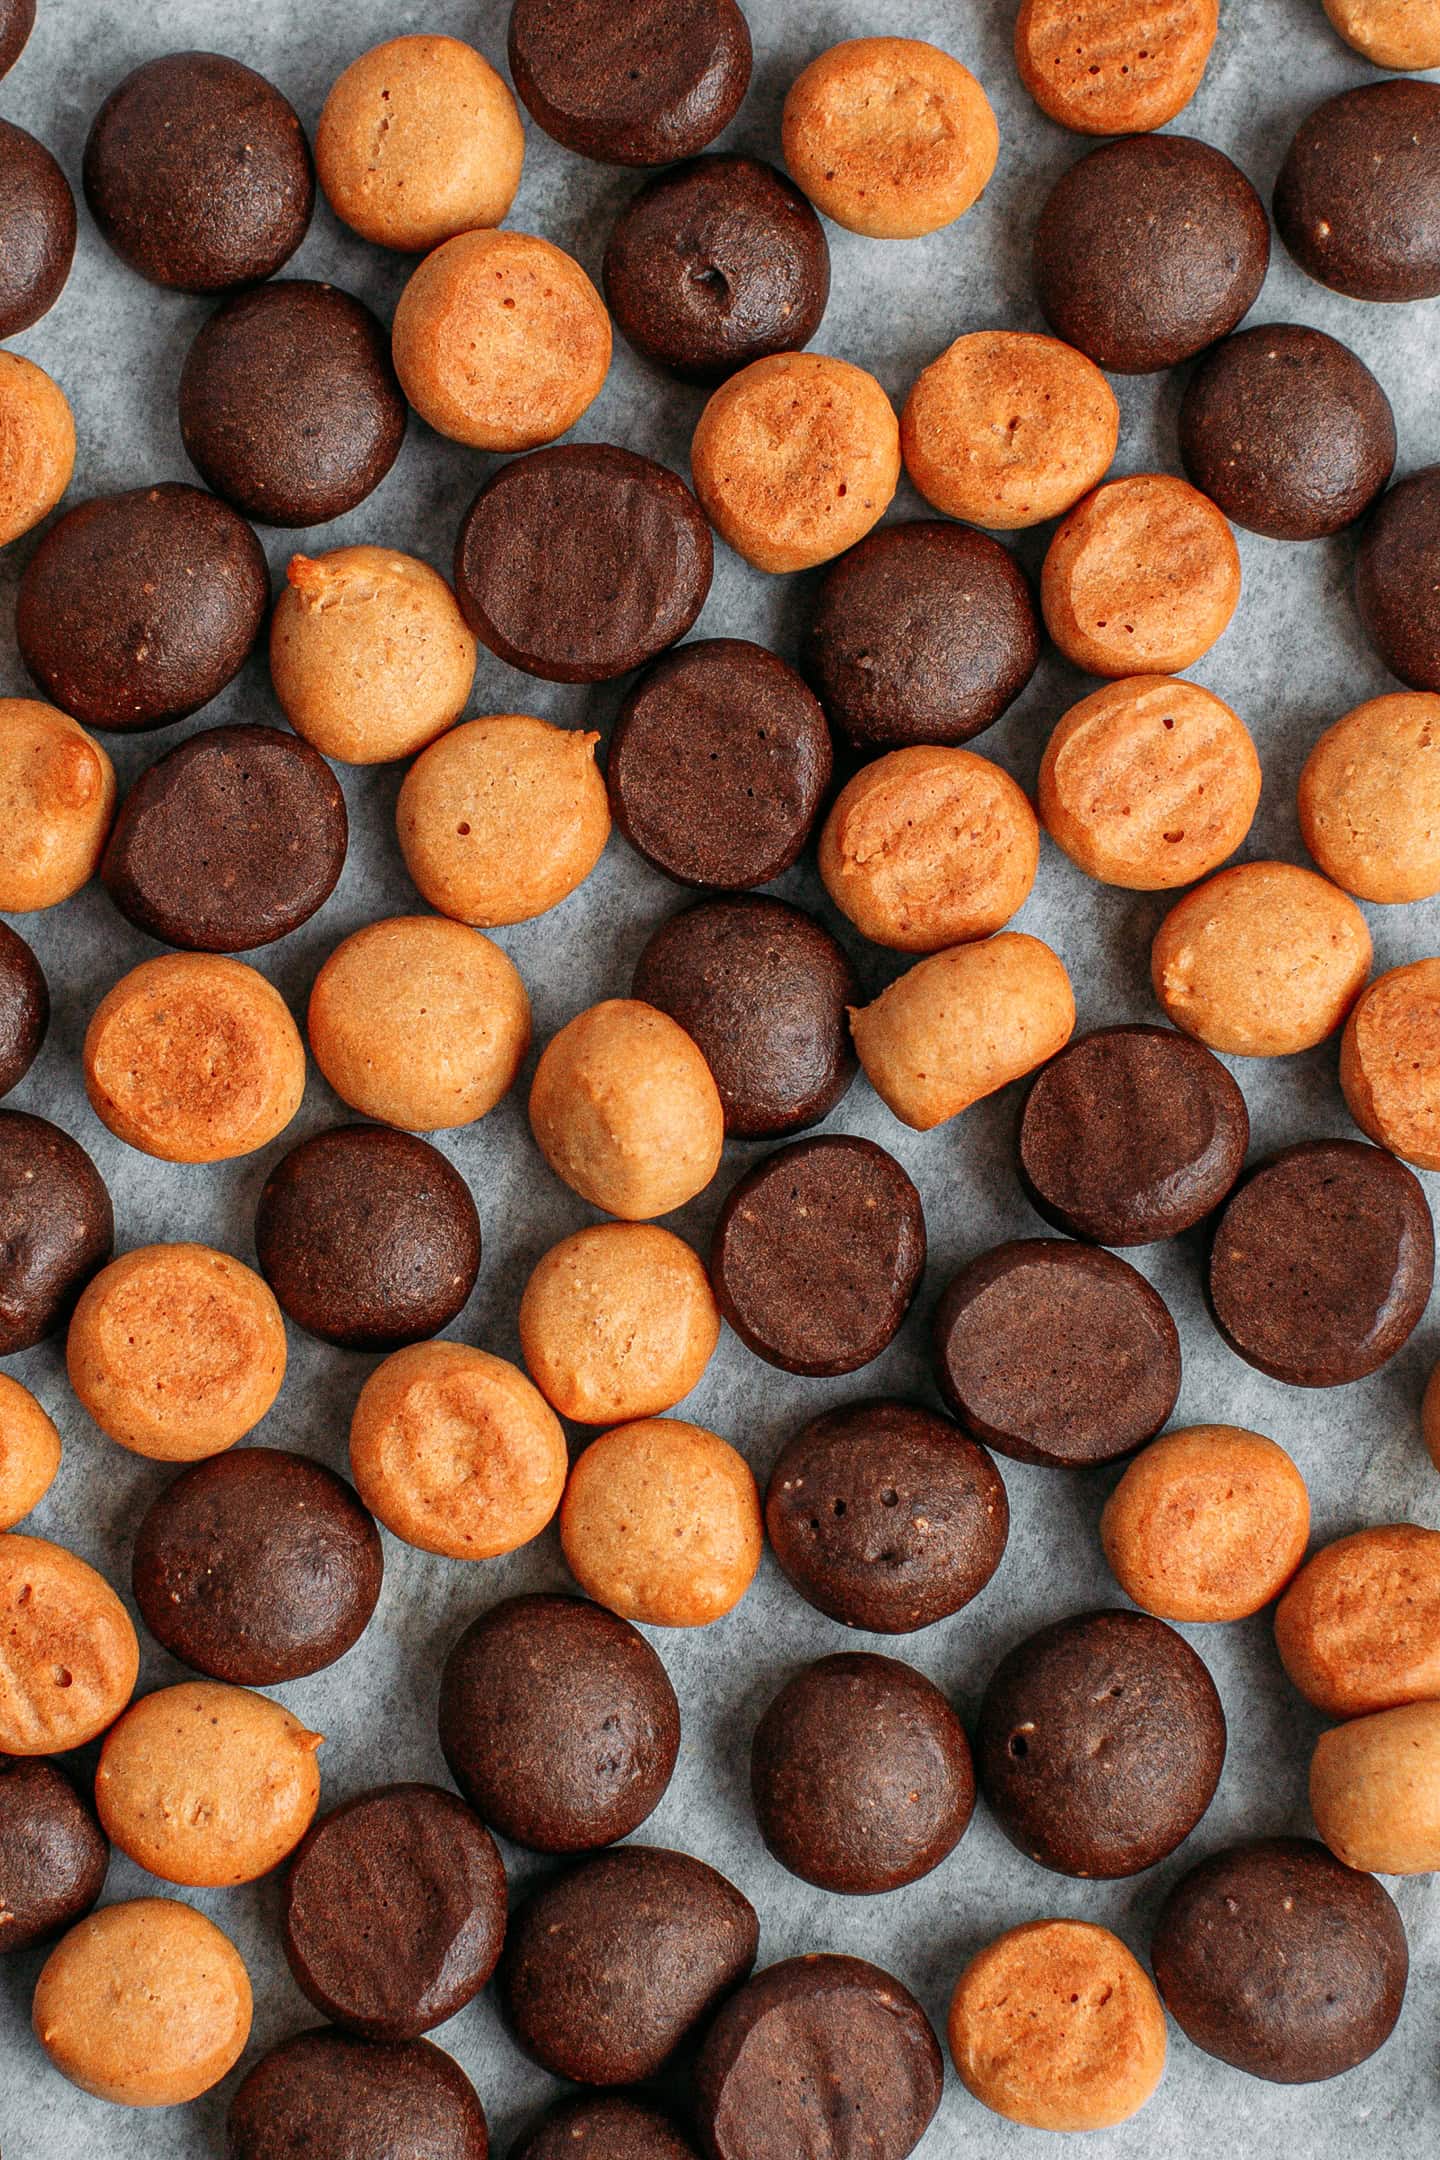
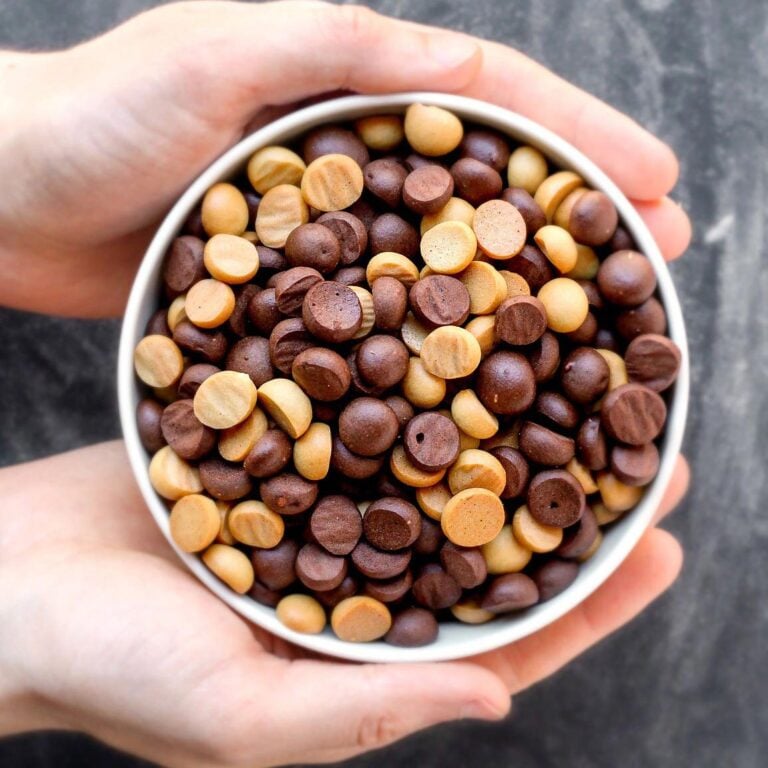
While this recipe is clearly inspired by Reese’s Puffs, keep in mind this homemade version doesn’t have the same light, puffed texture (that’s pretty much impossible without special equipment). Instead, the cereals are more like tiny crunchy cookies! And honestly, it’s a bonus point as this allows them to stay crispy even longer in milk!
⭐️ Why You’ll Love It
The perfect combo.
Chocolate and peanut butter are a match made in heaven. So, turning that combo into cereal? It’s pretty much a dream come true! At least for me.
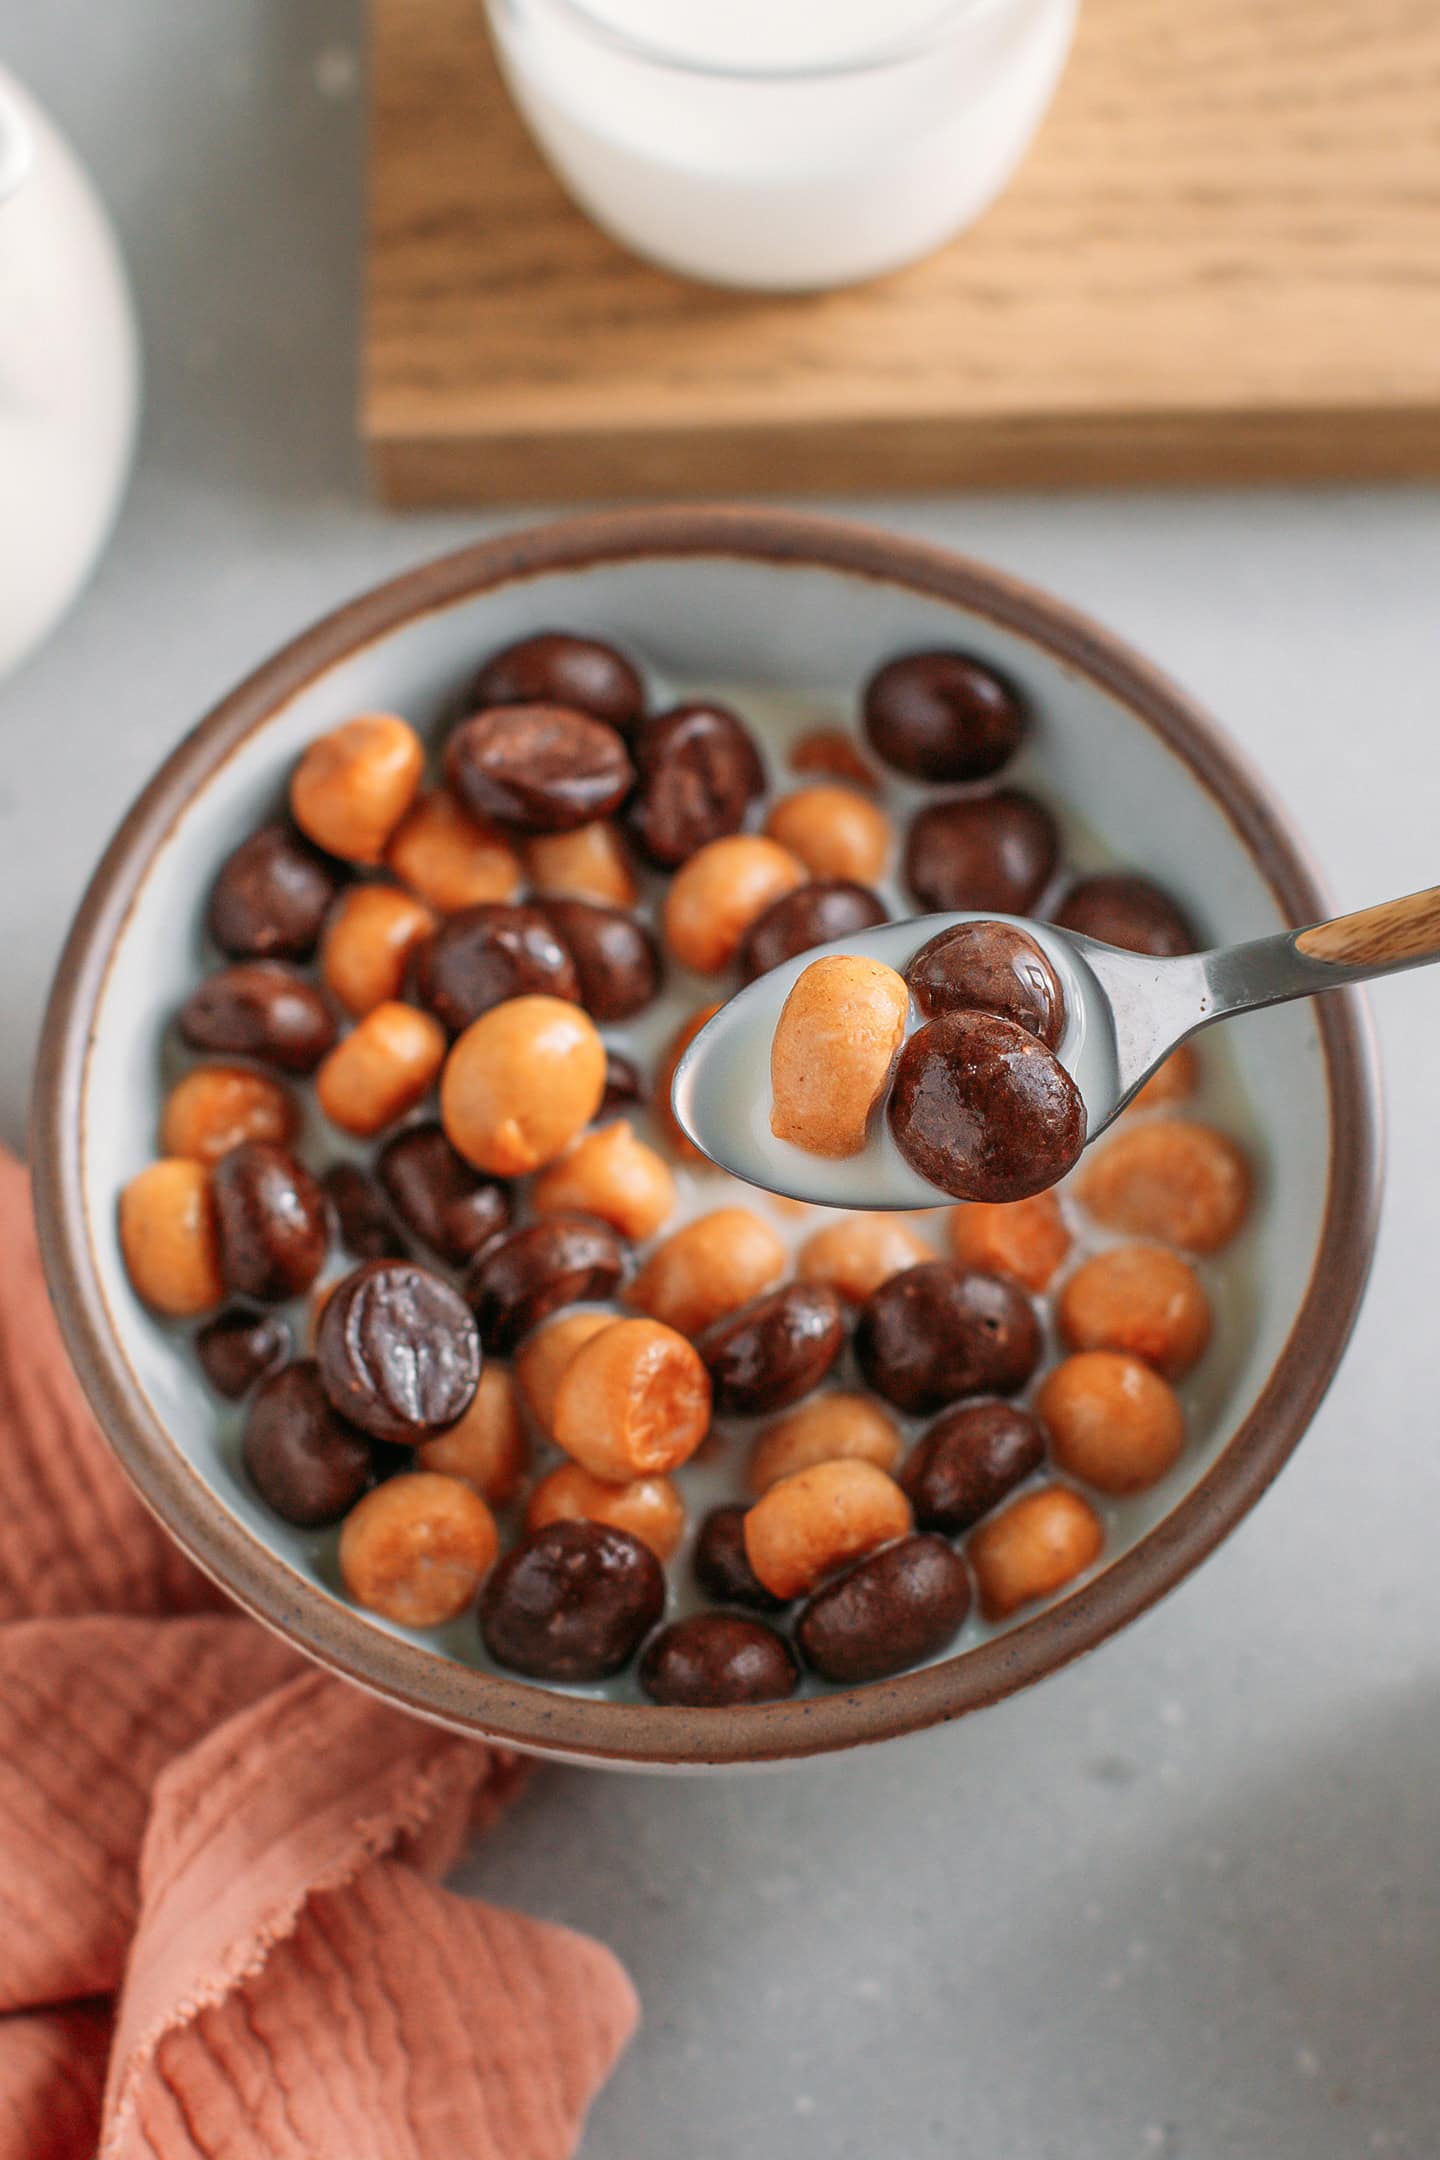
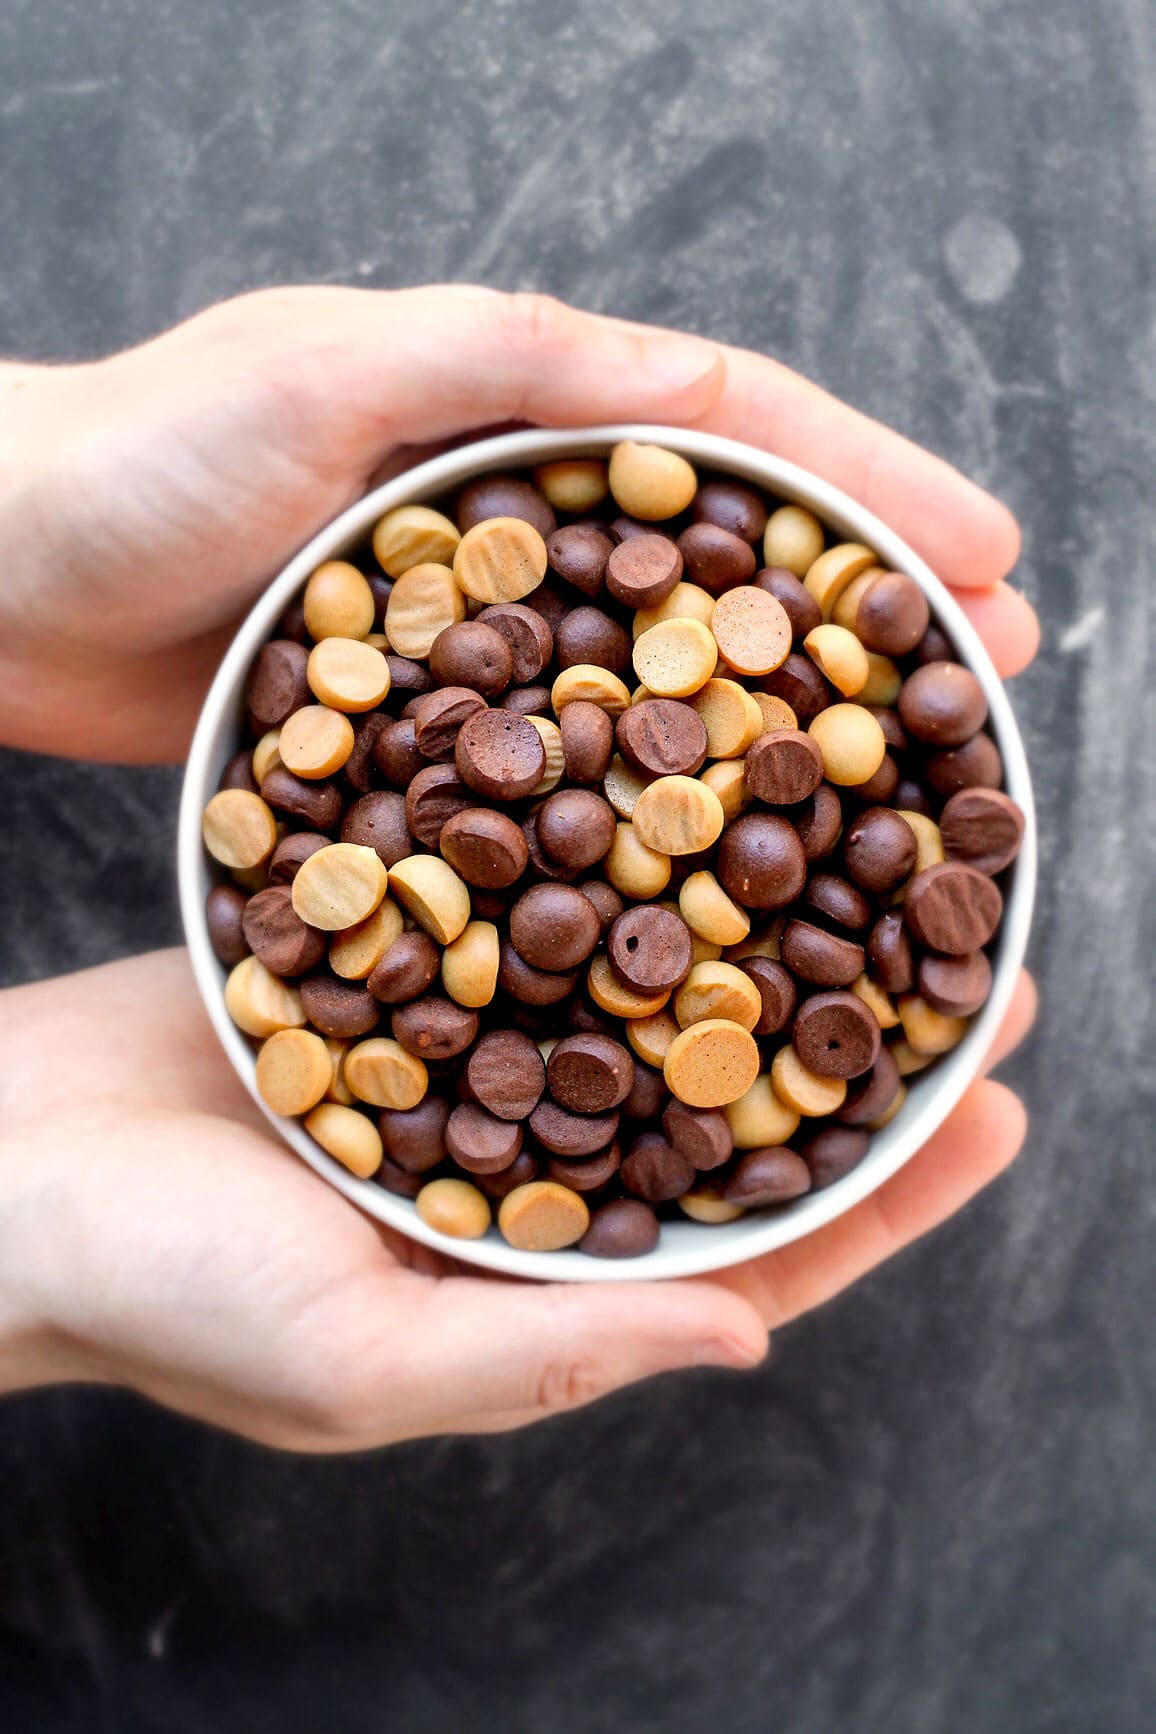
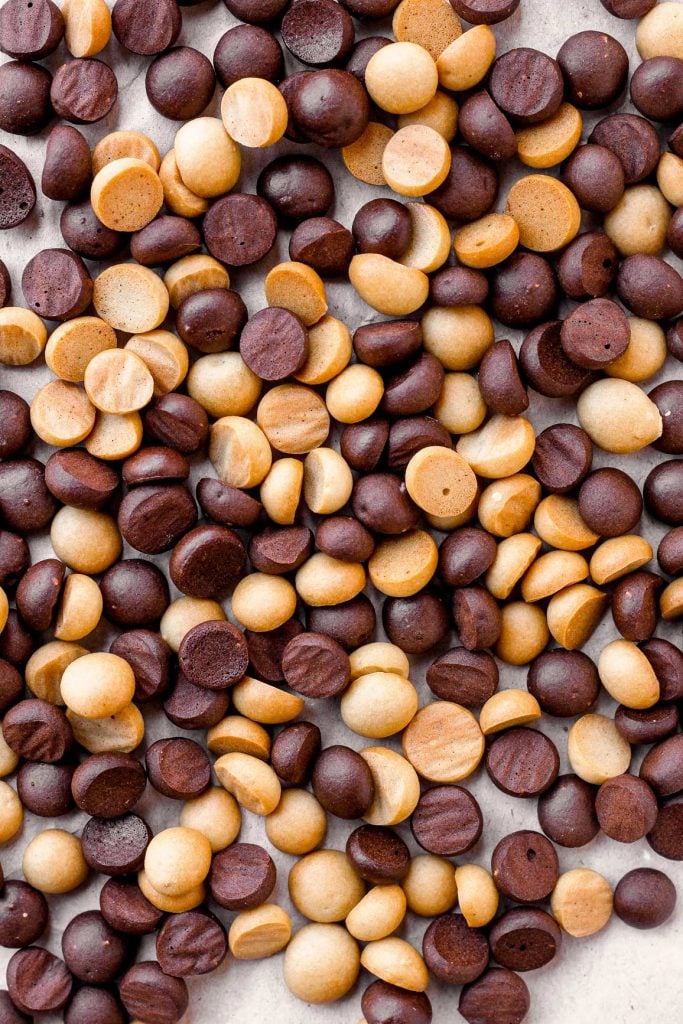
The chocolate cereal has a deep cocoa flavor, while the peanut butter version packs a double dose of peanut flavor, with both peanut butter AND powdered peanut butter incorporated into the batter!
Extra crunchy. No more soggy cereal!
These cereals are much crunchier than your regular puffed ones, so they stay crisp in milk longer. No more rushing to finish your bowl before the cereal turns soggy.
When it comes to texture, I would say it falls somewhere between a gingersnap cookie and Cookie Crisp cereal. So they are kind of like tiny crunchy cookies!
Simple to make.
Besides the powdered peanut butter, which can be found in most well-stocked supermarkets, all the other ingredients are pantry staples!
The process is also easy and can be prepared with kids in just a few minutes! You start with one batter and split it into two equal parts. Add the cocoa powder to one bowl and mix the peanut butter and powdered peanut butter into the other. Then, pipe small bites and bake until crispy!
🥜 What You’ll Need

Flour
Regular all-purpose flour makes the base of this recipe, providing structure and preventing the cereals from crumbling.
Substitute: You may be able to use whole-wheat flour, but you’ll have to use a little less than 1 cup, as it tends to absorb more liquid. Regarding a gluten-free version, I haven’t tested yet using a 1:1 gluten-free flour blend, but I believe it should work just fine!
Sugar
To sweeten the cereal, you will need granulated white sugar. I use a total of 1/3 cup for one batch, which gives it a sweetness similar to most European cereals. If you are used to American brands, just know that this homemade version is a bit less sweet.
Alternative: You can use coconut sugar as a refined sugar-free alternative.
Baking powder and baking soda
To allow the cereals to puff and crisp up.
Oil
Not a whole lot, just a tablespoon to allow the cereal to crisp up during baking. Try using a neutral oil such as canola, sunflower, or grapeseed oil.
Peanut butter
For the peanut cereal, I rely on two ingredients: natural peanut butter and powdered peanut butter.
Why use powdered peanut butter? Through testing, I discovered that to achieve a rich peanut flavor, you need to add a significant amount of peanut butter. The issue is that adding a large amount of peanut butter results in cereal that is less crunchy and higher in calories. Powdered peanut butter solves that! It contains less fat, and since it’s in powdered form, it doesn’t significantly affect the texture of the cereal. Plus, it’s high in protein!
Brand recommendation: I like to use PB2, but other brands will also work. Just stay away from the cheap alternatives. I’ve tried, and some barely have any peanut flavor.
Substitute: With that being said, you can still use only peanut butter and omit the powdered peanut butter if you want. To do so, after dividing the base batter between two bowls, add 1/4 cup of peanut butter to one of them. That’s all! You won’t have to use powdered peanut butter or add extra liquid. It won’t be as peanutty but still quite good.
Cocoa powder
And finally, for the chocolate cereal, you will need unsweetened cocoa powder. I used Dutch-processed cocoa powder, but natural cocoa powder will also work. Just keep in mind the cereal will turn out lighter in color.
🥣 How to Make It
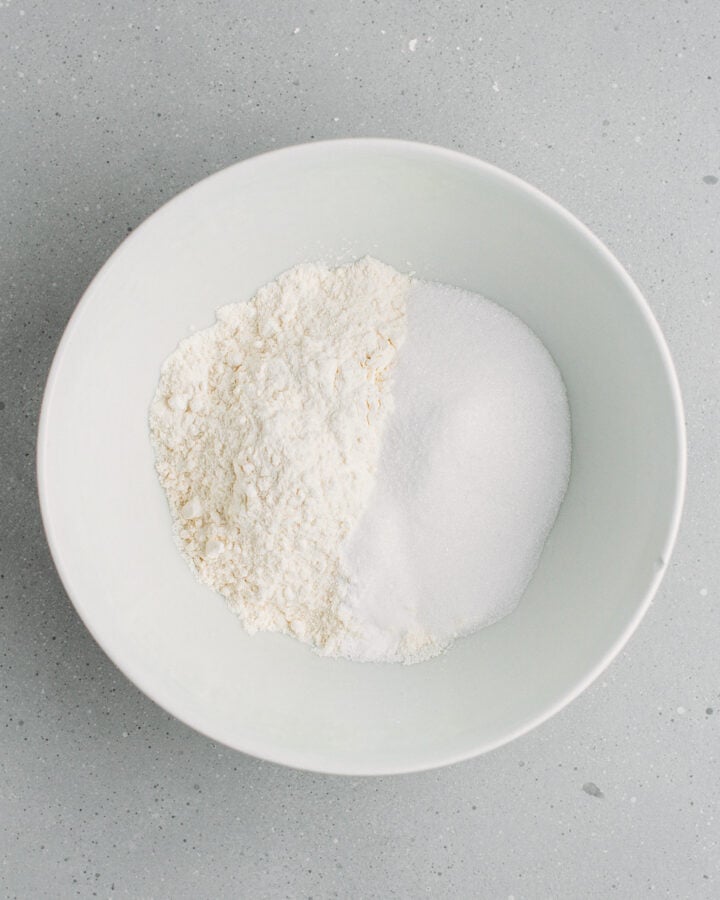
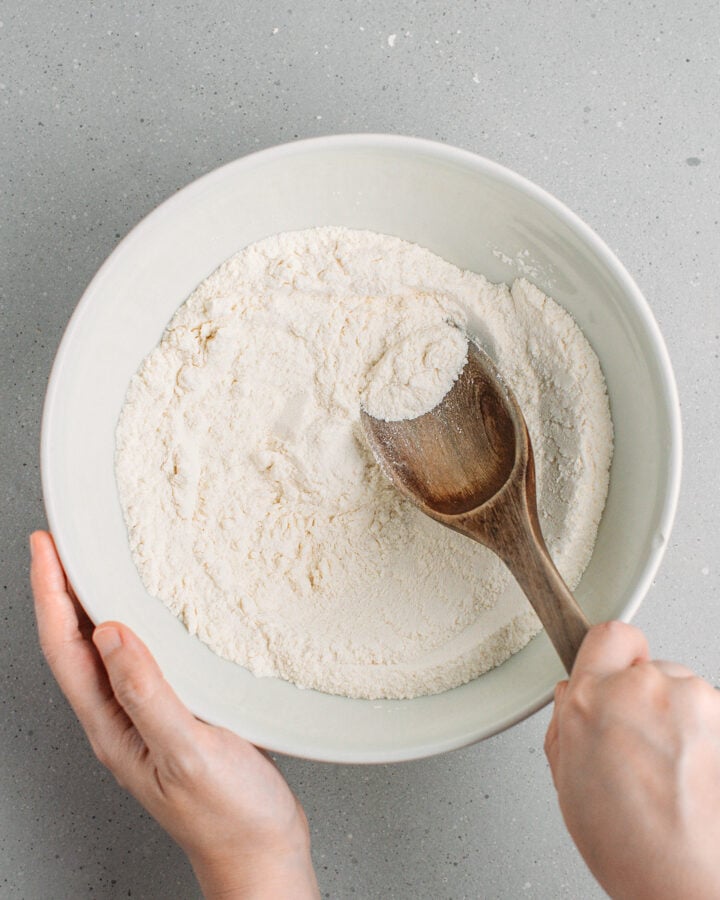
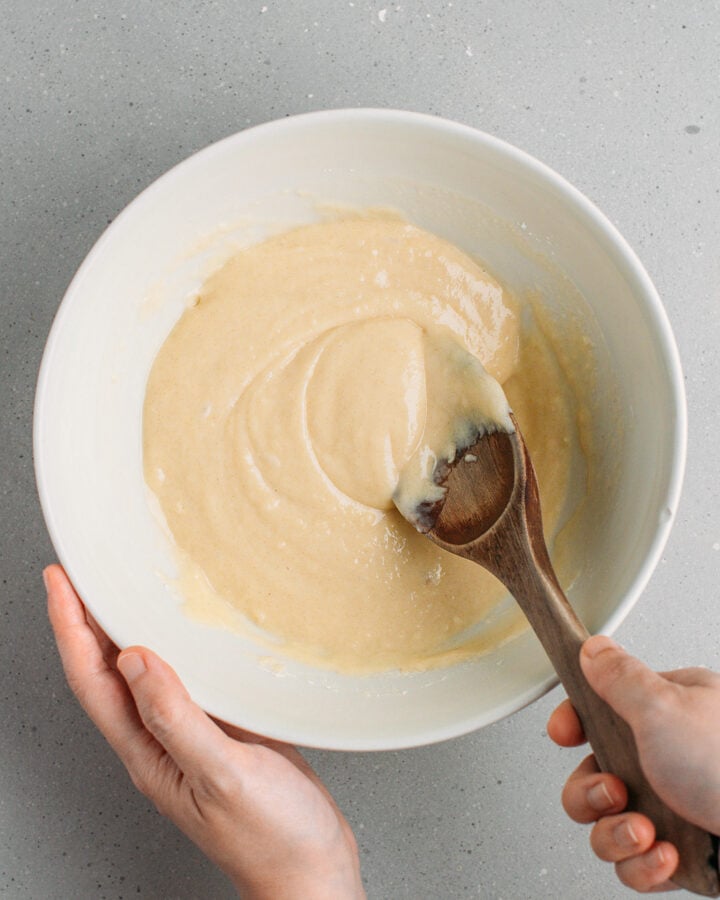
- Mix the dry ingredients. To a large mixing bowl, add the flour, sugar, baking powder, and baking soda. Mix until combined.
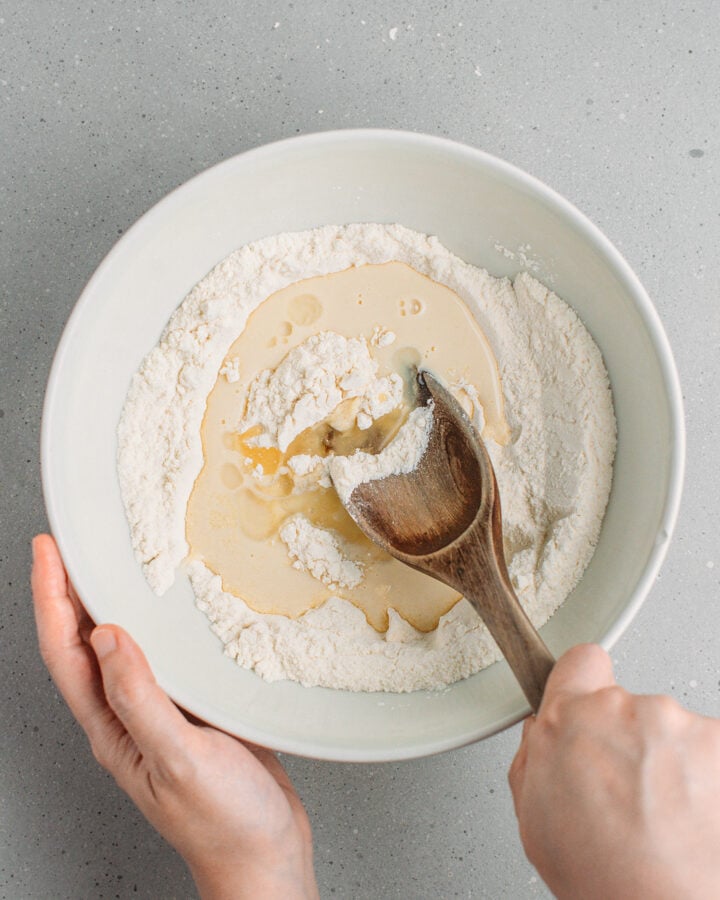
- Add the wet ingredients. Next, pour in the plant-based milk and oil, and mix again using a wooden spoon or spatula until the batter forms a thick and smooth consistency (it should resemble a thick pancake batter).
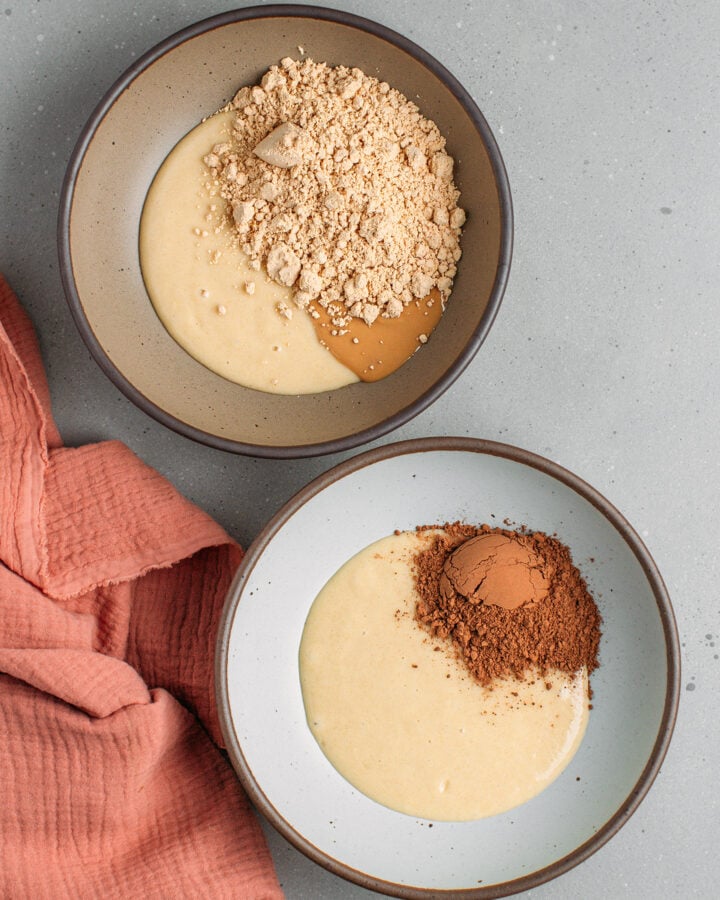
- Divide the batter. Divide the batter in half between two bowls.
- Make the peanut butter version. In one of the bowls, add the powdered peanut butter, peanut butter, and the two tablespoons of milk. Mix until well combined, but avoid overmixing. Set aside.
- Make the chocolate version. In the other bowl, add the cocoa powder and mix until combined.

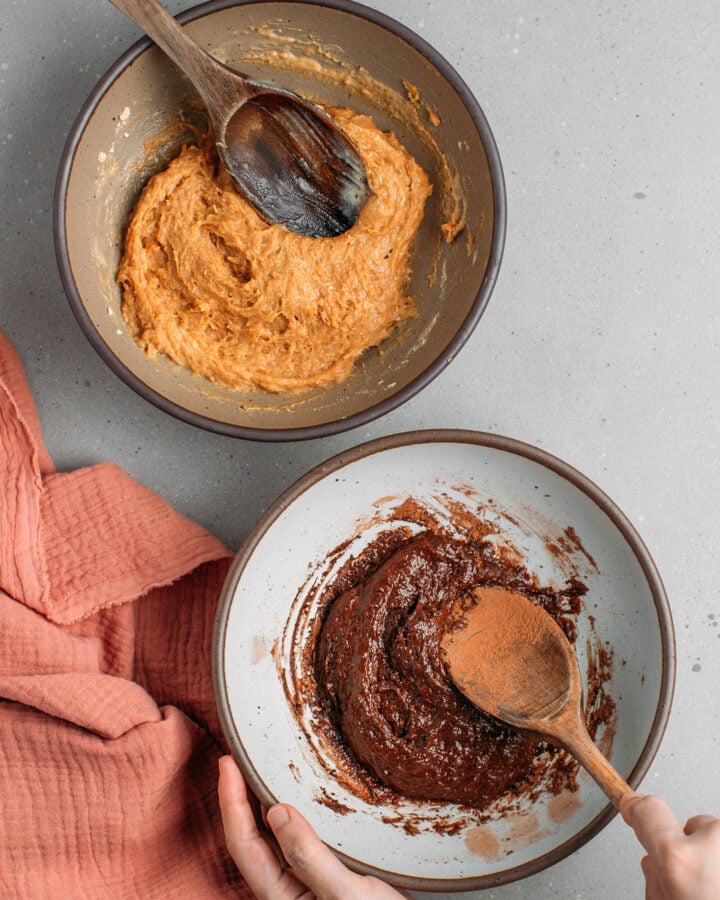
Just a heads-up!
Keep in mind that the batters will have slightly different textures. The chocolate batter will be a bit runnier, while the peanut version will be thicker and stickier. That’s completely normal. Do not try to add more milk to the peanut batter, or your cereal will turn soft.
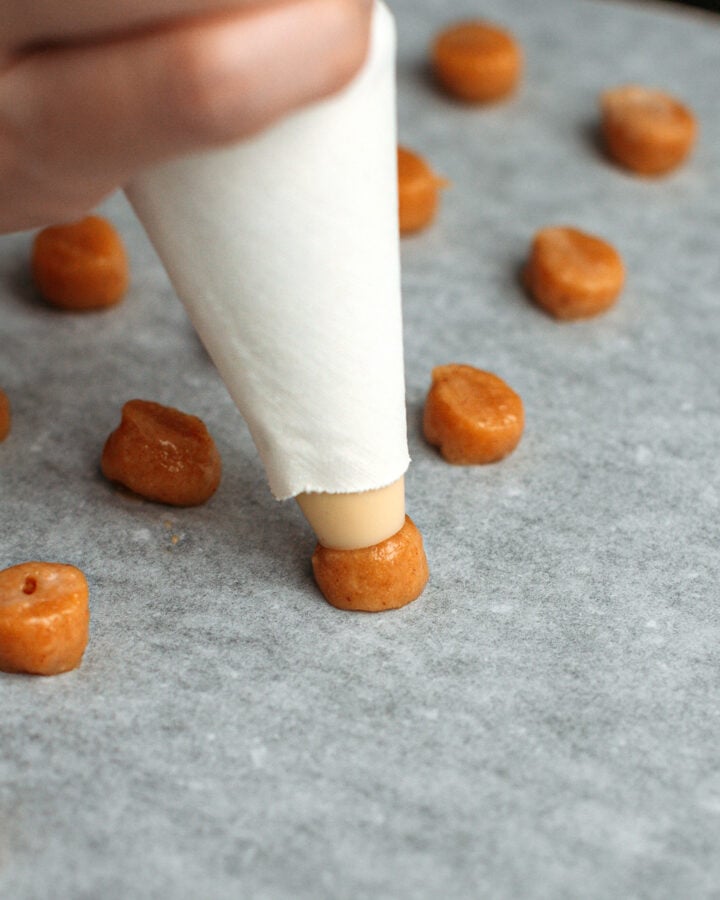
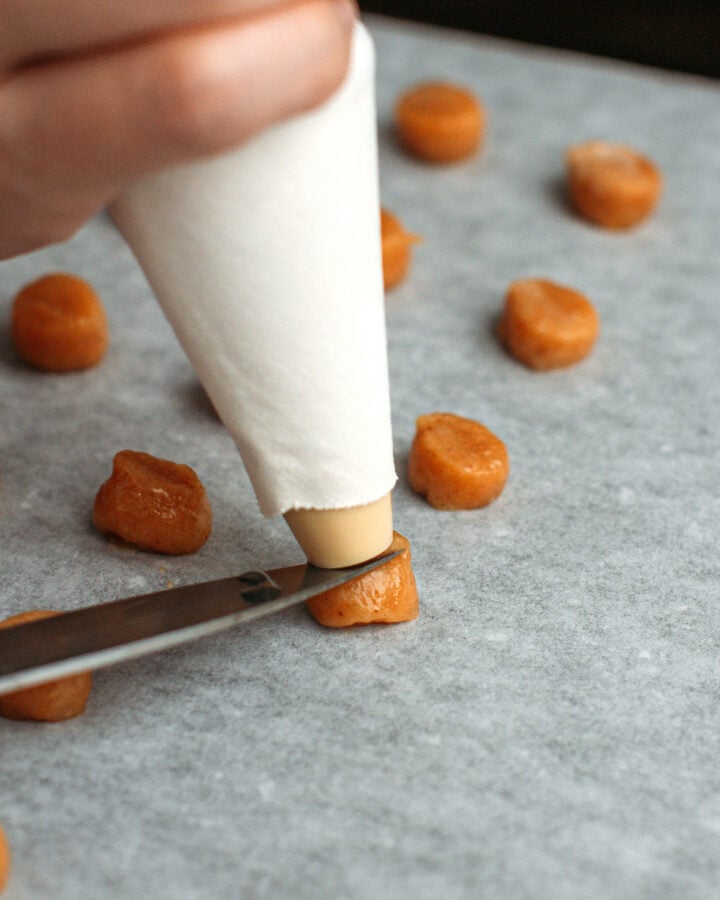
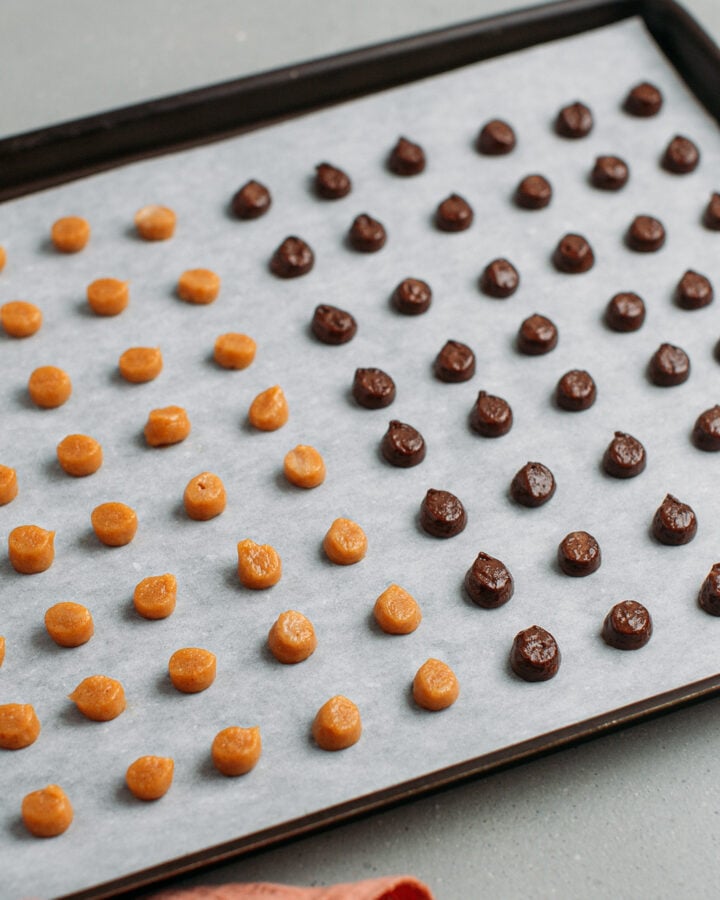
- Pipe the cereal. Transfer the peanut butter batter to a pastry bag fitted with a ¼-inch (0.6 cm) round tip and do the same with the chocolate batter. You should have two piping bags, one filled with the peanut butter batter and the other with the chocolate batter.
Working with one batter at a time, hold the piping bag vertically, close to the baking sheet, and pipe small ¼-inch balls, leaving about 1 inch (2.5 cm) of space between each ball. Use a wet knife to cut off the batter after piping each ball. Once you’ve finished piping the peanut butter cereal, continue with the chocolate one.
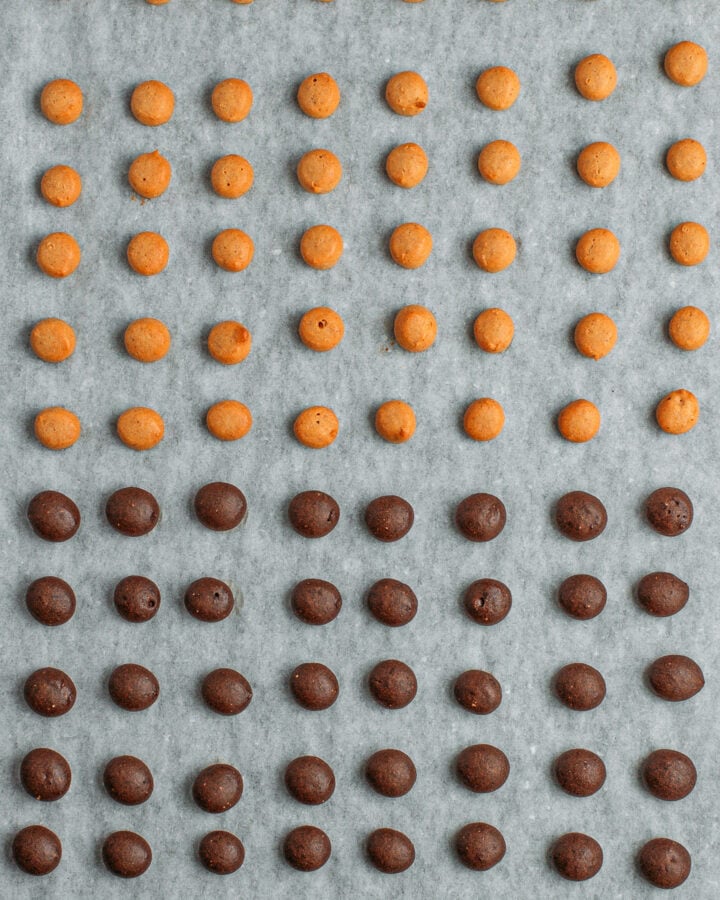
- Bake. Pop the baking sheet into the oven and bake for 12-14 minutes, depending on the size of your cereals. Remove the cereal from the oven and allow it to cool for at least 20 minutes before transferring it to a jar.
📔 Tips
Double the recipe.
One batch of this recipe yields approximately 2 cups of cereal, which is enough for 3 to 4 servings. Good for a weekend, but probably not enough to last the whole week!
If you want a big jar of cereal, feel free to double or even triple the recipe. Just keep in mind that piping all the batter takes a bit of patience, and you’ll likely need to bake the cereals in 2 to 3 batches.
Make small and even bites.
To ensure all your cereals are crunchy and evenly golden brown, try to pipe out even balls that are approximately 1/3 inch (roughly 1 cm) wide and 1/4 inch (0.6 cm) tall.
🥛 What to Serve Them With
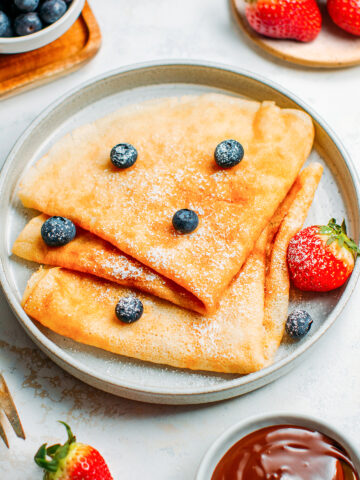
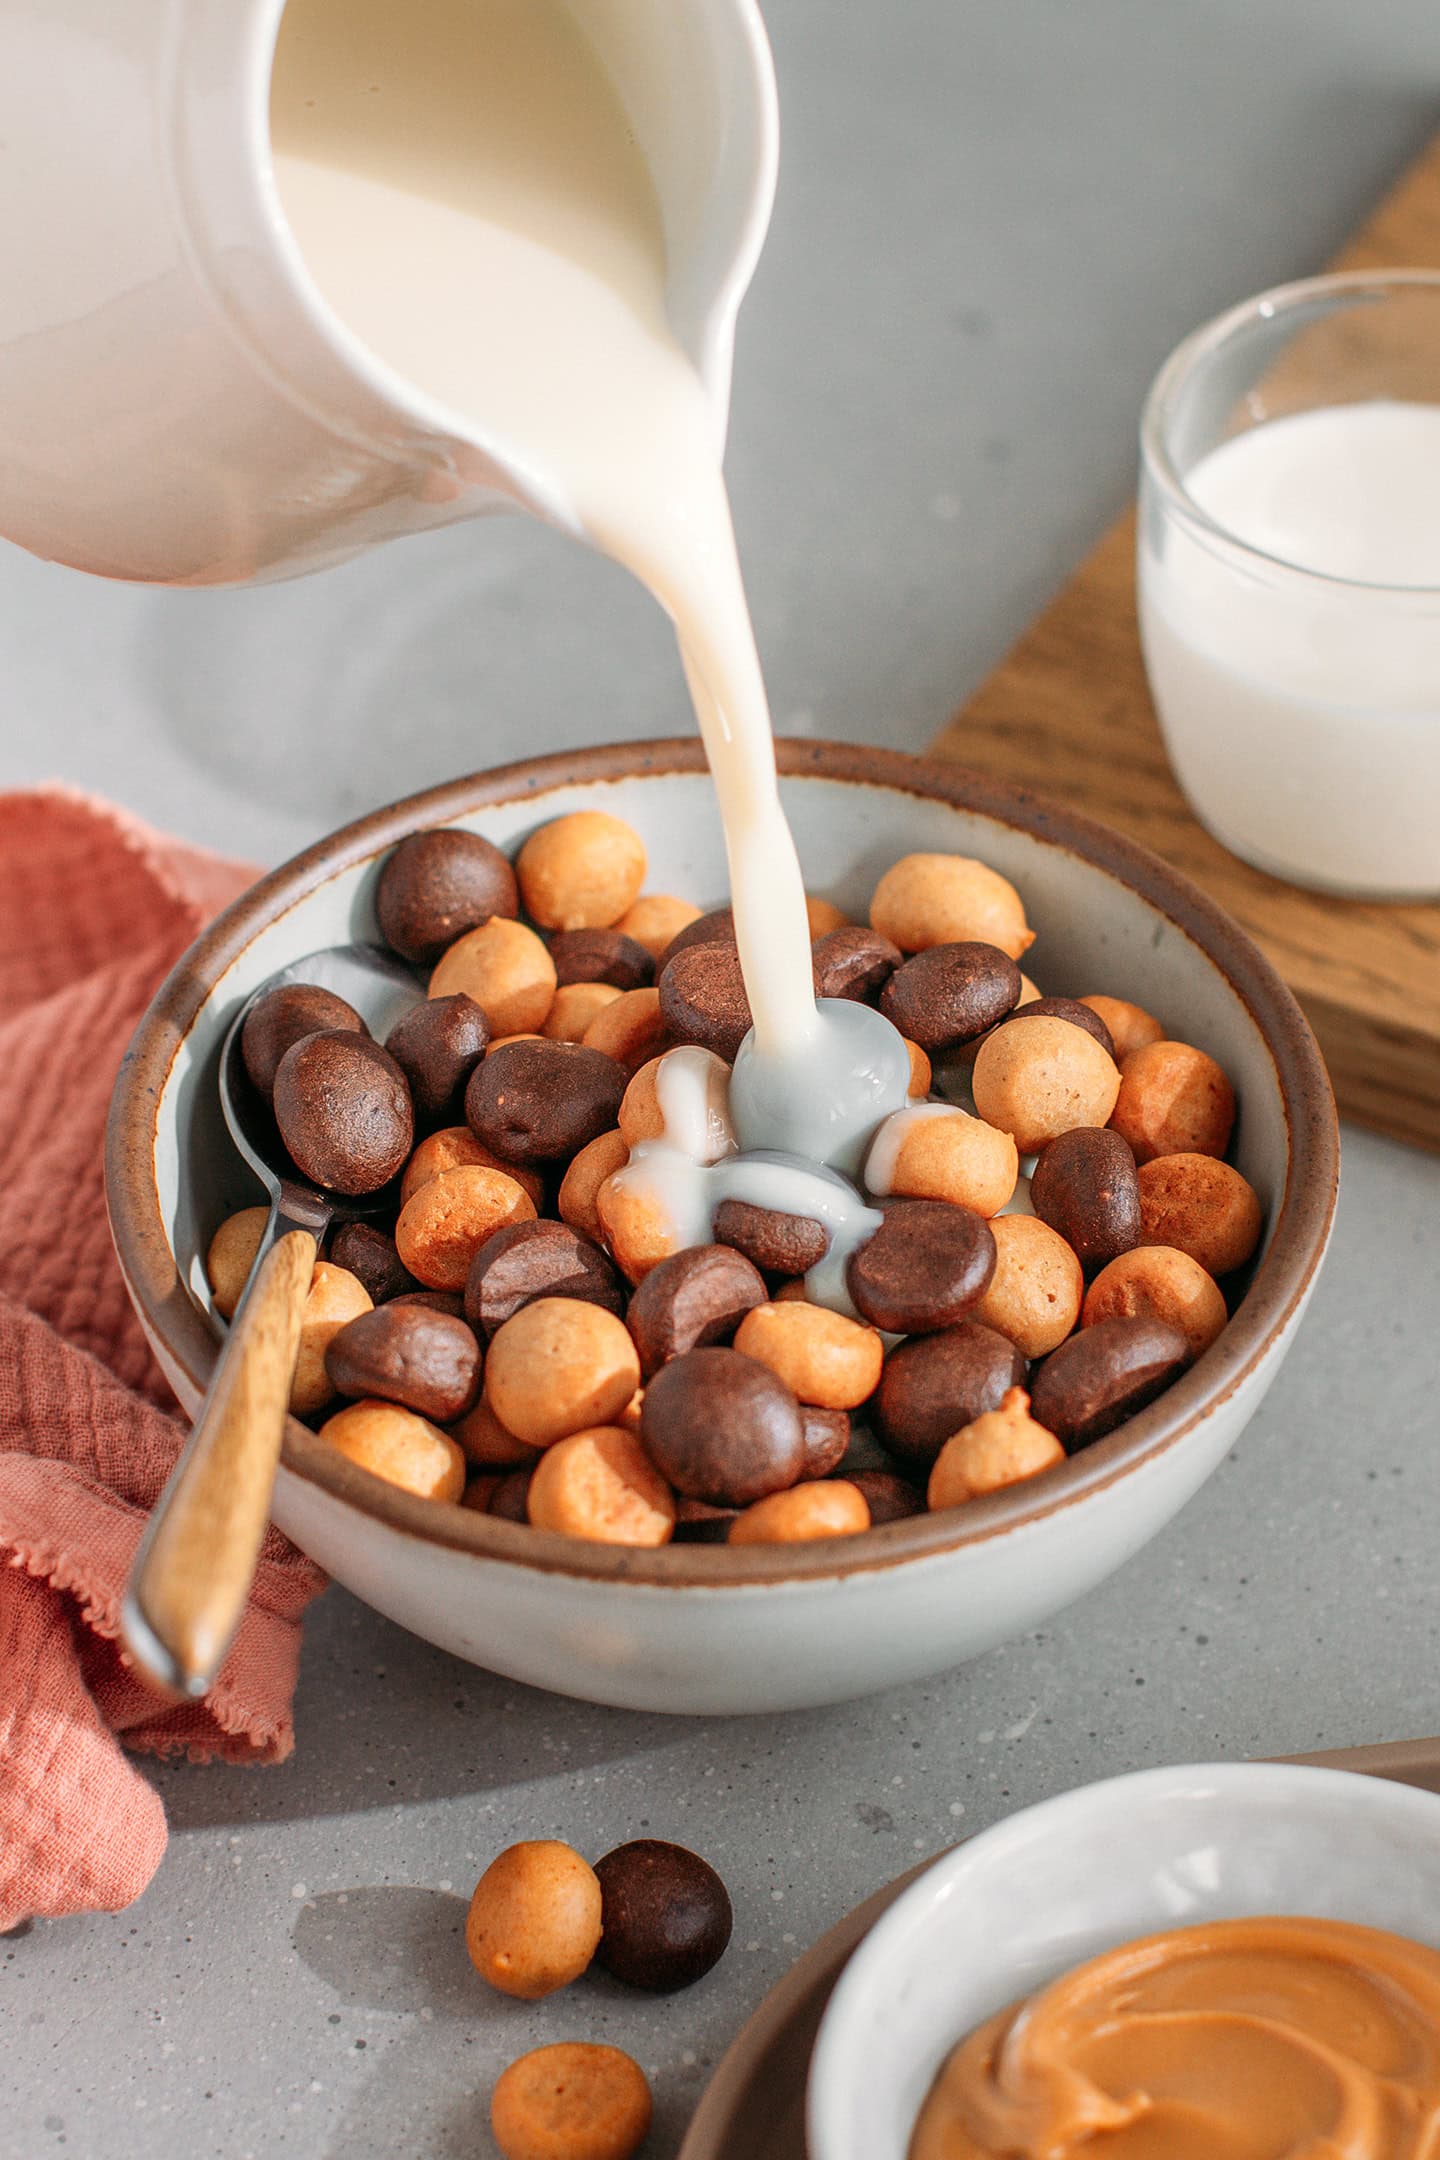
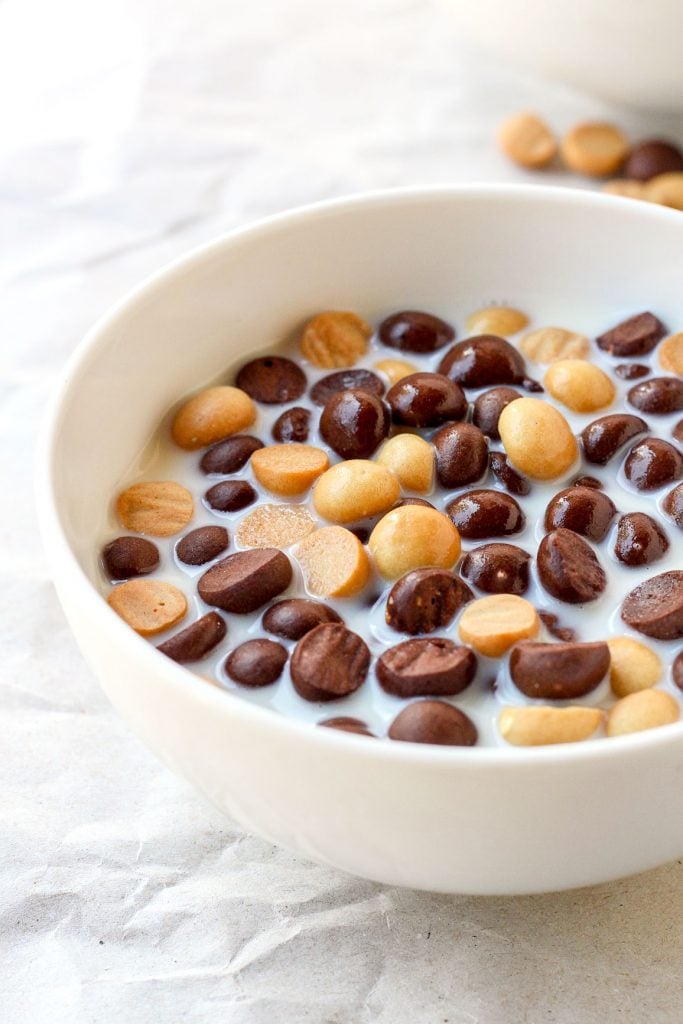
Just like most cereals, you can serve these with cold or warm milk, like hazelnut milk or even better: peanut milk! They also go well with vegan yogurt, or you can use them as a topping for vanilla ice cream!
They will stay crunchy in cold milk for up to 6 minutes. After that, they will start to get soggy.
🫙 Storing
What’s great about this cereal is that it will stay crunchy for up to 1 month if stored in an airtight container at room temperature.
💬 FAQ
I’m afraid the batter is too sticky to shape the cereal by hand. You can use a piece of parchment paper folded and then rolled into a cone shape to create a piping bag.
Your cereals were either too big or not baked long enough. Try baking for another 2-3 minutes next time, or until the peanut cereal is golden brown.
You can add extra ingredients after baking, but I wouldn’t recommend mixing them into the batter. Otherwise, it’ll not be easy to pipe.


Want to Save This Recipe?
Enter your email below & we’ll send it straight to your inbox! Plus, you will receive new recipes every week!
I’d like to receive more tips & recipes from Full of Plants.
This site is protected by reCAPTCHA and the Google Privacy Policy and Terms of Service apply.
Homemade Chocolate Peanut Butter Cereal
Ingredients
Main Batter
- 1 cup (125 g) all-purpose flour
- 1/3 cup (67 g) granulated white sugar or coconut sugar
- 1/4 tsp baking powder
- 1/4 tsp baking soda
- 6 tbsp (90 ml) unsweetened plant-based milk
- 1 tbsp (15 ml) canola oil
Peanut Butter
- 1/2 cup (37 g) powdered peanut butter
- 2 tbsp (30 g) peanut butter
- 2 tbsp (30 ml) unsweetened plant-based milk
Chocolate
- 2 tbsp (16 g) cocoa powder
Instructions
- Preheat the oven to
 350 °F (175°C) and line a baking sheet with parchment paper.
 - Mix the dry ingredients. To a large mixing bowl, add the flour, sugar, baking powder, and baking soda. Mix until combined.
- Add the wet ingredients. Next, pour in the plant-based milk and oil, and mix again using a wooden spoon or spatula until the batter forms a thick and smooth consistency (it should resemble a thick pancake batter).
- Divide the batter. Divide the batter in half between two bowls.
- Make the peanut butter version. In one of the bowls, add the powdered peanut butter, peanut butter, and the two tablespoons of milk. Mix until well combined, but avoid overmixing. Set aside.
- Make the chocolate version. In the other bowl, add the cocoa powder and mix until combined.
- Pipe the cereal. Transfer the peanut butter batter to a pastry bag fitted with a ¼-inch (0.6 cm) round tip and do the same with the chocolate batter. You should have two piping bags, one filled with the peanut butter batter and the other with the chocolate batter.Working with one batter at a time, hold the piping bag vertically, close to the baking sheet, and pipe small ¼-inch balls, leaving about 1 inch (2.5 cm) of space between each ball. Use a wet knife to cut off the batter after piping each ball. Once you’ve finished piping the peanut butter cereal, continue with the chocolate one.
- Bake. Pop the baking sheet into the oven and bake for 12-14 minutes, depending on the size of your cereals. Remove the cereal from the oven and allow it to cool for at least 20 minutes before transferring it to a jar.
- This cereal will stay crunchy for up to 1 month stored in an airtight container at room temperature.
Notes
Double the recipe.
One batch of this recipe yields approximately 2 cups of cereal, which is enough for 3 to 4 servings. Good for a weekend, but probably not enough to last the whole week! If you want a big jar of cereal, feel free to double or even triple the recipe. Just keep in mind that piping all the batter takes a bit of patience, and you’ll likely need to bake the cereals in 2 to 3 batches.Make small and even bites.
To ensure all your cereals are crunchy and evenly golden brown, try to pipe out even balls that are approximately 1/3 inch (roughly 1 cm) wide and 1/4 inch (0.6 cm) tall.Nutrition
Note: This recipe was first released in August 2016 and updated with new process shots and detailed instructions in July 2025. You can see the older photos below.

About the Author
Thomas Pagot is the founder, photographer, and recipe developer behind Full of Plants. He created the blog in 2016 as a personal cookbook for vegan recipes. Through years of recipe development, Thomas has successfully grown Full of Plants into a trusted resource for plant-based recipes.
Leave a Comment
Made this today! Sorry my previous statement I read canola oil as coconut oil lol. Recipe turned out perfect! Obviously they’re going to be crunchy so it’s won’t be soggy in milk. Depending on your preference you can lower the minutes you cook them. I can’t wait to eat them with milk since they’re so good without!!
Thanks for your feedback Heather! I’m happy to hear you had success with the recipe 🙂
Yes, they are quite crunchy (since they are not puffed cereals) but after a couple of minutes in the milk they become slightly tender.
Hi, I want to make today and will give an actual review. I just want to know are you measuring coconut oil thick/room temp or melted?
What exactly is the serving size? At the top it says 3/4 cup but over the nutrition it says 1/3 cup- thanks!
This recipe yields about 1 and 3/4 cup. The nutrition information is given for a serving of 1/3 cup.
How much does it make? Store in what size container? Thank you
It makes about 1 and 3/4 cup.
Tried this recipe and the cereal came out rock hard and I followed the instructions to a tee. Big waste of money and time…
Hi Donna,
Did you do any substitution? Also, these cereals are not meant to be puffed like most commercial cereals so they will be obviously a bit harder.
Hi! Thanks for this recipe. It is only one of two recipes I’ve found online for homemade peanut butter cereal. I’m trying to gain weight so I want to use peanut butter instead of the peanut flour. How much should I use?
Hi Ashley,
I am afraid using only peanut butter instead of peanut flour would change completely the texture.
Hi Tomas, I was wondering if I could use regular milk instead of almond? I am not that big of a fan for almond milk
Hi Alina,
Sure, any milk will work!
How can I make this cereal in Chocolate, various nut and seed butters and nutella
I haven’t tried with nutella, so I cannot say, sorry.
How would you make this cereal using nutella?
Are you planning to make this cereal using nutella?
Sorry, I do not use Nutella.
Can I use seed butter, other nut spreads and nutella for this recipe?
You can replace the peanut butter with your favorite nut butter.
Can I make this only in chocolate?
Sure! Do not divide the batter and double the amount of cacao powder.
How can I write the recipe since i’m not using any peanut flour nor peanut butter?
You can simply omit the peanut flour, peanut butter, and the 2 tbsp of extra almond milk. Then double the amount of cacao powder.
How much cocoa powder should I use since I’m omitting the peanuts?
I would say about 1/4 cup of cocoa powder.
You are a genius.
i used this and it didn’t work! It turned into pizza dough? I am very unhappy and probably won’t use this again!
Pizza dough? Did you used the exact ingredients?
This is so creative! I would have never thought to make my own cereal. 😀
Thank you Kaylie!
Can I use any other neutral cooking oil? I’m not a fan of canola
Sure!
Bonjour Thomas,
J’aime beaucoup ton blog, tes recettes sont super inspirantes et tes photos sublimes !
Petite question concernant cette recette que j’ai testée : mes céréales étaient mous et pas croustillants, peut-être que je devrais les laisser cuire plus longtemps ou les laisser refroidir à l’intérieur de mon four ?
Merci d’avance pour ta réponse et bonne continuation,
Aurore
Bonjour Aurore,
Merci pour ton message 🙂 Je pense que cela vient du temps et/ou température de cuisson, tous les fours ne chauffent pas de la même façon. Ça peut aussi dépendre de la taille de tes céréales, je te conseille d’en sortir une, laisser refroidir quelques minutes et gouter. Si elle est toujours molle à l’intérieur, alors laisse cuire le reste quelques minutes supplémentaires. Laisser refroidir à l’intérieur du four avec la porte légèrement ouverte peut aussi être une option.
Je suis en train de parcourir ton blog et je suis absolument sciée par ta créativité et tout le travail que tu mets dans ton blog, que ce soit au niveau des recettes elles-mêmes, des photos, enfin de tout en fait ! Bravo Thomas, continue à nous régaler, et merci !
Salut Audrey,
Merci beaucoup ! 🙂 Ton message fait très plaisir !
They have silicone hot pads that have a honeycomb design in them. My friend uses them to melt blocks of chocolate and make chocolate chips (they pop out so nice). Anyways–I’m wondering if you could spread that batter in the honeycombs to make the cereal, or maybe it wouldn’t be crunchy then. My family eats a lot of cereal and I can’t imagine trying to make it a dot at a time.
I never tried using a mold to make the cereals so I’m not sure how it would turn out. You are probably right though, I don’t think they would be as crunchy but feel free to try.
Well, if you really eat a lot of cereals I prefer to tell you this recipe is a little bit time consuming 🙂 I don’t eat cereals everyday so one batch lasts me a week.
Ok, I definitely have to try this! Such a creative recipe and looks delicious!
Thanks Natalia! 🙂
I’m sorry, but I’m trying to click on where you wrote PB2 and it’s taking me to a blank page. I’m trying to understand what that is. Is that the powdered peanut butter stuff you can mix with water to create peanut butter?
Yes it is!!!!!!
Thank you Amanda!! I’m conflicted on if it’s considered “healthy”? I’ve read about conflicting things, and honestly am weirded out by powdered peanut butter. how is it on the digestive tract, because I have GI issues. Alternatively, is there any other option?
Thank you!
Hey Golanz,
Peanut flour IS considered healthy and is an excellent source of vitamins, minerals, and antioxidants; including polyphenols, flavonoids, vitamin E, and Co-Enzyme Q10. Peanuts are good for your gut, and there is no evidence suggesting that peanut flour is not also. Peanuts are also a key ingredient in a nutrition bar used to renourish severely underweight children in 3rd world countries whose stomachs, I would imagine, are quite sensitive.
There’s no date on your comment (or this post for that matter), so I hope I’m not responding to a 2-year-old comment lol. Either way, I hope this helps someone.
Is there anything I could use in place of the peanut flour because of an allergy? I want to try them as chocolate&almond
I’m not sure Marie. I would probably replace the peanut flour with 3 tablespoons additional flour and add 1/4 tsp almond extract.