This post may contain affiliate links. Please read our disclosure policy.
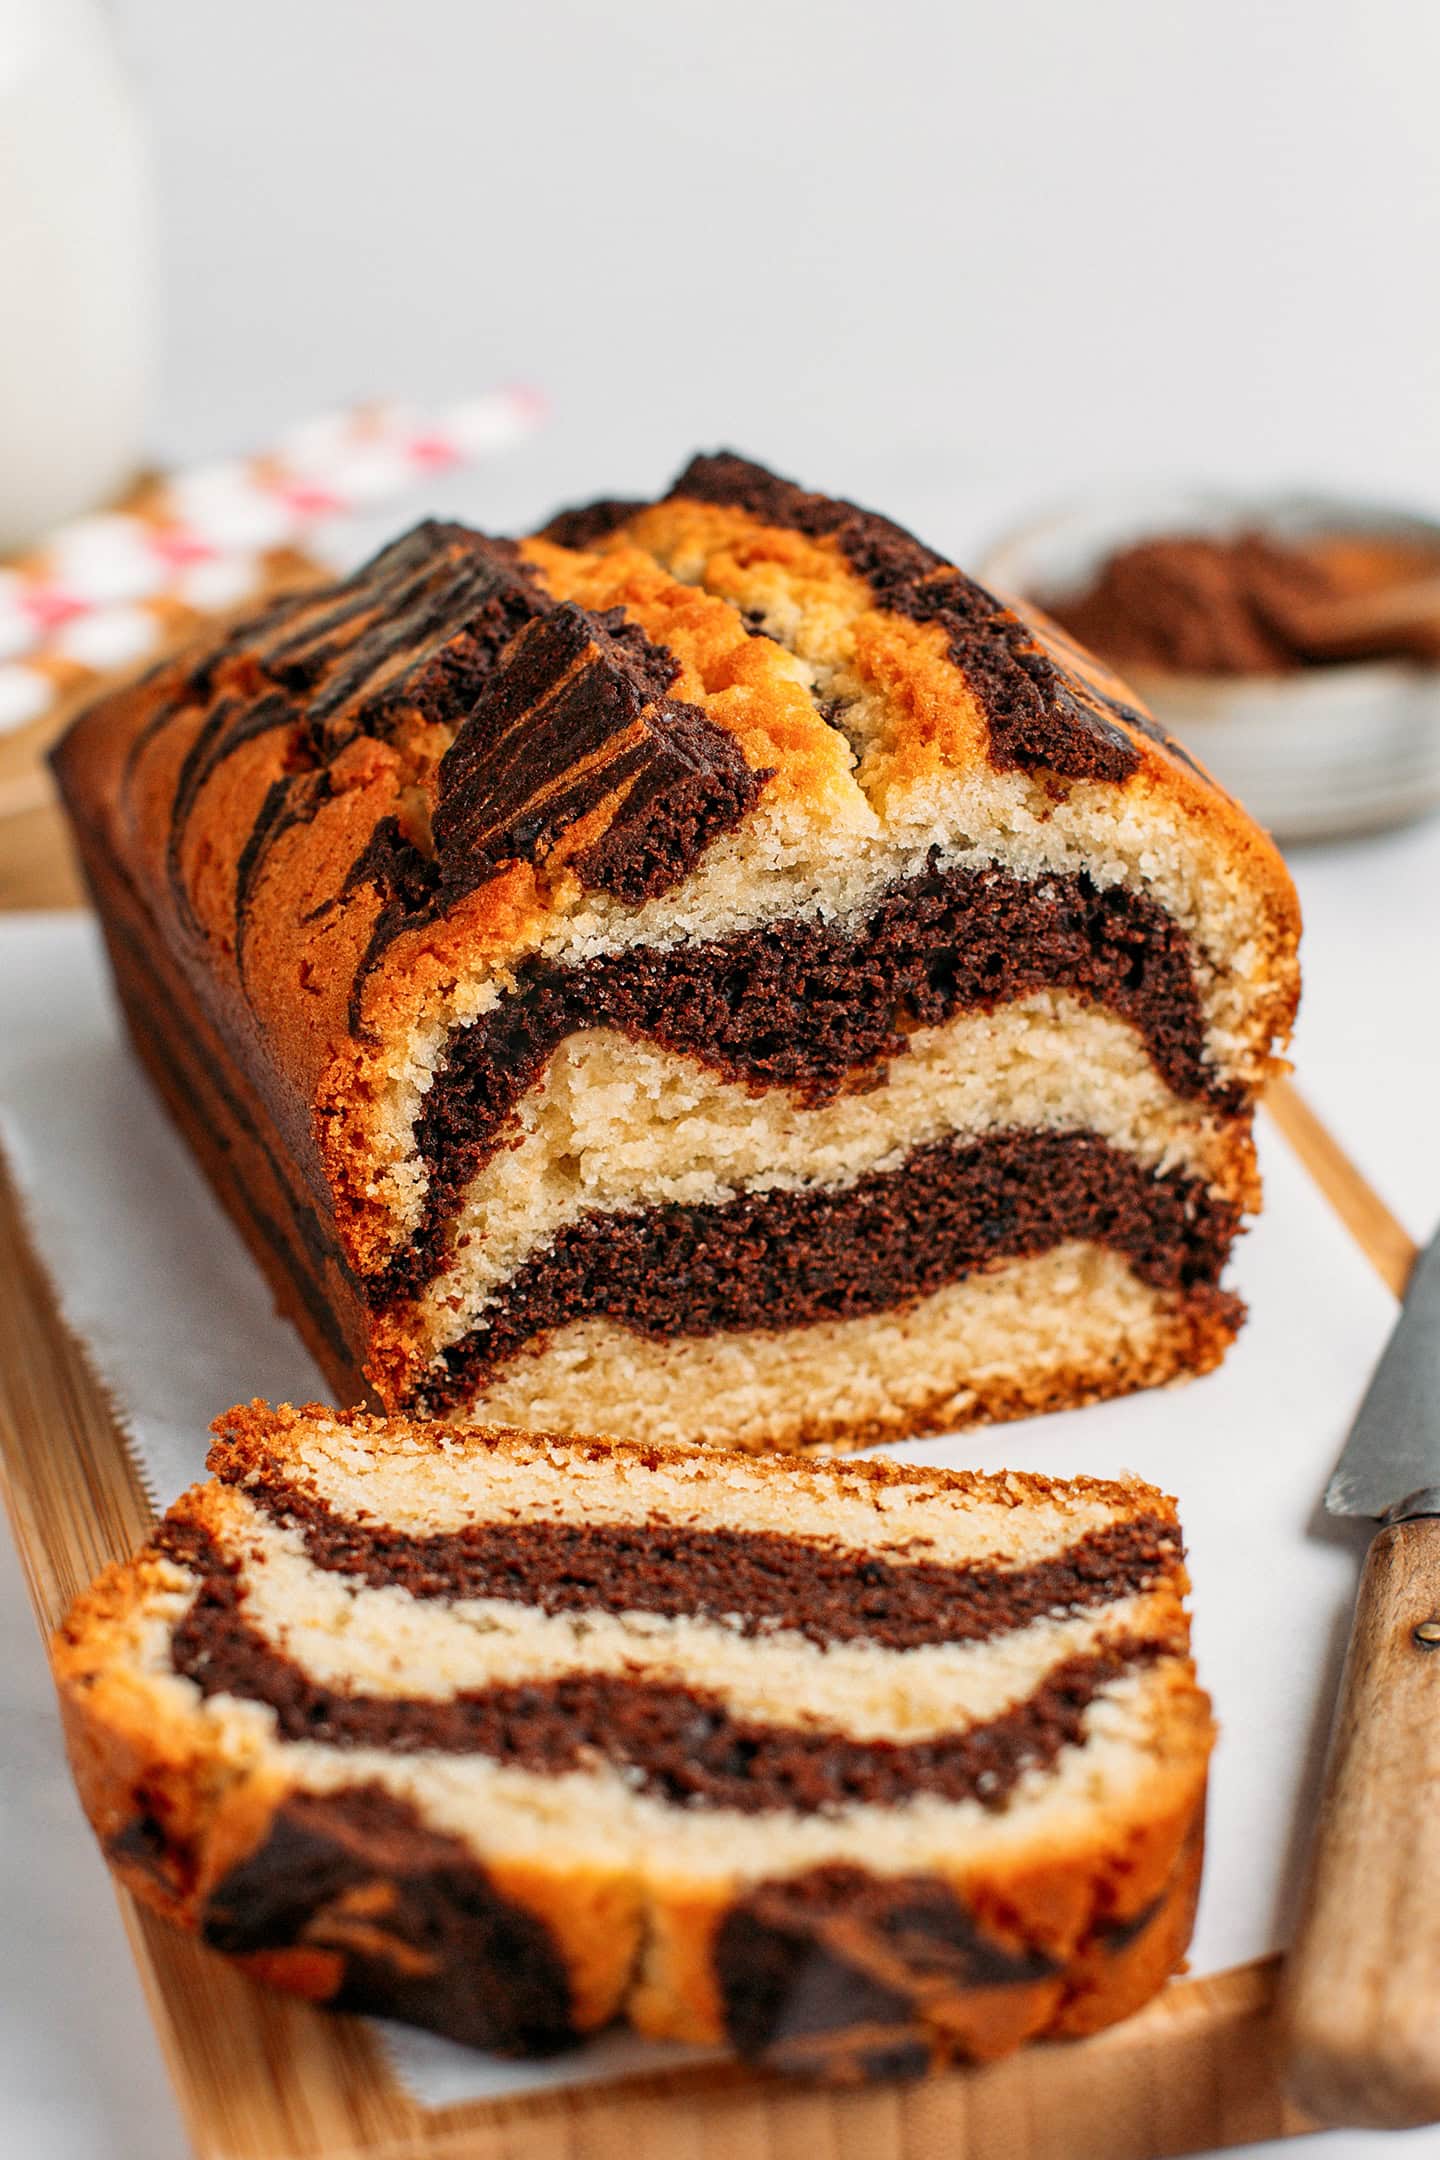
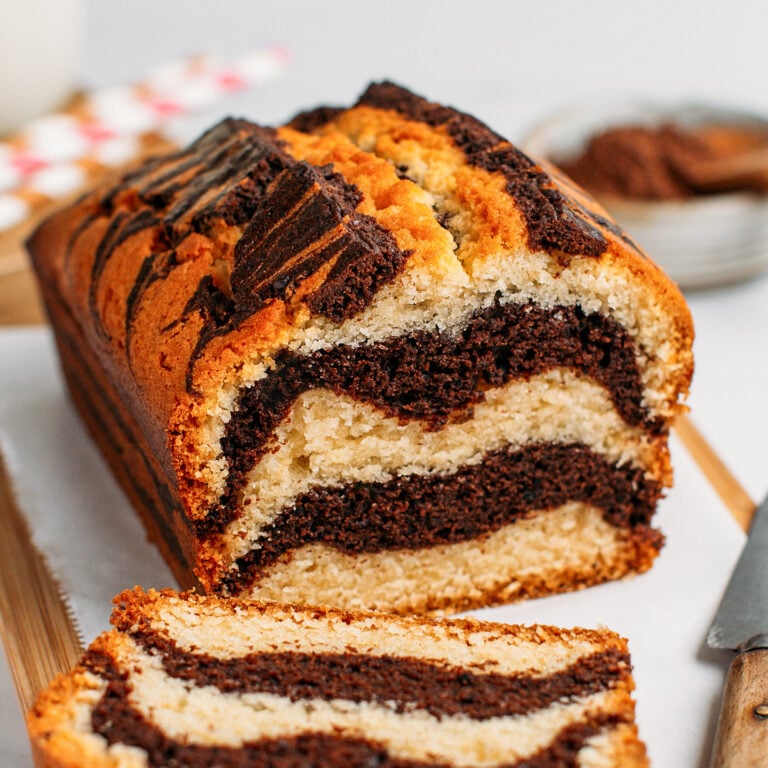
This vegan marble cake starts with a single main batter, with a portion of it flavored with cocoa powder to create beautiful layers of vanilla and chocolate. It’s tender, fluffy, and perfectly moist without being too sweet. Great as an after-school snack or to share with family and friends!
I’m thrilled to finally share this marble cake! It’s inspired by a childhood favorite called “Savane” from the brand Brossard. I believe this recipe is a true classic that every good cook should have in their recipe book!
How did I develop this recipe? I took my vegan pound cake recipe as a base and combined it with an upcoming muffin recipe I’m currently working on. The goal was simple, create a loaf cake a bit moister and lighter than your classic pound cake while also being a bit more breakfast-friendly. This meant cutting back on the sugar and butter just enough to keep it delicious but not too rich.
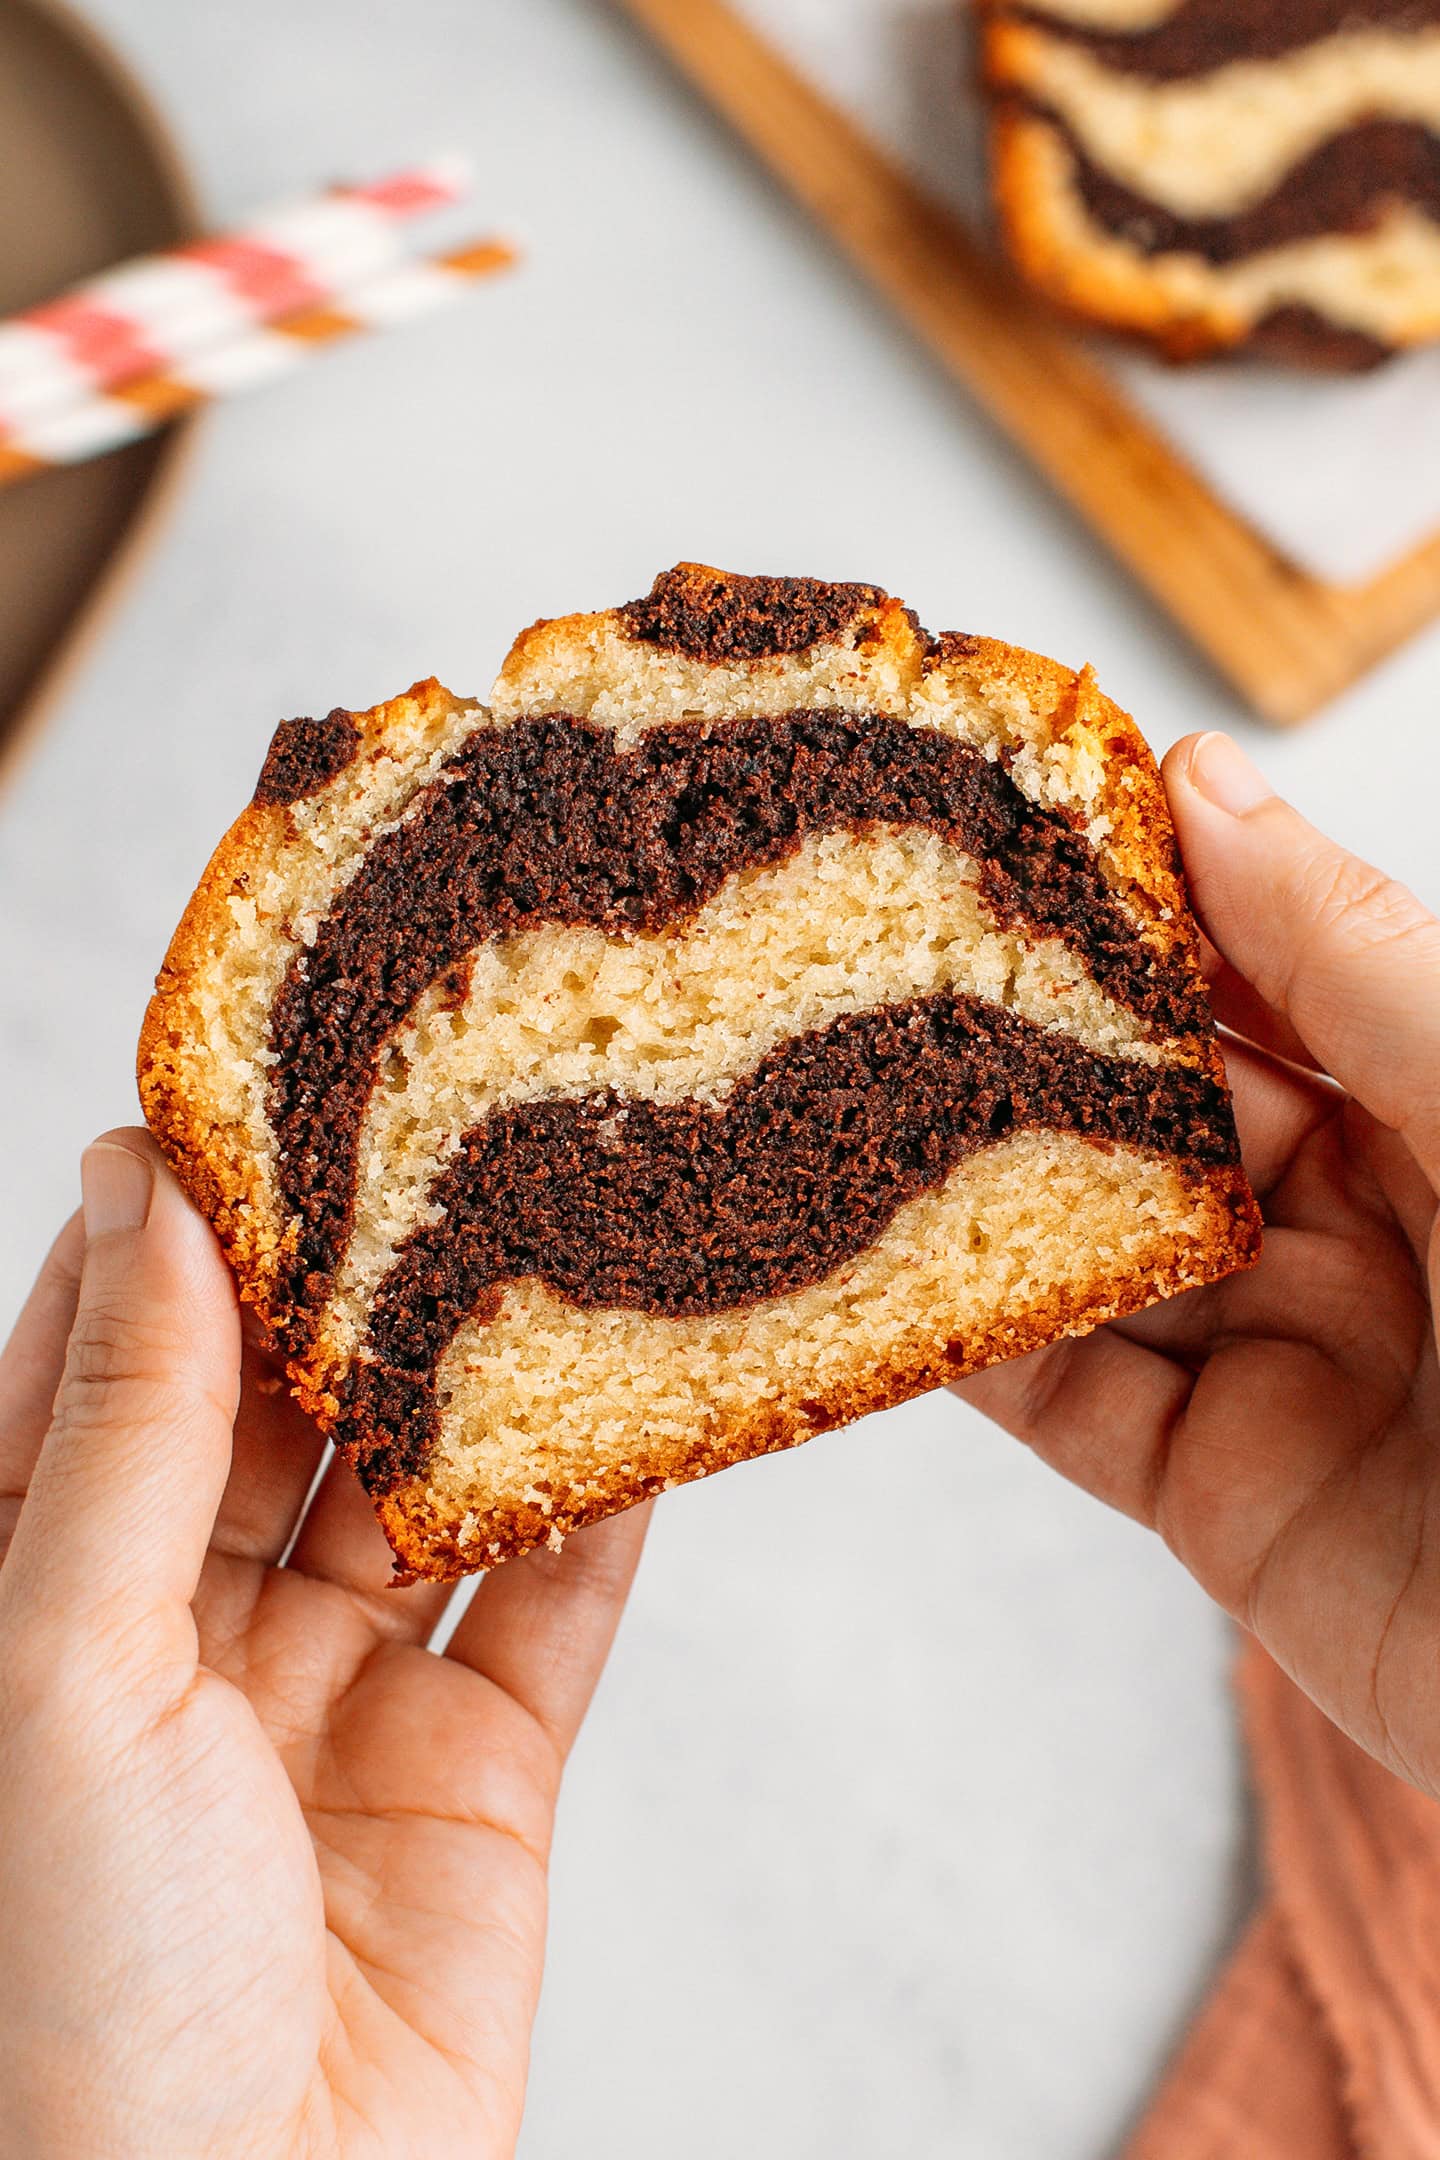
Once I nailed the batter – tender, just sweet enough, and with the right balance of vanilla and chocolate – it was time to tackle the real challenge: the layering. I wanted this cake to feel nostalgic, like the one I used to love as a kid, with two thick layers of chocolate right in the center. Well, easier said than done!
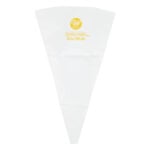
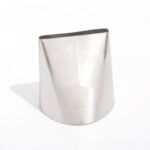
I’ll pass on the details, but after a few more trials, I discovered the secret: using piping bags! You will need two, each fitted with a large, flat tip (more on that later). One for the vanilla batter, one for the chocolate. Using a spoon or a cookie scoop works, but it won’t give you those clean layers. The piping bags, though, make it easy to create even layers of batter, resulting in a nice wave shape once it’s baked!
⭐️ What Makes It So Good
The ultimate after-school snack.
My marble may be vegan, but it has nothing to envy the traditional version. Actually, it’s been taste-tested by non-vegans and passed with flying colors! This loaf is buttery, fluffy, and melt-in-your-mouth tender, with just the right amount of moisture and a delicate sweetness that makes it perfect for breakfast.
For me, marble cake has always been the ultimate “after-school snack.” Maybe it’s because I grew up eating it in front of cartoons after school or enjoying a slice on lazy weekend mornings. However you enjoy it, I’m sure that both kids and grown-ups will fall in love with this simple, nostalgic treat!
Balanced with chocolate and vanilla.
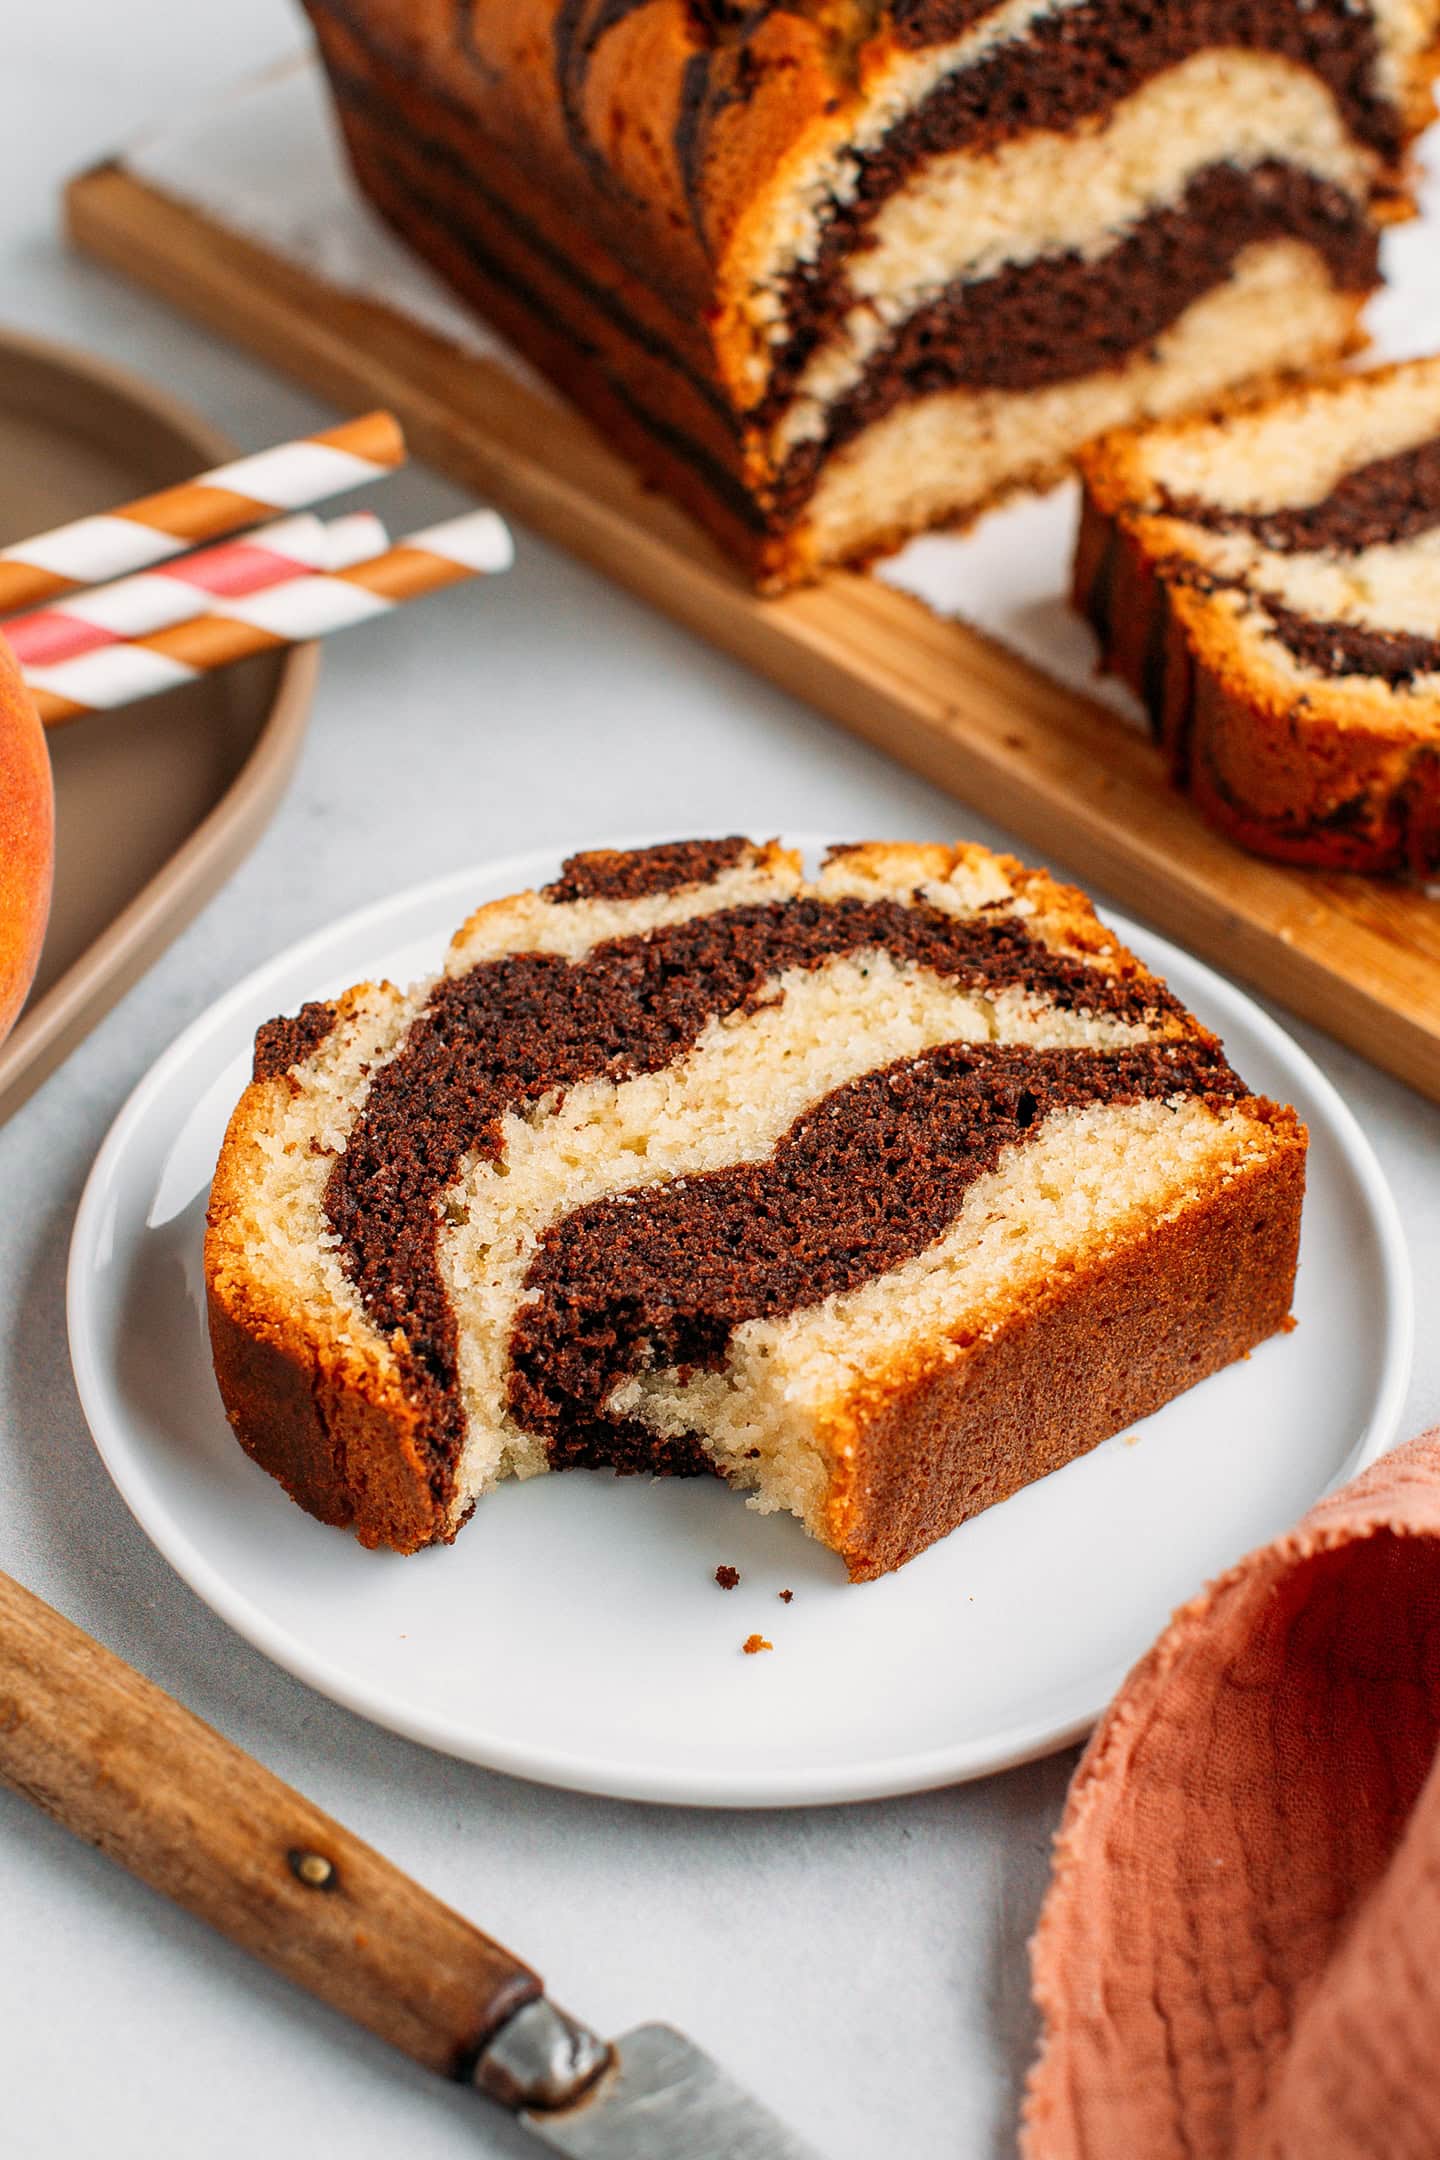
This is not your typical marble cake, where all layers are swirled together. This one keeps it simple and clean, with just two thick layers of chocolate.
Getting the chocolate-to-vanilla ratio is key. Too much chocolate, and it’s basically just a chocolate cake. Too little, and you can barely taste it. After plenty of testing, I settled on 40% chocolate to 60% vanilla, which, in my opinion, is the sweet spot.
Quick and simple.
This recipe uses 10 staple ingredients that you probably already have in your pantry. Honestly, if you start now, you could have this beautiful marble cake cooling on your counter in about an hour. So grab your apron, preheat the oven, and let’s do it!
📘 What Is Marble Cake
Marble cake, also known as zebra cake, is a type of cake that originated in Germany during the 19th century. It gets its name from the marbled pattern revealed when you slice into it.
Typically, the lighter cake is infused with vanilla, while the darker one is flavored with cocoa powder.
🍫 About the Ingredients
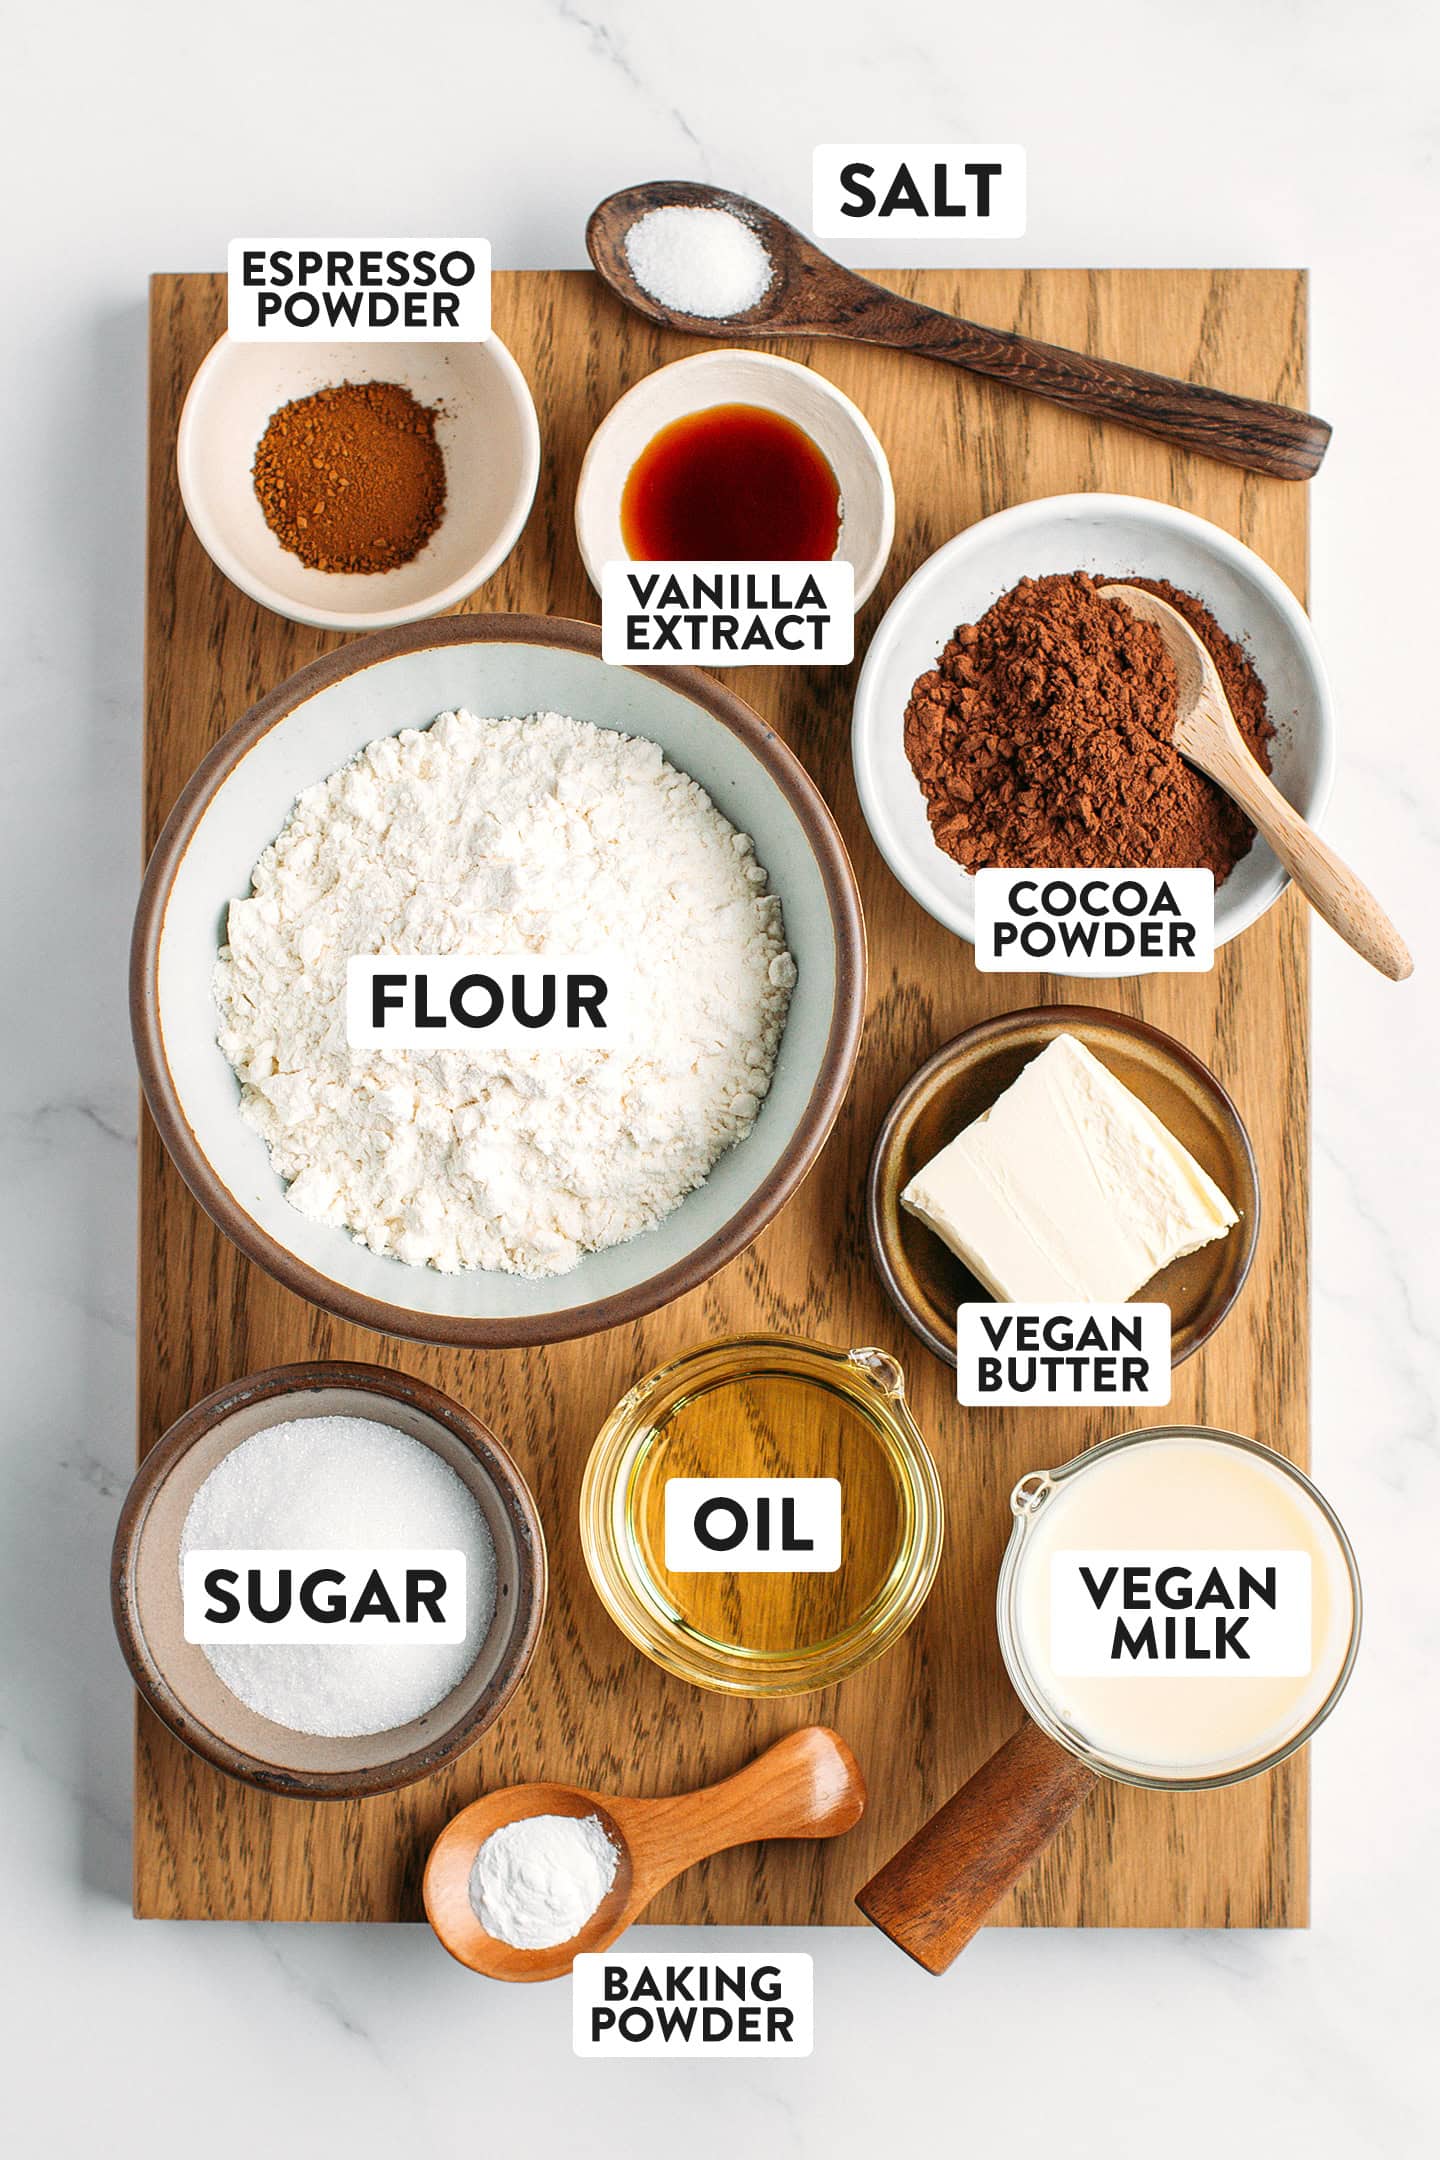
Flour
No need to reach for a special kind of flour here. Regular all-purpose flour works great!
Sugar
Although I like to use healthier sugar alternatives like maple syrup or coconut sugar when possible, I must admit that granulated white sugar works best for this recipe. Since it has no flavor, it doesn’t overpower the subtle vanilla flavor of the cake.
Is this cake very sweet? Sweetness obviously depends on your taste, but I would say that it’s mildly sweet. If you have a sweet tooth, I would suggest adding an extra 3-4 tablespoons of sugar.
Butter and oil
Just like in my pound cake recipe, I rely on a combination of butter and oil. Cakes made only with butter tend to be denser and a bit drier. Adding oil not only adds tenderness but also moisture, preventing the cake from drying too quickly. This marble cake stays soft and moist up to 5 days, thanks to that!
Note: Use a neutral oil such as canola, rapeseed, or avocado oil.
Plant-based milk
Use your favorite unsweetened plant-based milk. I went with soy milk, but almond, oat, or cashew milk will also work.
Cocoa powder
Preferably Dutch-processed cocoa powder. Unlike natural cocoa powder, Dutch-processed cocoa is treated with an alkaline solution, which reduces its acidity and gives it a darker color.
Recommendation: I used Van Houten here, but Ghirardelli or any other brand of Dutch-processed cocoa powder will work.
Vanilla extract
To infuse the batter with a wonderful floral aroma. Use high-quality store-bought vanilla extract or homemade vanilla extract. Alternatively, you can omit it and replace the sugar with vanilla sugar.
Espresso powder
Optional. Espresso powder enhances the chocolate flavor, adding depth and a very subtle bitterness.
🌈 Getting Nice Layers
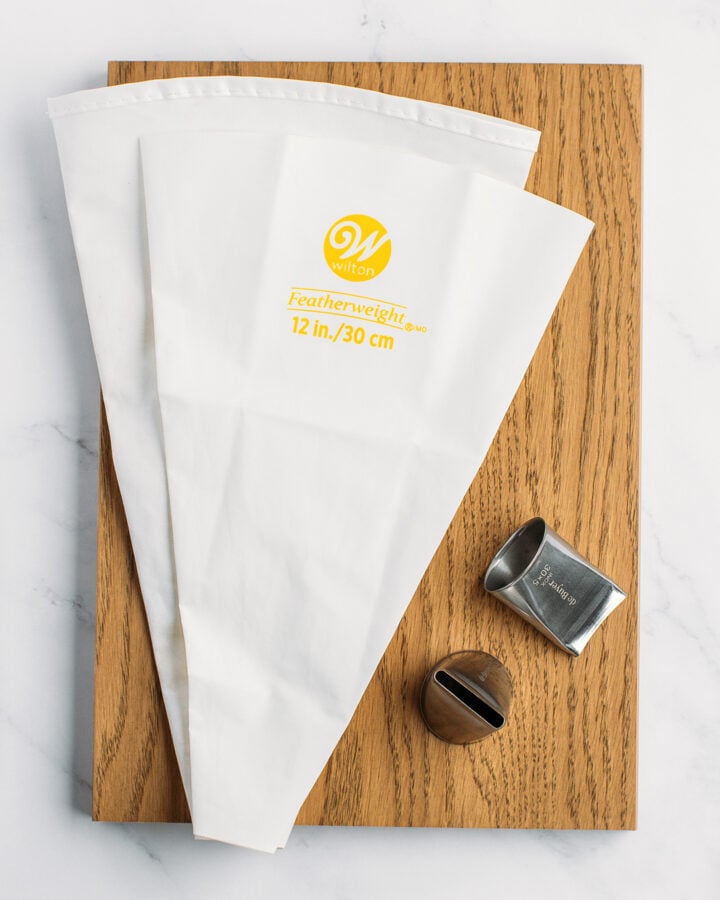
While you can just spoon the batter into the loaf pan, I suggest using piping bags fitted with a flat tip instead.
Why? It makes layering super easy, giving you nice, even layers.
I use those 12-inch Wilton piping bags fitted with a 2-inch flat tip.
Of course, this is only if you’re aiming for a picture-perfect marble cake! If you are short on time or baking with the kids, spooning the batter works great too!
📔 Success Tips
Let the butter cool. After melting the butter, it’s essential to let it sit for a few minutes. If it’s too hot when added to the batter, it will activate the baking powder too early, making the cake denser.
Weigh your ingredients. The recipe card includes both cup and gram measurements, but I recommend using grams for more accurate results. A kitchen scale is always handy for most baking recipes.
Soften the top crust. Fresh out of the oven, the marble cake will have a slightly crispy top. I like it that way, but if you prefer a fully soft cake, cover it with plastic wrap about 20 minutes after removing it from the oven. The moisture will be trapped, softening the crust.
🥣 How to Make It
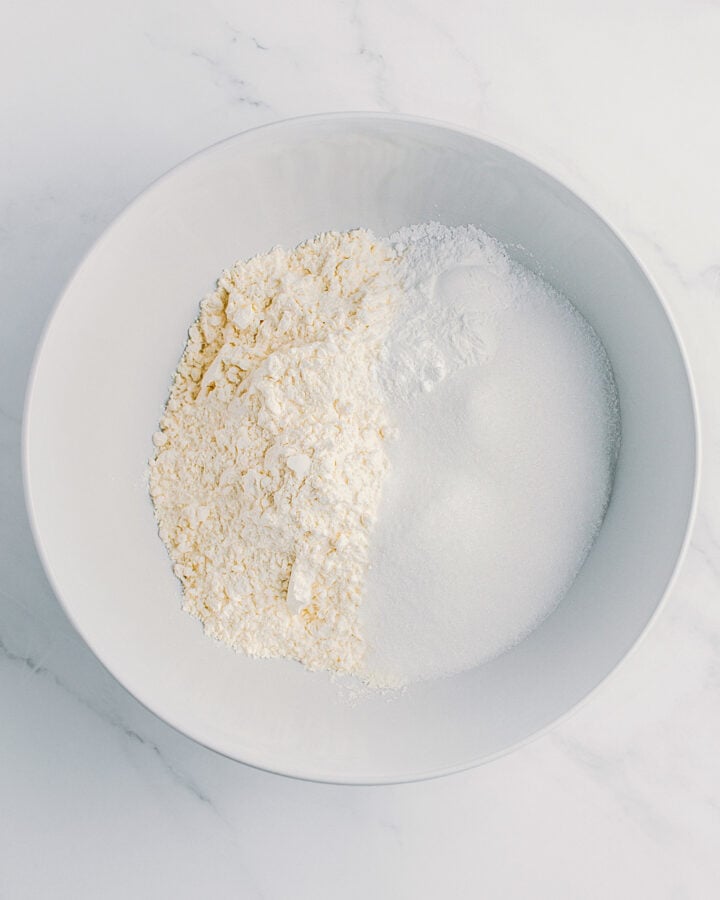
- Whisk together the dry ingredients. Add the flour, sugar, baking powder, and salt to a large mixing bowl. Whisk until fully combined.
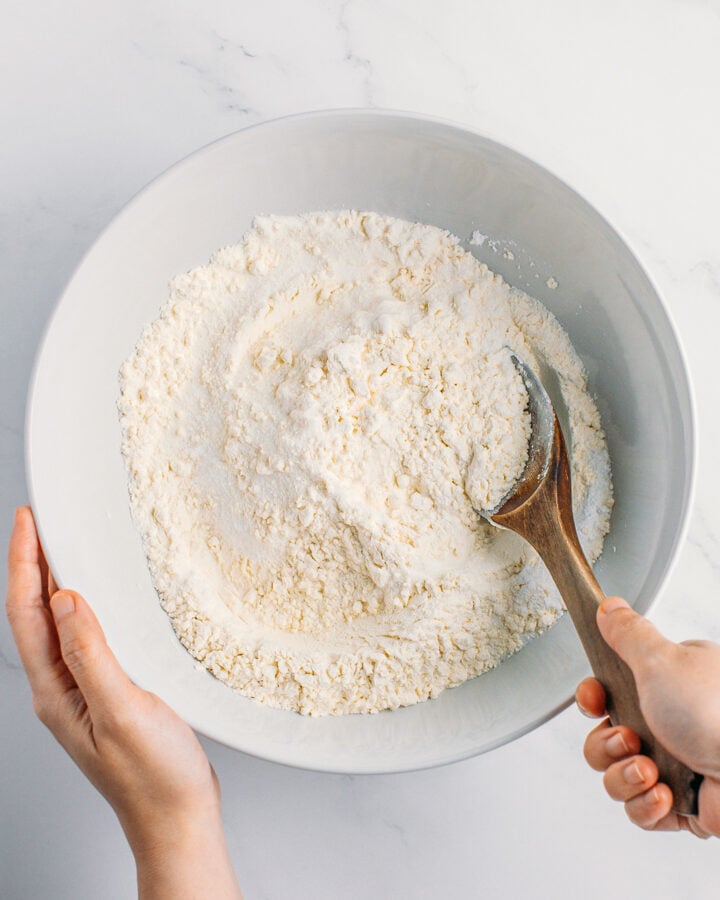
- Melt the butter. Add the butter to a small saucepan and melt it over low heat. Set it aside and let it cool for 5-10 minutes. Note: Your butter should not be hot, just melted.
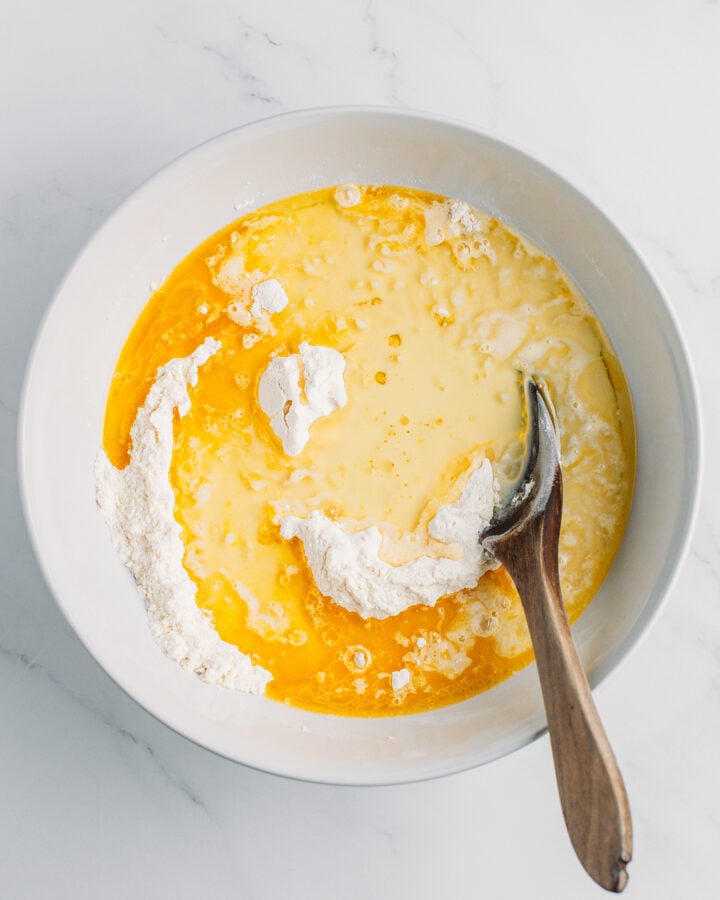
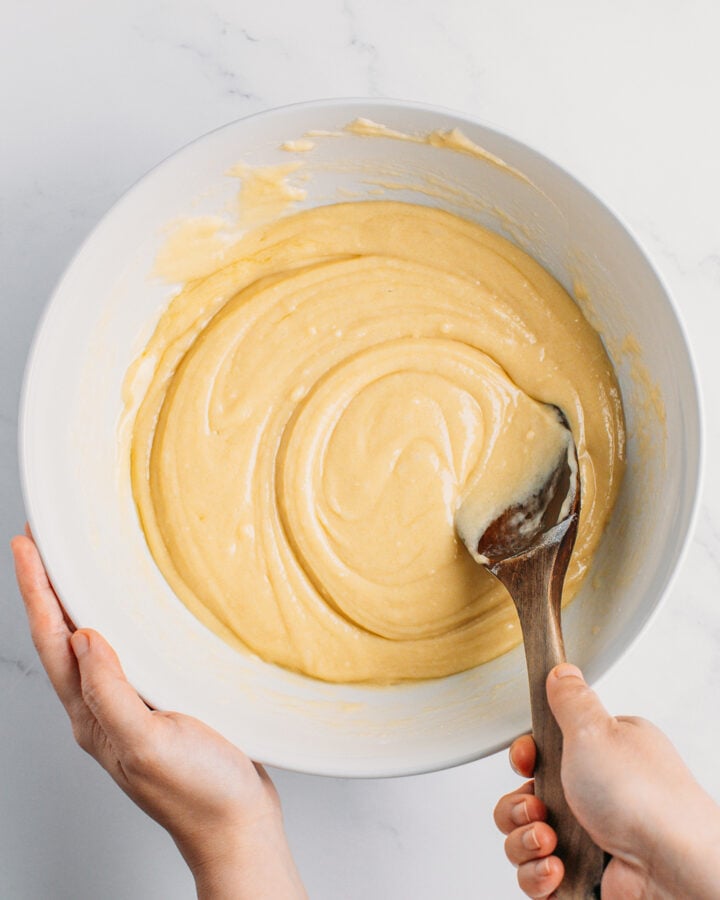
- Pour the liquid ingredients into the dry ones. To the mixing bowl, add the unsweetened plant-based milk, oil, melted butter, and vanilla extract. Mix using a wooden spoon until the batter forms a smooth and thick consistency.
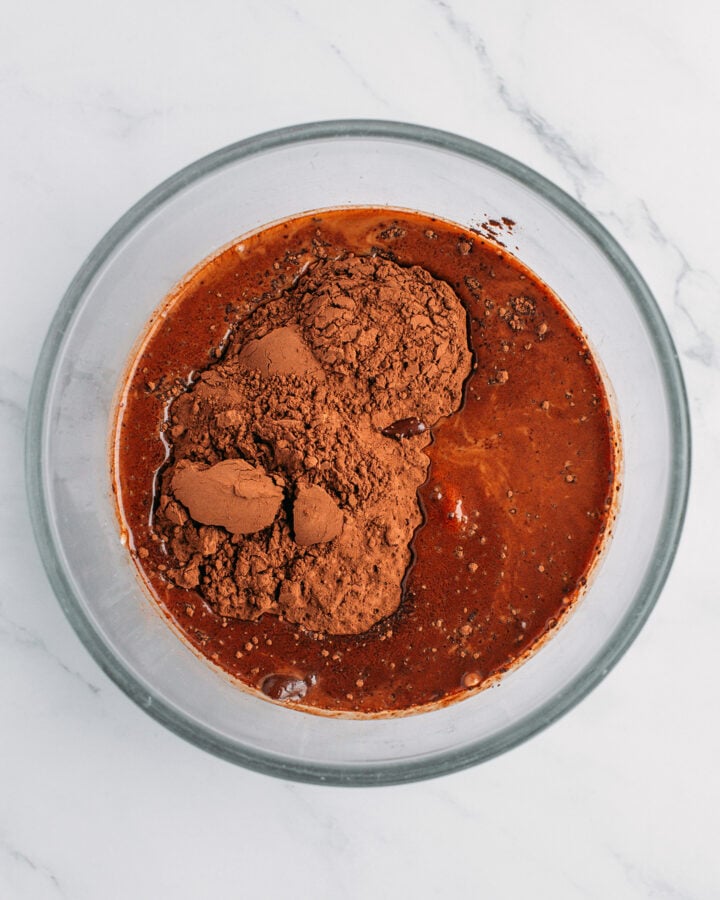
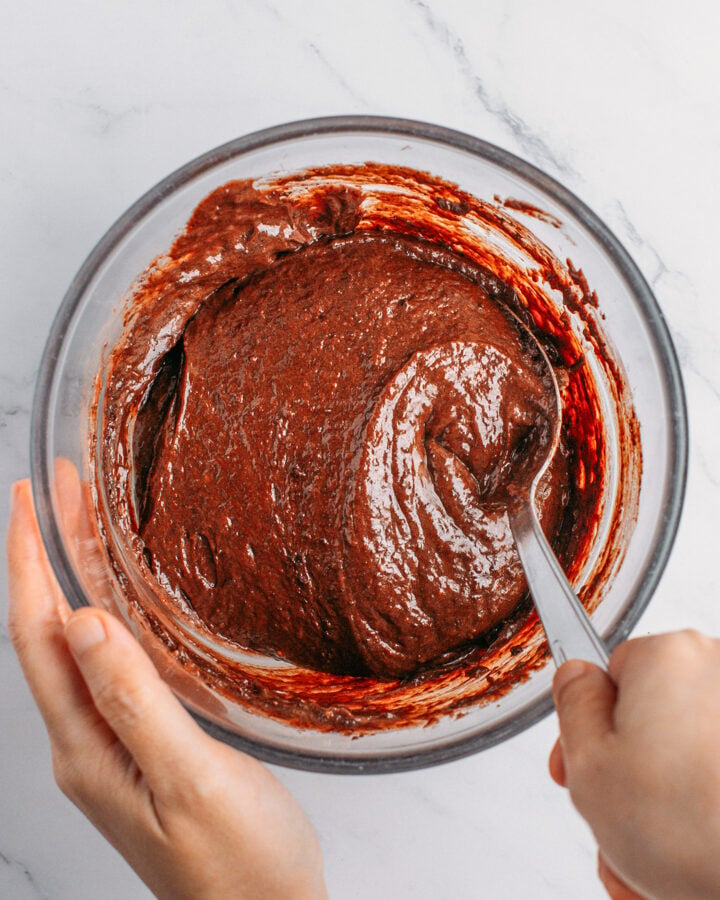
- Make the chocolate batter. In a small bowl, dilute the espresso powder with the 3 tablespoons of warm milk. Next, scoop out about 1 cup (roughly 12 ounces / 340 g) of the vanilla batter and transfer it to a smaller mixing bowl. Add the espresso milk and cocoa powder, and mix until well combined.
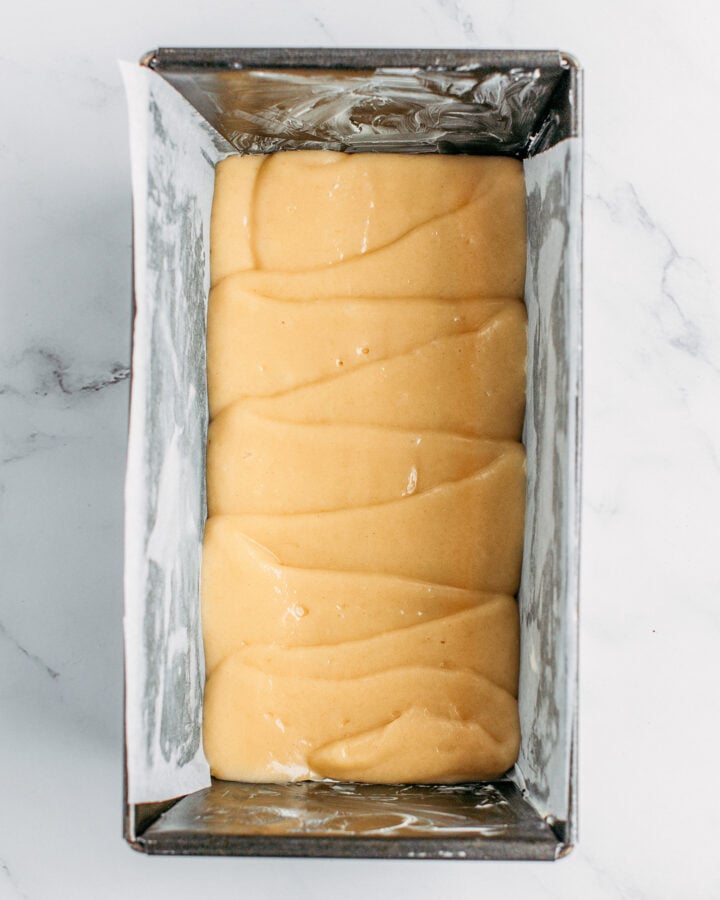
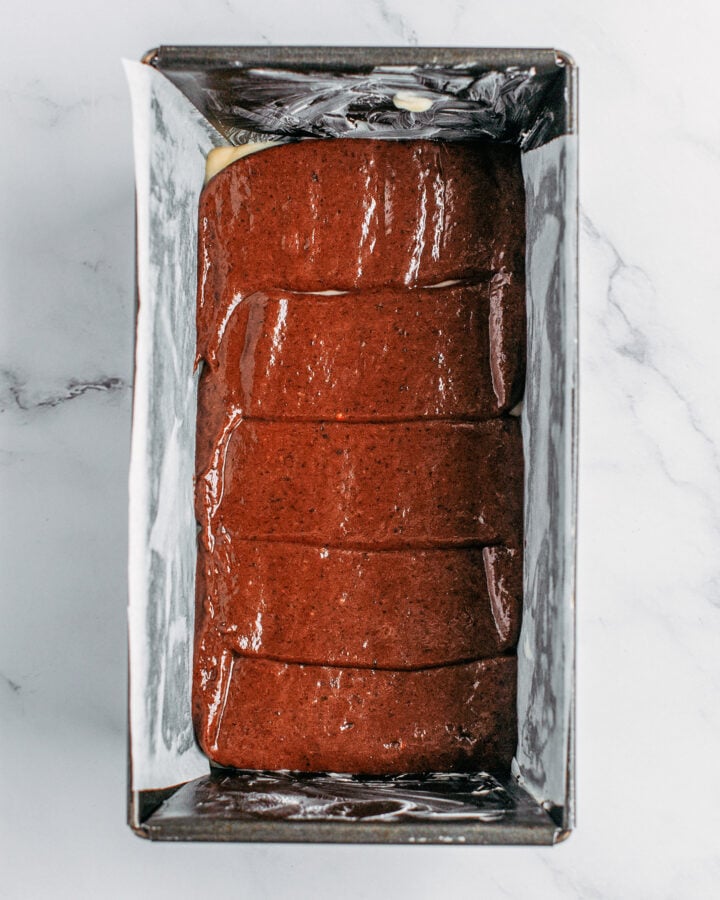
- Transfer to piping bags. Prepare two piping bags fitted with a 2-inch flat tip. Transfer the vanilla batter to one and the chocolate batter to the other.
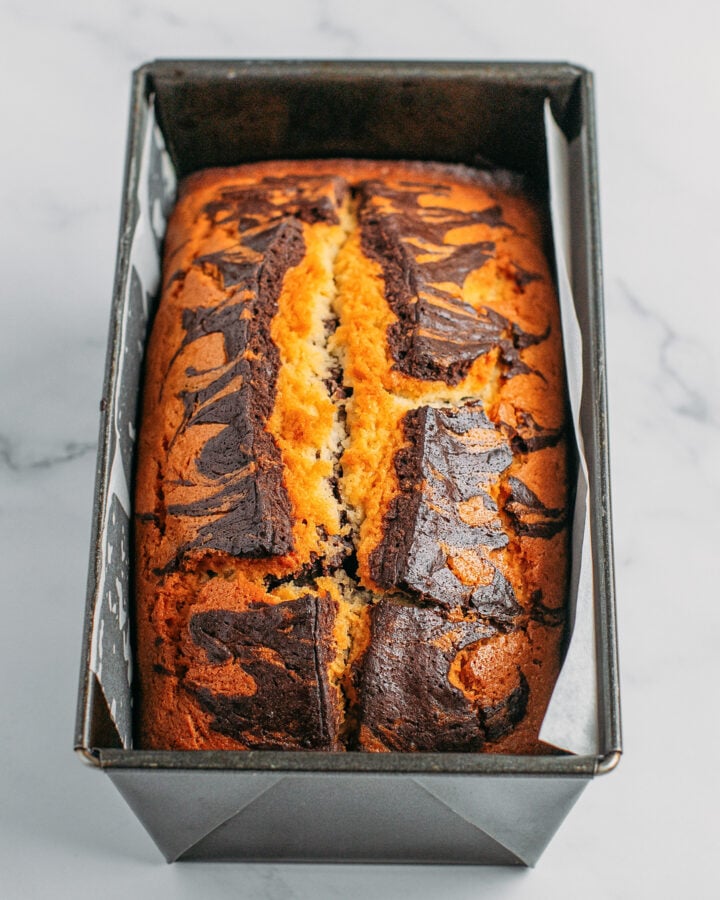
- Assemble the cake. Start by piping a thin layer of the vanilla into the bottom of the loaf pan. Next, pipe a layer of the chocolate batter on top. Keep alternating: vanilla, chocolate, and finish with a final layer of vanilla. Tip: Each layer should weigh approximately 170g.
Tips for a Georgous Cake Top
Two quick tips for the perfect finish!
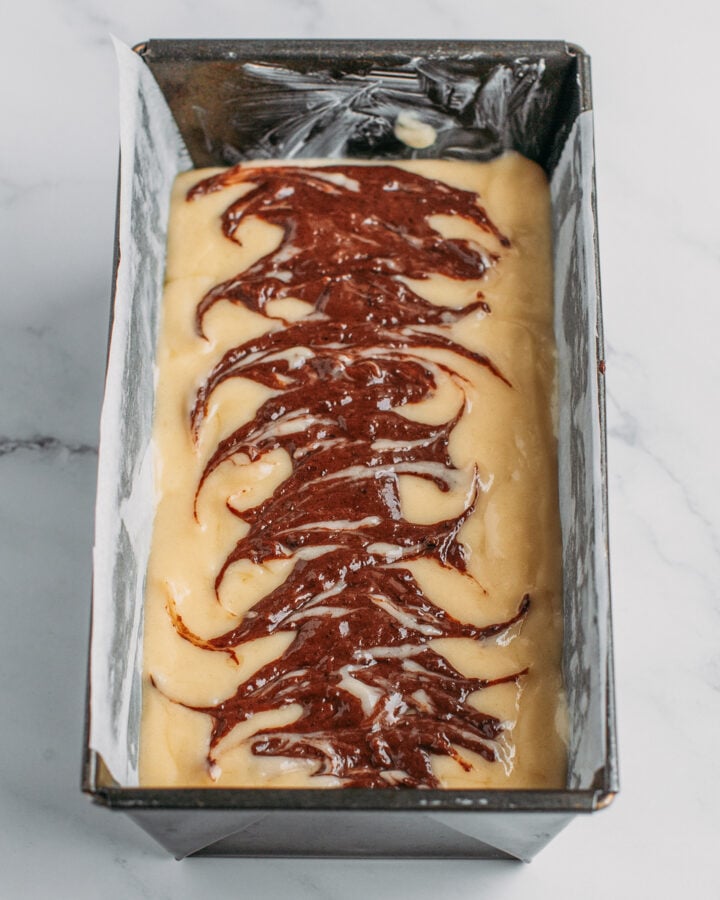
First: Save about 1/4 cup of the chocolate batter and pipe it over the final layer of vanilla batter. Then, use a toothpick or a knife to gently swirl just the top layer. Don’t go too deep – you want a nice marble effect only on top.
Second: Dip a silicon spatula into a tablespoon of melted butter (or oil) and draw a straight line, approximately 1/2 inch (1 cm) deep, lengthwise along the center of the batter. This trick makes the cake crack exactly in the middle as it bakes. It’s magic!
- Bake. Finally, bake the marble cake for about 1 hour or until the top is golden brown.
- Let it cool. Remove from the oven and let it cool for at least 45 minutes before taking it out of the loaf pan. You can enjoy it warm, but I personally think it tastes the best once it’s completely cooled!
🌰 Tweak It!
- Add chocolate chips: Chocolate lovers, feel free to sprinkle some chocolate chips on each chocolate layer before topping with the vanilla layer!
- Swirl the layers: Not into even layers? Nothing’s stopping you from swirling the batters a bit using a knife after pouring them into the loaf cake!
- Glaze it! Once the cake is cool, you can glaze it with melted chocolate or chocolate ganache.

🍦 What to Serve It With
You can serve it with vegan Greek yogurt, almond milk yogurt, or a scoop of vanilla ice cream!
❄️ Storing and Freezing
- To store: You can store this cake covered with plastic wrap at room temperature. It will stay soft and moist for up to 5 days.
- To freeze: Slice the leftovers into 1-inch-thick (2.5 cm) pieces and wrap each slice tightly in plastic wrap. Store in the freezer for up to 2 months. When ready to enjoy, let a slice thaw at room temperature for a couple of hours.
💬 FAQ
I’m afraid that I haven’t tried using a 1:1 gluten-free flour blend for this recipe yet, so I cannot report if it will work or not.
The batter should be slightly thicker than a pancake batter.
The cake is ready when the top is golden brown and has a nice crack down the center. You can test doneness by inserting a toothpick in the center of the cake. It should come out with just a few crumbs around it. If it looks wet, bake for a few more minutes.


Want to Save This Recipe?
Enter your email below & we’ll send it straight to your inbox! Plus, you will receive new recipes every week!
I’d like to receive more tips & recipes from Full of Plants.
This site is protected by reCAPTCHA and the Google Privacy Policy and Terms of Service apply.
Vegan Marble Cake
Equipment
Ingredients
Vanilla Batter
- 2 and 1/2 cup (312 g) all-purpose flour
- 3/4 cup + 2 tbsp (187 g) granulated sugar
- 1 and 1/2 tsp baking powder
- 1/2 tsp salt
- 5 tbsp (70 g) vegan butter melted
- 3/4 cup (180 ml) unsweetened plant-based milk
- 1/3 cup (80 ml) oil
- 1 tbsp + 1 tsp (20 ml) vanilla extract
Chocolate Batter
- 1/2 tsp espresso powder (optional)
- 3 tbsp (45 ml) warm unsweetened plant-based milk
- 5 tbsp (40 g) Dutch-processed cocoa powder
Instructions
- Preheat your oven to
 350 °F (175°C). Lightly grease an 8×4-inch (20×10 cm) loaf pan with butter and line it with parchment paper.
Vanilla Batter
- Whisk together the dry ingredients. Add the flour, sugar, baking powder, and salt to a large mixing bowl. Whisk until fully combined.
- Melt the butter. Add the butter to a small saucepan and melt it over low heat. Set it aside and let it cool for 5-10 minutes. Note: Your butter should not be hot, just melted.
- Pour the liquid ingredients into the dry ones. To the mixing bowl, add the unsweetened plant-based milk, oil, melted butter, and vanilla extract. Mix using a wooden spoon until the batter forms a smooth and thick consistency.
Chocolate Batter
- Make the chocolate batter. In a small bowl, dilute the espresso powder with the 3 tablespoons of warm milk. Next, scoop out about 1 cup (roughly 12 ounces / 340 g) of the vanilla batter and transfer it to a smaller mixing bowl. Add the espresso milk and cocoa powder, and mix until well combined.
Assemble
- Transfer to piping bags. Prepare two piping bags fitted with a 2-inch flat tip. Transfer the vanilla batter to one and the chocolate batter to the other.
- Assemble the cake. Start by piping a thin layer of the vanilla into the bottom of the loaf pan. Next, pipe a layer of the chocolate batter on top. Keep alternating: vanilla, chocolate, and finish with a final layer of vanilla. Tip: Each layer should weigh approximately 170g.
- Bake. Finally, bake the marble cake for about 1 hour or until the top is golden brown.
- Let it cool. Remove from the oven and let it cool for at least 45 minutes before taking it out of the loaf pan. You can enjoy it warm, but I personally think it tastes the best once it's completely cooled!
- You can store this cake covered with plastic wrap at room temperature. It will stay soft and moist for up to 5 days.
Notes

About the Author
Thomas Pagot is the founder, photographer, and recipe developer behind Full of Plants. He created the blog in 2016 as a personal cookbook for vegan recipes. Through years of recipe development, Thomas has successfully grown Full of Plants into a trusted resource for plant-based recipes.
Leave a Comment