This post may contain affiliate links. Please read our disclosure policy.

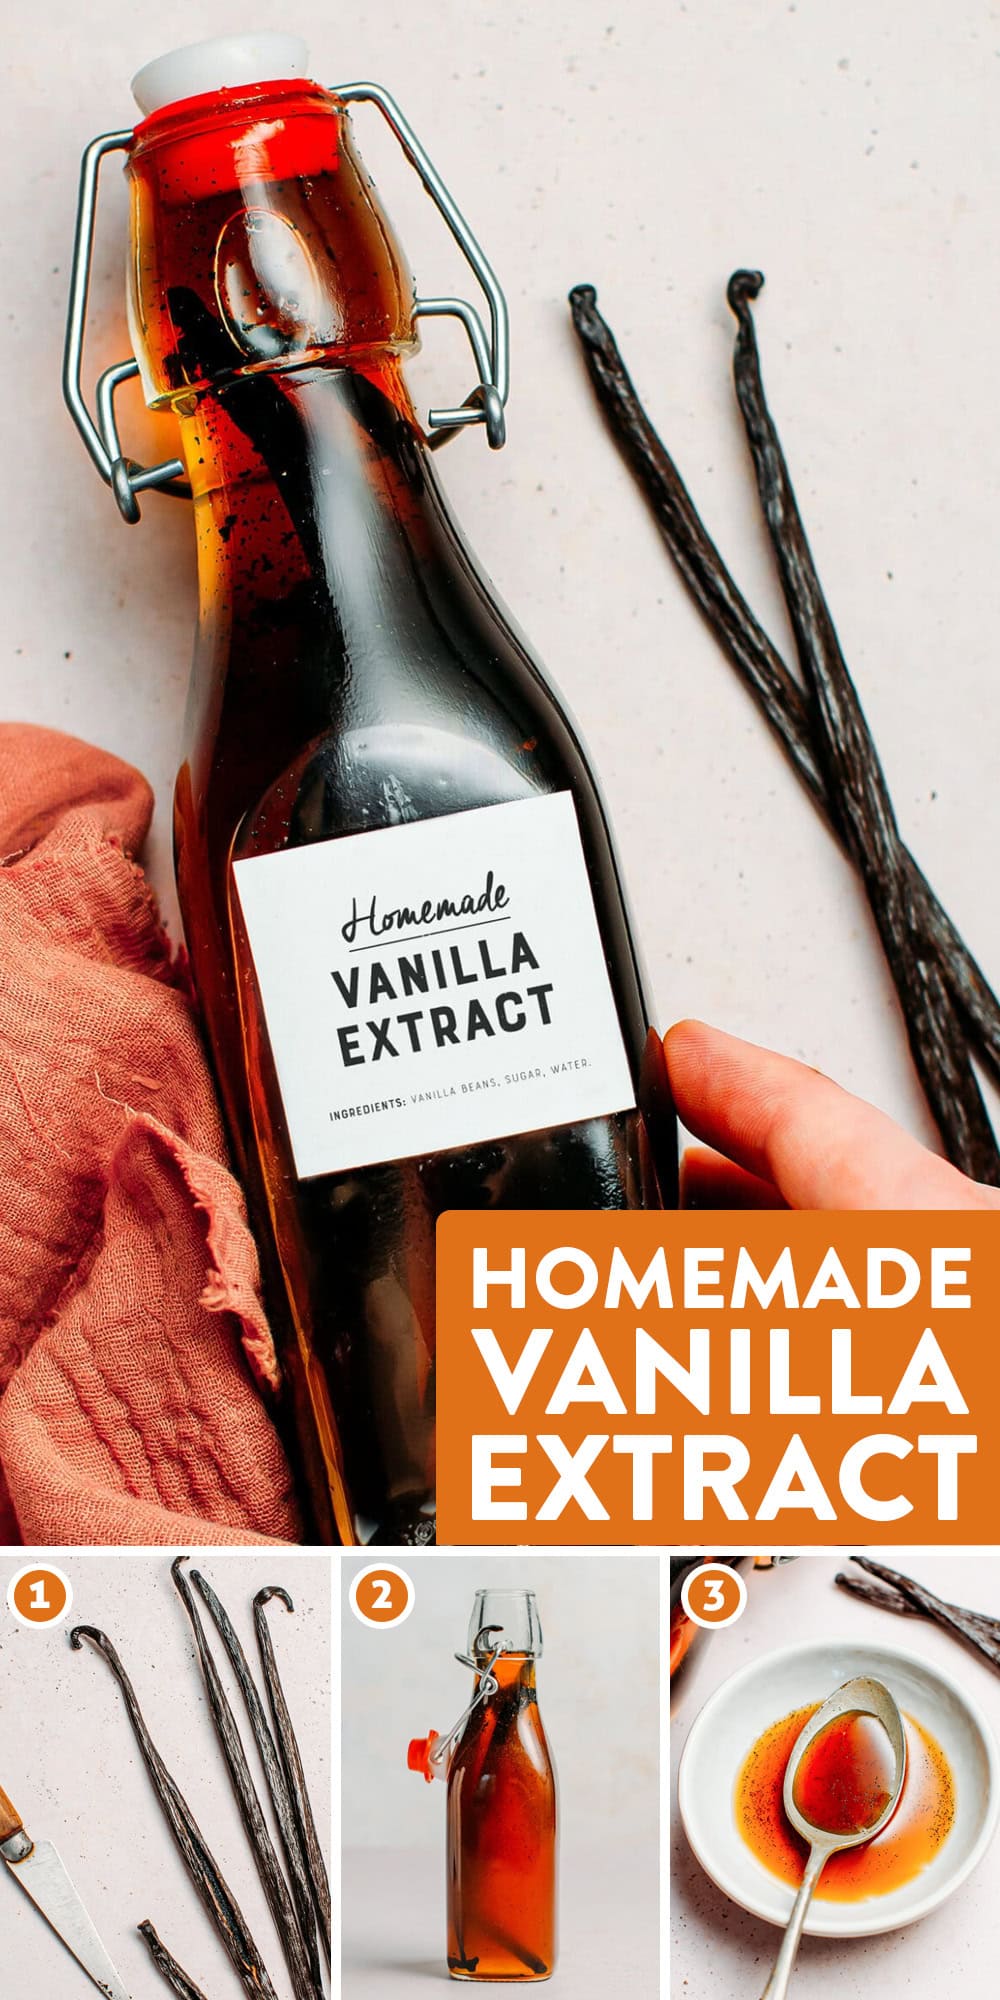
Homemade vanilla extract with just 2 ingredients! This alcohol-free extract is super simple to make and packed with flavor. Use it in cookies, baked goods, ice cream, cocktails, and lattes for a wonderful aroma!

Vanilla extract is that magic ingredient that transforms cookies, desserts, and cakes from okay to amazing. It adds complex flavors, freshness, and a floral aroma.
This recipe has been a long time in the making as I wanted to make sure the flavor was on point (and test the shelf life).
⭐️ Why You Should Try It
- It’s super simple to make: It takes less than 15 minutes to prepare and just 2 basic ingredients.
- Cheaper than store-bought: Let’s be honest, if you want to get the high-quality vanilla extract, it’s definitely not cheap. This version comes out much cheaper than store-bought and tastes even better!
- Packed with fresh vanilla flavor: This homemade extract is on par with the most expensive extracts you can find in the supermarket. Plus, a little goes a long way!
- It makes a great gift: Looking for a thoughtful and unique gift idea? Consider this homemade vanilla extract! Package it in a beautiful bottle with a nice label. Your loved ones will appreciate the special gift.
📘 What Is Vanilla Extract
Vanilla extract is a natural flavoring that is made by macerating vanilla pods in a liquid. It is then used to flavor baked goods, drinks, cocktails, and more. Vanilla extract can be alcohol-based or sugar-based.
Sugar-Based Extract vs. Alcohol-Based
Pros: As opposed to alcohol-based extract, which tends to always have an alcohol smell, this sugar-based extract only smells and tastes vanilla. Nothing else.
Cons: Sugar-based vanilla extract will only keep for about 6 months and must be stored in the refrigerator. On the other hand, alcohol-based extracts will keep almost indefinitely at room temperature.
If you are familiar with store-bought vanilla extract, this sugar-based version will add the same sweetness with even more vanilla flavor!
🫙 Ingredient Notes
- Sugar – You can use white sugar or light brown sugar if you want a subtle caramel flavor. I recommend staying away from coconut sugar as it would be overpowering.
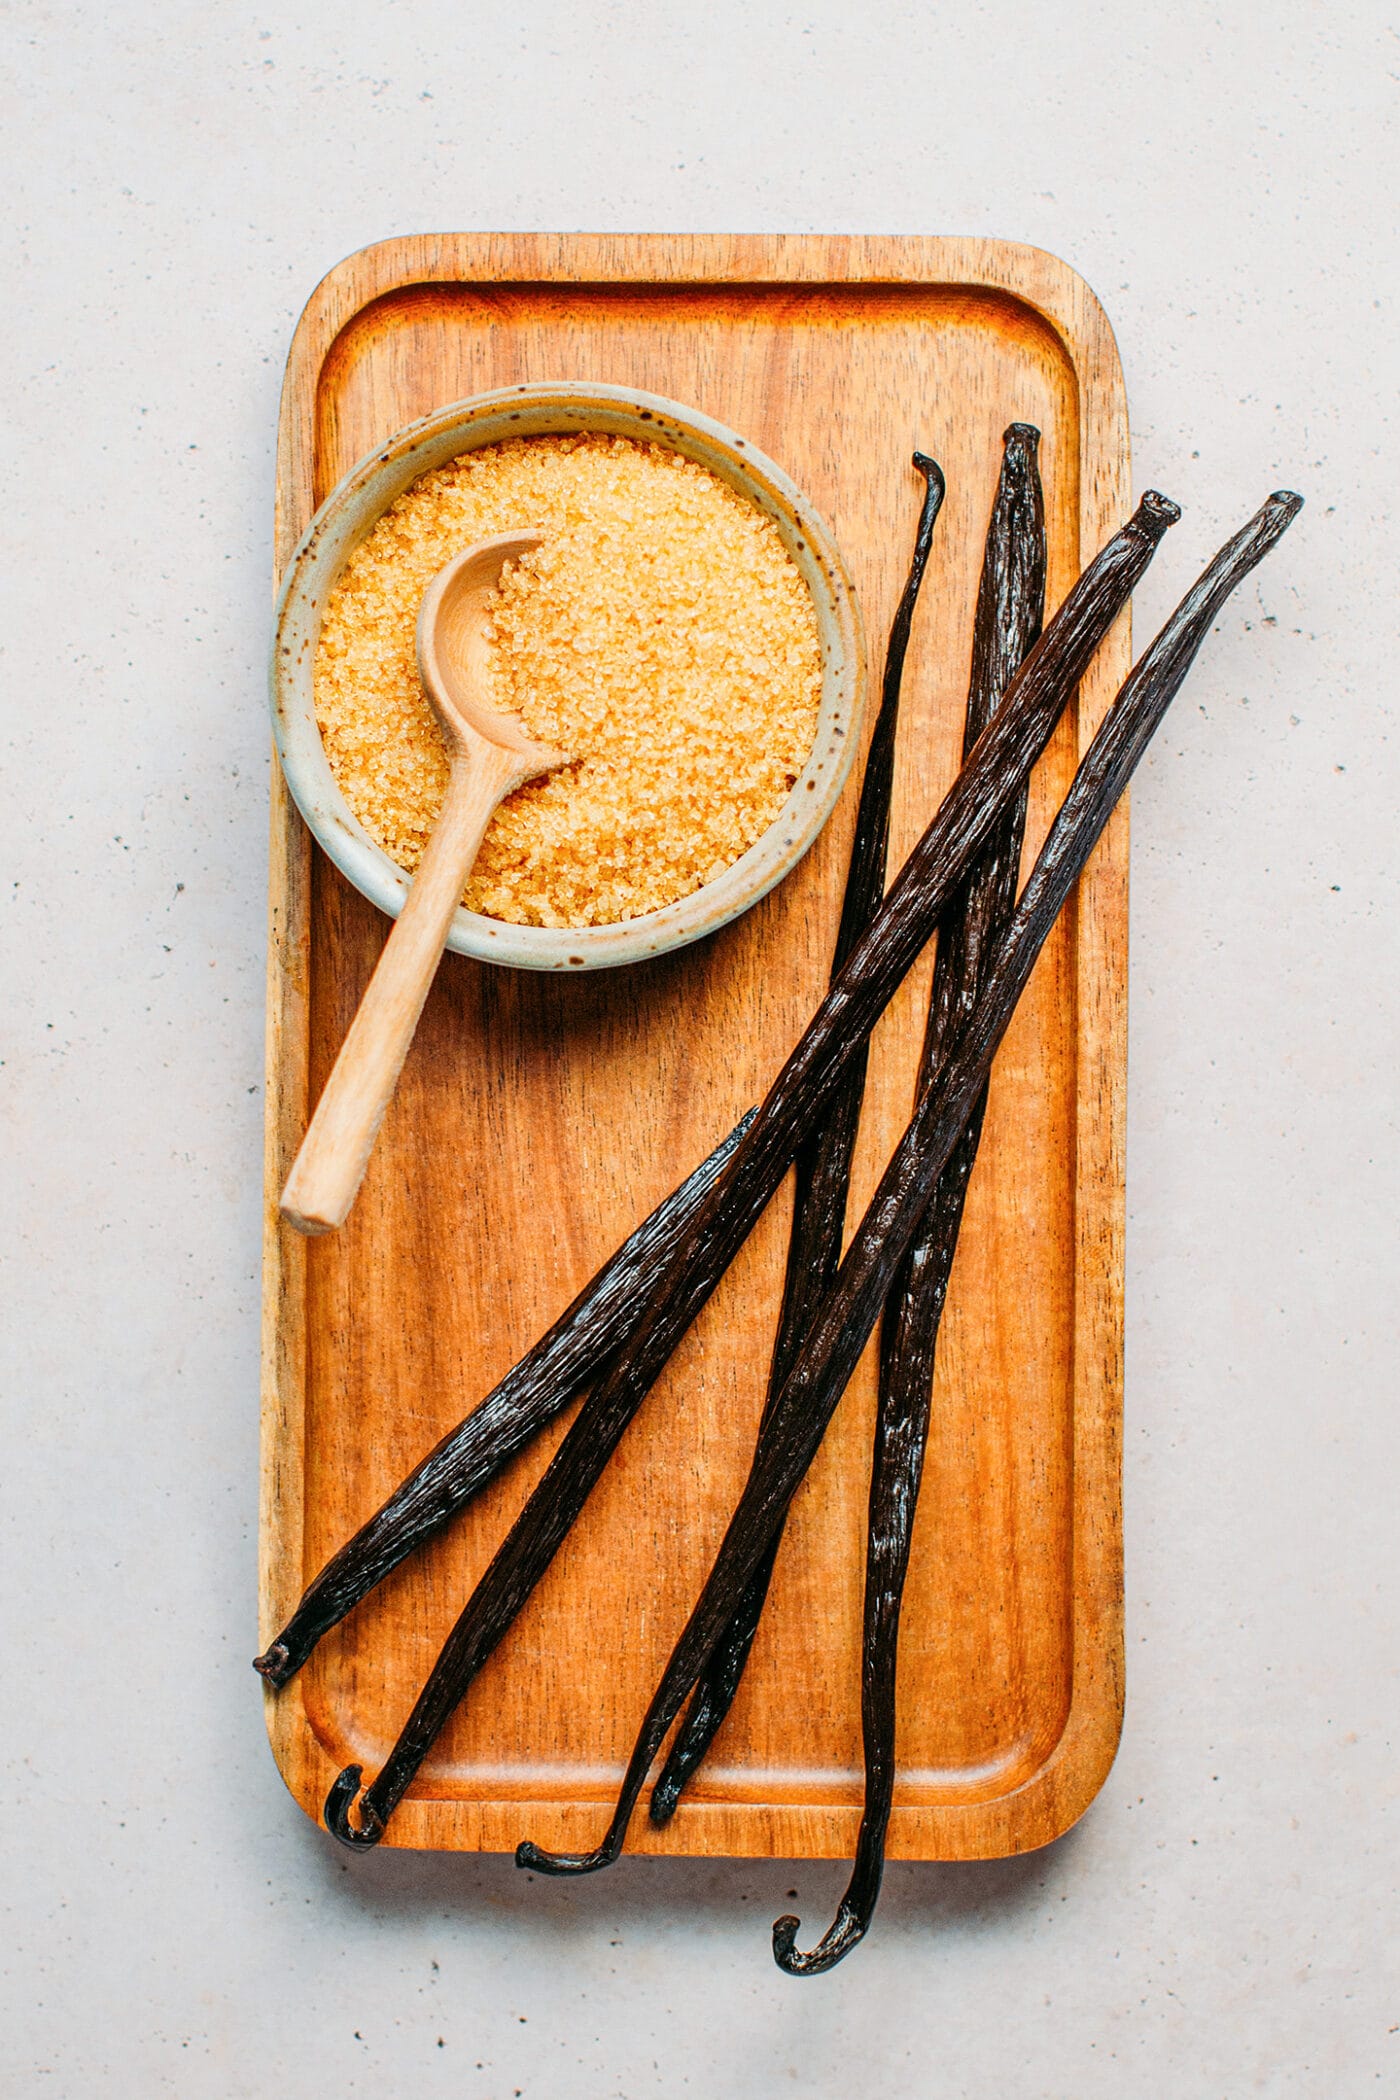
- Vanilla pods – Preferably fresh and soft vanilla beans for the best flavor. You can learn more about the different types of vanilla beans below.
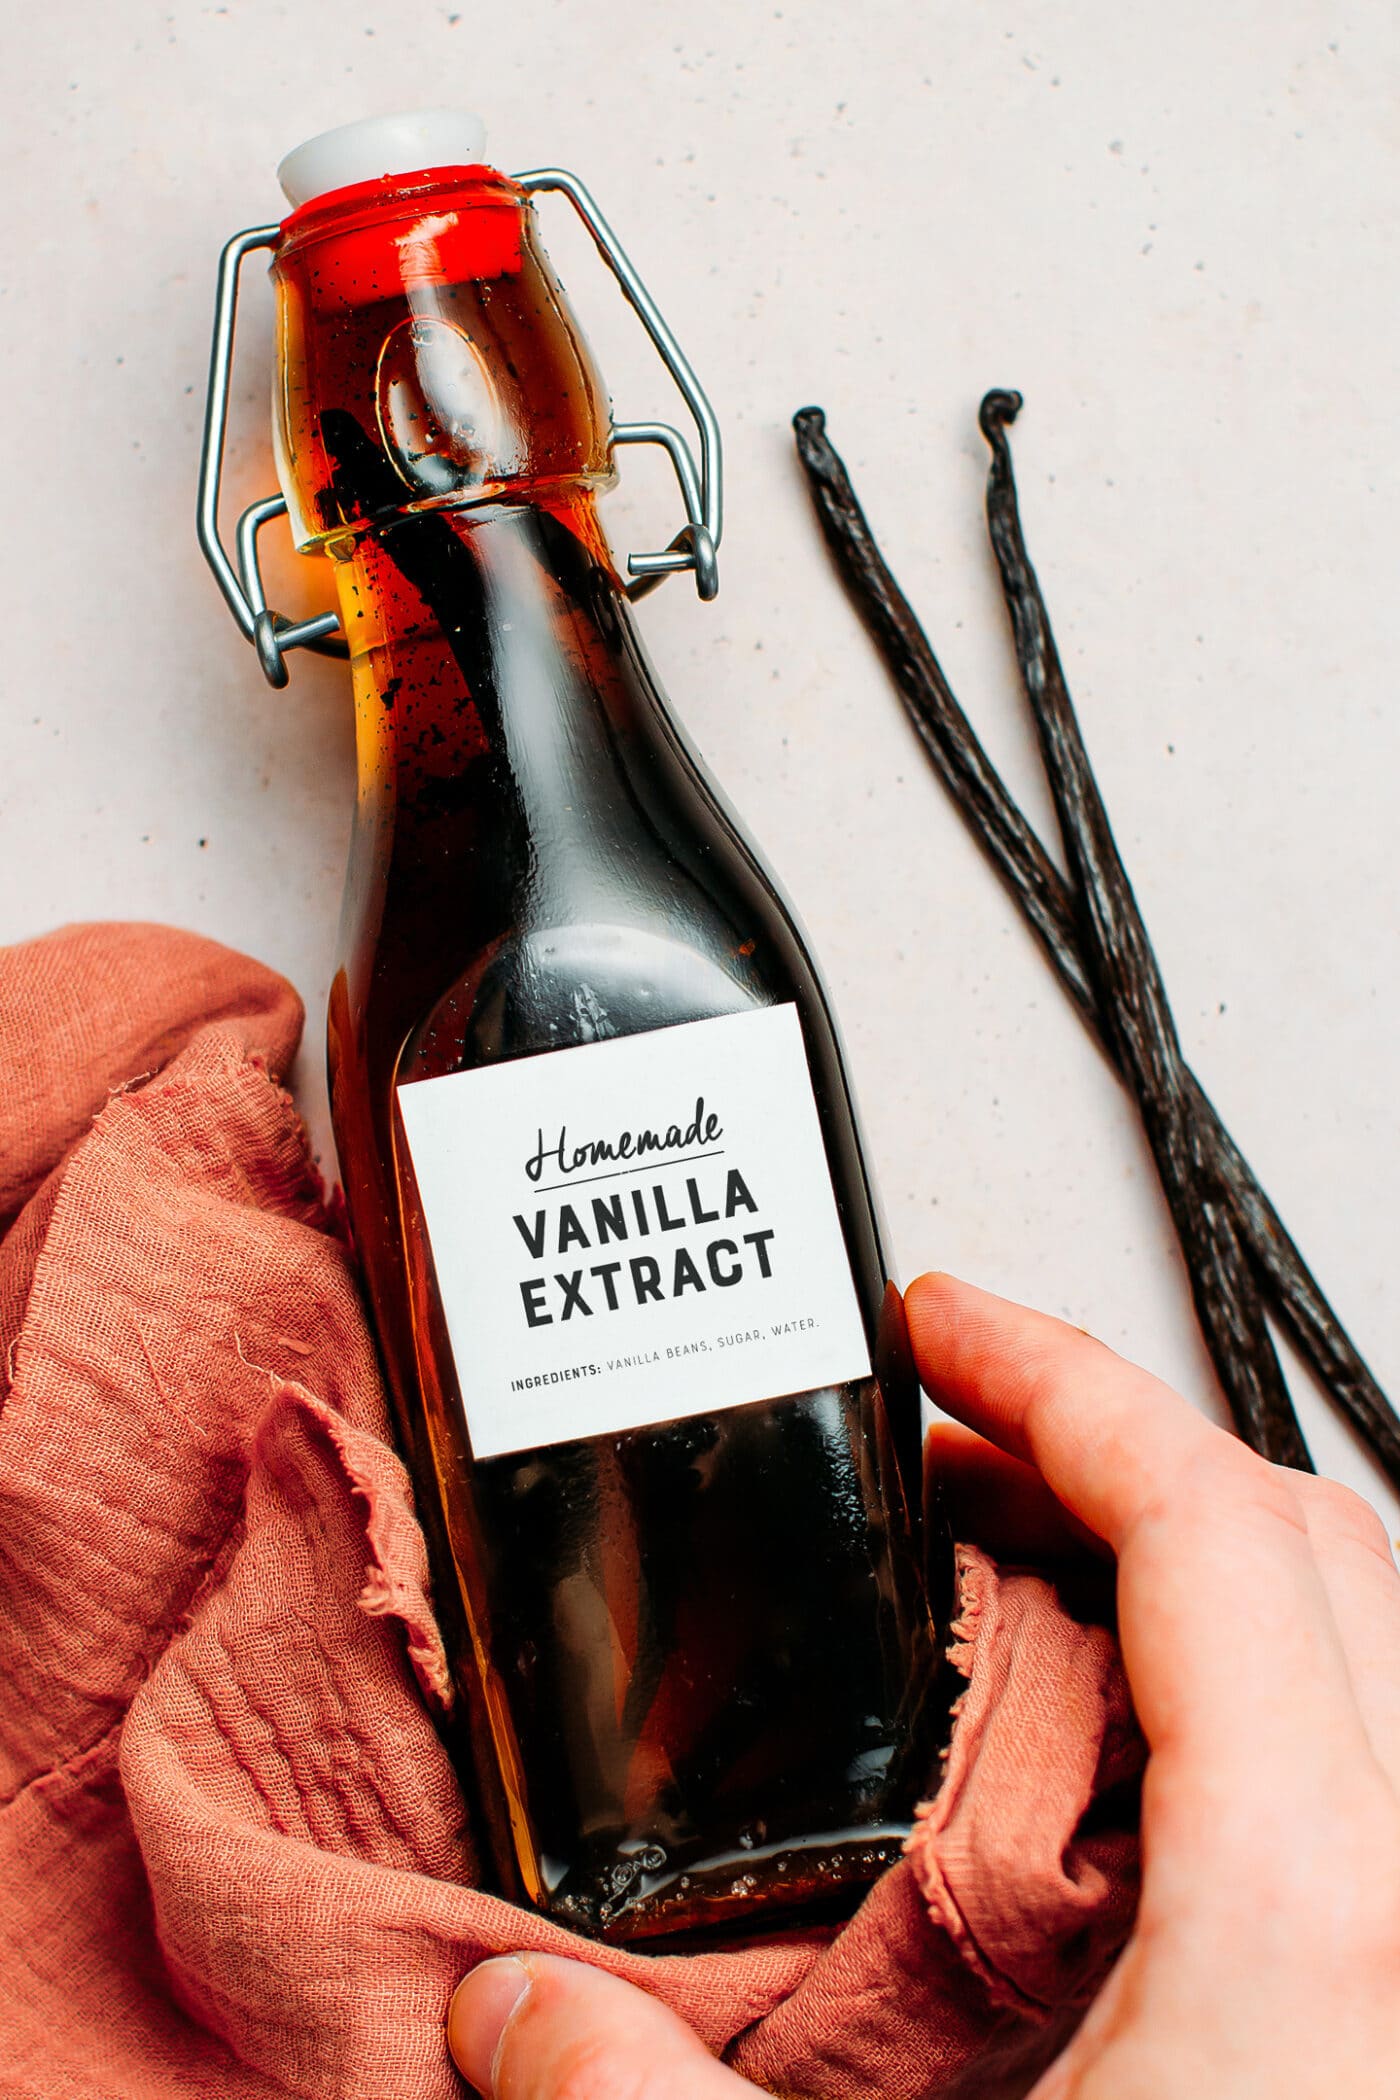
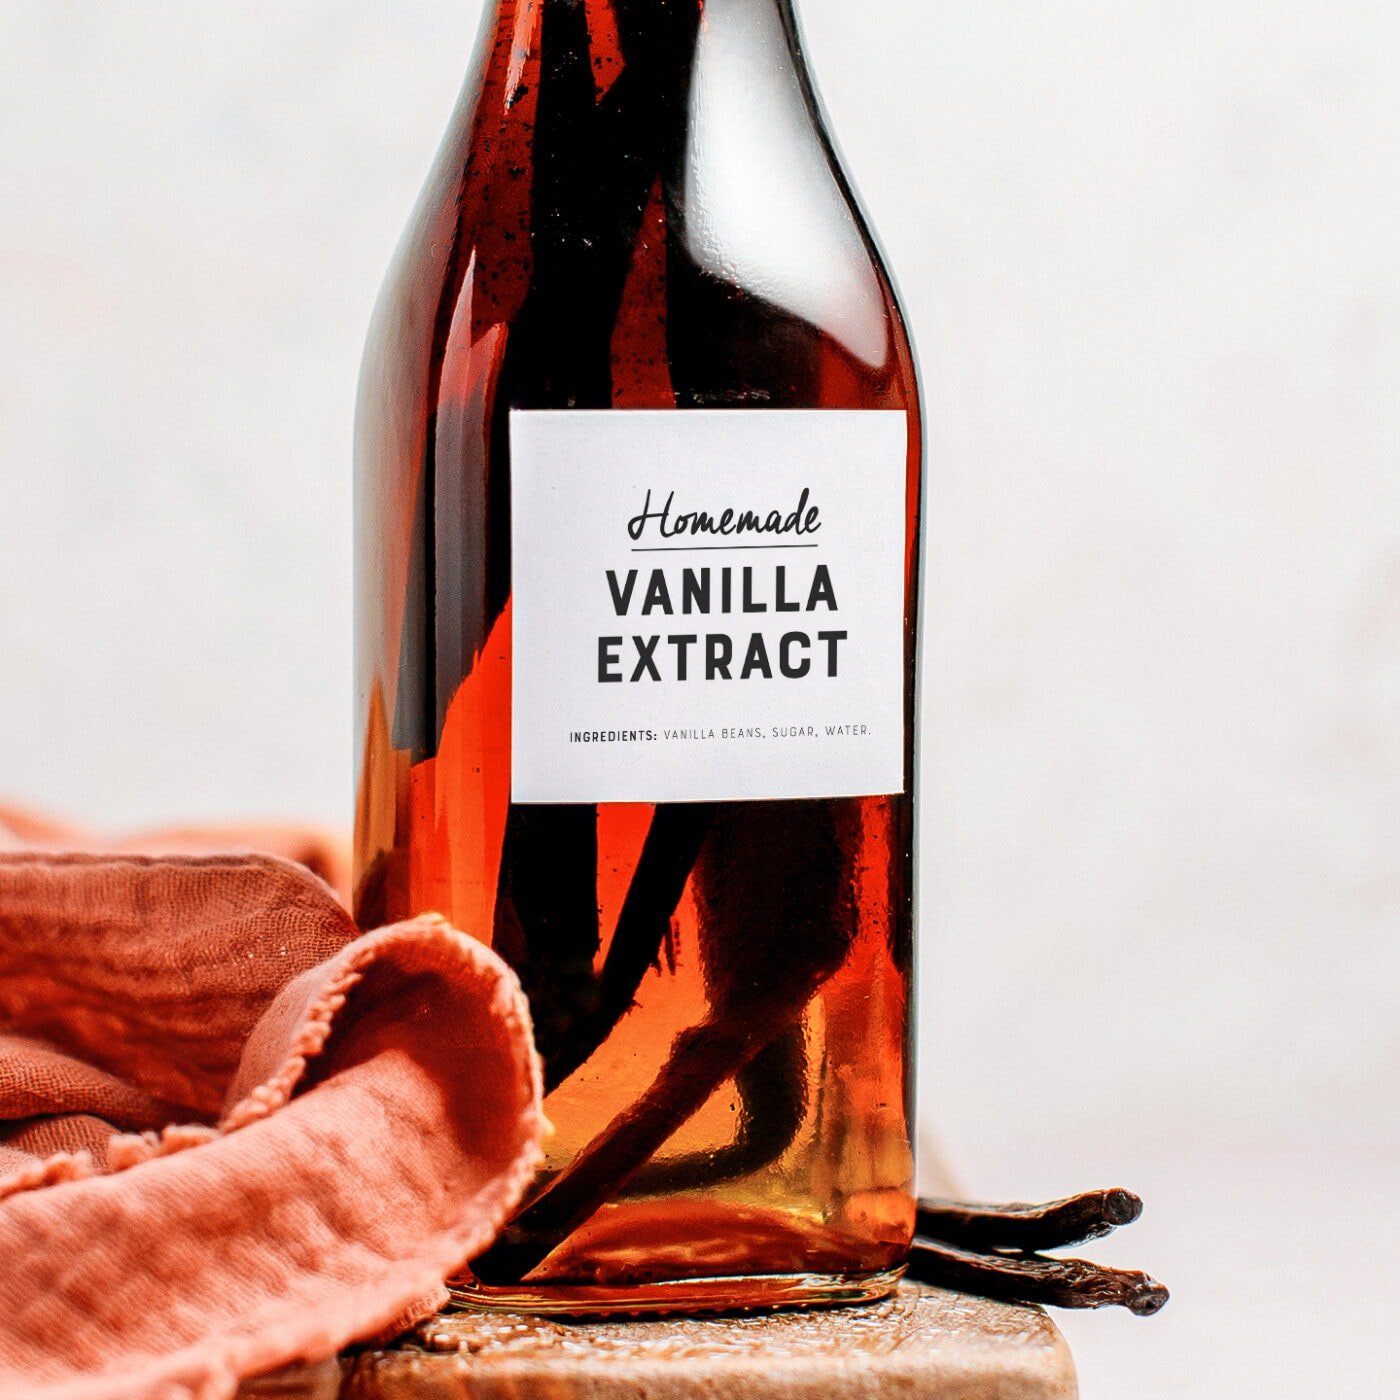
- Glass bottles – I personally used an 8-ounce glass bottle, but any glass container will work.
🥣 How to Make It
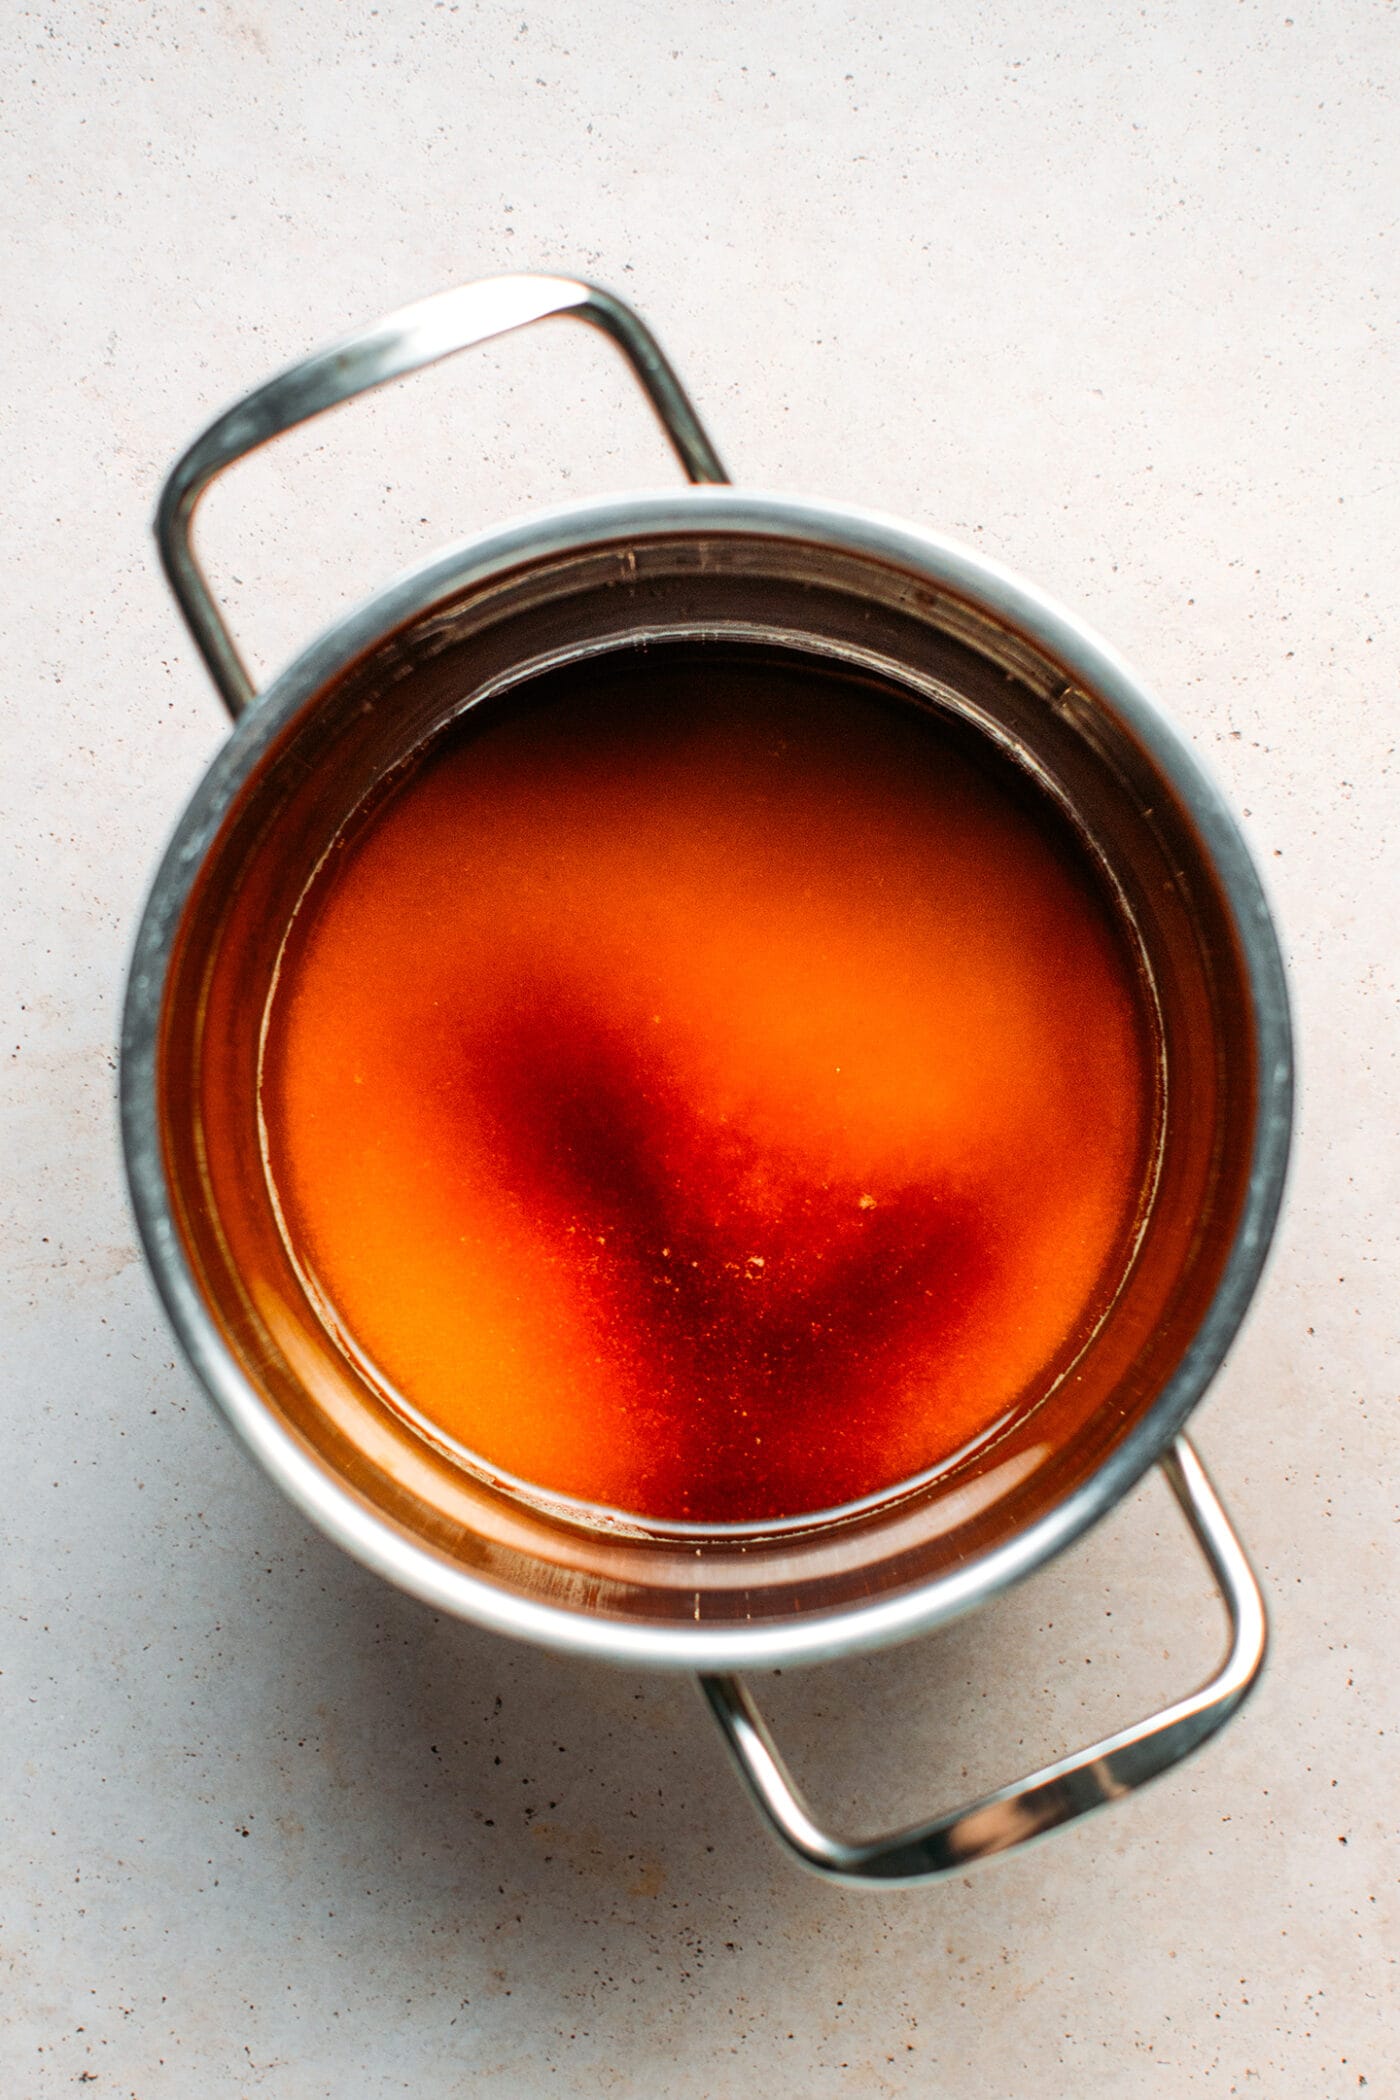
1. Prepare the Syrup
Start by preparing a double-strength simple syrup:
- Add the water and sugar to a saucepan.
- Heat over low-medium heat, stirring constantly until the sugar has dissolved. Note: do not bring it to a boil, or you will end up with crystallized sugar.
- Remove from heat and let it cool.
2. Slice the Vanilla Beans
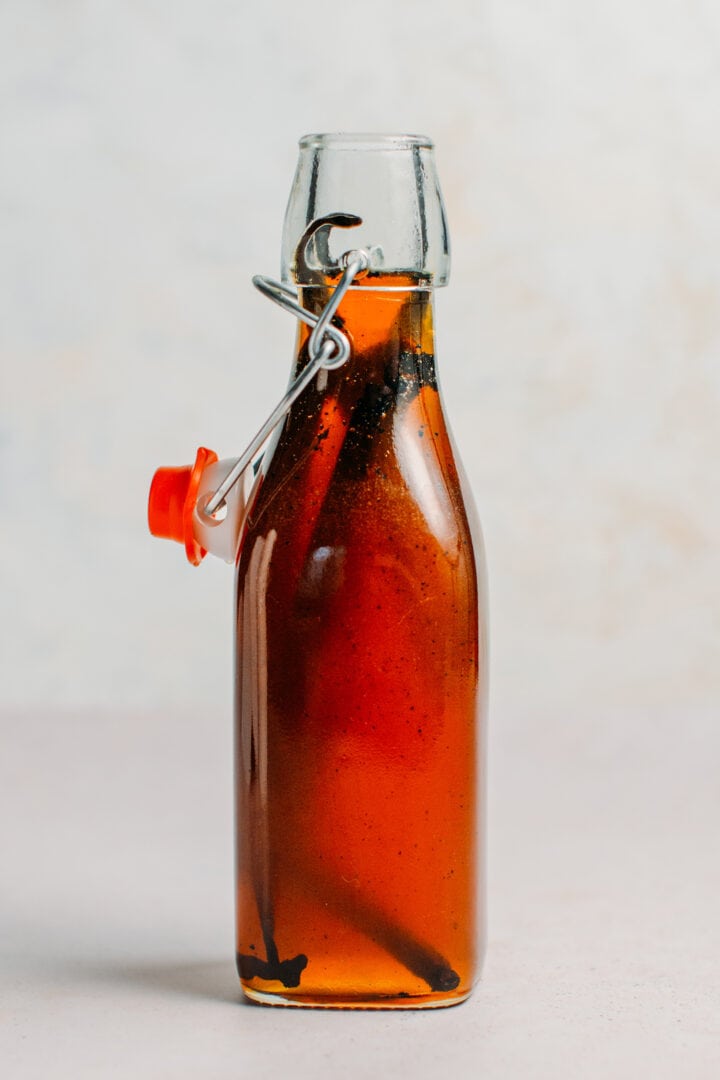
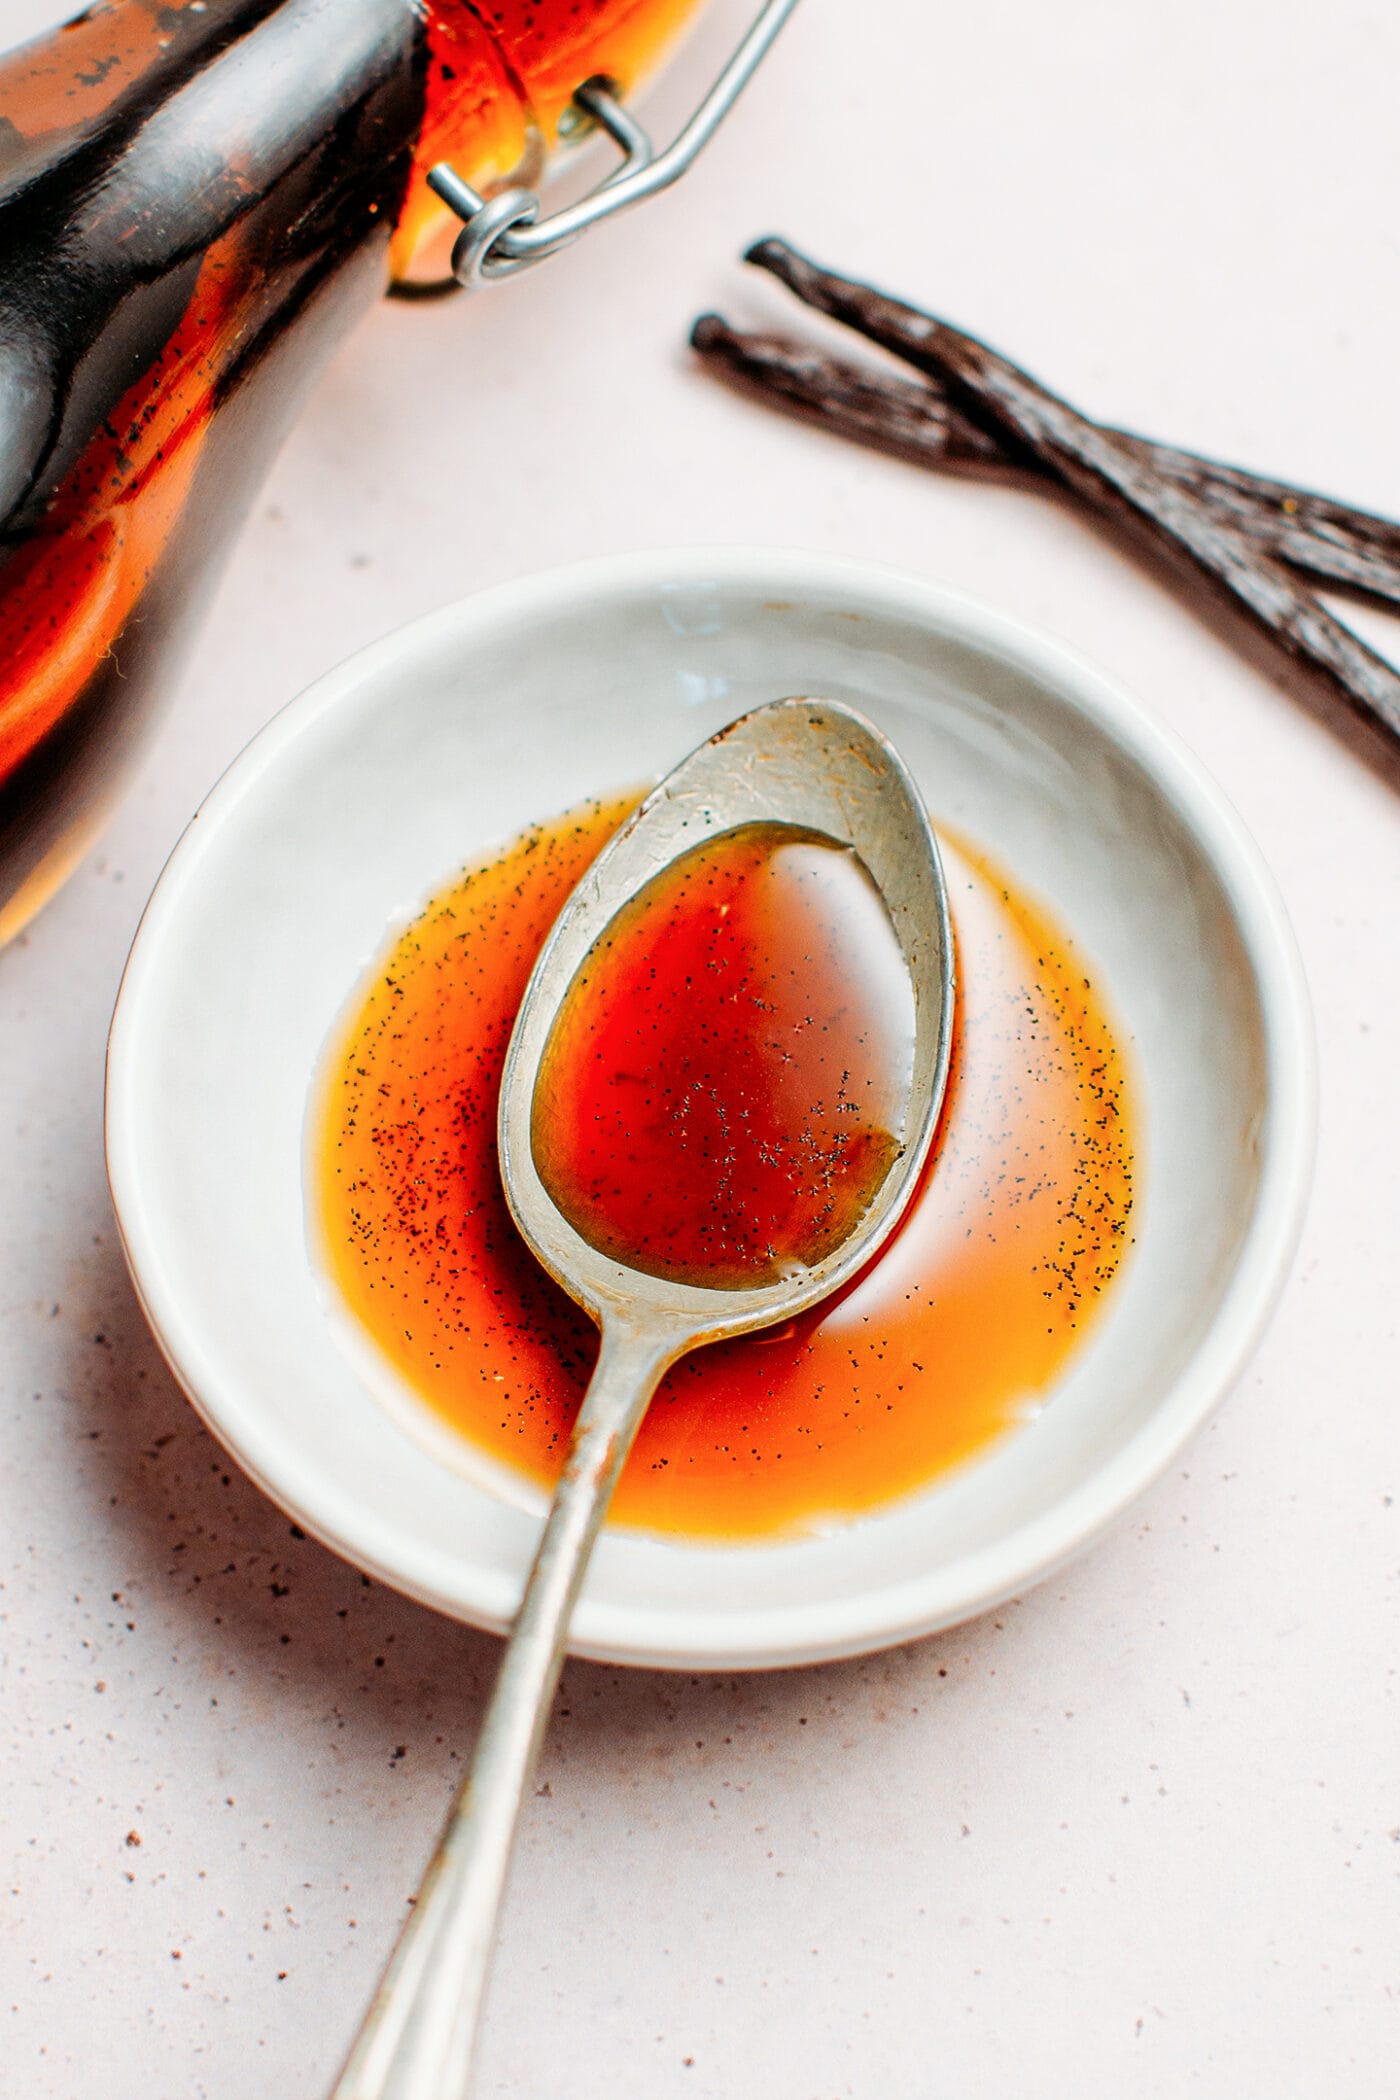
While the syrup is cooling, slice the vanilla beans in half lengthwise. Using a sharp knife, scrape the seeds and add them to your glass bottle. Next, fill the bottle with the sliced vanilla beans.
Which Vanilla Bean to Use
There are 3 main types of vanilla beans, each one having a slightly different flavor:
- Planifolia: Or “Bourbon vanilla”, it is the most popular vanilla bean in the world. It’s mainly cultivated in Madagascar, but can also be found in India or Indonesia, for example. It has a woody and subtly spicy flavor.
- Tahitensis: Grown in South Pacific, these vanilla beans are shorter than the Planifolia variety. They have a stronger aroma compared to the other two varieties, with a fruity flavor and notes of caramel.
- Pompona: Also called “vanilla banana” due to its large size, this variety is cultivated in Guadeloupe, Martinique, or Brazil. It has a floral aroma with notes of plum.
I recommend using either Planifolia or Tahitensis as these are the easiest to find and usually the cheapest.

3. Let Infuse
Finally, refrigerate and let the vanilla infuse the syrup for at least 2 months, preferably 3.
I tested this vanilla extract at the 3-month mark in a few cakes and desserts and found it as strong, if not stronger than store-bought extract!

📔 Tips
- Sterilize the bottles. To ensure maximum safety, I suggest sterilizing any glass bottles or jars. For plastic bottles, soak them in hot soap water, rinse them well, and dry them completely before use.
- Shake it occasionally. If you are not using the extract regularly, give it a quick shake from time to time. I recommend removing the vanilla beans once they are just half submerged or cutting them into smaller pieces.
- Do a smell test. If your vanilla extract looks cloudy or muddy, do a smell test. If it smells good, it’s safe to use. If it smells unpleasant (like ammonia), you should discard it. Be aware that considering the high percentage of sugar, the chances of the extract turning bad are extremely low. I have made this vanilla extract multiple times and it never turned bad, even after 6 months.
🍮 Where to Use It
Vanilla extract is incredibly versatile and can be used in a multitude of recipes:
- In sweets: To flavor chocolate chip cookies, caramel flan, pastry cream, cakes, vanilla ice cream, vegan brownies, and so much more!
- In cocktails and drinks: Take your coffee latte or matcha to the next level by adding a teaspoon of vanilla extract! You can also use it to add freshness and sweetness to your cocktails.
❄️ Storing
- To store: You can keep this vanilla extract in the refrigerator for up to 6 months. Remember to give it a quick shake from time to time.
💬 FAQ
For a rich extract, I recommend going with 5 beans per cup of syrup.
Any glass jar will work. I recommend using a small 8-ounce bottle jar as it’s easier to use, but a mason jar will work as well.
This homemade vanilla extract will keep for up to 6 months in the refrigerator. If you are not using it regularly, give it a quick shake from time to time. I recommend removing the vanilla beans once they are just half submerged.
I hope you are going to give this vanilla extract a try! It’s super easy to make, cheaper than store-bought, and PACKED with fresh vanilla flavor! You will never buy imitation vanilla ever again!


⭐️ Did you like this recipe? Let us know in the comments below, and tag us on Facebook, Instagram, or Pinterest!
Save this recipe!
Enter your email below and I’ll send it to your inbox!
Plus, you will receive new recipes every week!
Homemade Vanilla Extract (Alcohol-Free!)
Ingredients
- 1/2 cup (125 ml) water
- 1 cup (250 g) sugar
- 5 vanilla beans
Instructions
- Add the water and sugar to a saucepan and heat over low-medium heat. Stir constantly until the sugar has completely dissolved. This step will take 1-2 minutes. Note: do not bring to a boil, you would end up with crystallized sugar. Remove from heat and let cool while you prepare the vanilla beans.
- Using a thin and sharp knife, split the vanilla beans in half lengthwise. Scrape the vanilla seeds and add them to a clean 8-ounce bottle. Fill the bottle with the vanilla beans. Note: if your vanilla beans are too long, simply cut them in half.
- Next, pour the syrup into the bottle containing the vanilla beans. You want the syrup to cover the vanilla beans completely. Let cool completely until no longer warm.
- Close the bottle with the lid and transfer it to the refrigerator. Let it infuse for at least 2 months, giving it a quick shake from time to time. 2 months is the minimum, I recommend 3 months for a concentrated flavor.
- Use the extract in cookies, brownies, ice cream, drinks, etc! This vanilla extract will keep for up to 6 months in the refrigerator.
Notes
- Sterilize the bottles. To ensure maximum safety, I suggest sterilizing any glass bottles or jars. For plastic bottles, soak them in hot soap water, rinse them well, and dry them completely before use.
- Shake it occasionally. If you are not using the extract regularly, give it a quick shake from time to time. I recommend removing the vanilla beans once they are just half submerged or cutting them into smaller pieces.
- Do a smell test. If your vanilla extract looks cloudy or muddy, do a smell test. If it smells good, it’s safe to use. If it smells unpleasant (like ammonia), you should discard it. Be aware that considering the high percentage of sugar, the chances of the extract turning bad are extremely low. I have made this vanilla extract multiple times and it never turned bad, even after 6 months.
Nutrition

About the Author
Thomas Pagot is the founder, photographer, and recipe developer behind Full of Plants. He created the blog in 2016 as a personal cookbook for vegan recipes. Through years of recipe development, Thomas has successfully grown Full of Plants into a trusted resource for plant-based recipes.
Leave a Comment
I look forward to trying this recipe!! Thanks
You are welcome!
I was looking for an alcohol free vanilla extract recipe and found a great one. Merci !
When I use vanilla in my desert recipes, I usually simply use the pollen scraped directly out of a pod or in the form of vanilla sugar. I make vanilla sugar myself in the simplest way by slicing a pod open, scrape off the pollen in it and put everything in my sugar jar, shake it to mix and store the mixture like that for use. It’s easier to handle for me this way.
Yes, vanilla sugar is so easy to make and tastes amazing! I also always put my leftover vanilla beans in a jar with sugar.
Thank you so much for your recipe! Where did you get your labels
I made it in Photoshop and printed it 🙂
Hallo Thomas, thank you for your great recipes!
I’ll try this but don’t want to use white sugar. Is it possible to substitute white sugar with xylit (Birkenzucker)? Will it last as long?
And perhaps is it possible to freeze vanillaextract in icecubes?
Thank you for your answer!
Hello Agathe,
I’m not familiar with sweeteners so I have no idea, but I doubt it will have the same shelf-life.
Freezing vanilla extract in cubes should work though 🙂
Thank you for this recipe, I am going to try it. I was not thinking and used my homemade extract in buttercream icing and I ruined the Batch. It tasted like alcohol. Vanilla alcohol. I would rather it taste like vanilla and be sweet.
You’re welcome Renee 🙂
This is not extract. This is vanilla syrup.
Well, then you can say the same about most “vanilla extracts” sold in supermarkets. Most are sugar or syrup-based, even the higher-end ones (at least in Europe).
It still acts exactly the same as vanilla extracts and adds a ton of flavor to baked goods. Vanilla syrup would not be that concentrated.
Vanilla extracts are vanilla beans and alcohol. No quality extract has anything else. Again – if you want to be a food writer, have the self-awareness to be factual in what you publish instead of lying to your readers.
Well, instead of attacking me about a recipe that you haven’t even tried, maybe you should do some research as well. In the US you might call it “vanilla extract” when there is just alcohol and vanilla, but in Europe, 90% of our vanilla extracts are made from sugar syrup and vanilla seeds/beans (300-400g/L). The most famous pastry chefs actually use that, and the biggest vanilla producers in Madagascar sell it as well, under that exact name. Maybe you can try to contact them.
Now, I will not keep arguing over a term, especially with someone accusing me of lying just to prove their point. You can call it vanilla syrup if that makes you happy.
I am sorry you are being attacked. I also make my own vanilla extract and love them. Thank you for sharing your new recipe with US. I am definitely going to make it.
You’re welcome Daisy, and thanks for your support 🙂
Lol, some people are unreal. I’m on the hunt for an alcohol and glycerine free vanilla extract recipe, and this is a great option! It always amazes me how nutty some readers can get about FREE content offered them on the internet. Keep up the great work, Thomas.
Thanks for your support Alison ^^ I hope you will enjoy this alcohol-free vanilla extract 🙂
How very rude. I love your recipes Thomas and will continue to use them
Thanks Debra 🙂 It’s fine, some people will always find something to argue about.
Could you replace the sugar with honey or remove it all together?
I’m afraid that would change the flavor and texture completely.
Regarding removing it completely, no. You need a high sugar content for the extract to keep well.
I have seen honey jar with vanilla bean in it on store shelves, so why not? I guess it’s honey infused with vanilla in that way, like I do with my sugar. Such honey of course costs more than the one without vanilla pods. The high concentration of sugar in the honey should help keep the kind of vanilla-infused honey for some time. Frankly, I usually consume a honey jar for my herbal tea and as sugar substitute before its expired date anyway.
Fabule astuce que je vais mettre en place. C’est si simple !!!
Juste une question : A quelle période de l’année peut-on trouver de la vanille fraîche ?
J’ai moi aussi tester dans l’alcool est je n’ai pas apprécié.
Merci beaucoup.
On peut en trouver presque toute l’année sur les sites spécialisés dans la vente de gousses de vanille. Contrairement aux gousses de supermarché, elle sont souvent beaucoup plus fraîches.
Can it be used to replace vanilla essence? Thank you
Yes!
Thank you for sharing Thomas !
You’re welcome Tommy!