This post may contain affiliate links. Please read our disclosure policy.

Learn how to make tempeh at home with just 3 ingredients! This homemade tempeh is easy to make, requires just 3 ingredients, and tastes so much better than store-bought. Follow this step-by-step recipe to make tempeh in the Instant Pot!

For years, I have been making my own tempeh, and this post is the result of everything I have learned along the way! My recipe relies on just the Instant Pot for both cooking the soybeans and incubating the tempeh, making it as easy as possible.
Whether you are new to fermented foods or have been at it for years as well, I have no doubt you will love this tempeh! It requires very little active time, just a few ingredients, and tastes so much better than store-bought (no bitterness or aftertaste)! It’s also budget-friendly and makes a fun experiment!
Update: I have since updated this recipe with clearer instructions and many more process shots to show you the method step-by-step!
⭐️ Why You Should Try It
It’s a fun & easy project.
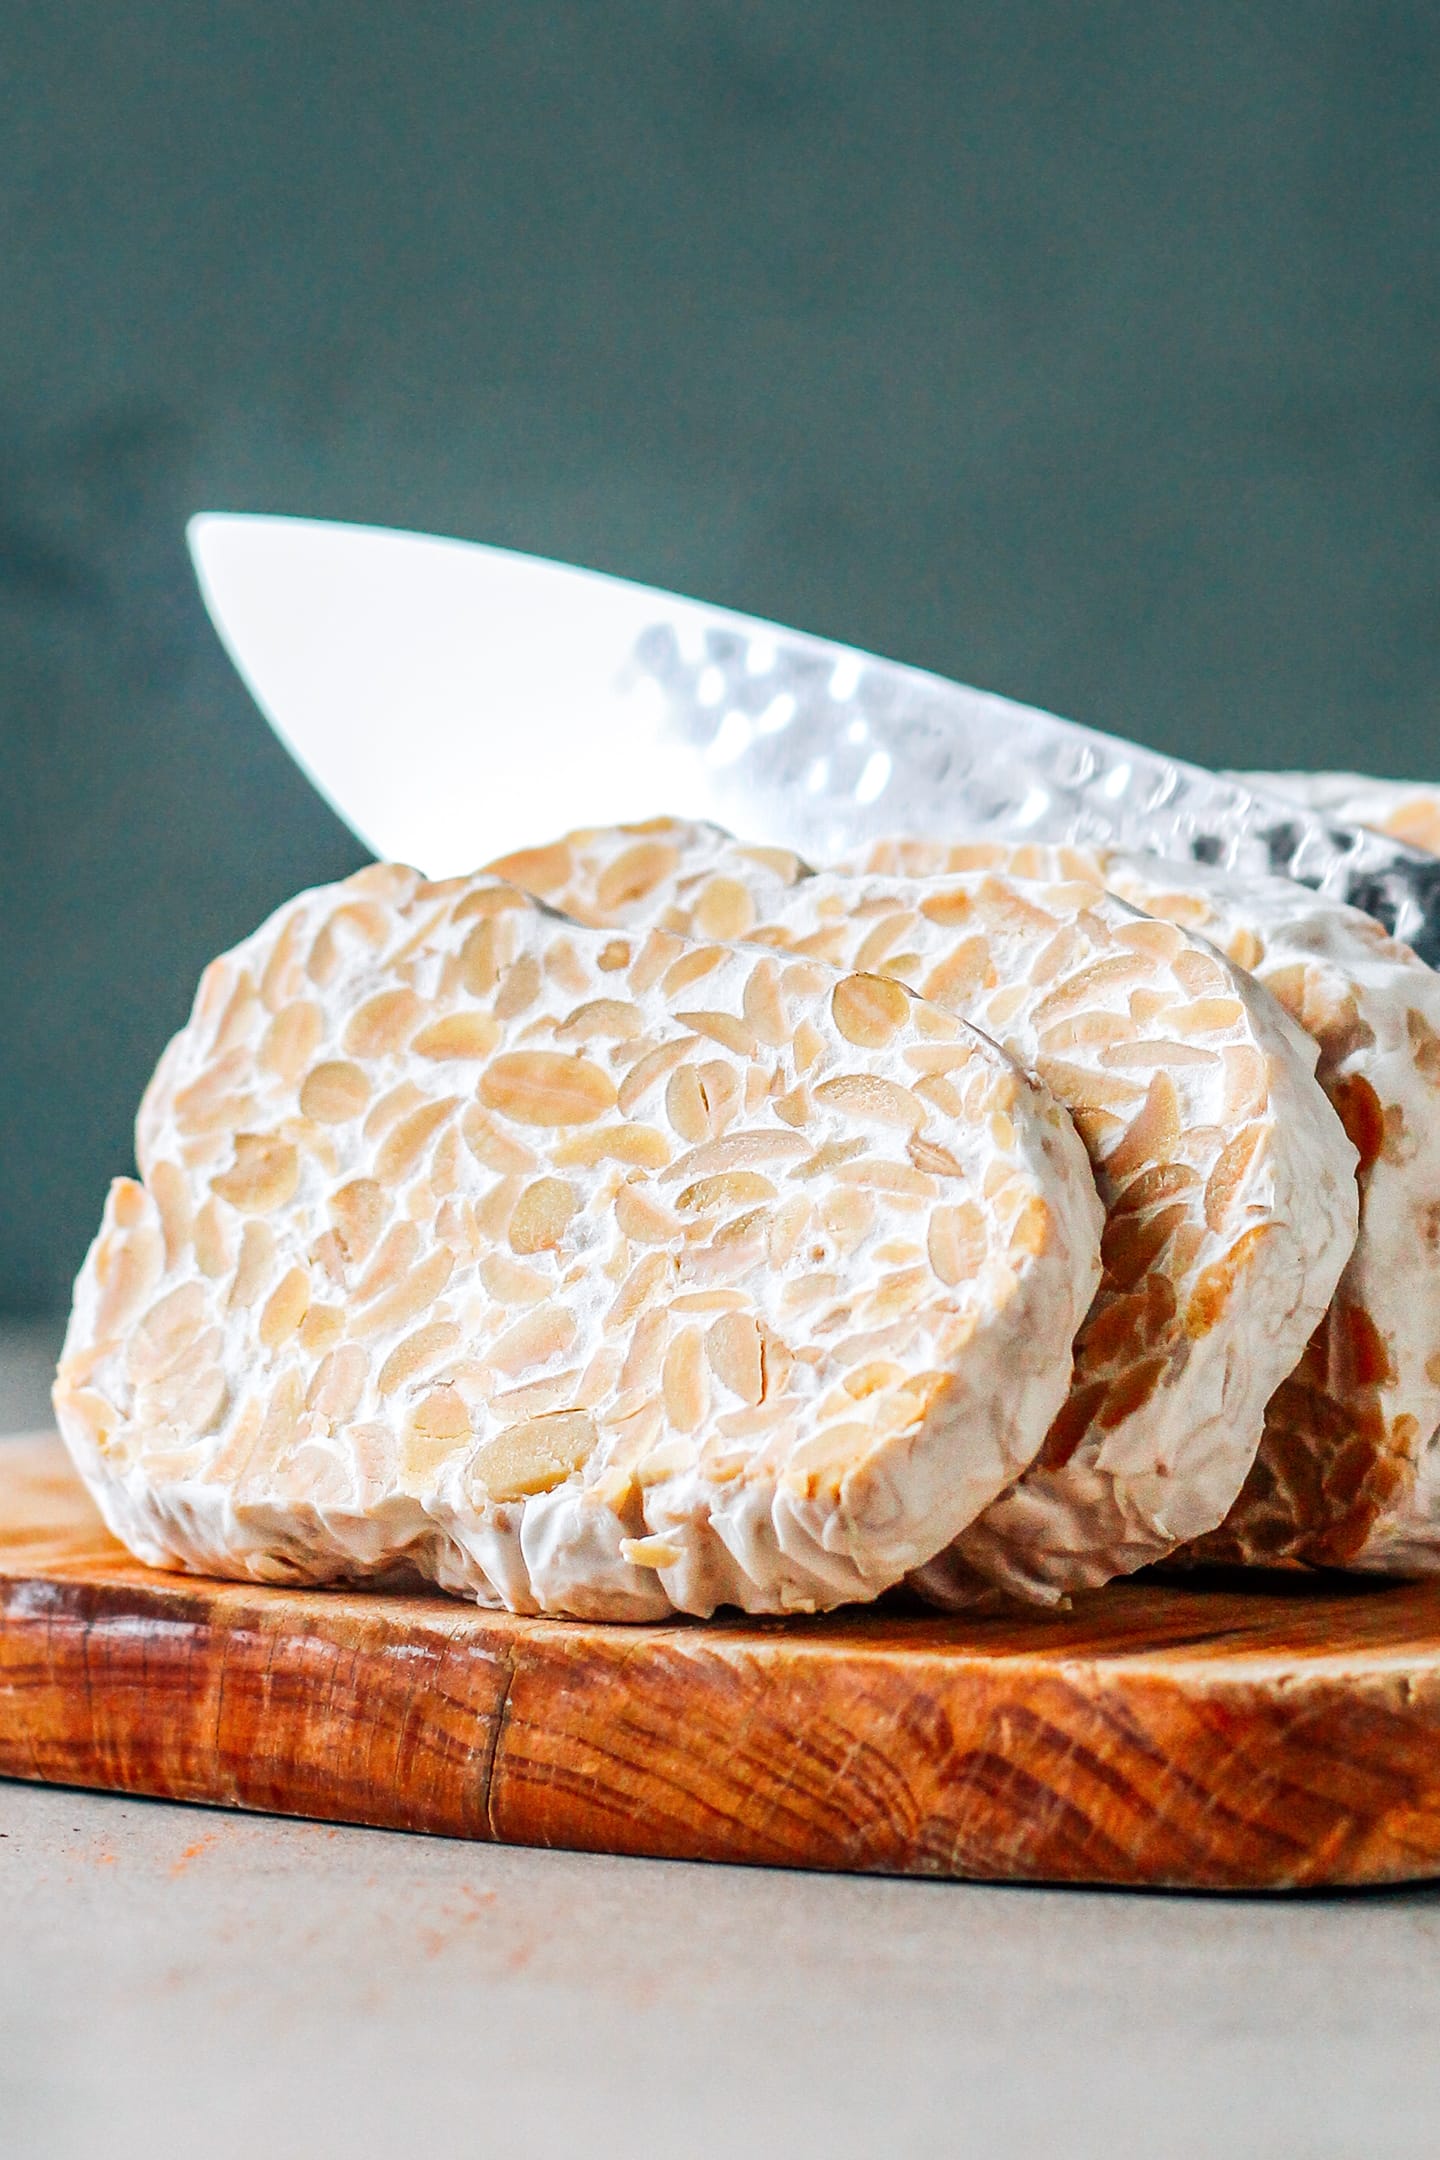
Although it may seem intimidating at first, there is honestly nothing complicated about making tempeh at home. You will only need 3 simple ingredients and a bit of patience while the mold does its magic. The best part is when you finally open the pot and discover a beautiful white loaf of tempeh that you actually made from scratch. So satisfying!
Bonus point: homemade tempeh is cheaper and way tastier than store-bought. Some brands can be very bitter, but not this one! It’s subtly nutty and quite mild, making it a great vehicle for flavor.
Loved by readers.
With an average rating of 5 stars from 50 reviews, readers love this recipe!
Courtney, a reader, said: “This is my first time making tempeh. I followed your recipe to the T, and it turned out perfect! ★★★★★”
Michelle, a reader, said: “I just tried this for the first time, and it was a complete success!!! Thank you for providing such a clear and easy-to-follow recipe. I had found other recipes that say to use the oven light, and that method seemed too iffy for me…I happened to have an instant pot, and it made the whole process so easy! The incubation time ended up being spot on. The loaves were firm and easy to slice. They didn’t crumble at all. And, the taste was amazing! Better than any other tempeh I’ve tried. ★★★★★”
📗 Instant Pot Benefits
Making tempeh in the Instant Pot is not only easier, but it’s also quicker. Obviously, it still requires several hours to incubate, but the pressure cooker simplifies the whole process.
So, what are the advantages of making tempeh in the Instant Pot?
- You don’t have to soak the beans! Assuming you use hulled split soybeans, you will only have to rinse them under cold water and pressure cook them.
- Beans cook a lot faster and require less attention. This is the main advantage to me. I used to cook soybeans on the stovetop, and it took over 1 hour and constant attention, checking from time to time to see if there was still enough water or if the beans were not overcooked.
- No oven is required for the incubation step. Yes, you read that right! Thanks to the yogurt mode of the Instant Pot, the tempeh is at the perfect temperature, allowing the mold to develop well. I used to incubate tempeh in my oven, meaning I couldn’t use it for 48 hours. Not good when you have a chocolate chip cookie craving…Problem solved with the Instant Pot!
📘 What Is Tempeh
Tempeh is an Indonesian food made by fermenting soybeans with a mold called Rhizopus Oligosporus. The mold grows between each bean, binding them into a firm and sliceable loaf.
What is the difference between tempeh and tofu? Tempeh is made from whole soybeans that are fermented, while tofu is made from curdled soy milk. Because tempeh contains entire soybeans, it’s higher in protein and fiber than tofu.
🫘 Key Ingredients
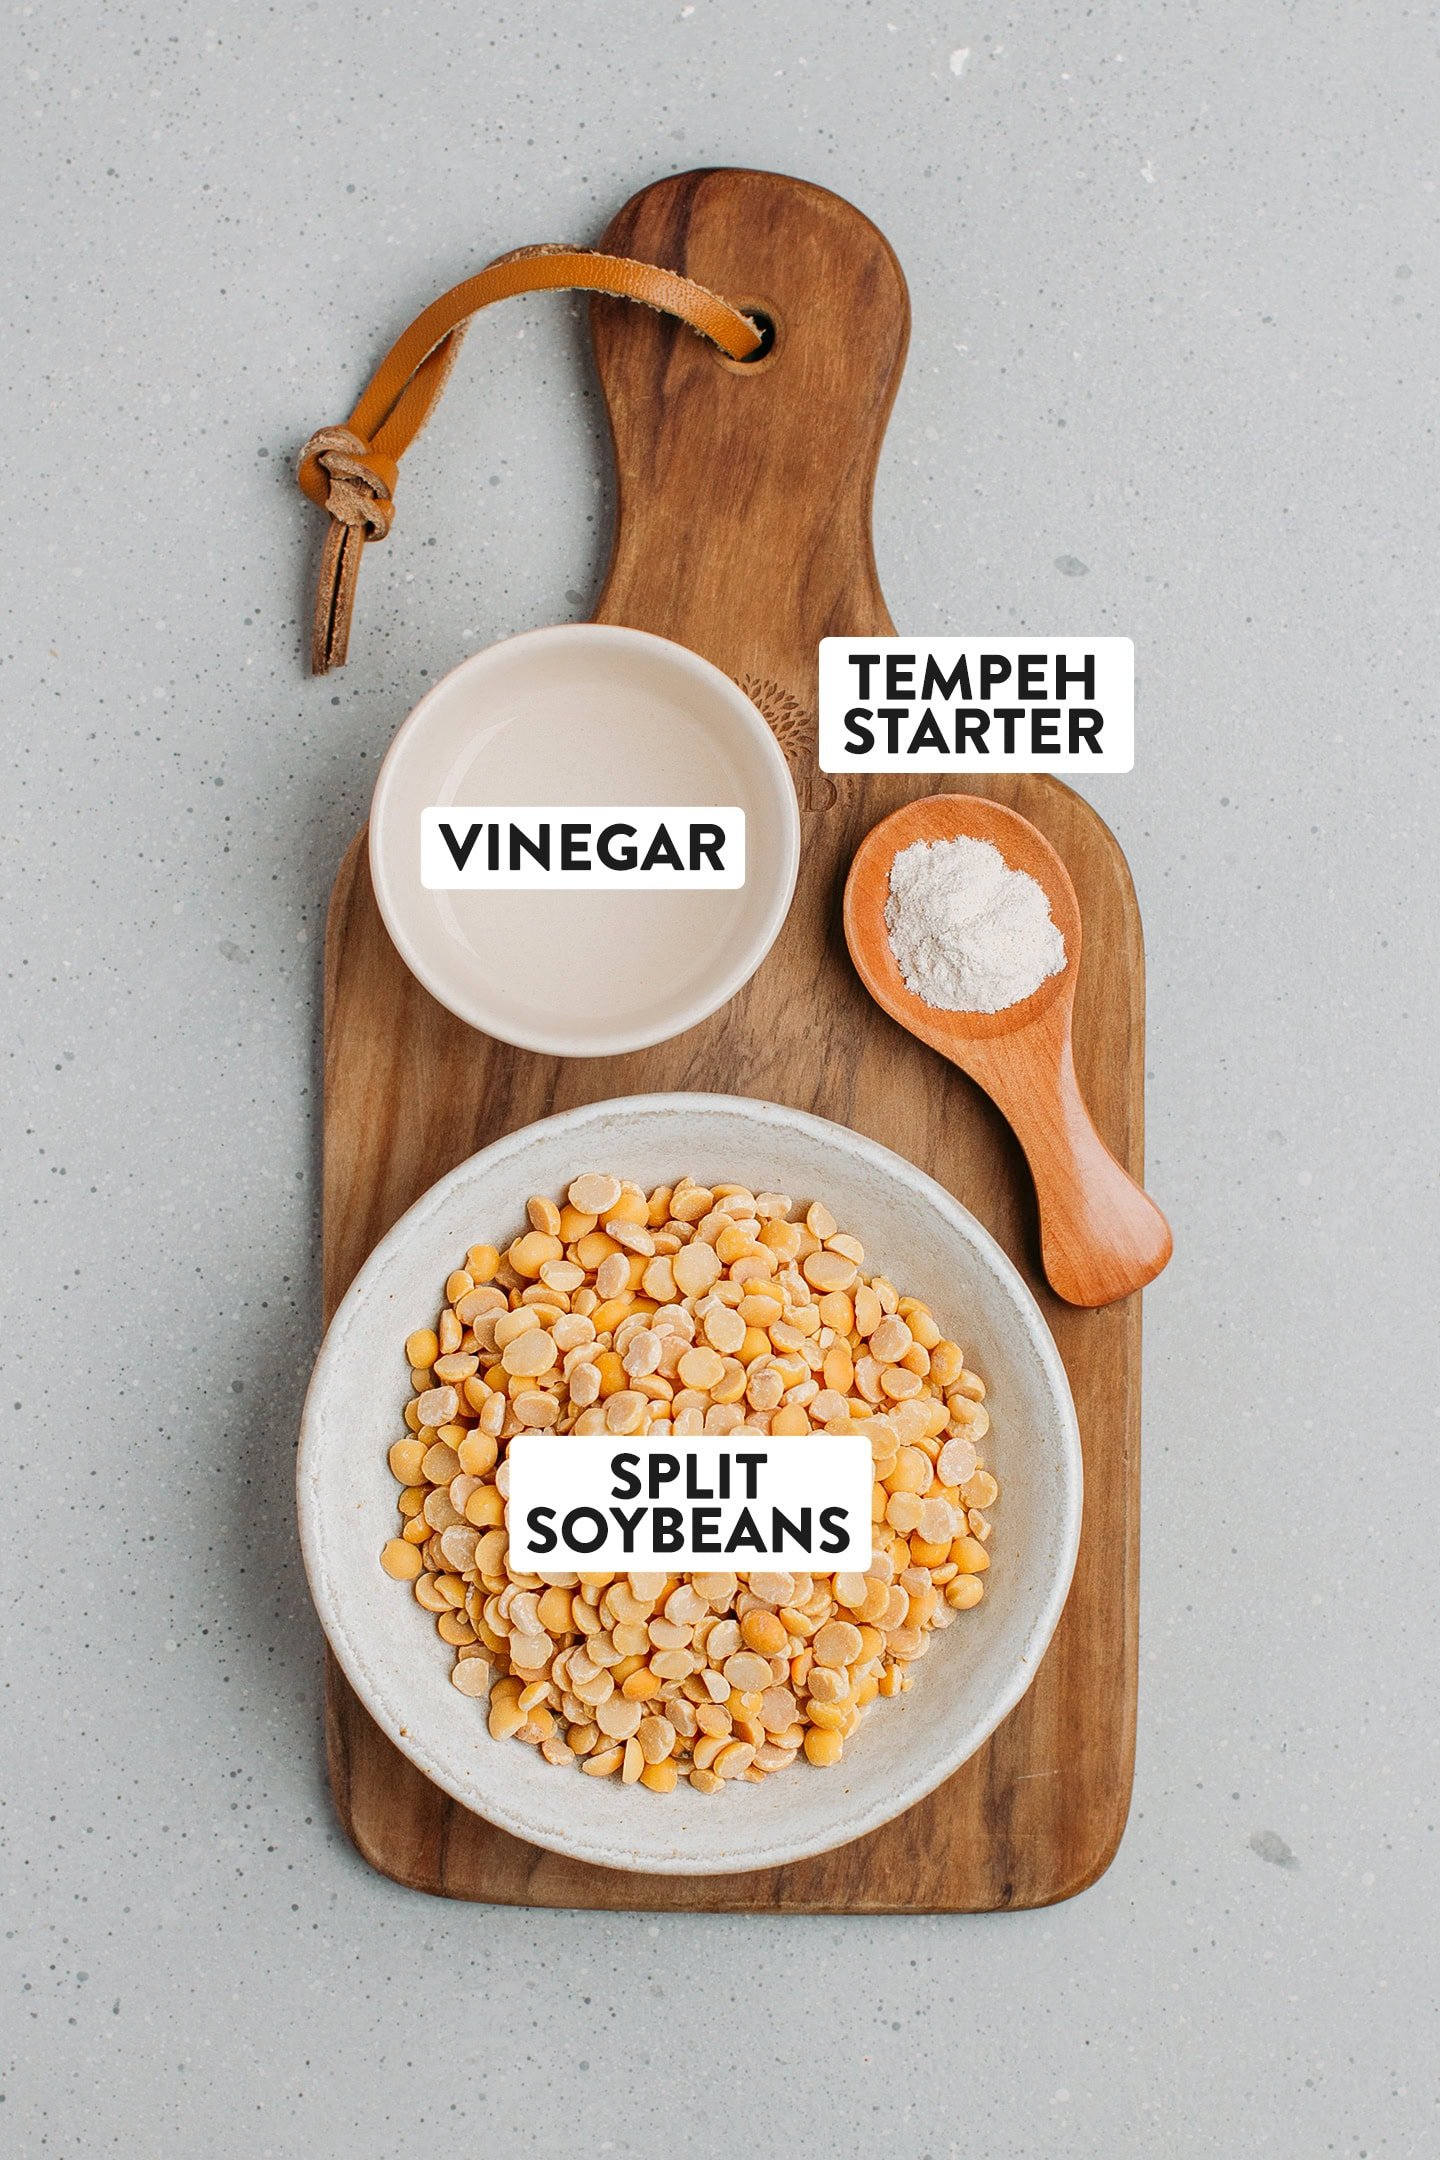
Soybeans
Soybeans make the base of tempeh! In this recipe, I use peeled split soybeans to speed up the process. They not only require no soaking but also require no peeling, which can be a bit time-consuming when making tempeh from whole soybeans.
Where to buy: I have to admit that dehulled soybeans can be a bit tricky to find. I usually get mine from a local organic supermarket, but since I am located in Europe, I am not sure if those are available in the US.
If Using Whole Soybeans
If you can’t find split and hulled soybeans, this recipe will also work with whole non-GMO soybeans. Here is how to process:
- Soak the soybeans. Add the soybeans to a large bowl and cover them with water. Cover with plastic wrap and soak the soybeans for 16-24 hours.
- Remove their skins. The next day, rinse them and return them to a large bowl. Cover with water. Using your hands, massage the beans to remove the hulls. Hulls will float on top – remove them using a colander and discard them.
Don’t worry if you can’t remove all of them, as long as you remove most, it’s fine. For information, I removed roughly 1 cup of peels from 2 cups of soaked soybeans. This step should take you no more than 15 minutes. - Cook the soybeans. Then, drain the soybeans and add them to the Instant Pot along with 6 cups of water. Pressure cook for 12 minutes and follow the rest of the recipe.
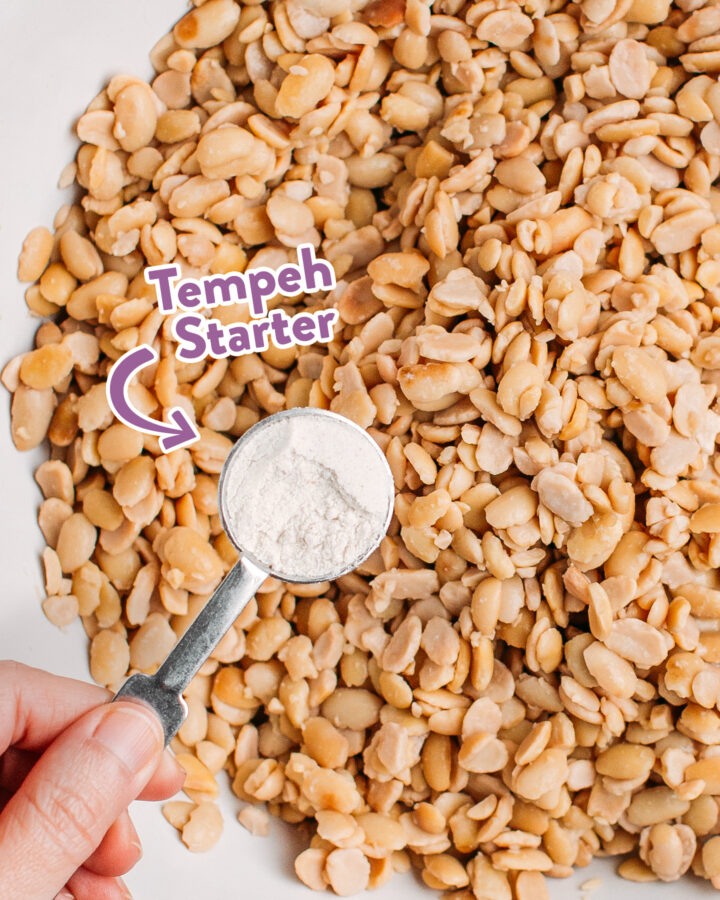
Tempeh starter
Tempeh spores (also known as Rhizopus Oligosporus) are a key ingredient in tempeh making. It’s responsible for creating that white mold (mycelium) that allows the soybeans to transform into a firm loaf.
Tempeh spores are usually sold as a powder, and a little goes a long way! You can order tempeh starter online and store it for months in the refrigerator.
White vinegar
Vinegar lowers the PH and prevents bad mold from growing.
Note: Both regular white vinegar and rice vinegar work.
🥣 Quick Look: How to Make Tempeh
I will walk you through the main steps below so you can get a quick overview of the process. For the full instructions, please refer to the recipe card at the bottom of this post.
1. Cook the soybeans
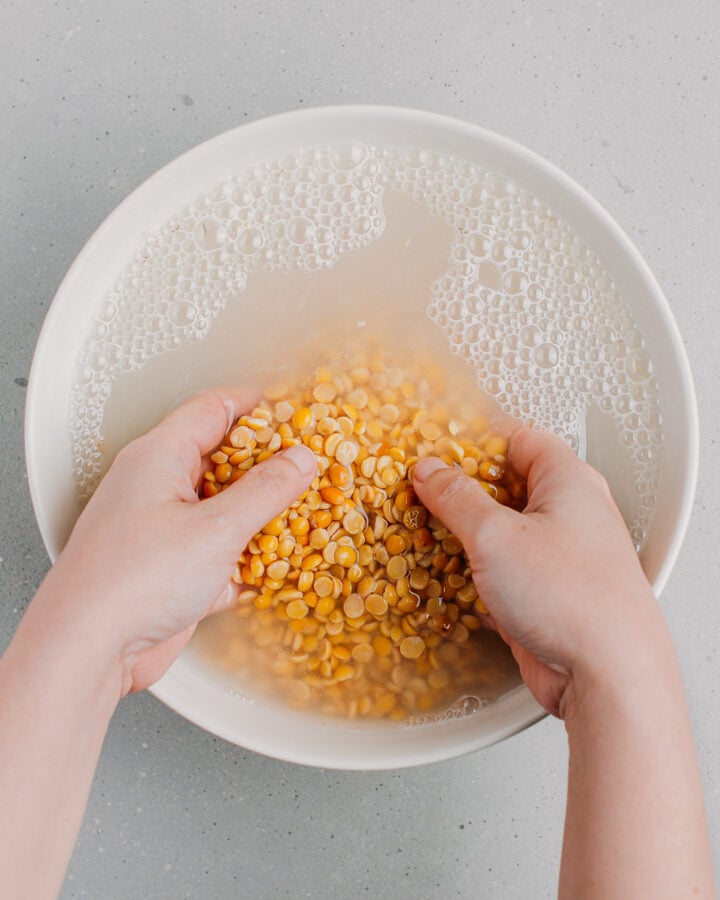
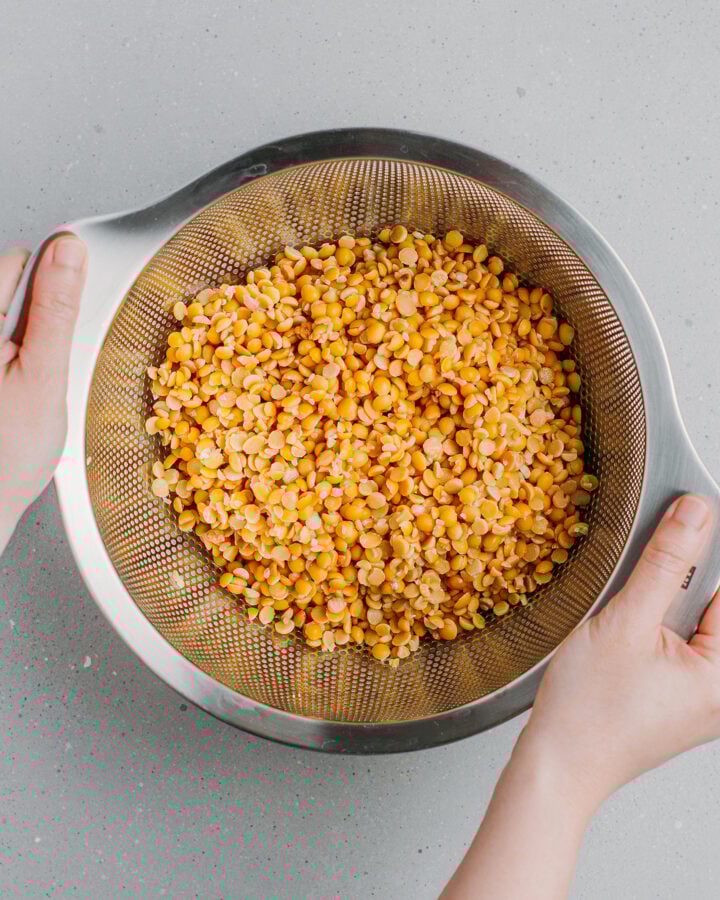
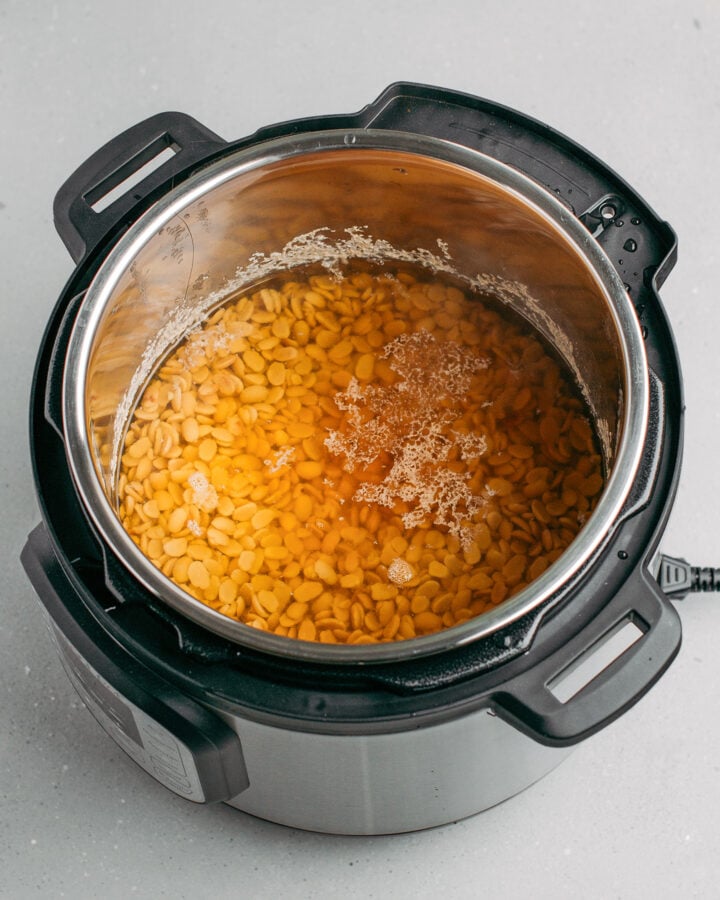
- Rinse them. Transfer the soybeans to a bowl and cover with water. Stir using your hands to clean them. Drain and repeat 2-3 times.
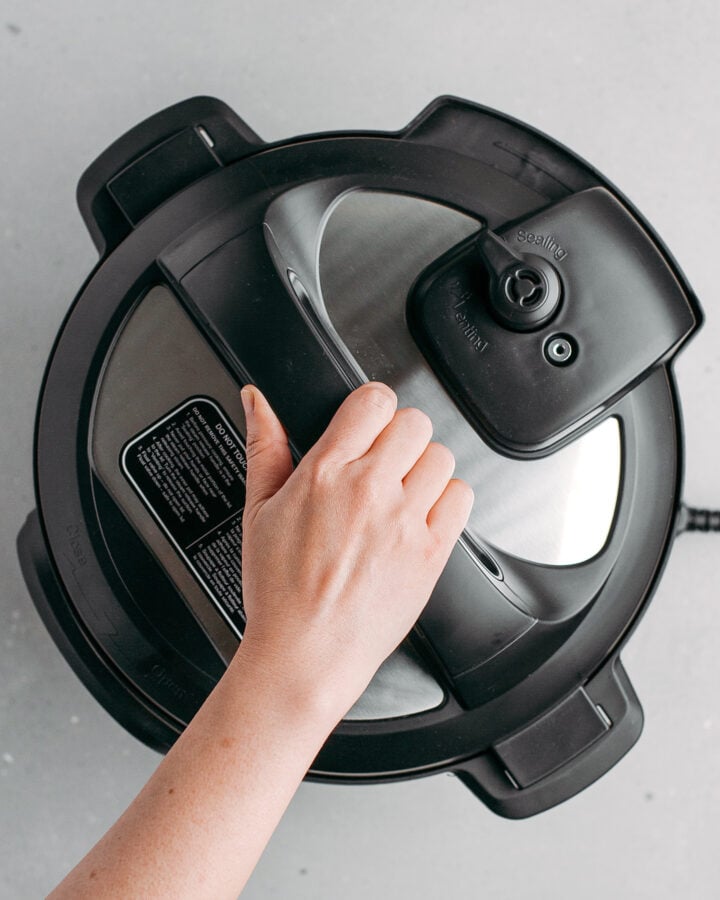
- Pressure cook. Next, transfer the soybeans to the Instant Pot and cover with water. Close with the lid and pressure cook for 40 minutes.
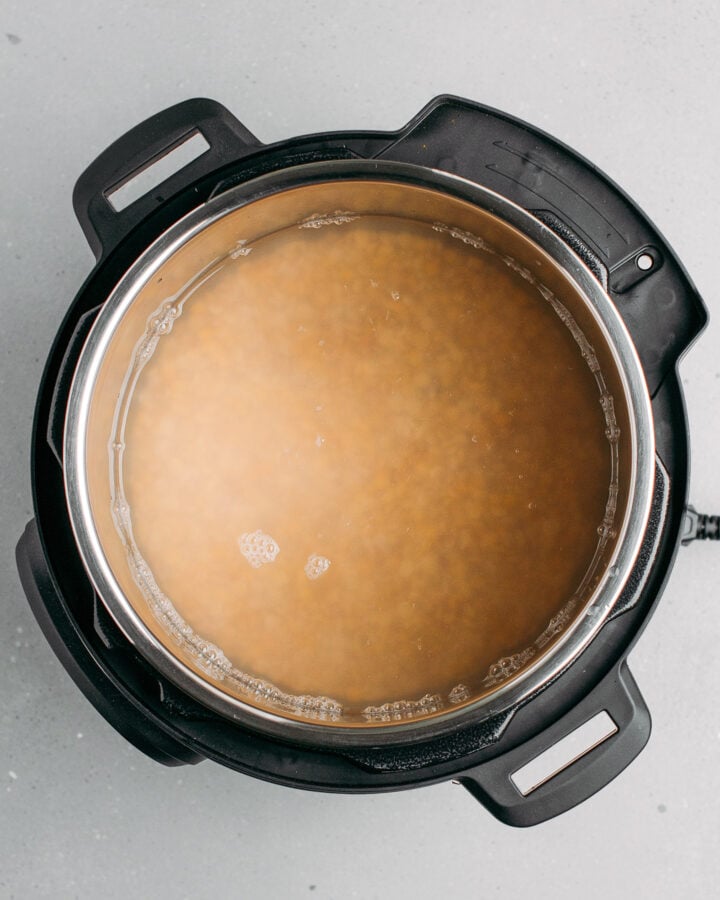
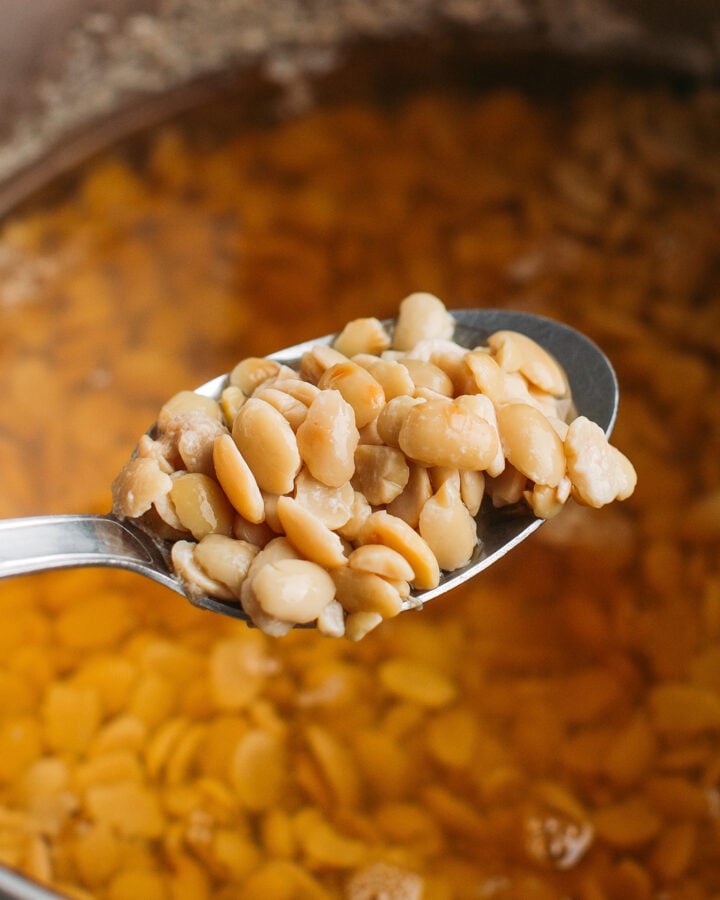
- Let the pressure release. Allow the pressure to release naturally before opening the Instant Pot. Your soybeans should now be perfectly cooked!
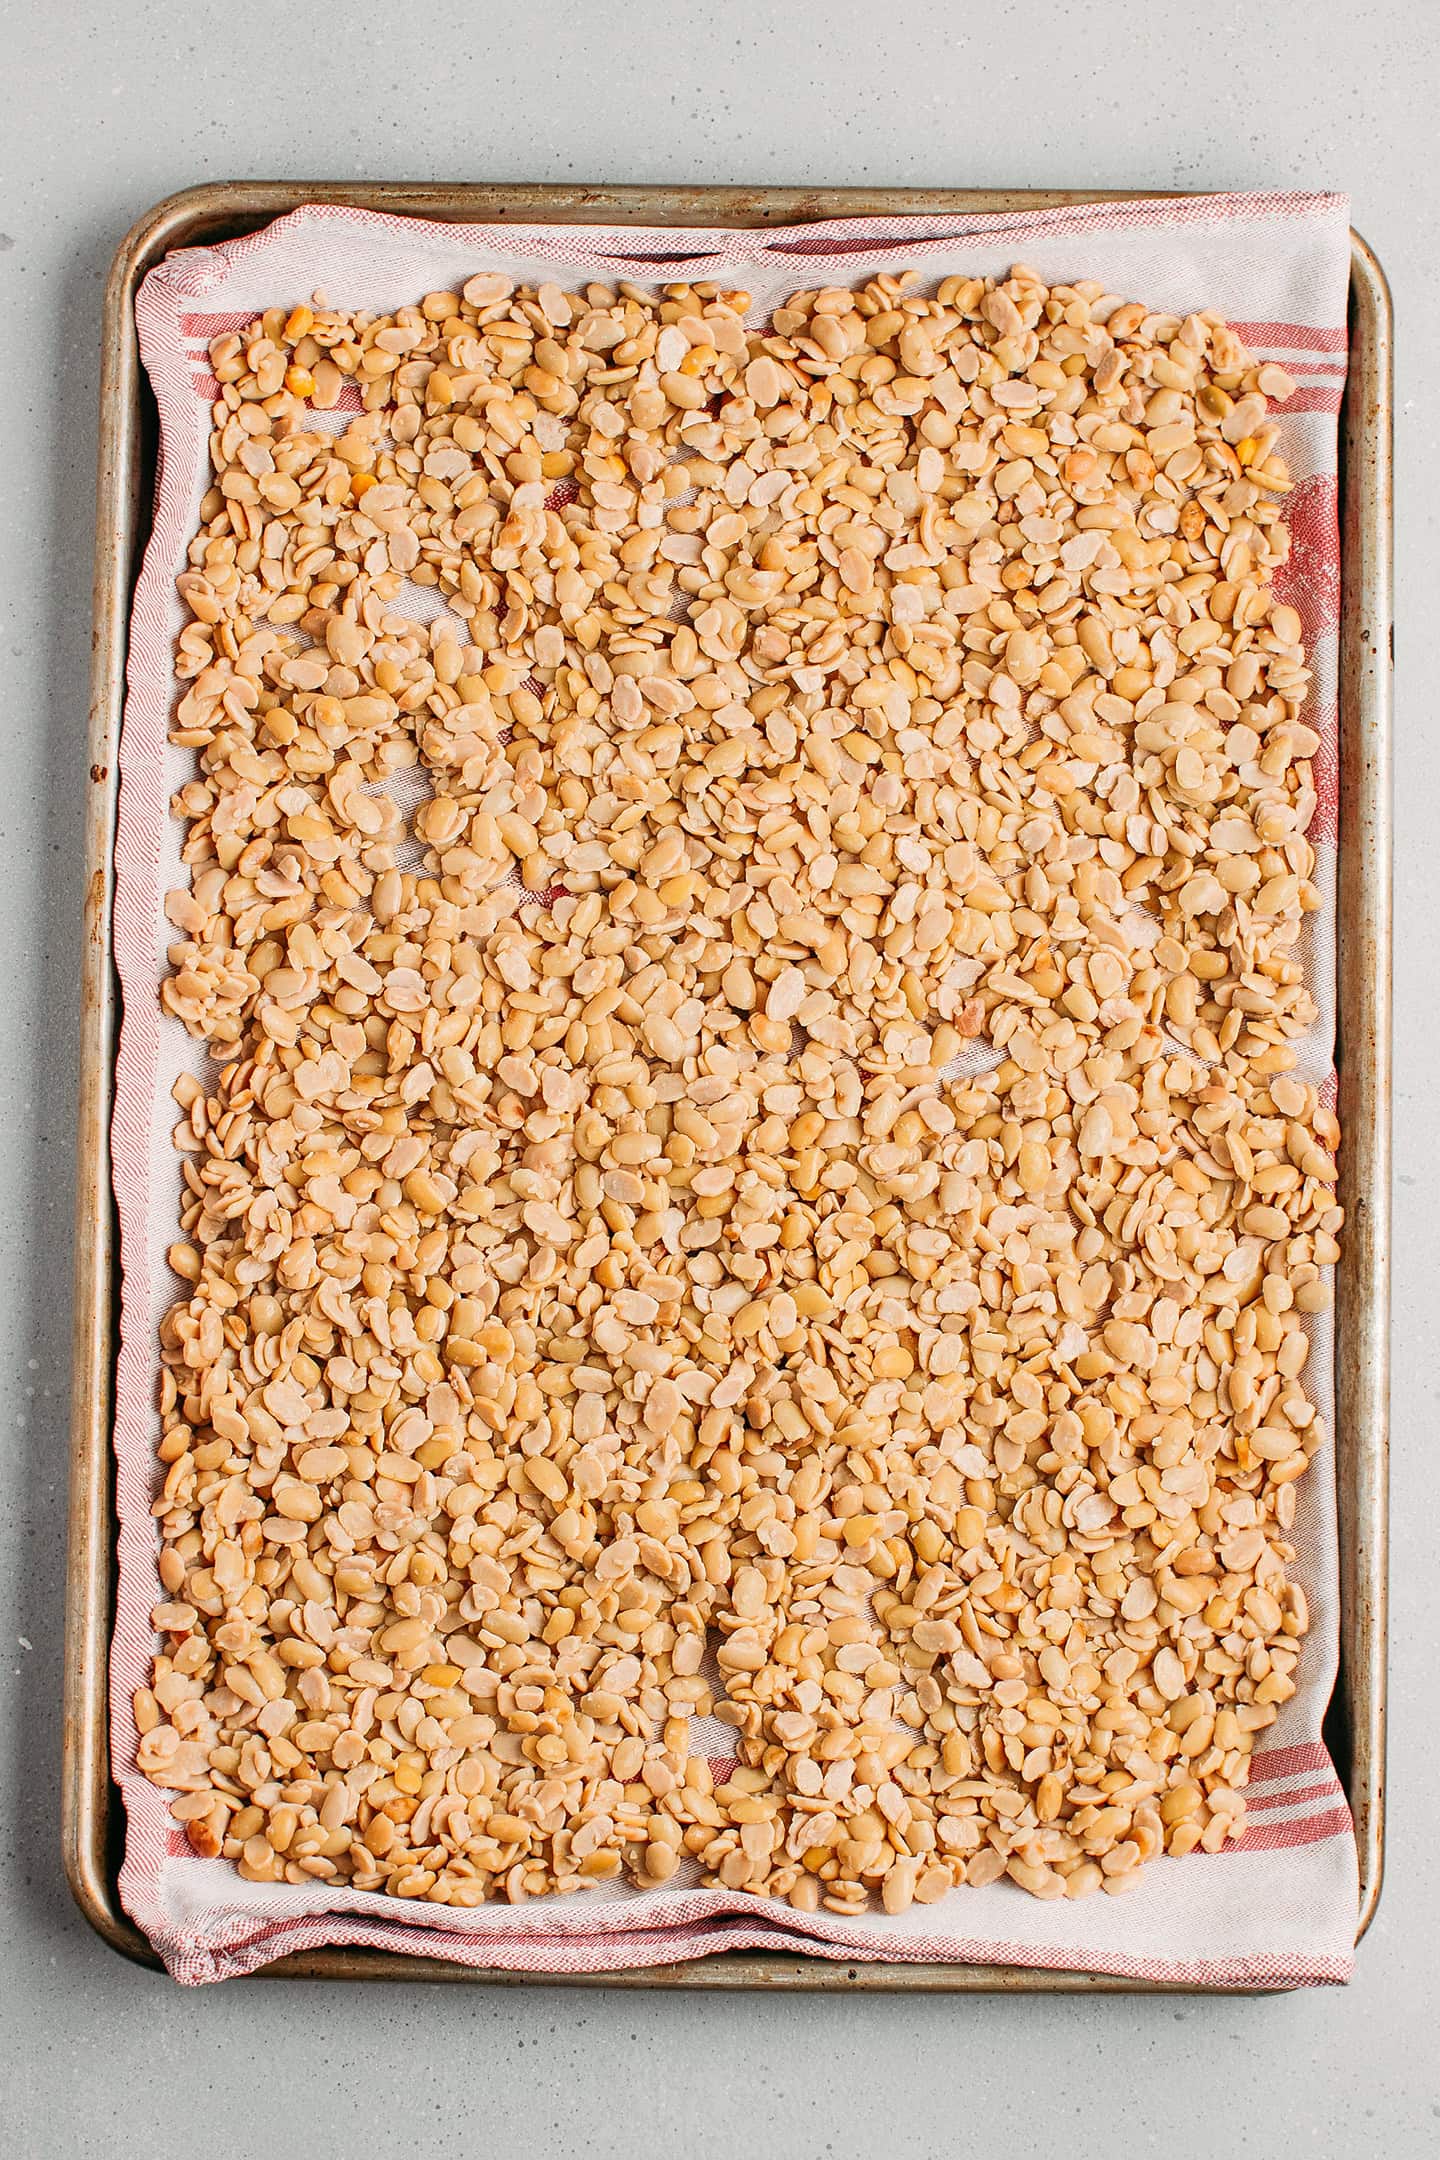
Once your soybeans are cooked, the next step is to pat them dry. This step is essential as the mold won’t grow well if there is too much moisture.
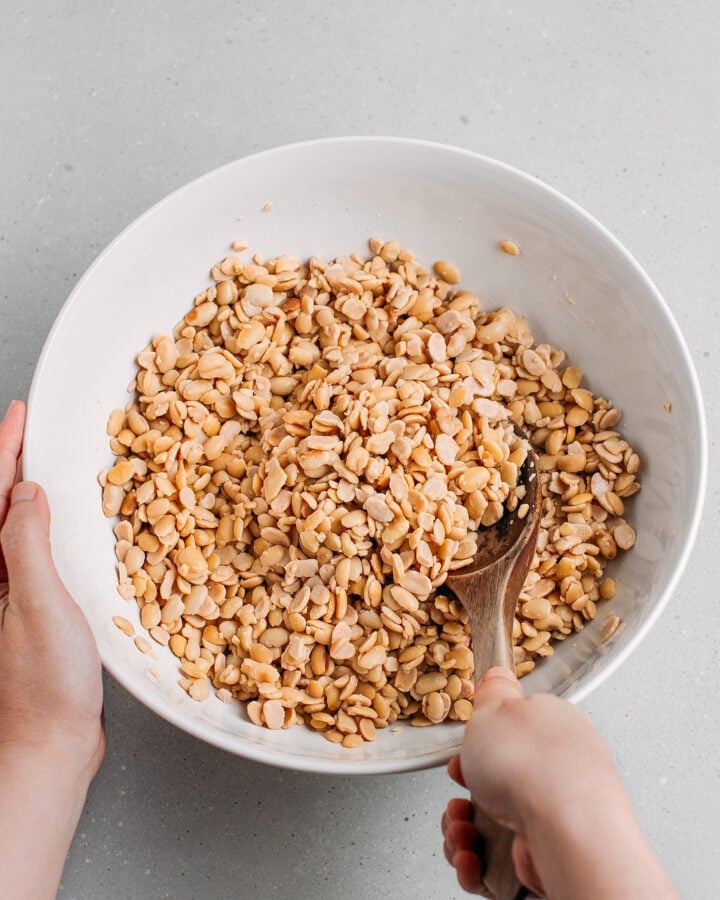
- Pat them dry. Spread the soybeans on a clean kitchen towel and let them sit for 15-20 minutes. Then, top with another kitchen towel and press gently to absorb any excess moisture. Then, transfer them to a large mixing bowl.
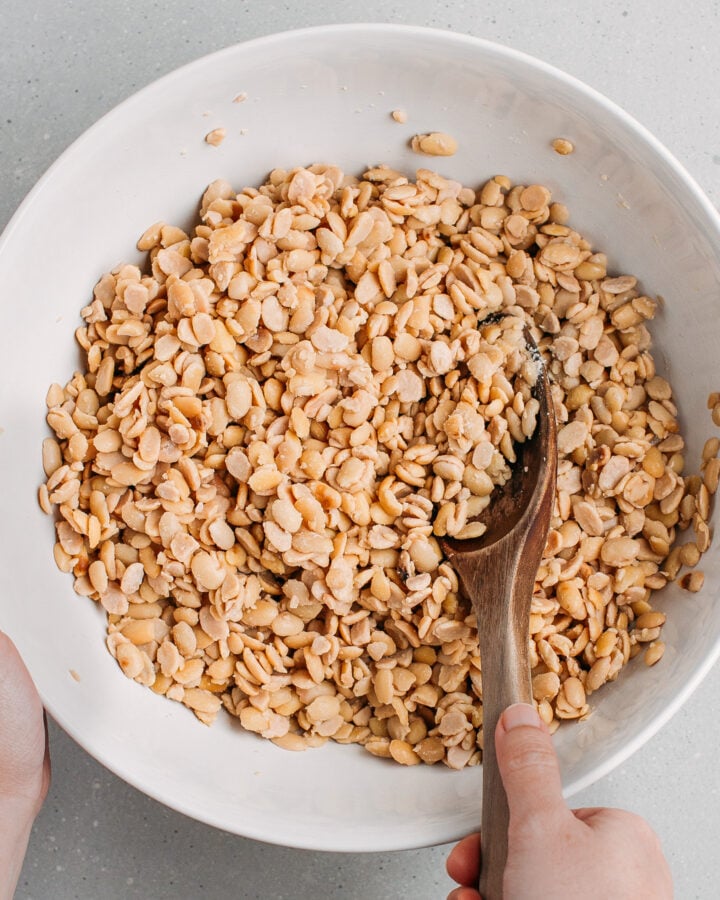
2. Toss them
- Toss with vinegar. Stir in a tablespoon of white vinegar.

- Toss with the starter. Next, sprinkle the tempeh starter over the soybeans and toss to coat.
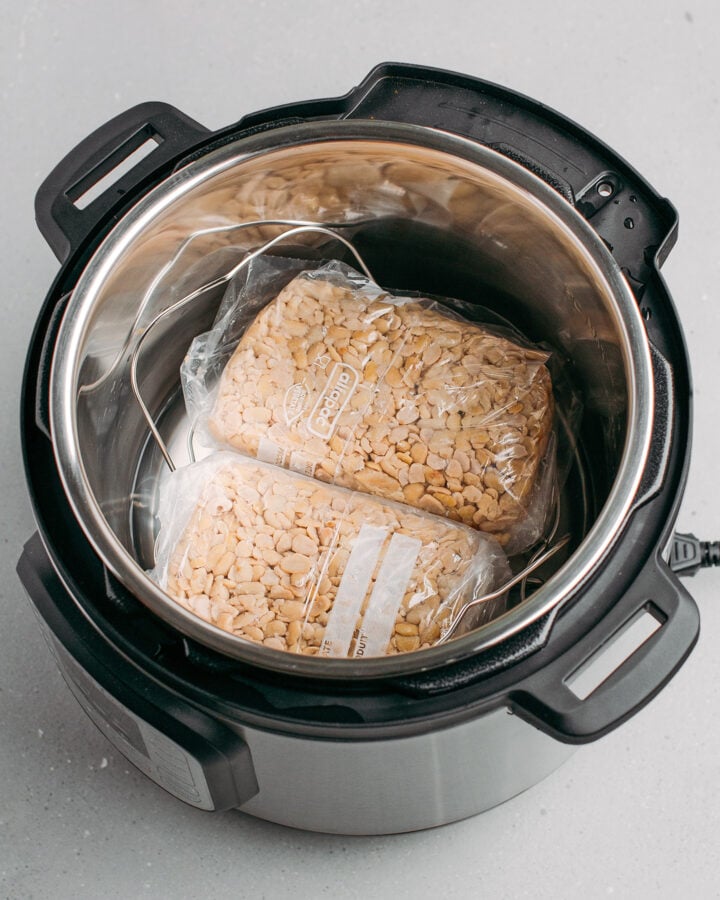
3. Pack into bags
- Transfer to bags. Prick two small freezer bags using a fork at 1-inch (2.5 cm) intervals. Next, divide the soybeans between the two bags and shape them into tight loaves.
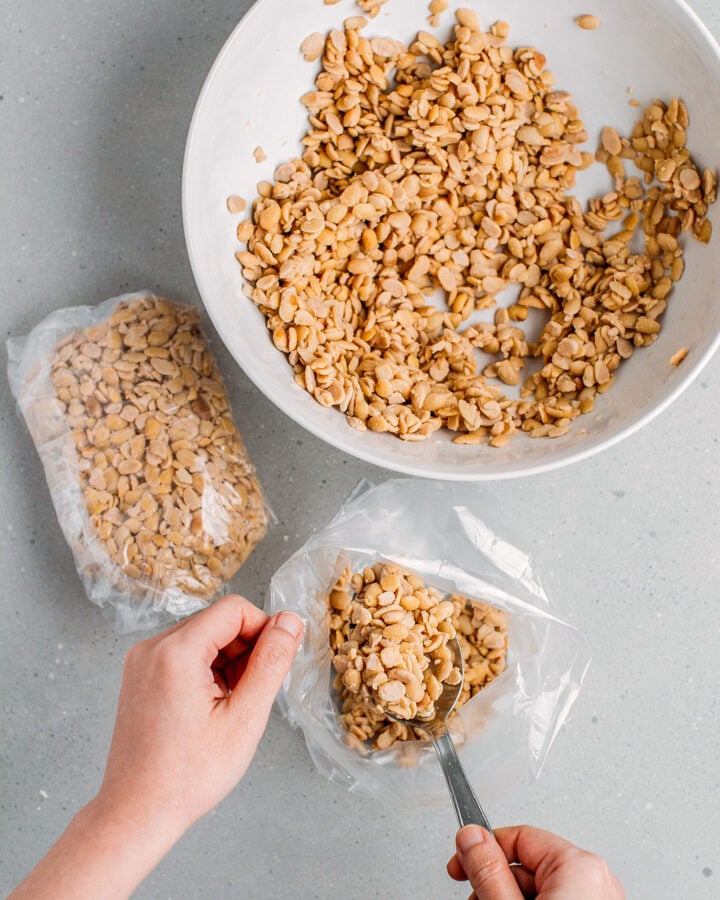

Tip: Ensure the soybeans are packed tightly in the freezer bags. You don’t want too much space between each soybean.
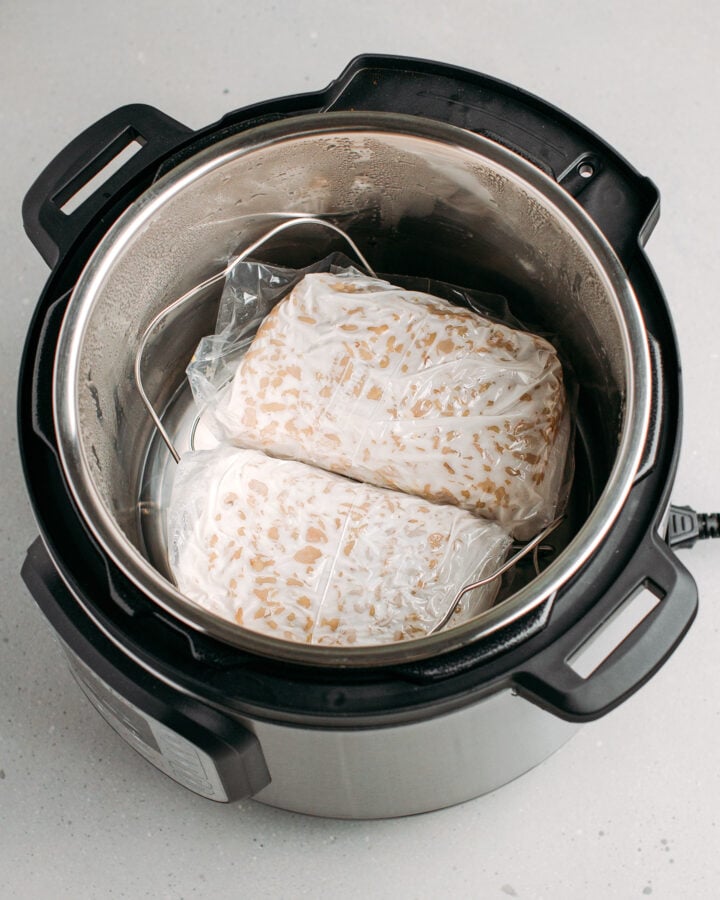
4. Incubate the tempeh
To incubate, we will use the Instant Pot’s yogurt mode!
- Transfer to the pot. Pour 1 cup of water into the liner, add the steamer rack, and place the soybean bags on it so they don’t touch the water.
- Incubate. Set the Instant Pot on yogurt mode and let it do its magic! After approximately 32 hours, you can turn it off and let it incubate for an additional 24 hours. Your tempeh loaves should now be firm and completely white!
Note: Once you start seeing white mold growing, you no longer need the Instant Pot to generate heat, as the mold will begin to produce its own. It’s actually funny how the tempeh is still warm after 24 hours!

📔 Success Tips
Pack it tight.
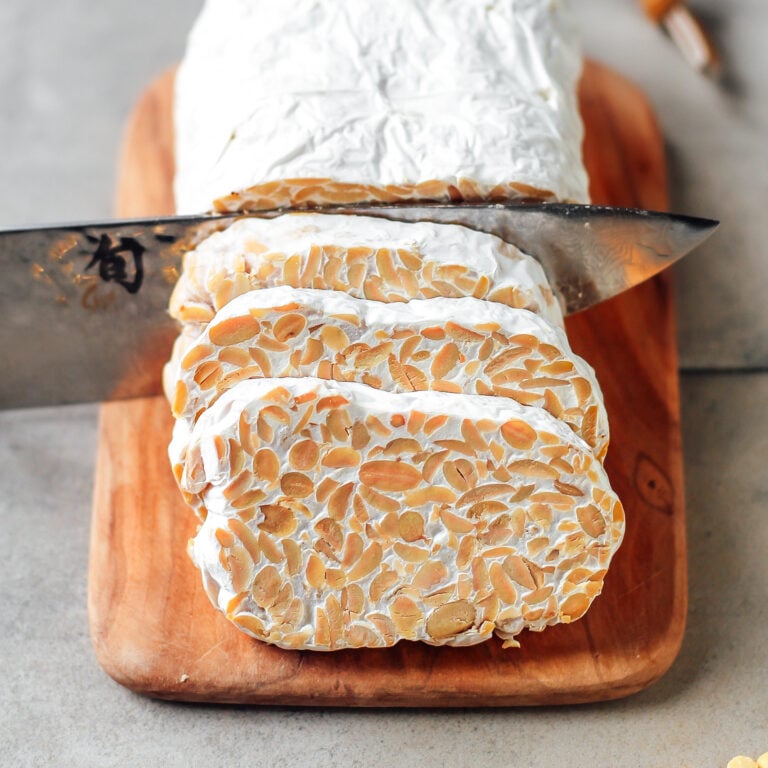
Pack the soybeans as tightly as you can in the freezer bags. This helps the tempeh turn out firm and hold together nicely. If the beans are packed too loosely, the tempeh may fall apart easily when you try to cut it.
Be patient!
You will start to see white mold growing after approximately 18-20 hours, and the soybeans will be fully covered after only about 40 hours. So, don’t worry if nothing happens in the first few hours. This is normal, just be patient 🙂
Pat the lid dry every 6 to 8 hours.
Open the Instant Pot every few hours and gently pat the lid dry with kitchen paper towels to remove any condensation.
Adjust the incubation time.
Depending on different factors, the incubation time may vary. Remove the tempeh from your Instant Pot only once it’s firm and a white layer covers all the beans.
🌰 Tempeh Variations
I have created many different kinds of tempeh over the years, and not just with soybeans. Here are some you might be interested in:
- Black bean tempeh – I’ll admit this tempeh looks quite unusual because it’s made from black beans, which gives it a black color. But don’t let that fool you, it still tastes delicious and is a great soy-free alternative.
- Chickpea tempeh – Love chickpeas? This tempeh recipe replaces the traditional soybeans with chickpeas, giving you a mild, nutty flavor!
- Okara tempeh – This one’s a little different, as it makes use of the leftover soybean pulp after you strain homemade soymilk. A great way to reduce waste, plus it has an interesting texture that’s completely different from my other tempeh recipes.
🌯 Where to Use It
Tempeh is super versatile and can be used just like you would use tofu:
- Sauté/Bake: Marinate diced tempeh in your favorite marinade and then sauté or bake it until golden brown. You can then add it to vegetable stir-fries, noodles, or soups like this Tempeh Khao Soi. It’s also delicious in sandwiches or wraps.
- Fry: Tempeh can be deep-fried for a crispy texture. You can deep-fry it as is, or dip it in a slurry and then toss it with breadcrumbs or panko for extra crispiness.
- Grill: Tempeh is also perfect for grilling! It holds up well on the grill and can be charred for a smoky flavor. These Sesame & Peanut Tempeh Skewers are one of my favorites!

❄️ Storing and Freezing
- Storing: Tightly wrapped in plastic wrap, you can store tempeh in the refrigerator for up to 2 weeks.
- To freeze: Wrap each loaf with plastic wrap and store in the freezer for up to 6 months.
💬 FAQs
Yes, you can cook the soybeans in a regular pressure cooker and incubate the tempeh in a warm place, such as an oven with the light on.
An optimal temperature for mold growth is 85°F (30 °C).
Yes, you can use black beans, chickpeas, lentils, and more!
Yes, you need to be patient. It can take up to 72 hours for the tempeh to be ready.
Your tempeh should be firm and hold together well. It should also have a white appearance as the mold covers most of the soybeans.
It’s possible that black spots/areas appear on your tempeh if you incubate it for too long. These spots are not toxic and are safe to eat. If your tempeh has an ammonia smell, though, then it has turned bad and should not be eaten.
I hope you will find this guide helpful and that your first batch of tempeh will turn out amazing!


⭐️ Did you like this recipe? Let us know in the comments below, and tag us on Facebook, Instagram, or Pinterest!
Note: This recipe was first released in November 2018 and updated with new process shots and detailed instructions in October 2025.


Want to Save This Recipe?
Enter your email below & we’ll send it straight to your inbox! Plus, you will receive new recipes every week!
I’d like to receive more tips & recipes from Full of Plants.
This site is protected by reCAPTCHA and the Google Privacy Policy and Terms of Service apply.
How to Make Tempeh in the Instant Pot
Equipment

Ingredients
- 2 cups (345 g) split peeled soybeans
- 6 cups (1.4 L) water
- 1 tbsp (15 ml) white rice vinegar
- 1 tsp tempeh starter
Instructions
- Rinse the soybeans. Add the soybeans to a large bowl and cover with water. Stir using your hands to clean them. Drain and repeat this step 2-3 times.
- Pressure cook. Transfer the drained soybeans to the Instant Pot and cover with the 6 cups of water. Close the Instant Pot with its lid and set the valve to the "Sealing" position. Press the pressure cook button and set the timer to 40 minutes.
- Let the pressure release naturally. Once the timer has turned off, allow the pressure to release naturally (about 25 minutes). Once there is no more pressure, open the Instant Pot and drain the cooked soybeans.
- Pat them dry. Transfer the cooked soybeans to a clean kitchen towel and let them sit for 15-20 minutes. The soybeans should not be wet. If they still appear too wet, top them with another clean kitchen towel and gently press to absorb any excess water.
- Toss with vinegar. Transfer the soybeans to a large mixing bowl. Add the vinegar and stir using a wooden spoon.
- Toss with the starter. Sprinkle the tempeh starter over the soybeans and stir again until well combined.
- Transfer to bags. Take two small freezer bags and pierce them with a fork or a chopstick at 1-inch (2.5 cm) intervals. Divide the soybeans between the freezer bags and pack them well. Try to shape them into thick loaves. Then fold the rest of the bag over the soybeans to keep it tight.
- Transfer to the pot. Pour 1 cup of water into the Instant Pot liner and place the steamer rack inside. Arrange the soybean loaves on top of the rack. Make sure they don't touch the water.
- Incubate. Cover with a glass lid (or use the Instant Pot lid if you don't have a large glass lid). Then, press the Yogurt button 3 times to set it to "Less" mode. Set the timer to 32 hours. After that time, turn off the Instant Pot. Allow the tempeh to incubate for another 12 to 24 hours or until the loaves are firm and completely white.You can now place it in the refrigerator and use it as you wish!
- Tempeh will keep for up to 2 weeks in the refrigerator or 6 months in the freezer.
Notes
Pack it tight.
Pack the soybeans as tightly as you can in the freezer bags. This helps the tempeh turn out firm and hold together nicely. If the beans are packed too loosely, the tempeh may fall apart easily when you try to cut it.Be patient!
You will start to see white mold growing after approximately 18-20 hours, and the soybeans will be fully covered after only about 40 hours. So, don’t worry if nothing happens in the first few hours. This is normal, just be patient 🙂Pat the lid dry every 6 to 8 hours.
Open the Instant Pot every few hours and gently pat the lid dry with kitchen paper towels to remove any condensation.Adjust the incubation time.
Depending on different factors, the incubation time may vary. Remove the tempeh from your Instant Pot only once it’s firm and a white layer covers all the beans.Nutrition

About the Author
Thomas Pagot is the founder, photographer, and recipe developer behind Full of Plants. He created the blog in 2016 as a personal cookbook for vegan recipes. Through years of recipe development, Thomas has successfully grown Full of Plants into a trusted resource for plant-based recipes.
Leave a Comment
Hi Thomas,
Thank you for all your amazing recipes, I tried to make tempeh but after 24 hours it wasn’t fully covered in white mold and it had tiny black spots and fuzzy mold coming out of the holes of the bag and in some parts inside the bag in the loaf is that normal?
Hi Gaby,
This is not normal. Something definitely went wrong and I would not recommend eating the tempeh if you see black spots.
I would suggest trying again and maybe using gloves when handling the soybeans. It’s possible that some dust or bacteria contaminated your tempeh.
Hi Thomas,
I made this very successfully using your recipe six years ago using whole beans, soaked/skinned, but I don’t remember the details and have lost that recipe. With this current iteration, after soaking/skinning whole beans, how long should they be cooked? After cooking for 40 minutes today, natural release, the beans are still crunchy. Are they supposed to be soft?
Thanks
Hi Camille,
40 minutes is the cooking time for split and peeled soybeans. If using whole beans, I would try soaking them overnight and then pressure cooking them for 45-50 minutes.
Also, ensure your soybeans are fresh and not expired. I have had an issue before where soybeans were past the expiration date and even after 1 hour of cooking, they were still hard.
Hope this helps!
Hi, Thomas,
I cooked them quite a bit longer, and they did develop some mycelium, but it was not nearly as thick as it was the previous time. I think the beans were just too old. Will try again with fresh.
Also I found a place that sells split/peeled beans. so I’m looking forward to not having to skin them.
Thanks for your help!
During the fermentation process, should I set the ip valve to Sealing? I believe that vent mode is better. I also wanted to remove the silicon ring..
Hi Andrea,
Yes, vent mode or sealing, it doesn’t really matter since the Instant Pot is not under pressure or high heat. You can even use a glass lid instead of the IP lid.
Thomas, you are such an inspriation!
I’ve got hulled, split chickpeas and tempeh starter that I bought at an Indonesian shop here in Paris, so my Instant Pot and I are all set to go! The lady who sold me the starter was tickled pink that I was making my own tempeh. She mentioned that cashew-nut tempeh is also delicious; have you tried that? I assume we start with raw cashews, but would we need to cook them first? I’ll have to go back and ask her — when I’ve successfully made your recipe!
Thank you again for all your hard work.
Thanks for your kind words Carole!
Oh that sounds very interesting, I have never heard of cashew tempeh before! I only knew about peanut tempeh.
I’ll definitely check that out. Please report back if you ever try it 🙂
Clearly people in your comments are happy with the recipe but I’m curious about your thoughts in regard to moisture. It seems that adding water to the bottom of the instant pot would create a moist environment that’s bad for the tempeh. What are your thoughts on why that’s not a problem for this recipe?
I have made this recipe countless times and never had any issue with the moisture but I do plan to re-test it soon without adding any water to the pot to compare. I’ll update it if needed.
I had it on the less yogurt setting for 16 hrs then left alone with instant pot off for about 24. Checked this morning and it was ice cold and not covered in spores. I turned the instant pot back on but am now not sure if this would be safe to eat if it does work. Thoughts?
It should be fine. Don’t turn off the heat until you can see white mold.
It seems that in your case, the spores didn’t develop yet, so your tempeh couldn’t generate its own heat.
Turned out great! I started with whole beans, and after soaking and dehulling (which is much easier if you use a big bowl and a few rinses) I cooked them for 18 min on high pressure. I also wrapped them in banana leaves instead of plastic. Question about fermentation: why do we need water at the bottom of the instant pot?
Thanks for your feedback and rating Emily!
Regarding your question, I actually doubt you really need to add water (I’ll try without next time). I just recently made natto (although quite different) and didn’t add any water to the bottom of the pot, got great results.
Oo, sounds delish!
Did anyone else’s smell really bad during the process? It’s starting to grow mold but it’s already been over 24 hours and idk if this is right…
What do you mean by bad smell? It should have a mushroom scent (a bit like a camembert).
What size freezer bags did you use?
I used “small-size” freezer bag that I folded in half. The size doesn’t really matter, use what you have and fold them or cut as needed.
Hi. I tend to cook by scale. How heavy are two cups of (uncooked) soybeans, approximately?
Hi Trang,
2 cups of uncooked soybeans will equal to approximately 360g. Hope this helps!
Is this the same measurement for soybeans that were soaked overnight? They swell up, so I want to be sure the original dry measurement is correct.
It is a dry measurement, not after soaking.
Hi. I’ve read that making tempeh requires air circulation. Does the Instant Pot allow for air circulation?
Hi Kate,
I am not sure if the Instant Pot allows air circulation but I never had any trouble making tempeh in the Instant Pot.
I made this recipe today. It took 2 hours to dehull the soybeans. Despite the good directions, I will have to achieve enlightenment before I try this again unless there’s some work-around. Difficult to find hulled soybeans online. One recipe fits into 2 1-quart freezer bags. Is there an extra step that will make this easier?
I’m afraid there is not. If you want to save time, the only option is to start with hulled soybeans.
I’m not able to get dehulled soy beans so I did the extra step and soaked first. I then cooked for 40 minutes which was far too long. I think the cooking time for soaked beans should be halved.
Thanks for your feedback Lisa, I’ll make sure to try again with whole soy beans and adjust the cooking time accordingly.
Great vid and very helpful. I have seen other versions in which (a) no water has been used during the fermentation process and (b) the pot has been left on the “Low” setting from the time mould has started forming u til the end product. If the IP is switched off, is fermentation guaranteed to continue?
It will continue if the mold is already well developed. Usually at this point, the heat from the tempeh itself will allow the mold to develop without any other heat source.
I tried making natto in my instant pot and it turned out very wet – am concerned if I use the lid which seals, that it will do the same thing to the tempeh. Can I put any glass lid over if it covers the pot – I don’t have one that fits exactly. Would appreciate your input. Cheers
Yes, I usually use a glass lid too. Just be aware that it will also produce steam so you will have to pat it dry from time to time.
You could try taking the removable silicon ring out of the lid. I think that is crucial to sealing.
Super recipe. Enjoy the mild and somewhat sweet taste. I don’t buy premade food and appreciate finding this recipe. Many thanks.
You are welcome!
My employer had served many different cuisines that were “complimentary” during Covid Days so I tried many World Cuisine dishes. I searched and followed this recipe since my wife bought a Magic Pot or whatever you call it. The recipe (16hrs at 109F) didn’t quite make it as I needed to “incubate” within the Insta Pot another ~24hr – with no heat – I was worried to overcook it – until I saw the two punctured freezer bags become white inside. I froze them within non-perforated bags and I must say about 9mos later I remembered my adventure and I took one out, partially defrosted it, cut it into cubes, tossed in corn flour, and then sprayed generously with olive oil and put them on my barbecue grill over a perforated tray and they came out so crispy and delicious! This was a teal treat to go down this culinary pathway and I def want to do it again as I have more Tempeh Starter dormant in the fridge. I took many photos but alas I cannot share. Cheers!
Yes, it can sometimes take longer for the mold to develop, depending on the temperature.
Thanks for your feedback!
Is it possible to follow these instructions using chickpeas? Isee your chickpea tempeh recipe has slightly different ratios
Yes, this recipe should definitely work with chickpeas as well!
Using the instant pot as an incubator for tempeh is a great idea. Thank you. Now I don’t need to go out and buy an incubator. It worked perfectly.
You are welcome Roger 😉
For me, The temperature was a great issue for making tempeh.
Tempeh is fussy! It needs to ferment at between 85°F and 90°F. Much cooler and the mycelium won’t grow (giving rise to undesirable microorganisms to grow instead) But I was always confused between 85F to90F.
Thomas I am a fan of your recipes and always tell friends about them. I love how you push us to try new things.
I recently ran across a couple of recipes using Pumfu (pumpkins seed tofu) and I’d love to know how to make it if you’re ever inclined.
Please know that we know a lot of hard work goes into your recipes, testing, testing and more testing and we all appreciate it!!
Hi Annie,
Thanks for your kind words 🙂
It’s the first time I hear about Pumfu, but I’m really intrigued! Thanks for sharing 🙂 I will definitely add this to my list!
Hi, my lowest Instant Pot setting is 91 degrees F. Is that too hot? I have made two failed batches and I’m wondering if it’s too hot. It also gets quite damp in the IP with the water put in initially. Both times, I had a lot of white but the beans were only partially covered with white and the loaves were still soft enough to break apart easily after 48 hours. They also started to smell bad, like feet, so I threw them out. Any suggestions? Thank you.
Hi Lilian,
91F should be okay, but I would stop it as soon as the tempeh starts to produce its own heat, usually after 36 hours. Sometimes tempeh can take up to 72 hours to be ready, so let it incubate for a longer period of time if the loaf is not firm enough. Regarding the smell, it should smell like camembert/mushrooms (which some people refer to smelling like feet), so I am not exactly sure if your tempeh went bad or not.
Thank you so much for posting this recipe! I can’t wait to buy an Instant Pot and make Tempeh this easier way! I saw a comment that said dried hulled split soybeans can be found in EBay. I don’t know how old that post is, but has anyone been able to find them? I can’t find them on EBay. Thanks so much!
I DID IT!!!! The hulling process was pretty tedious – I can totally see the benefit of buying them pre-hulled. But, super thrilled with how well it turned out. Thank you for such great instructions!!!!!
Thanks so much for your feedback Josie!
Yes, pre-hulled are not available everywhere but it’s worth finding it!
Espectacular el resultado!! Definitivamente, no vuelvo a comprar tempeh en la tienda, este es mucho mejor. Gracias!
¡De nada!
Hi!! Thank you for taking the time to share how you made Temph in the instant pot. I am so excited to try this. I have never made temph, and I feel the part that was a little confusing to me was regulating the temperature during the fermenting process.
My question is, have you ever made your own Temph starter in the insta pot using the yogurt mode? I have been reading about how to make my own starter and I am guessing you could use the insta pot to produce the started also.
Hi Leslie!
I have never tried making my own starter, I didn’t even know it was possible!
What size IP did you use? I have a 6 qt but only have room for 4 small bags of tempeh using a trivet and a taller trivet to keep them separate. The tempeh was delicious. I need to be able to make it in larger quantities.
How large is your IP. I have a 6 qt. There is no way I can fit two of those bags in the IP on a trivet. So, I use a second trivet for the second bag. Finding halved/hulled soybeans is now a prority.
I make tempeh in 3 cup Sterilite containers with holes drilled into the container bottom and lid. I steam my tempeh once it is ready to harvest so I found these steamer trays on Amazon. Using the trivet that comes with your IP you can stack two steamer trays in a 6 quart IP. Check them out and see what you think – HapWay Stainless Steel Steamer Basket with Egg Steam Rack Trivet Compatible with Instant Pot 5,6 qt Electric Pressure Cooker
Do you have to wrap in plastic? I don’t keep any in my house. Can I use a beeswax cloth perhaps?
I only tried with plastic, however some readers had success using glass containers (check the comments).
I have made this recipe several times (rated it 5 stars), and I’m back to share a couple of things I’ve learned in case it helps anyone:
1- For anyone using whole soybeans, I’ve figured out a quick way to de-hull. First, I soak the dried beans in the fridge overnight. The next day, I simmer them in water for about 20 mins. Then, I turn off the heat and use a potato masher with a pressing and twisting motion (similar to mashing potatoes). Less than 5 mins of this removes over 90% of the hulls and splits most of the beans without breaking them. After that, you need to pour the hulls out to discard. As for cooking, I do it on the stovetop for 2 hrs so I can’t speak to how long to put them in the IP for, but there are probably resources online that say how long to cook soaked beans for.
2- I believe Arthur also mentioned this somewhere, but if you’ve done everything correctly and the mold isn’t growing, it could be that your starter is bad. In one experience, I noticed that something was wrong when the loaves were not staying warm after the Instant Pot yogurt cycle had ended. It was due to the bad starter batch.