
This post may contain affiliate links. Please read our disclosure policy.


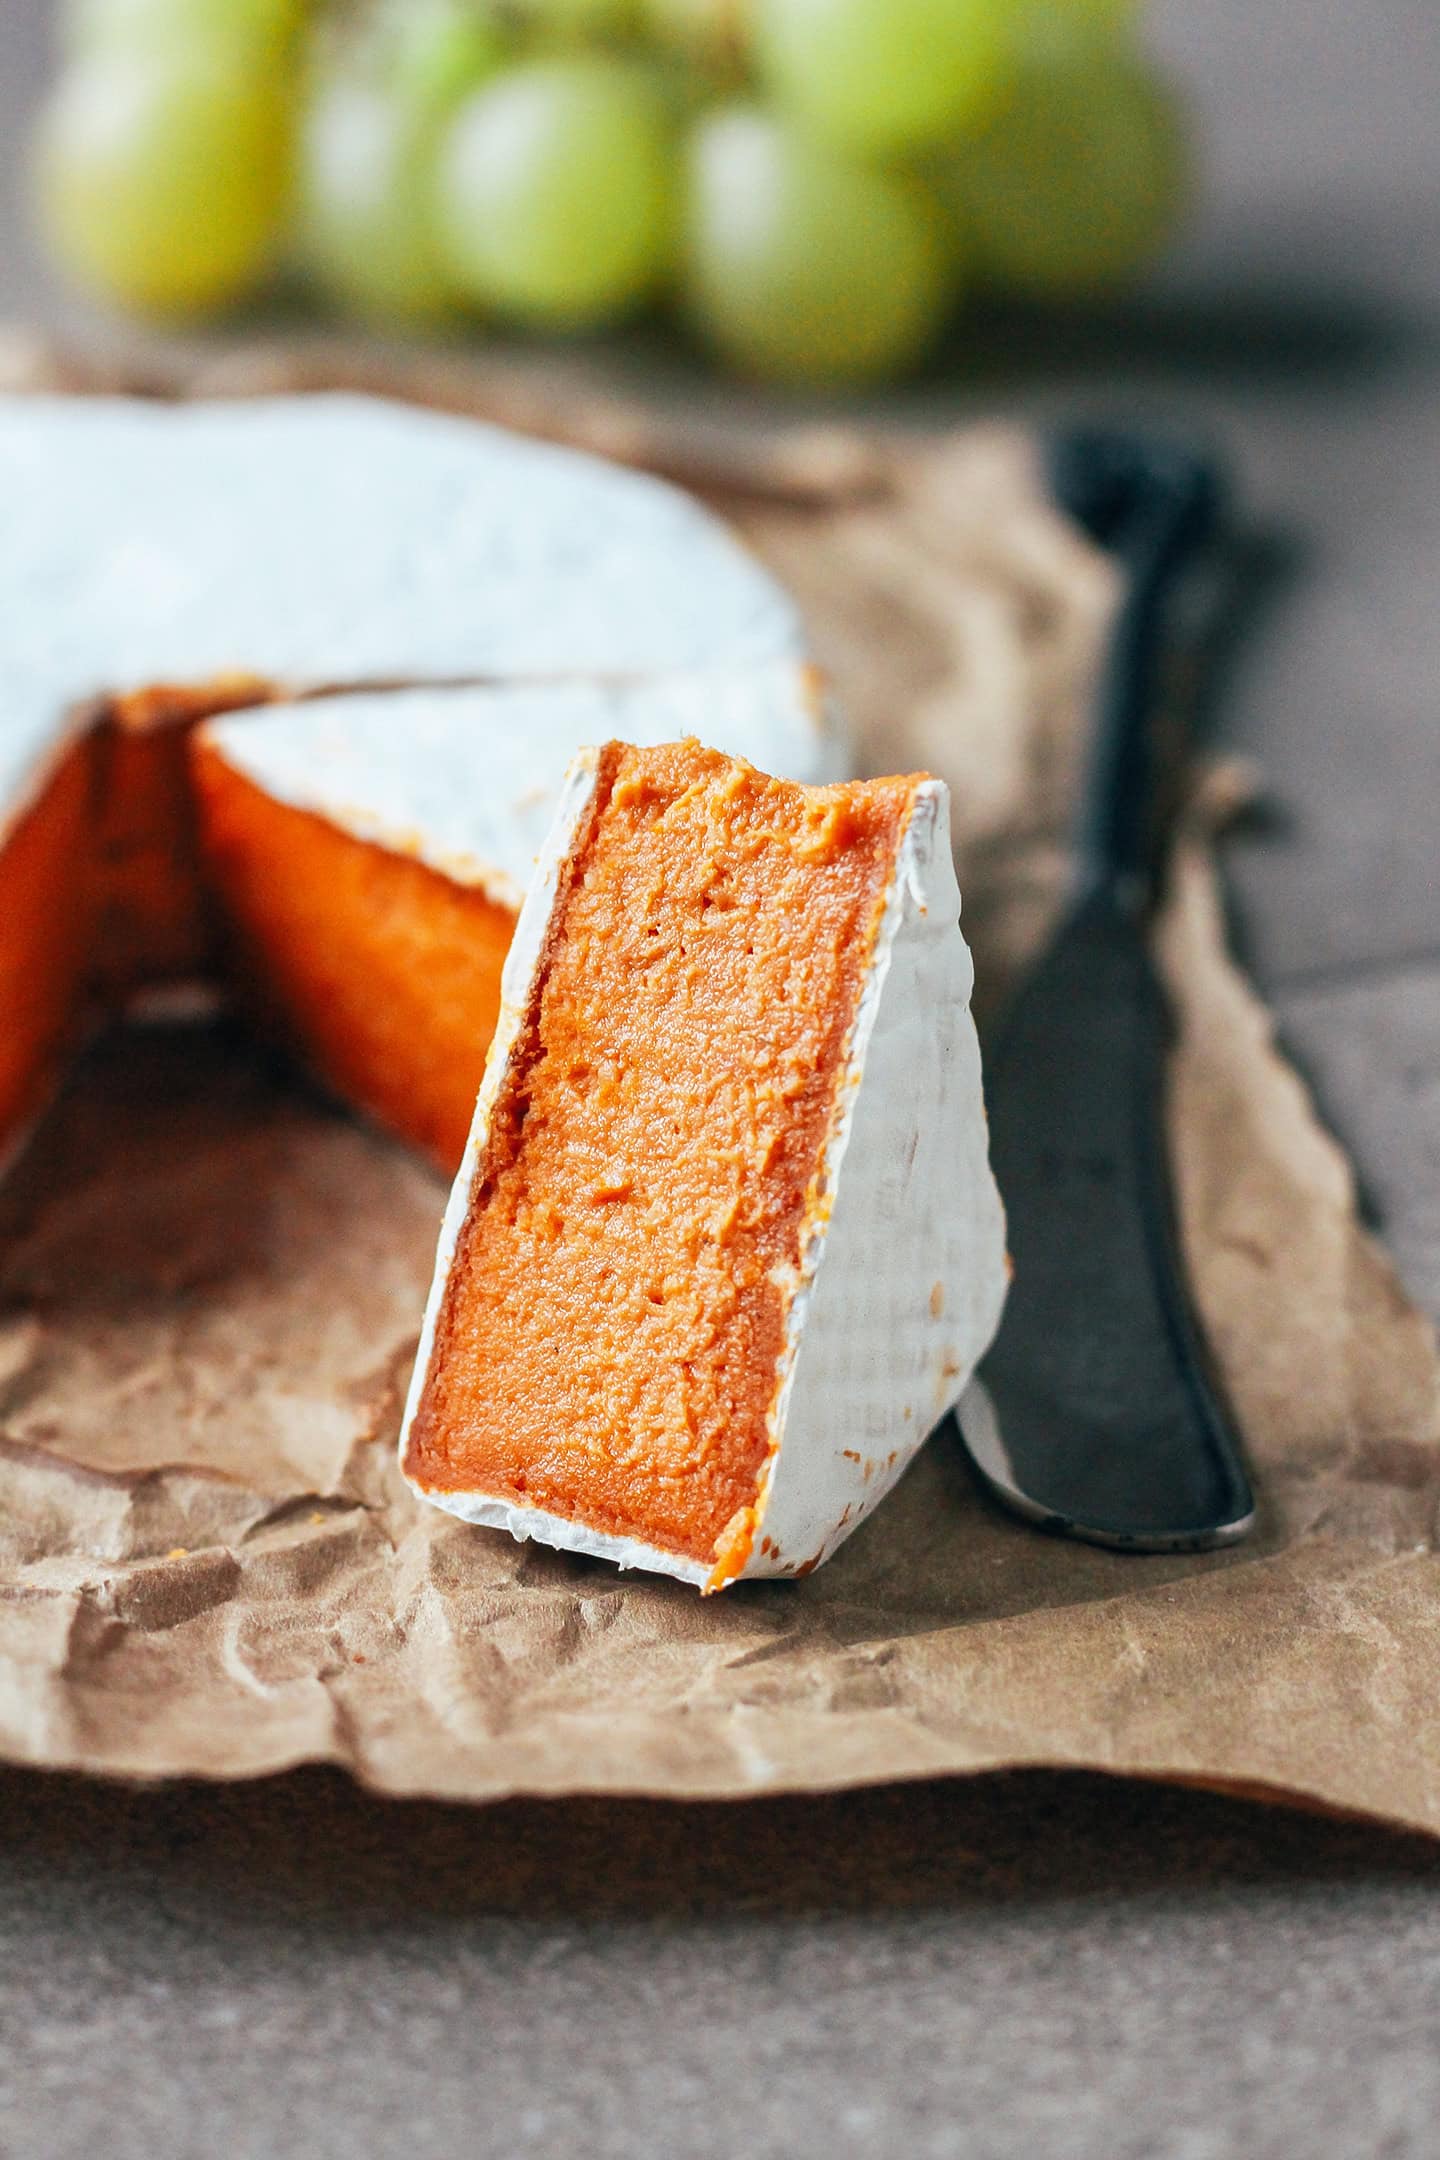
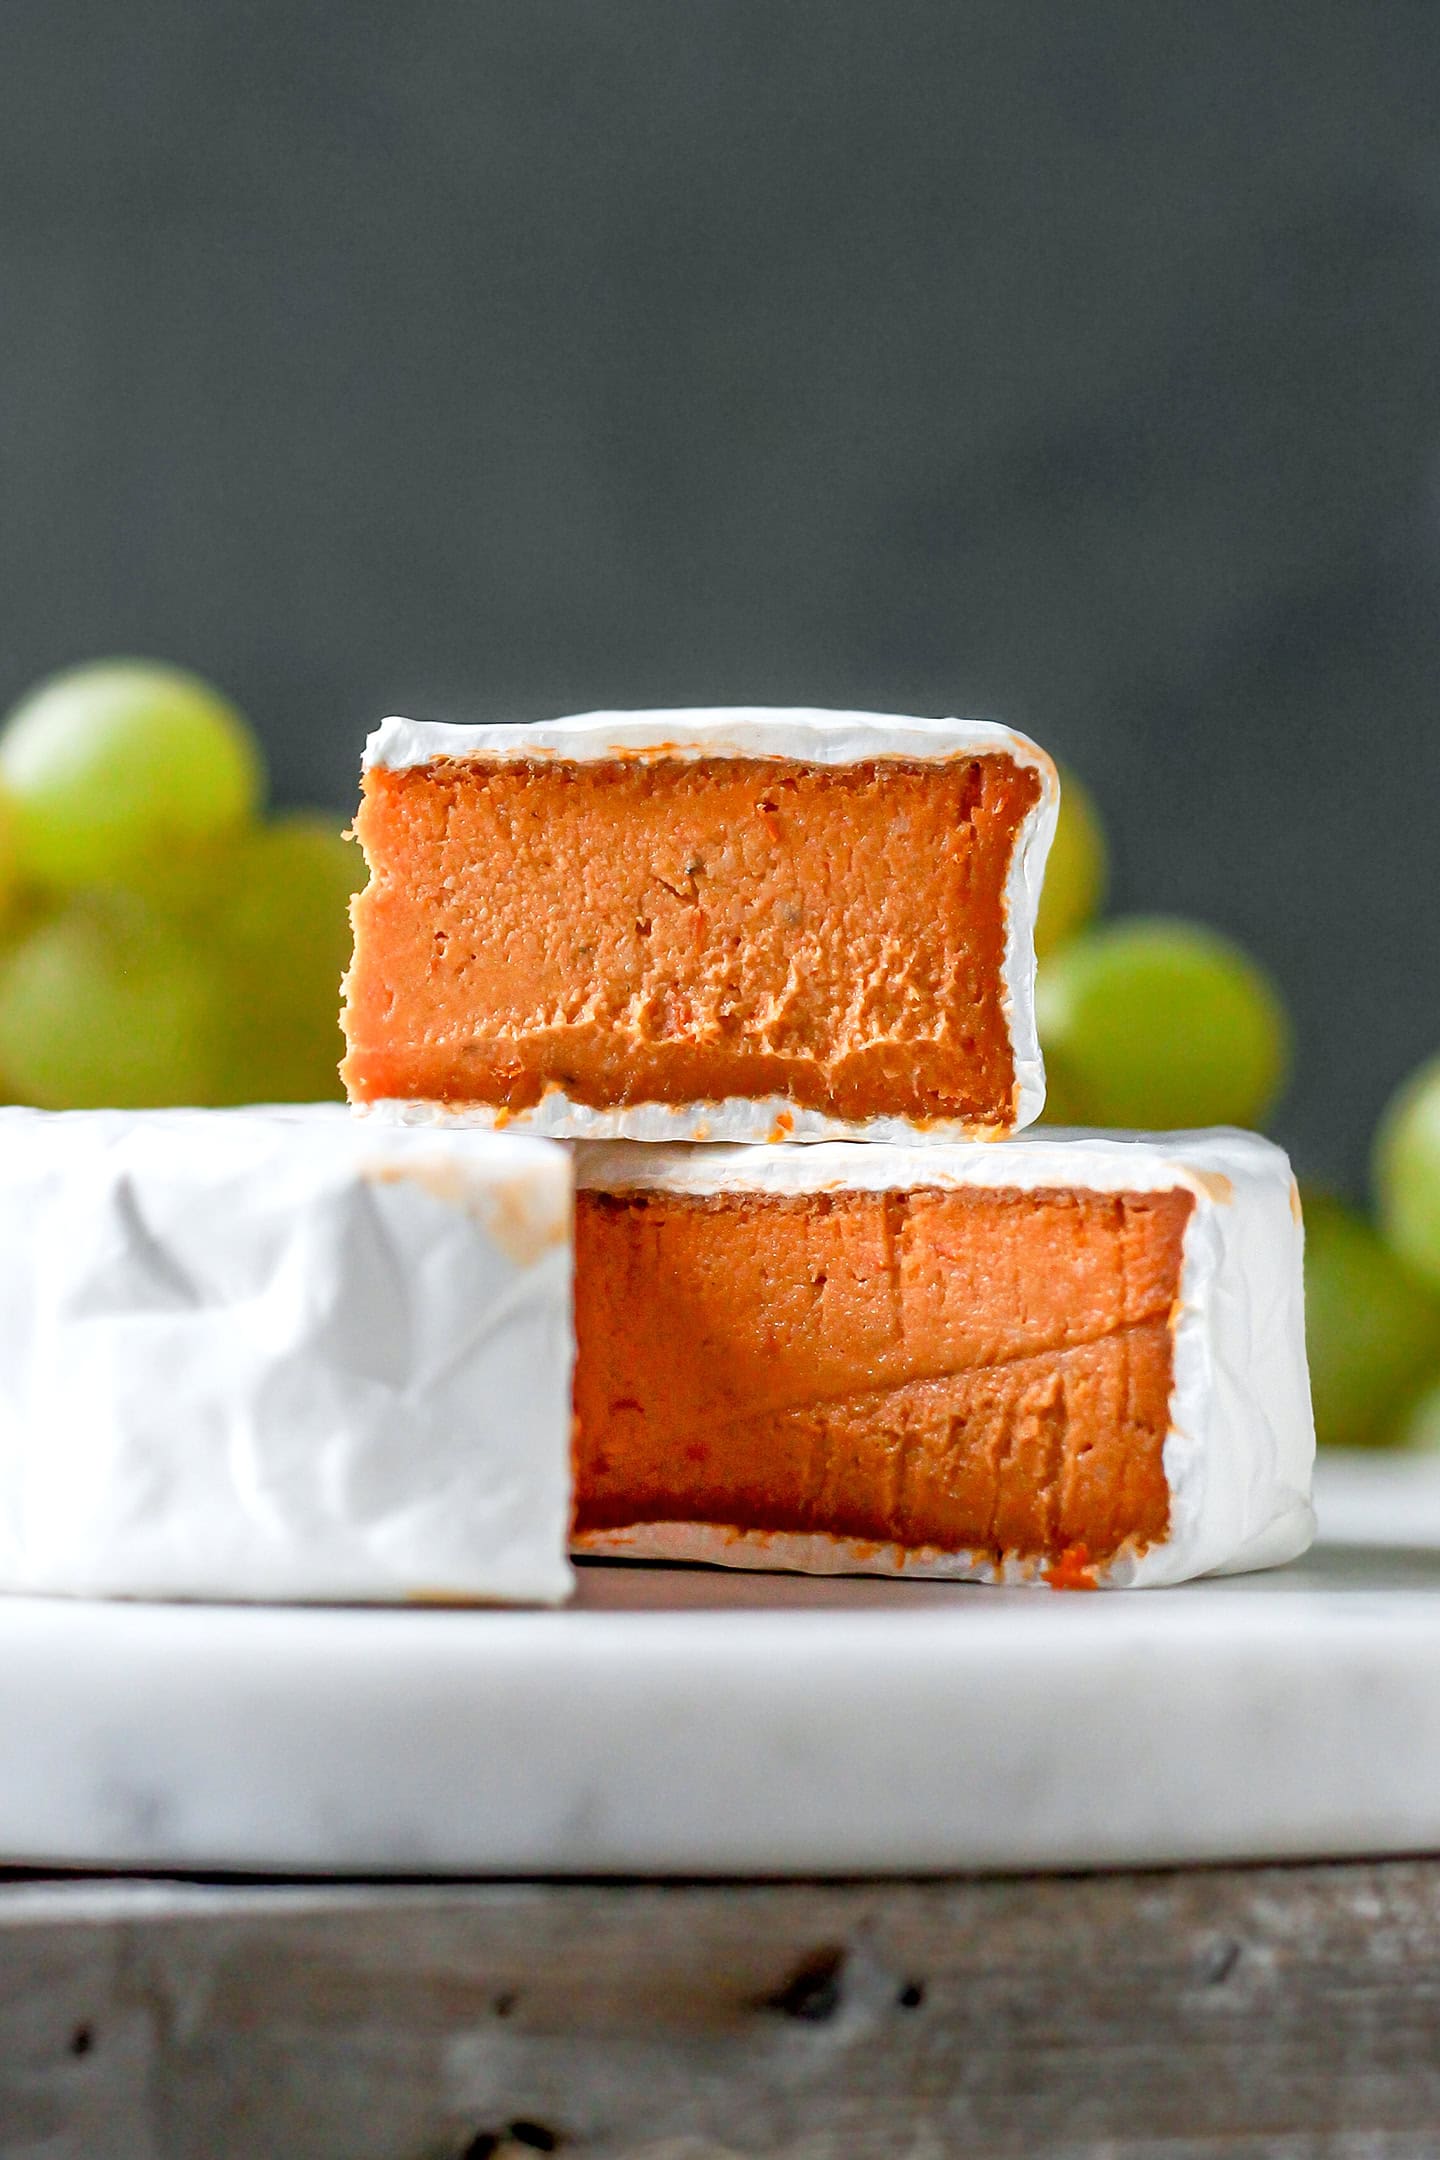
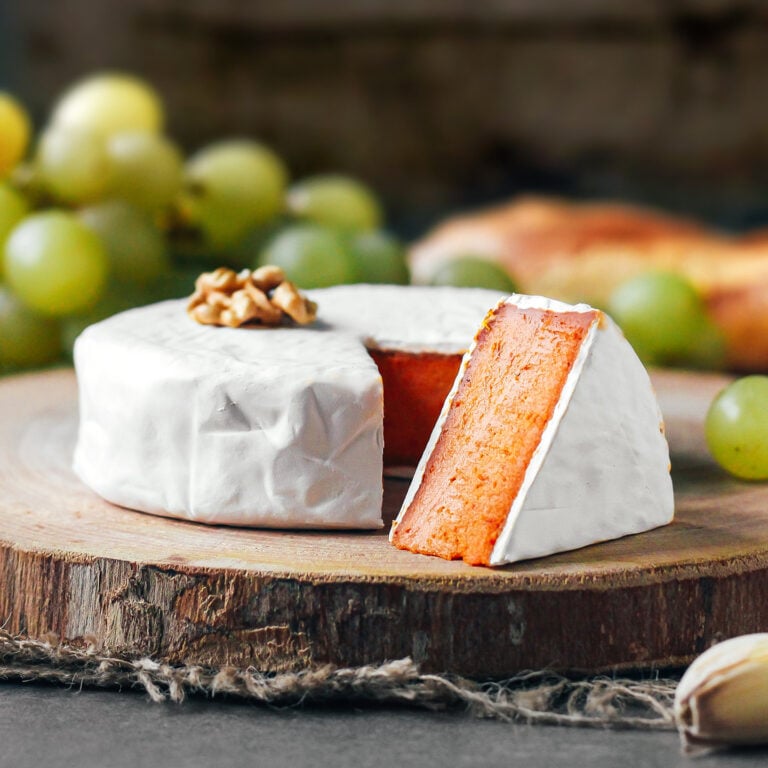
This vegan dried tomato camembert is garlicky, cheesy, savory, and packed with an intense tomato flavor! It has a tender and incredibly creamy texture and is naturally coated with a white and fluffy rind. Made with just 12 wholesome ingredients, you have to try this cheese!

You may know that my favorite cheese recipe to date is my hickory-smoked cheese. Well, in all honesty, this one comes very close. And it’s not any vegan cheese – it’s a camembert infused with an intense dried tomato flavor!
I wanted to share this recipe with you sooner, but it took me a while to tweak each ingredient. My main problem was that the cheeses were way too salty because I was using store-bought sun-dried tomatoes, usually packed with salt. To fix this problem, I decided to make my own salt-reduced dried tomatoes. It takes a bit longer to prepare, but at least you know (and can brag) that you made everything from scratch!
If you have ever made vegan camembert before, you will see the base remains the same, but the taste is totally different. It’s garlicky, slightly herby, and so savory.
Honestly, have you ever seen a dairy camembert like this?!
⭐️ Why You Should Try It
A camembert like you have never tried.
Unless I am mistaken, there is no dairy camembert that has dried tomatoes blended into it. The reason is that it would be difficult to do because of the process of curdling and draining the milk. But that’s completely doable with vegan cheese!
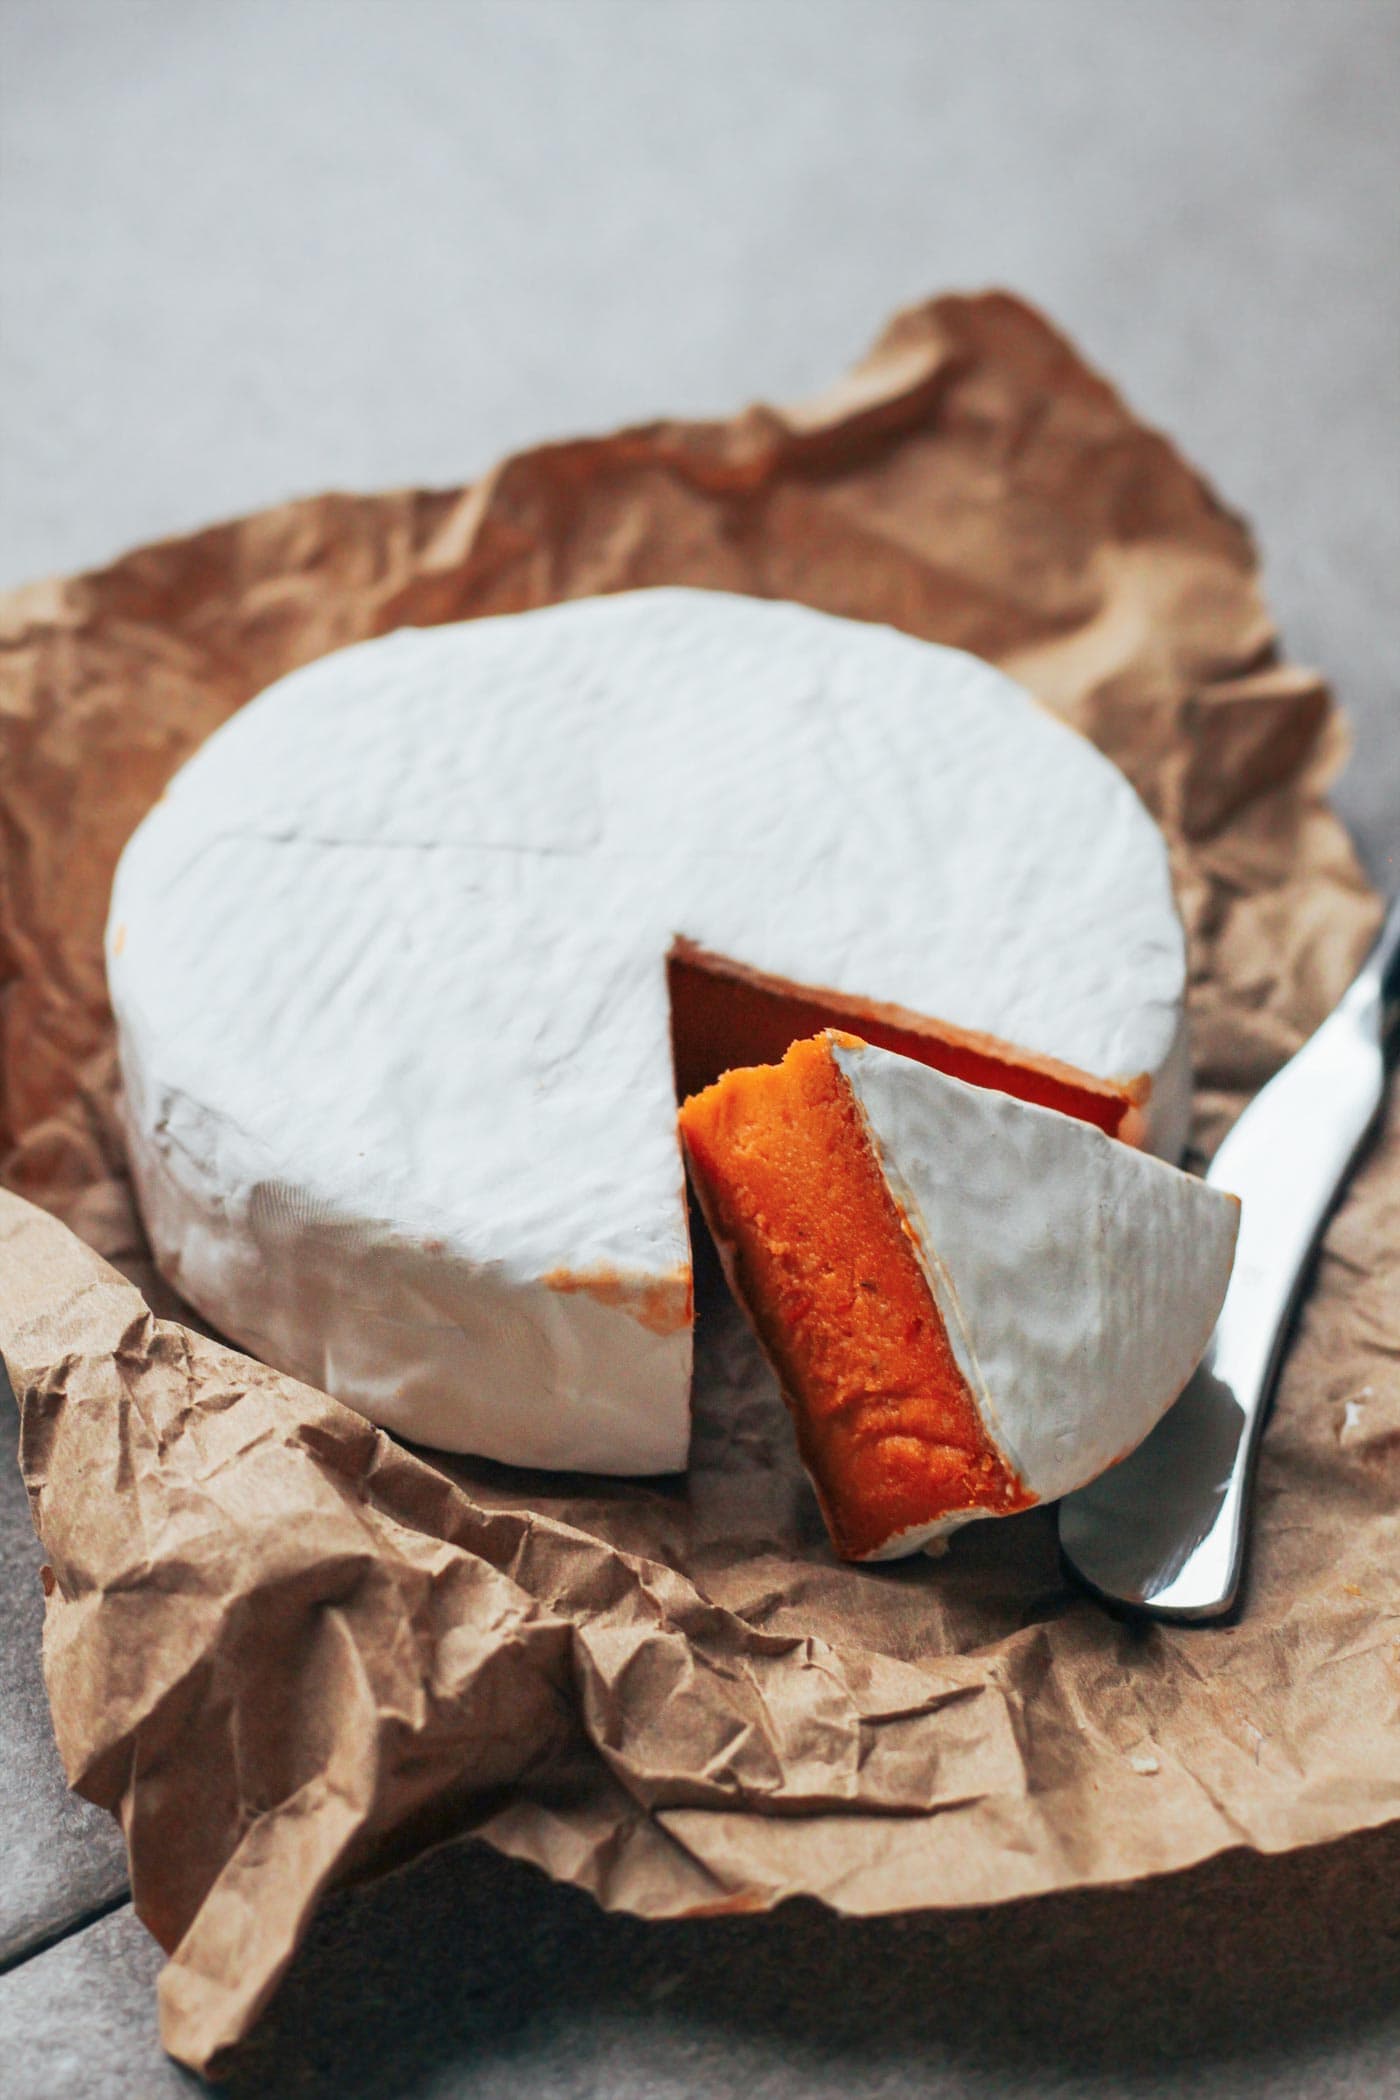
Since there is no curdling or draining happening with cashew-based cheeses, it’s possible to blend dried tomatoes directly into the cream cheese! The result is a cheese that features a lovely orange hue, beautifully contrasted by its white crust.
Packed with umami goodness.
Imagine a cheese that is super savory, loaded with an intense garlicky tomato flavor and a hint of herbs. The natural bloomy rind adds to that a mushroomy aroma and floral notes. This dried tomato camembert is truly unique, and I’m confident you have never tried anything like it!
Made with wholesome ingredients.
You won’t need any starch or gum to make this cheese. It only relies on wholesome ingredients such as cashews, tomatoes, nutritional yeast, herbs, and cultures.
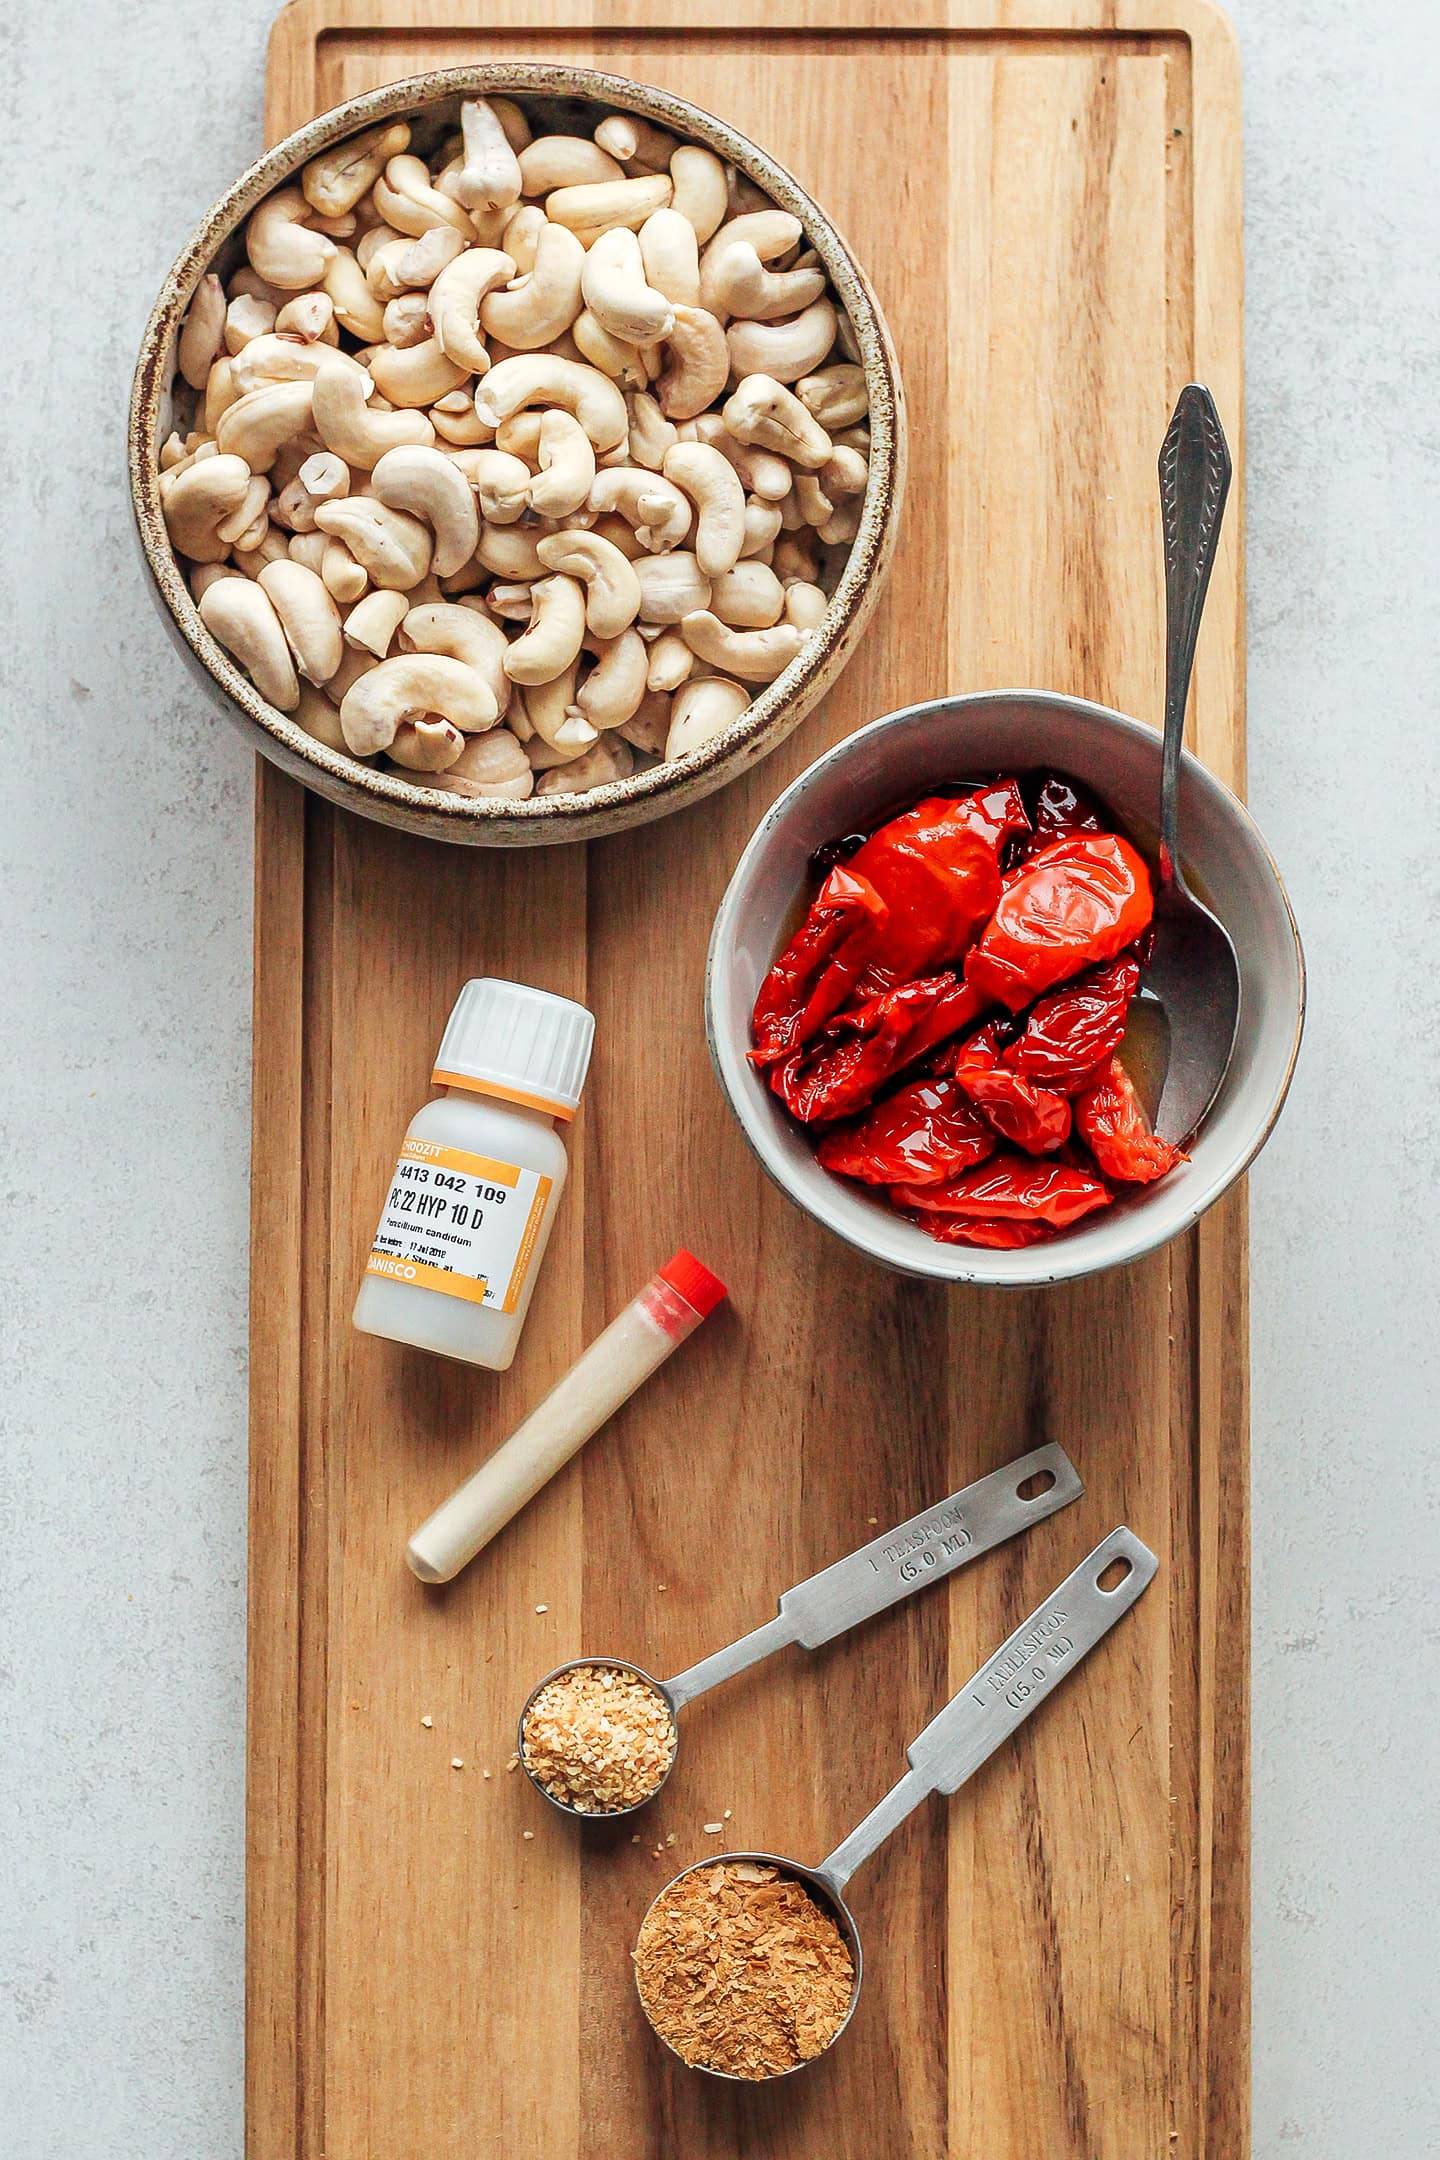
🍅 Ingredient Notes
Cashews
I love to use raw cashews as a base to make vegan cheese for a few reasons. First, they create a rich and creamy consistency. Second, they can be cultured just like real dairy cheese!
Tip: To prevent bad mold from growing, I recommend adding your soaked and drained cashews to a bowl and covering them with boiling water. Allow them to sit for 1-2 minutes before draining them again and letting them cool down. This extra step will kill possible harmful bacteria.
Cultures
Cultures are essential in this recipe as they bring natural tanginess, umami, and a buttery flavor.
The first type of culture you will need is either Acidophilus probiotics or Mesophilic Culture. Similar to a yogurt starter, it allows the cashew cream to ferment. It’s responsible for the tanginess of your cheeses.
Note: I have tried this recipe with both probiotics and mesophilic cultures. The probiotics yield a tangier taste, while the mesophilic creates more buttery notes.
Recommendation: For the probiotics, I recommend using Acidophilus from the brand Solgar. Each capsule contains 500M micro-organisms, and I use a total of 6 capsules. If using mesophilic, only use 1/16 of a teaspoon.
The second culture required is called a ripening culture. In this recipe, I use a mold powder called Penicillium Candidum. It won’t create fermentation but is responsible for the growth of the white and fluffy rind, which is characteristic of camembert, as well as the mushroom aroma.
Note: Remember that Penicillium Candidum is not always vegan, as the mold can be grown on lactose. You can find vegan versions by doing a quick search online -they’re quite easy to find nowadays. In case you are really unlucky and can’t get your hands on a vegan culture, feel free to use the regular one. Your cheeses won’t be 100% vegan, but they will be quite close, considering the tiny amount of culture used.
Tomatoes
Dried tomatoes have rich, complex flavors that develop through the drying process. They add an intense tomato flavor and umami to this camembert.
Instead of using store-bought dried tomatoes, I make my own. Why? The main reason is to control the amount of salt.
See, the sun-dried tomatoes stored in oil that you can buy at the supermarket are usually very salty, and since you have to salt the exterior of the cheese for better mold development, it results in an extremely salty, unpleasant flavor. To prevent that, I make my own and use a very small amount of salt. Don’t worry – making your own dried tomatoes is not as complicated as it sounds!
Nutritional yeast
The addition of nutritional yeast is optional but brings more cheesiness and umami.
Garlic and onion powder
Garlic and onion powder complement the tomato flavor. Do not replace them with fresh onion or garlic. Powders work best in this recipe as they pack a more intense flavor.
Thyme and oregano
I like to add some dried thyme and oregano to add an herbaceous flavor. Feel free to use your favorite dried herbs. Rosemary, sage, or basil work well too.
Salt
Salt does three things: 1) It prevents bad mold from appearing. 2) It boosts the development of the white mold, also called Penicillium Candidum. And 3) It removes excess moisture from the cheeses, making them firmer.
🥣 How to Make It
1. Dry the tomatoes
- Preheat the oven. Start by preheating your oven to 200°F (94°C). Line a baking sheet with parchment paper and set aside.
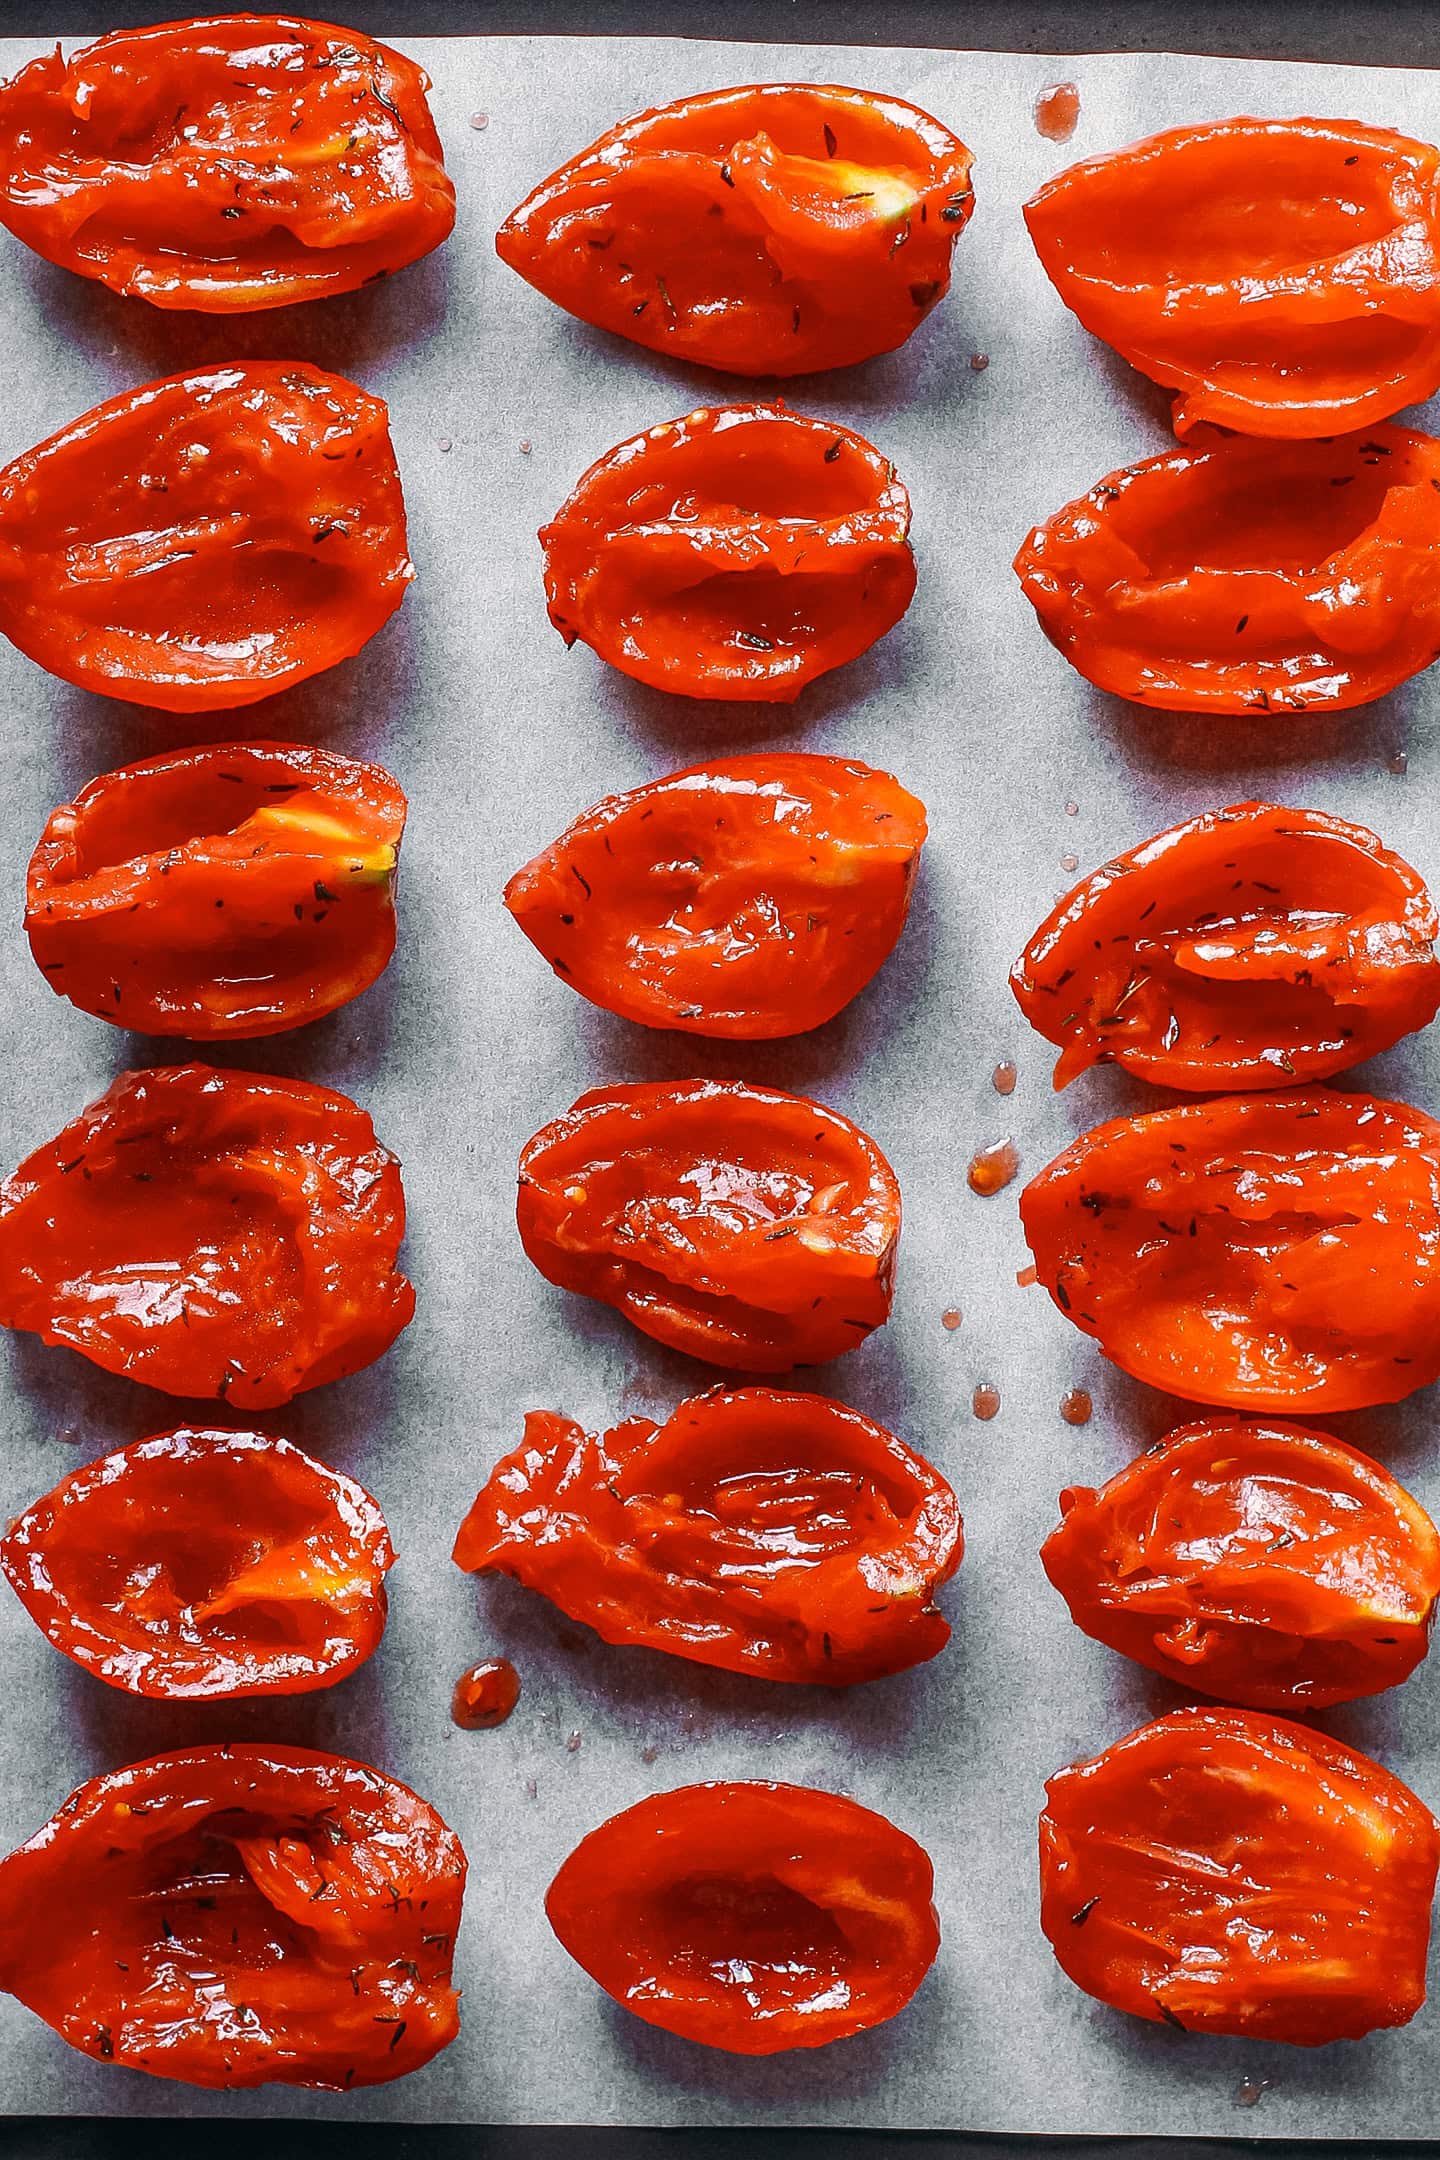
- Prepare the tomatoes. Rinse the tomatoes under cold water and pat them dry using kitchen paper towels. Cut the tomatoes into quarters and remove the core. Scoop out the seeds and pulp and discard them.
- Season them. Transfer the quartered tomatoes to a mixing bowl. Add the olive oil, thyme, oregano, and salt. Toss to coat.
- Transfer to a baking dish. Arrange the tomatoes on the baking sheet, cut-side up. Make sure to leave space between each one. You don’t want them to touch each other. Note: Depending on the size of your oven, you might have to use two baking sheets.
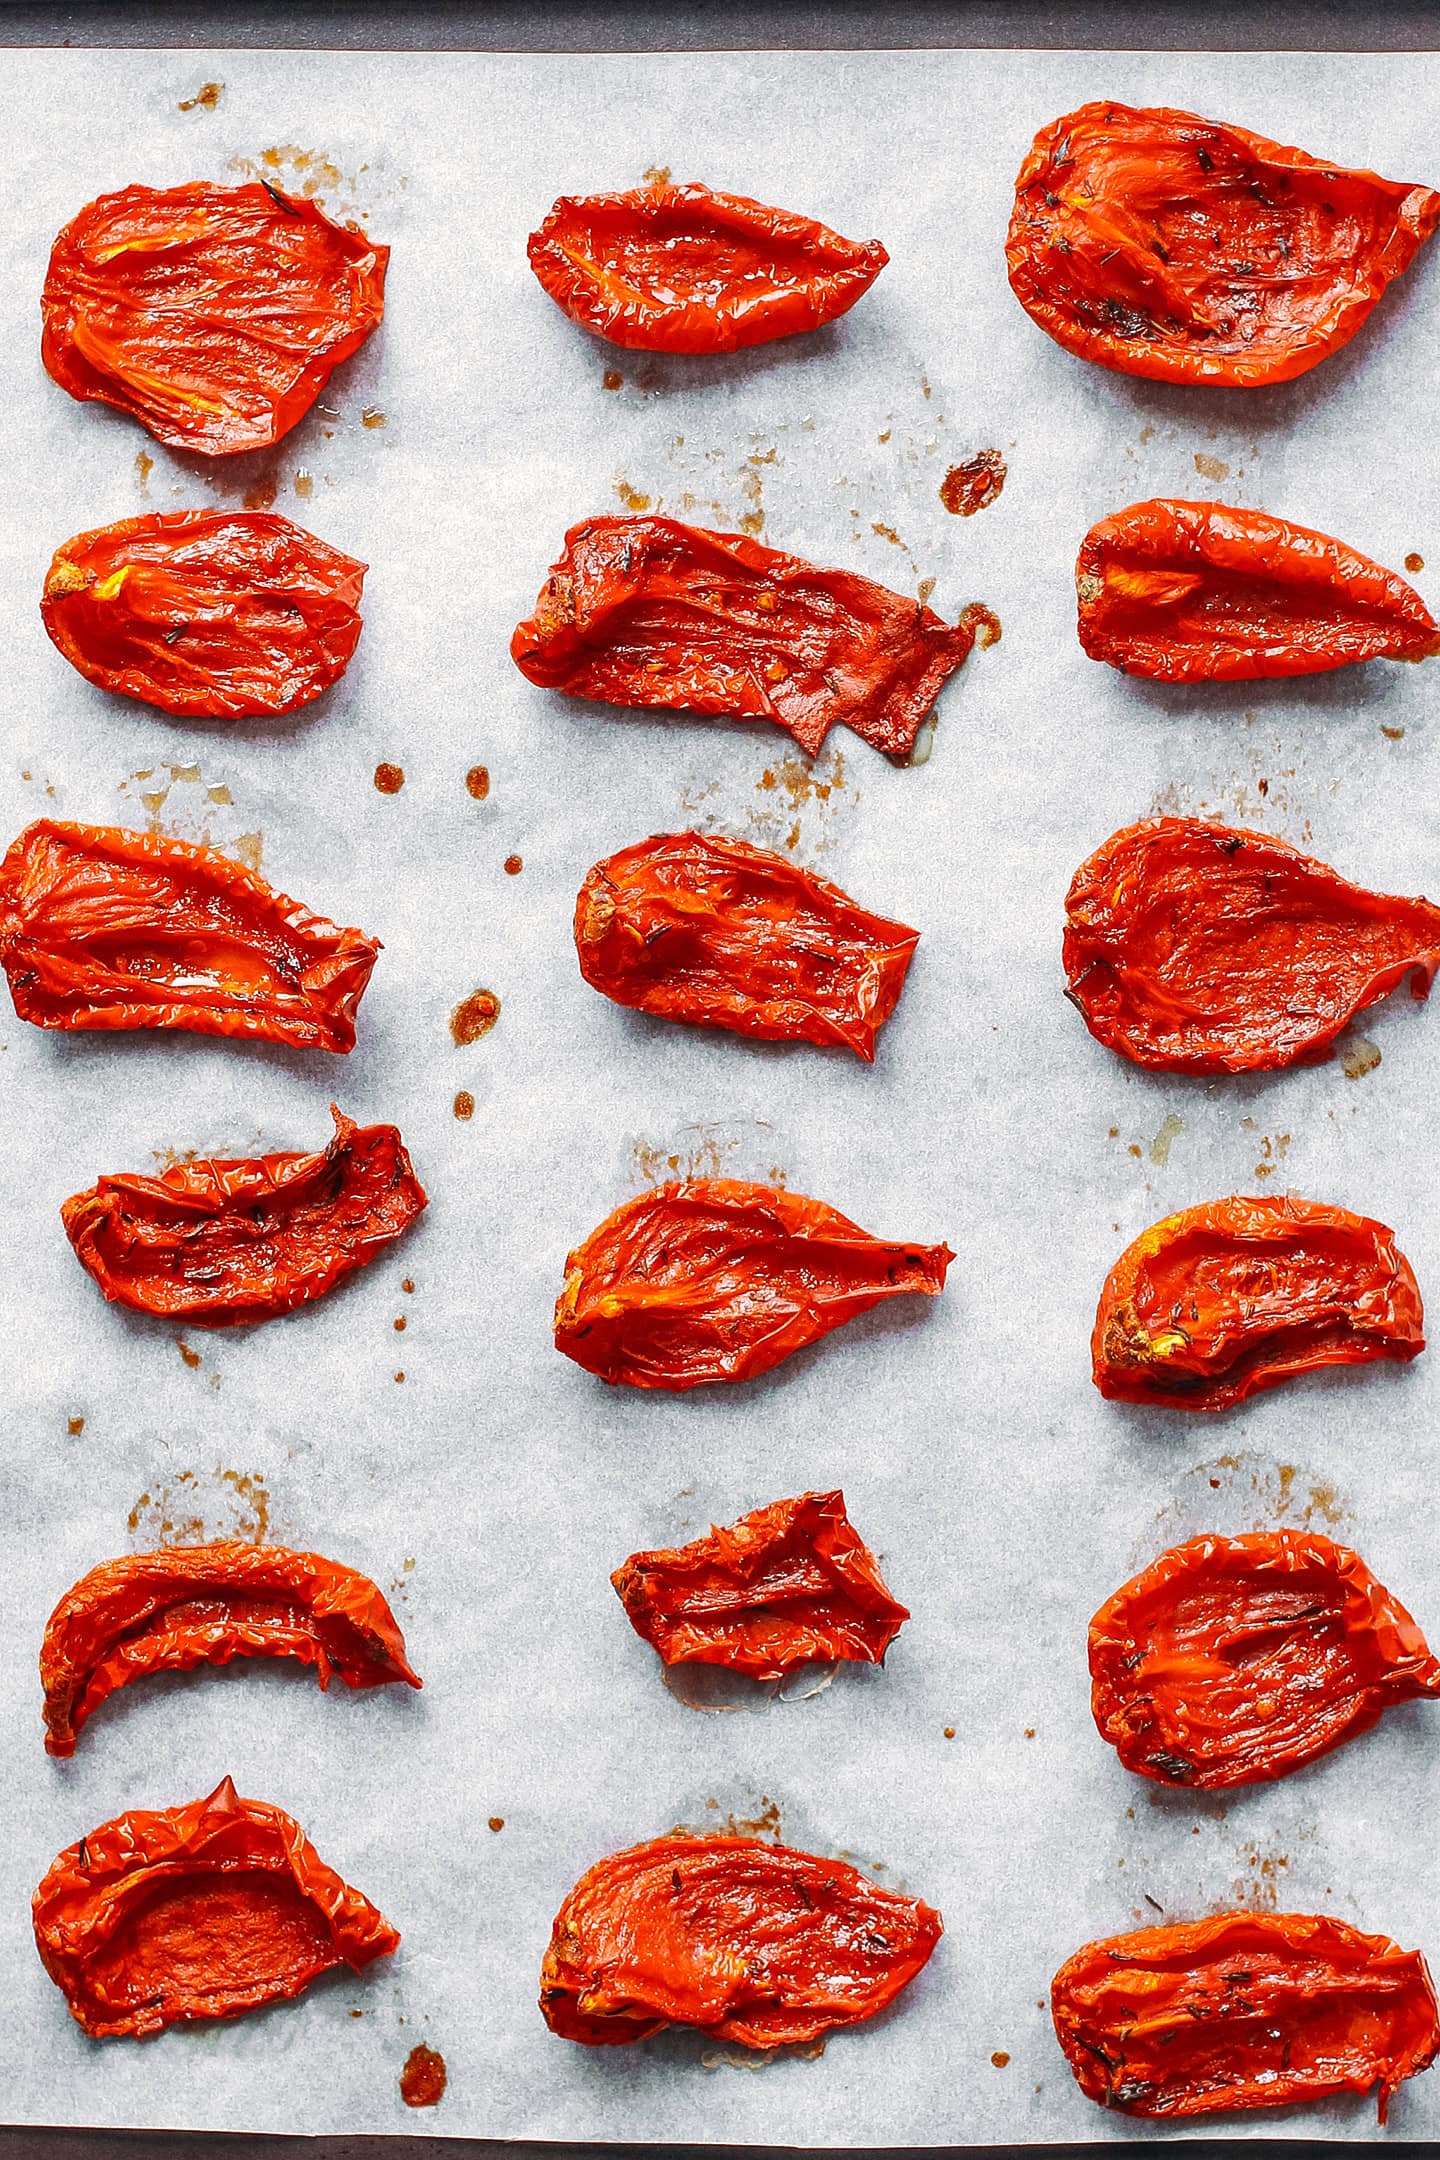
- Bake. Bake the tomatoes for 4 hours or until they have reduced in size by about half. Remove from the oven and let them cool completely.
How to store dried tomatoes
If you don’t plan to use the dried tomatoes right away (or if you have made a double batch), you can transfer them to a glass container and cover them with canola or sunflower oil. Dried tomatoes can be stored in the refrigerator for up to 6 weeks. Pat them with kitchen paper towels to remove the oil before using them.
2. Blend the cashew mixture
Once your tomatoes are ready, it’s time to prepare the cashew cream. To do so:
- Combine all of the ingredients. Place the soaked and drained cashews, dried tomatoes, nutritional yeast, garlic powder, onion powder, and two tablespoons of water in a blender.
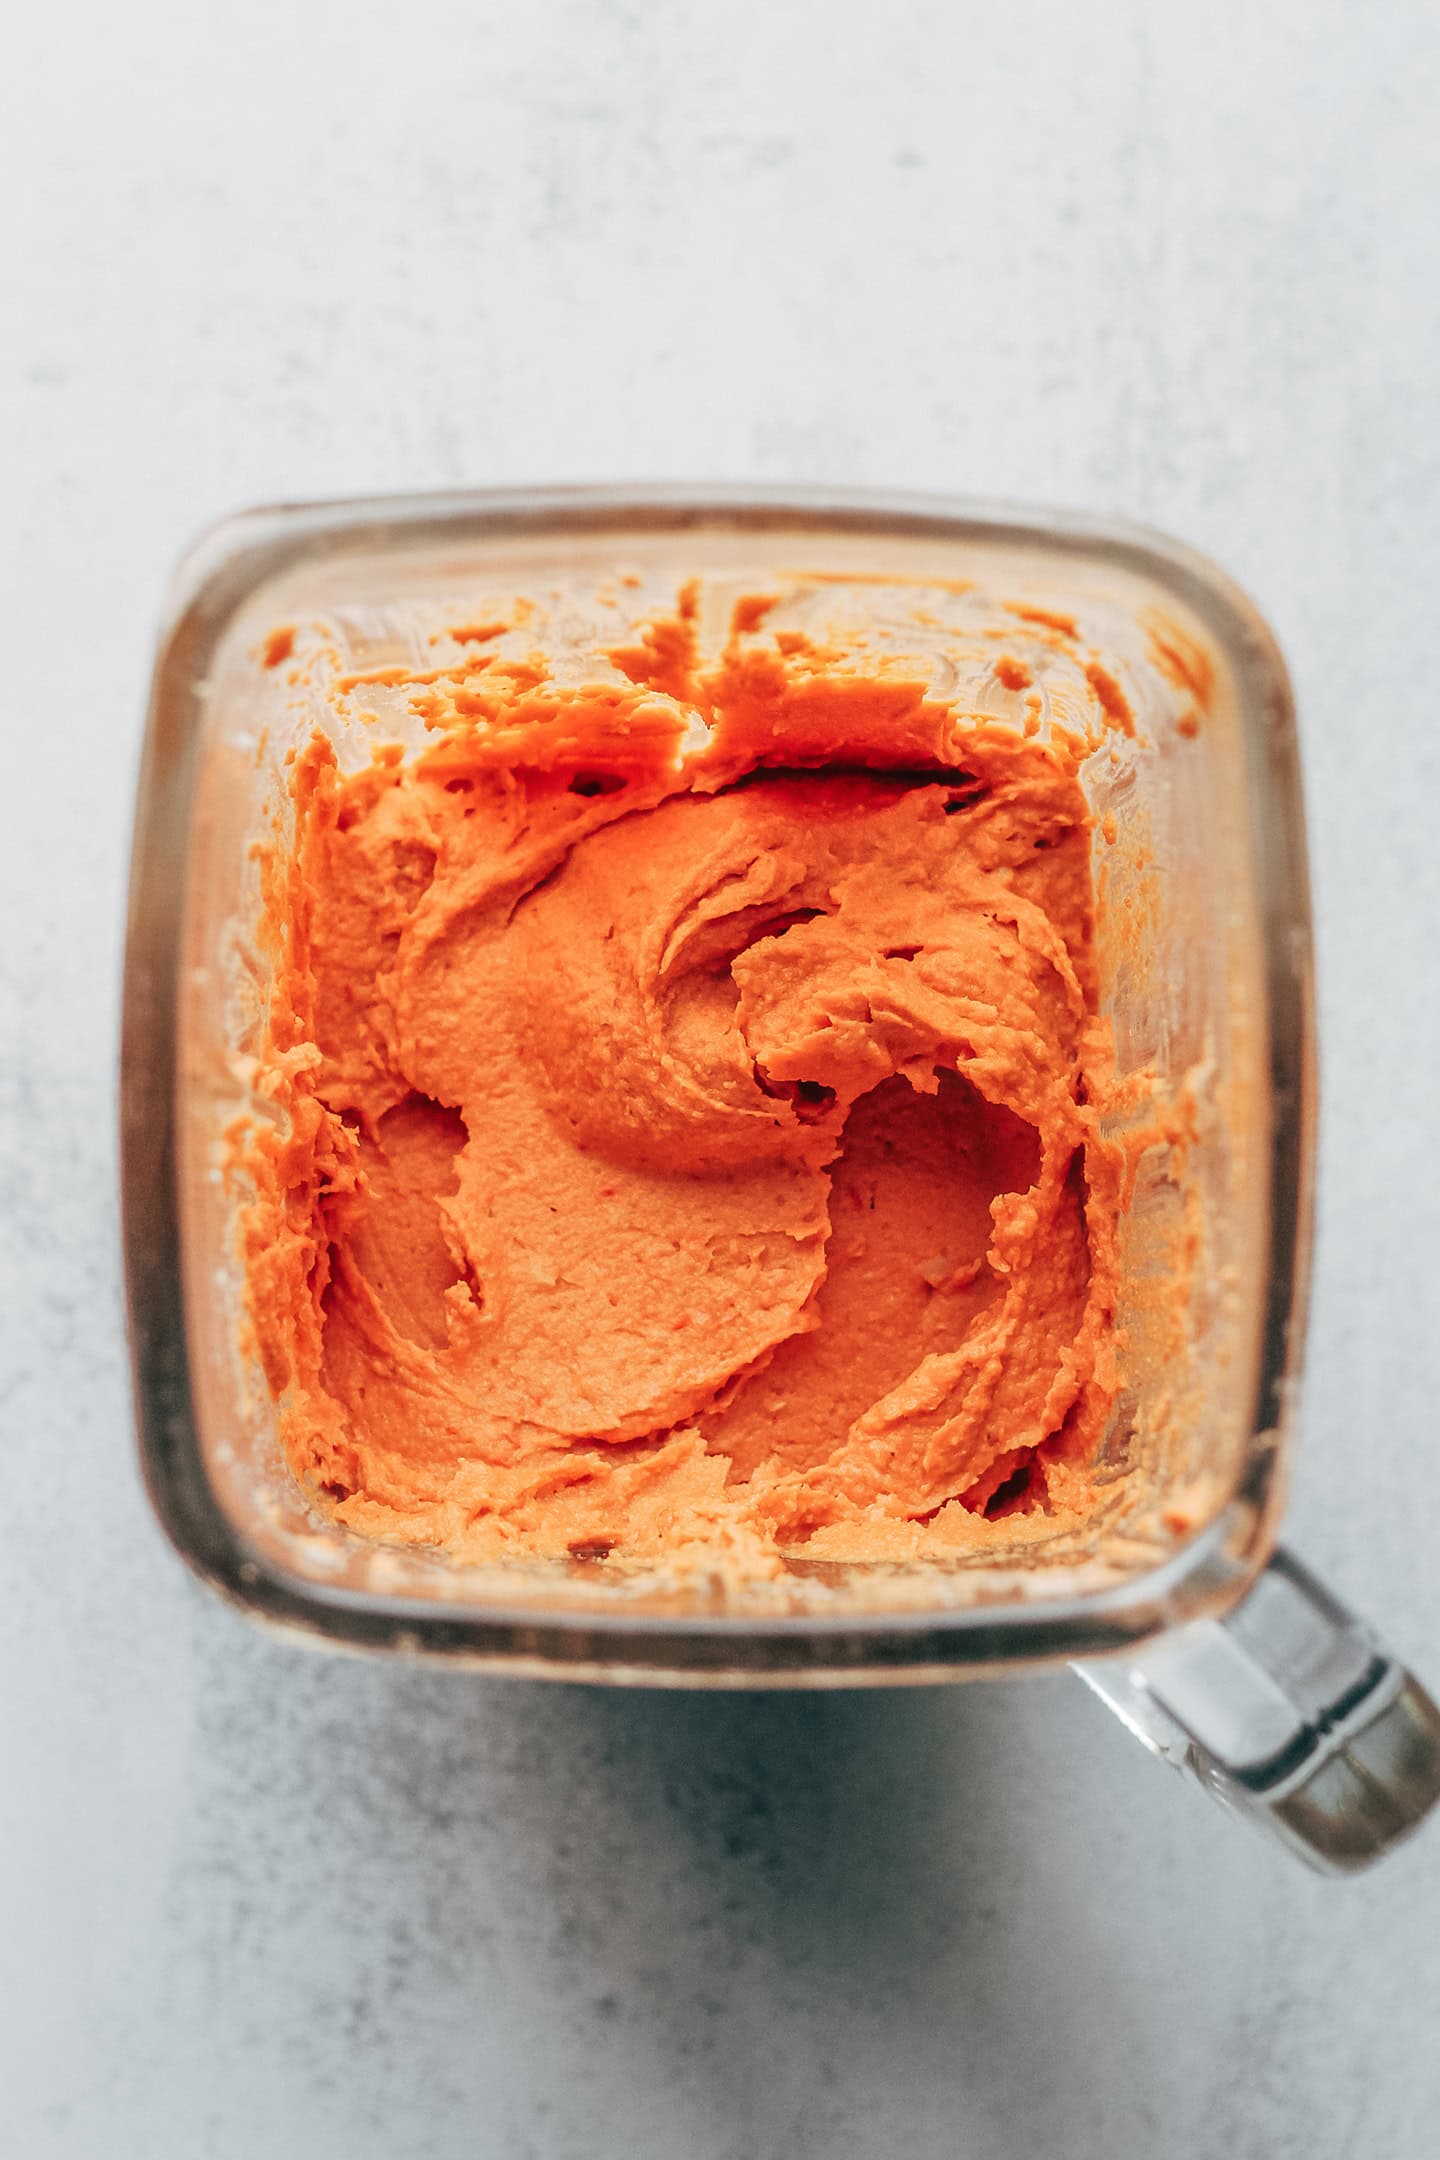
- Blend. Blend on high speed, scraping down the sides from time to time. This step might take about 10 minutes, depending on your blender. You want a very smooth yet thick texture. If needed, add 1 tablespoon of water at a time until smooth. Do not add too much water, or the cheeses will be very hard to handle during the aging step.
- Add the cultures. Open the probiotic capsules and add the powder to the bowl. You can use a mesophilic culture starter instead if you prefer (both work). Add the Penicillium Candidum as well. Blend for another few seconds.
- Transfer to a bowl. Once your mixture is smooth, transfer it to a clean bowl. At this step, you can stir in some chopped dried tomato pieces if you want more texture. Cover the bowl with plastic wrap touching the mixture – this will prevent the top from drying.
- Let it ferment. Let the cashew cream ferment at room temperature for 12-36 hours. After about 12 hours, taste the cashew cream. It should have a slightly sour taste, like fresh cream cheese. If it doesn’t and still has a strong cashew flavor, let it sit on the counter for another 12 hours.
- Chill. Once cultured, place the bowl in the refrigerator for at least 4 hours, preferably overnight. Once cold, the cashew cream will be slightly firmer and easier to work with.
3. Shape the cheeses
Now that the cashew cream cheese is ready, you can shape it into wheels. To do so:
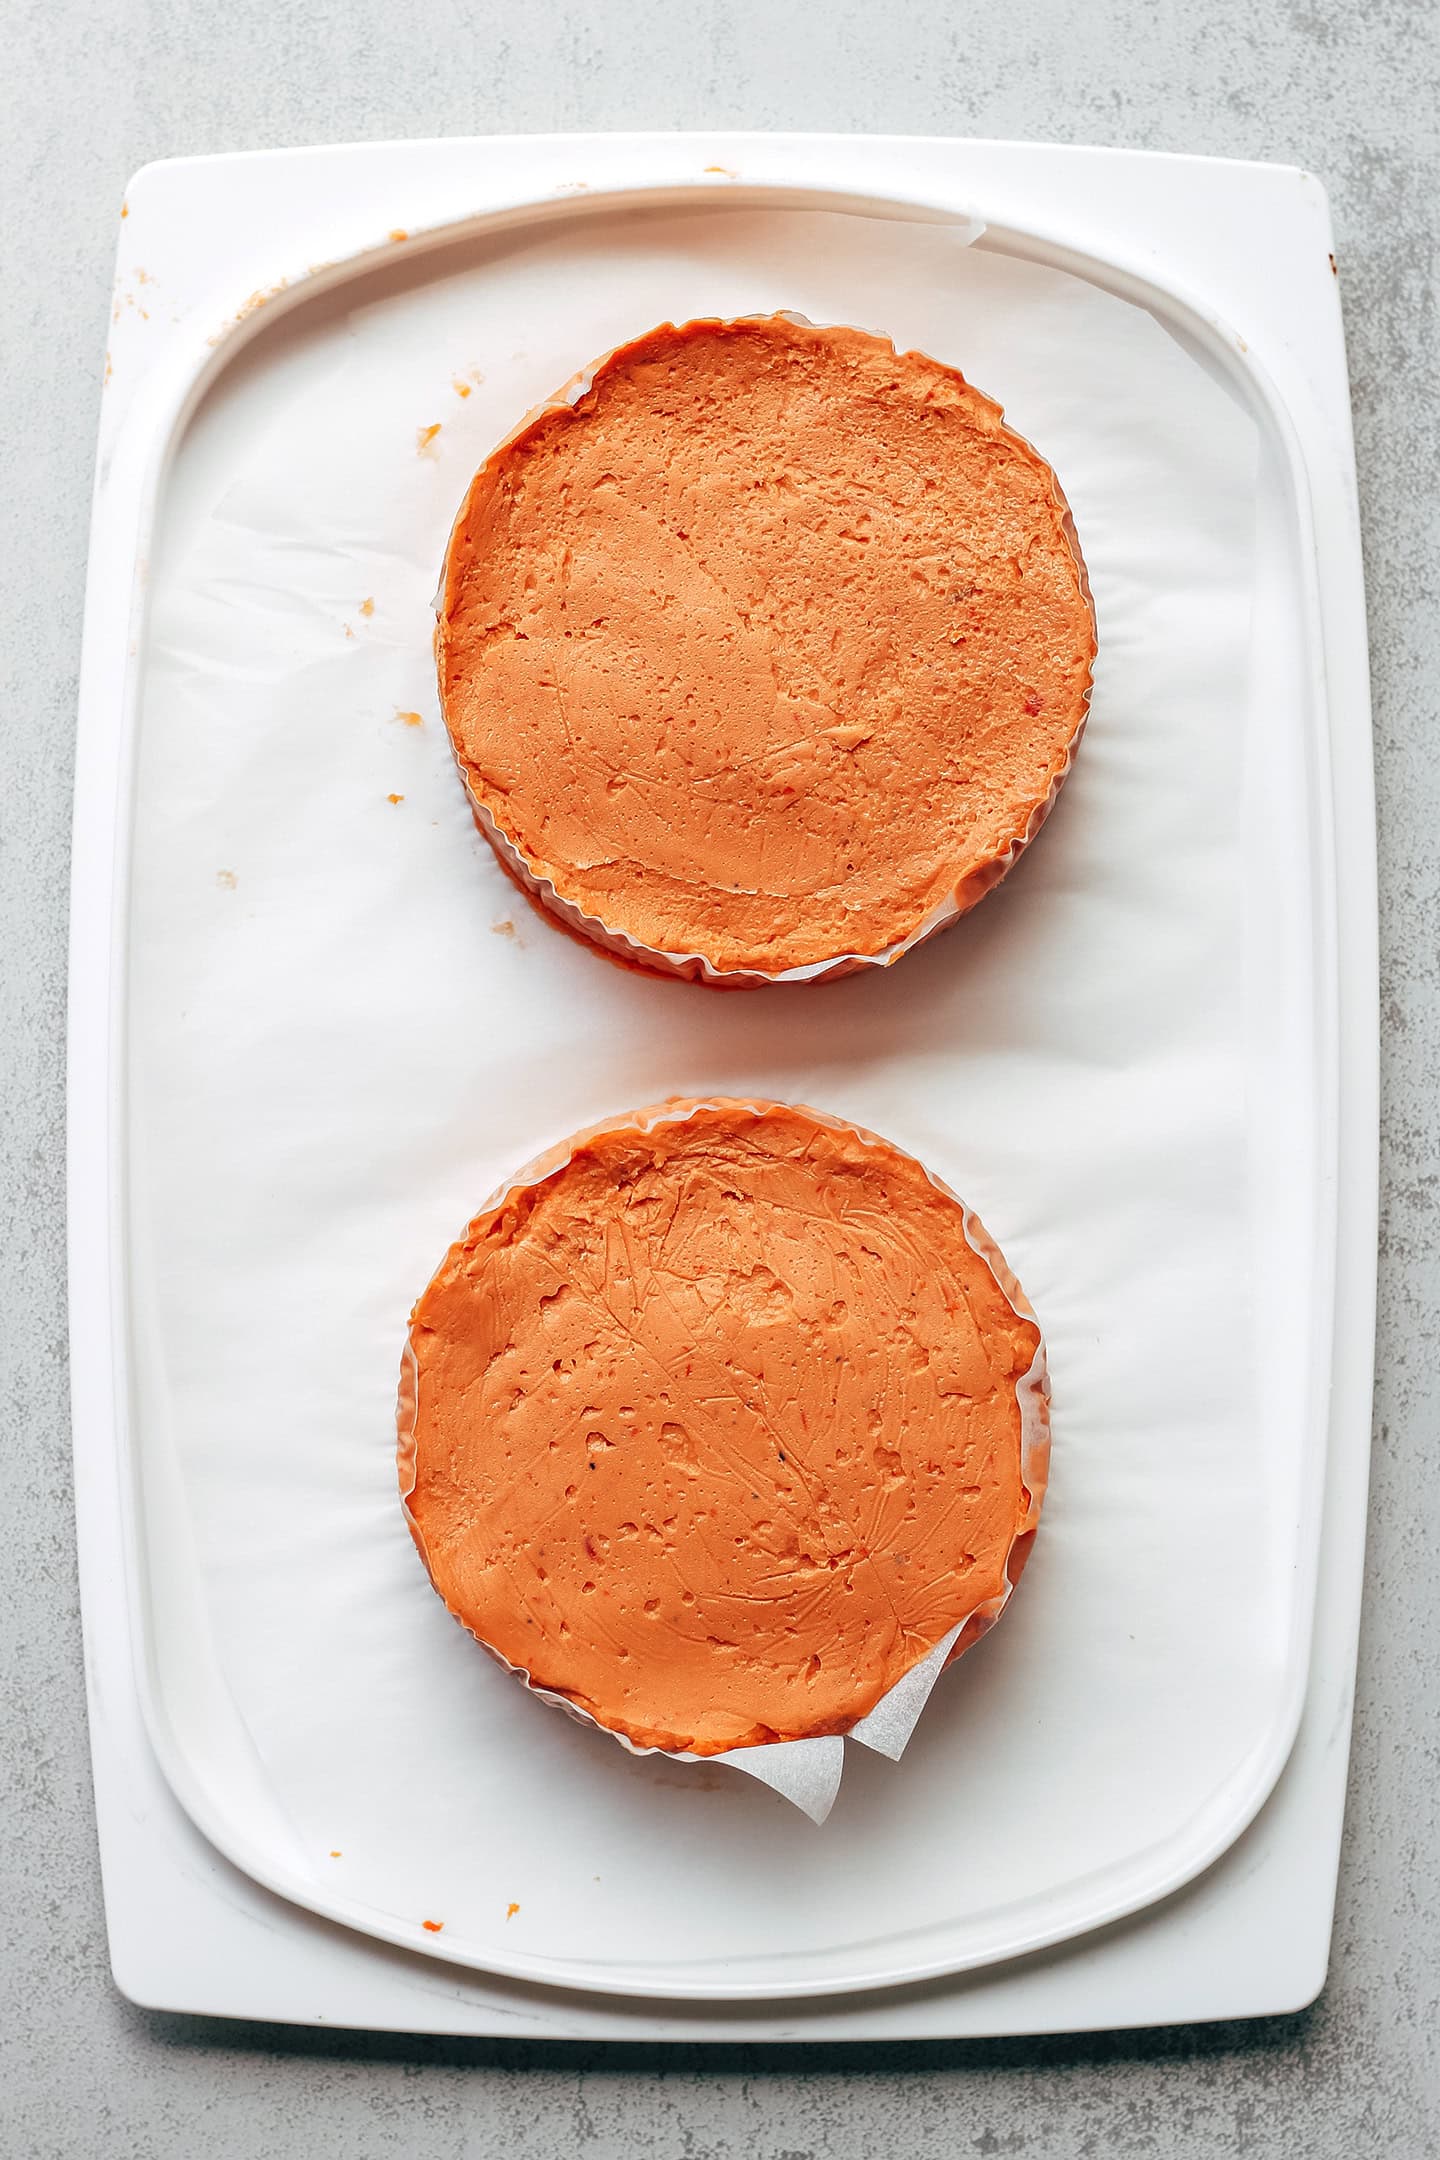
- Prepare the pans. Cut strips of parchment paper and lay them into three 4-inch (10 cm) springform pans to cover the sides and bottom. The goal is to prevent the cream cheese from touching and sticking to the metal. Alternatively, you can use food rings like these to shape the cheeses. No parchment paper? Simply use cling film.
- Fill pans with the cream cheese. Fill the pans with the cashew cream and press it down using plastic film so it doesn’t stick to your hands. Try to make the top as flat as possible (it will result in a nicer shape).
- Refrigerate. Cover each springform pan with plastic wrap touching the cream cheese, and refrigerate overnight.
4. Age them
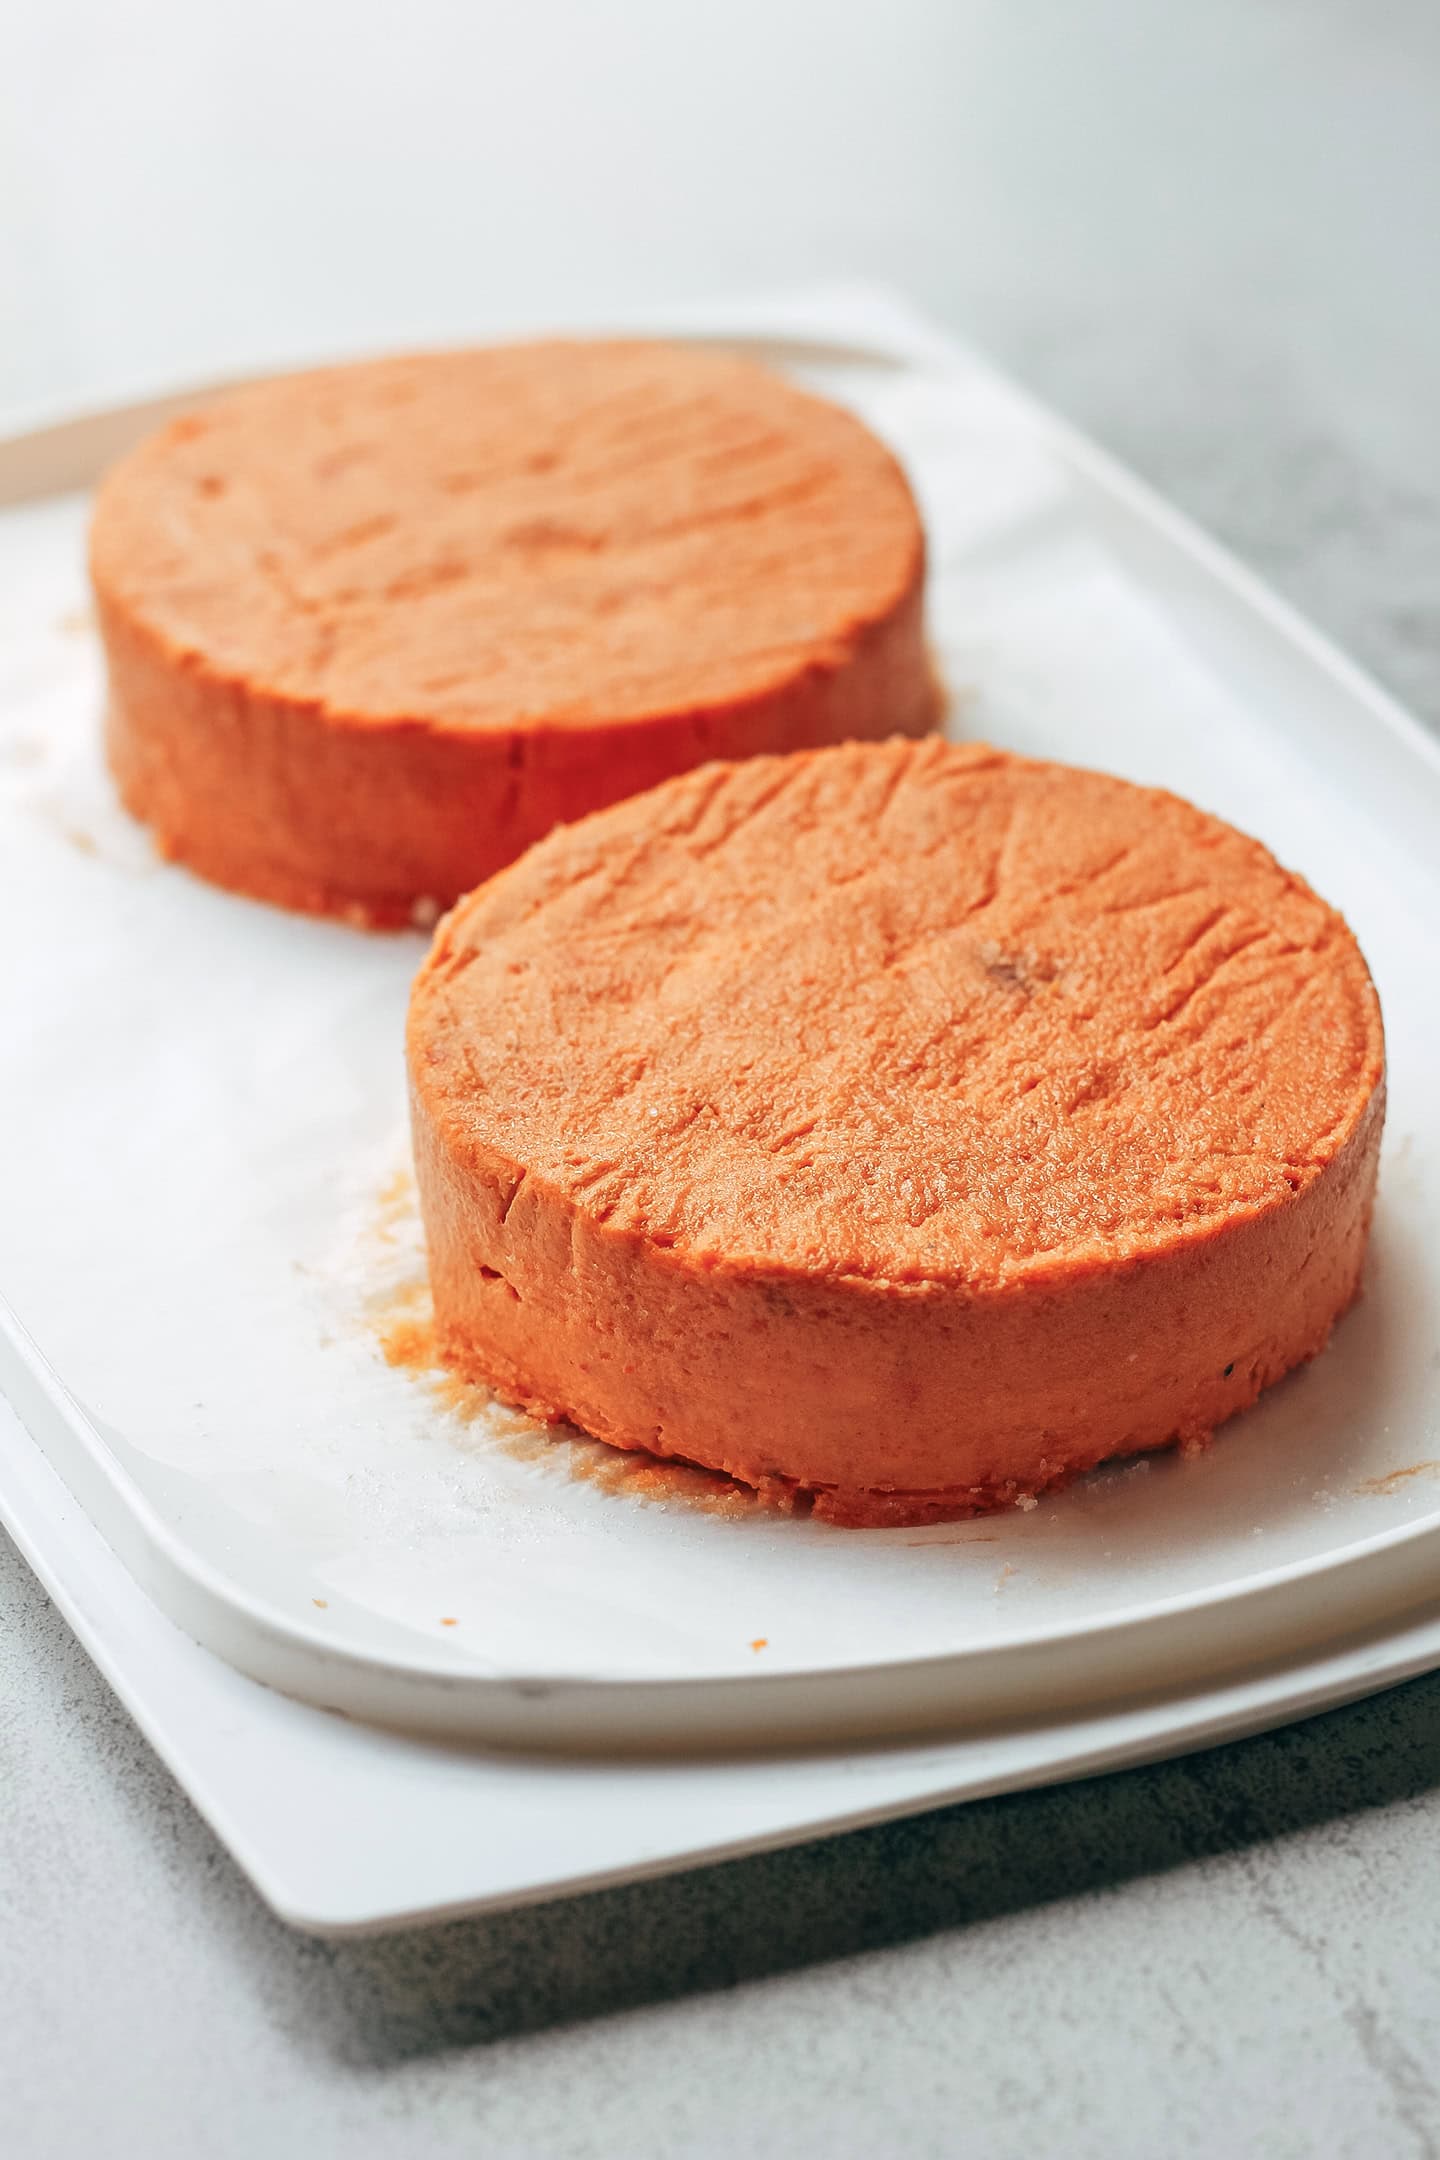
- Salt the cheeses. Line a deep container with parchment paper. Carefully remove the wheels of cheese from the springform pans and place them inside the container. Sprinkle about 1/4 tsp of salt over the top of each cheese, flip them, and sprinkle another 1/4 tsp on the other sides. Rub with your finger to distribute the salt evenly on each face and on the sides. Close the container containing the cheeses and place it in the refrigerator.
Regarding the aging temperature
This recipe can be made in a regular fridge, but you will have to increase the temperature slightly. Penicillium Candidum, which is the mold responsible for the white rind, grows faster and better at slightly higher temperatures. I recommend a minimum of 45°F (7°C) and a maximum of 57°F (14°C) to age your cheeses.
- Flip the cheeses. Every day for the next 3 days, carefully flip the cheeses. In the beginning, the cheeses will still be very soft, like cream cheese, which makes them a bit difficult to handle. Don’t worry, they will be easier to work with after a few days. Always place the container back inside the refrigerator after flipping the cheeses.
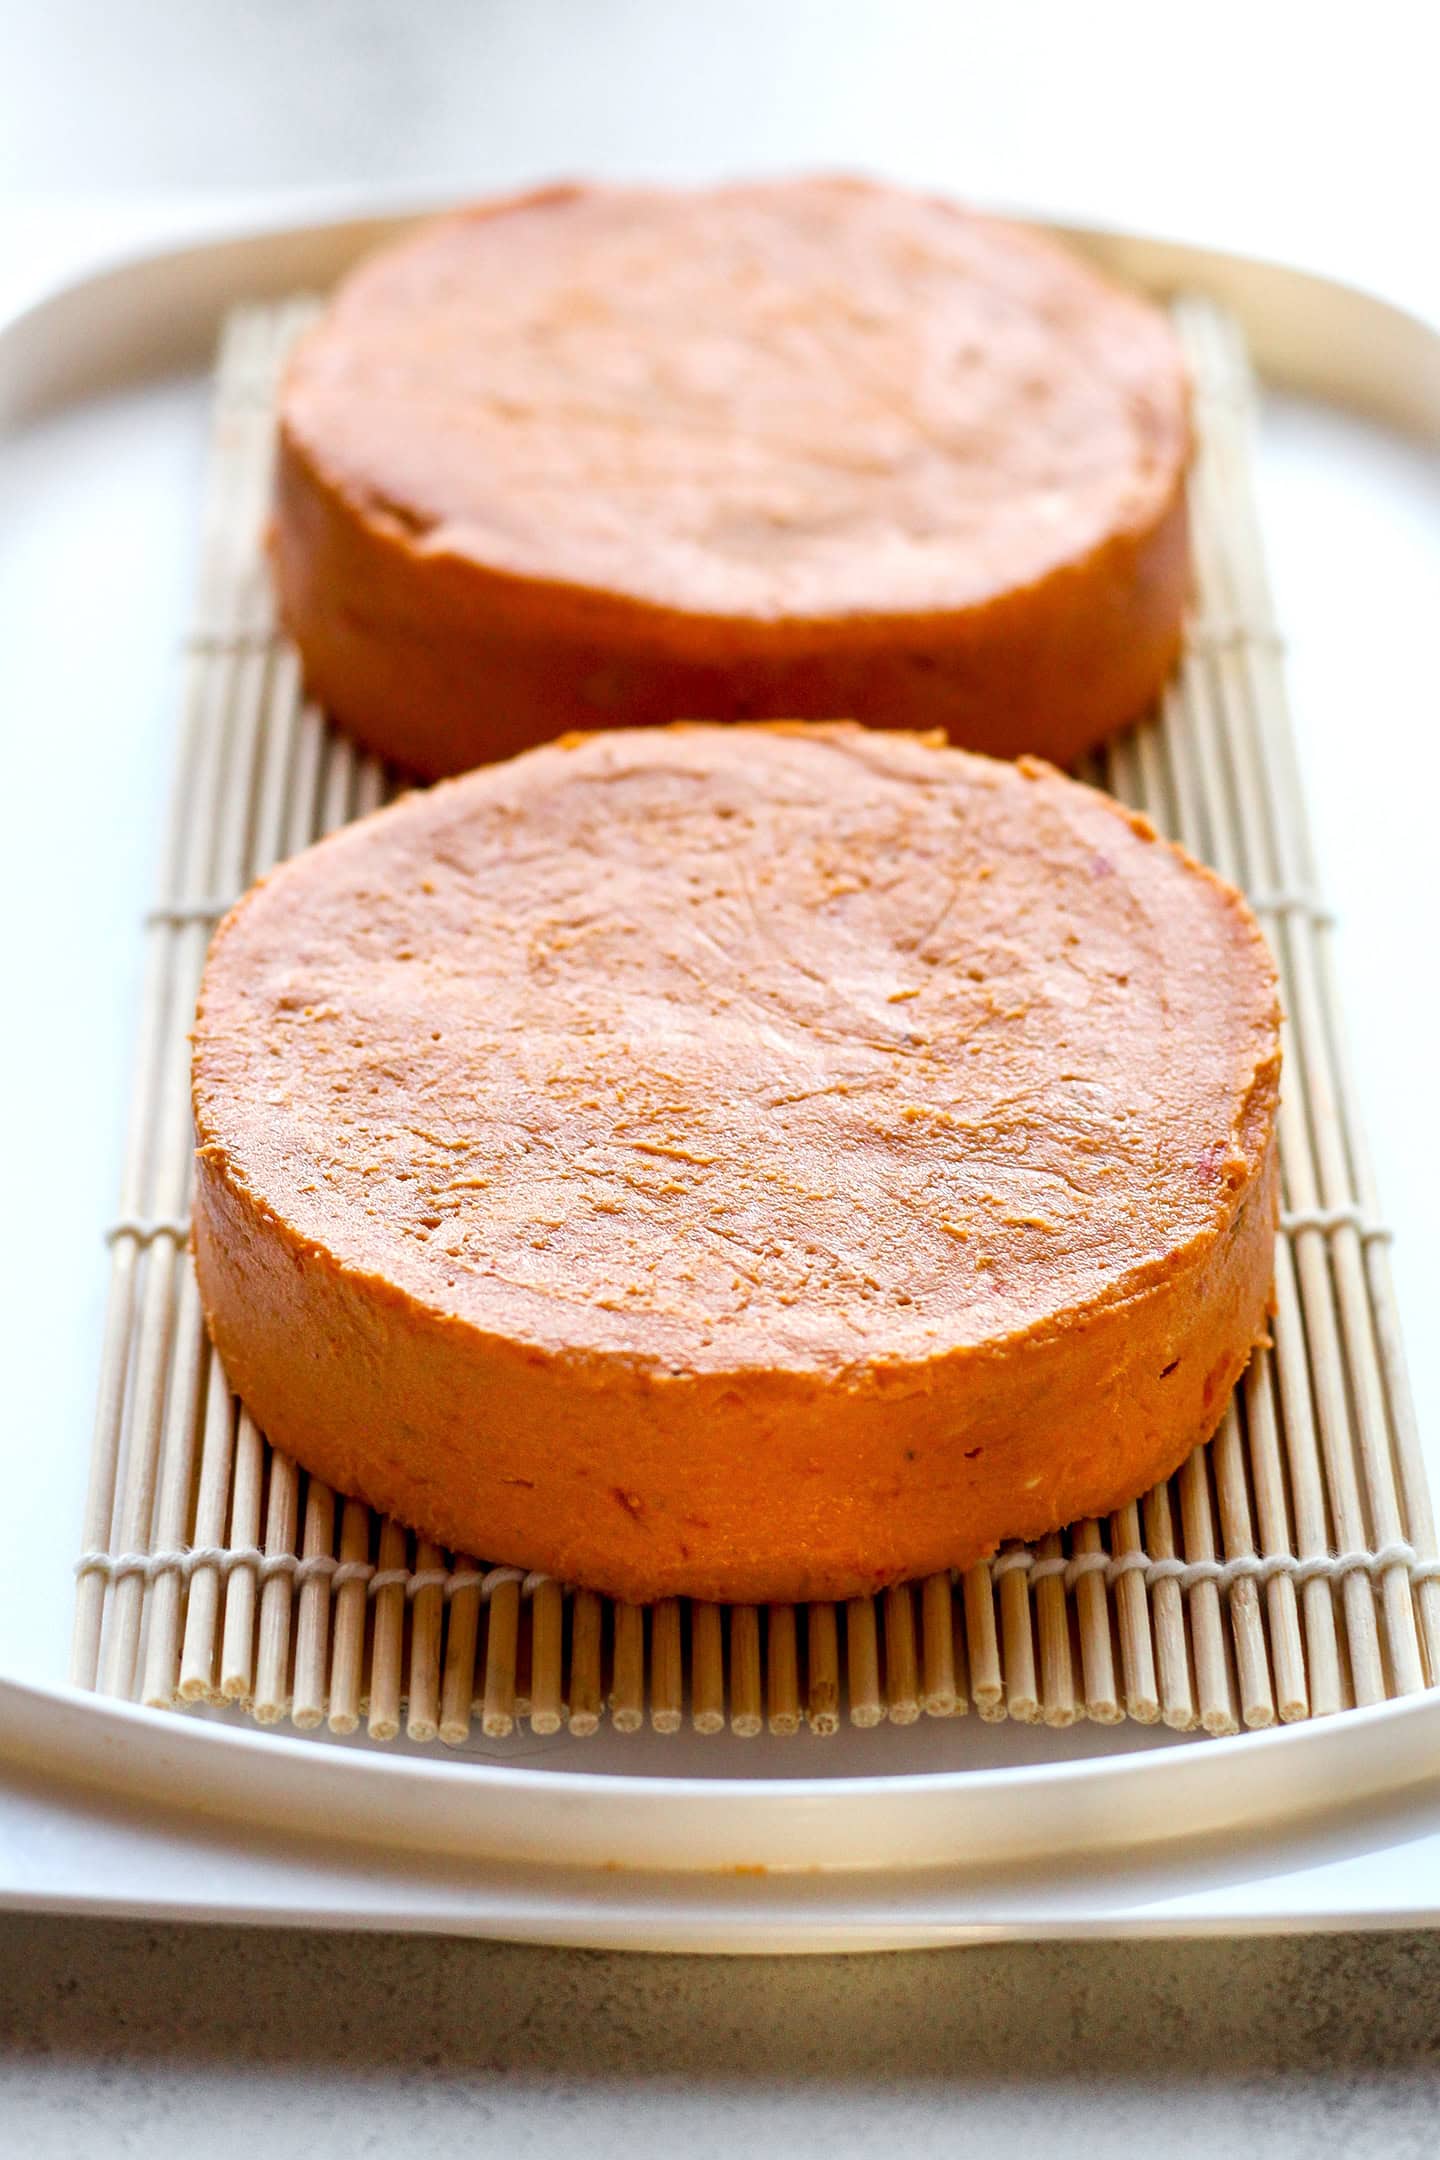
- Age them. Continue to flip the cheeses every day for the next two weeks, leaving them in the container inside the refrigerator all the time. Always use clean hands or work with plastic film to ensure you are not touching the cheeses. The mold will start to appear on days 8-10, depending on the humidity and temperature of your fridge. Once the mold has started to appear, you can transfer the cheeses to a plastic grid or bamboo mat or put them on top of chopsticks to allow the mold to grow better (still leaving them in the refrigerator, covered). After another week or so, the cheeses should be fully covered with white mold!
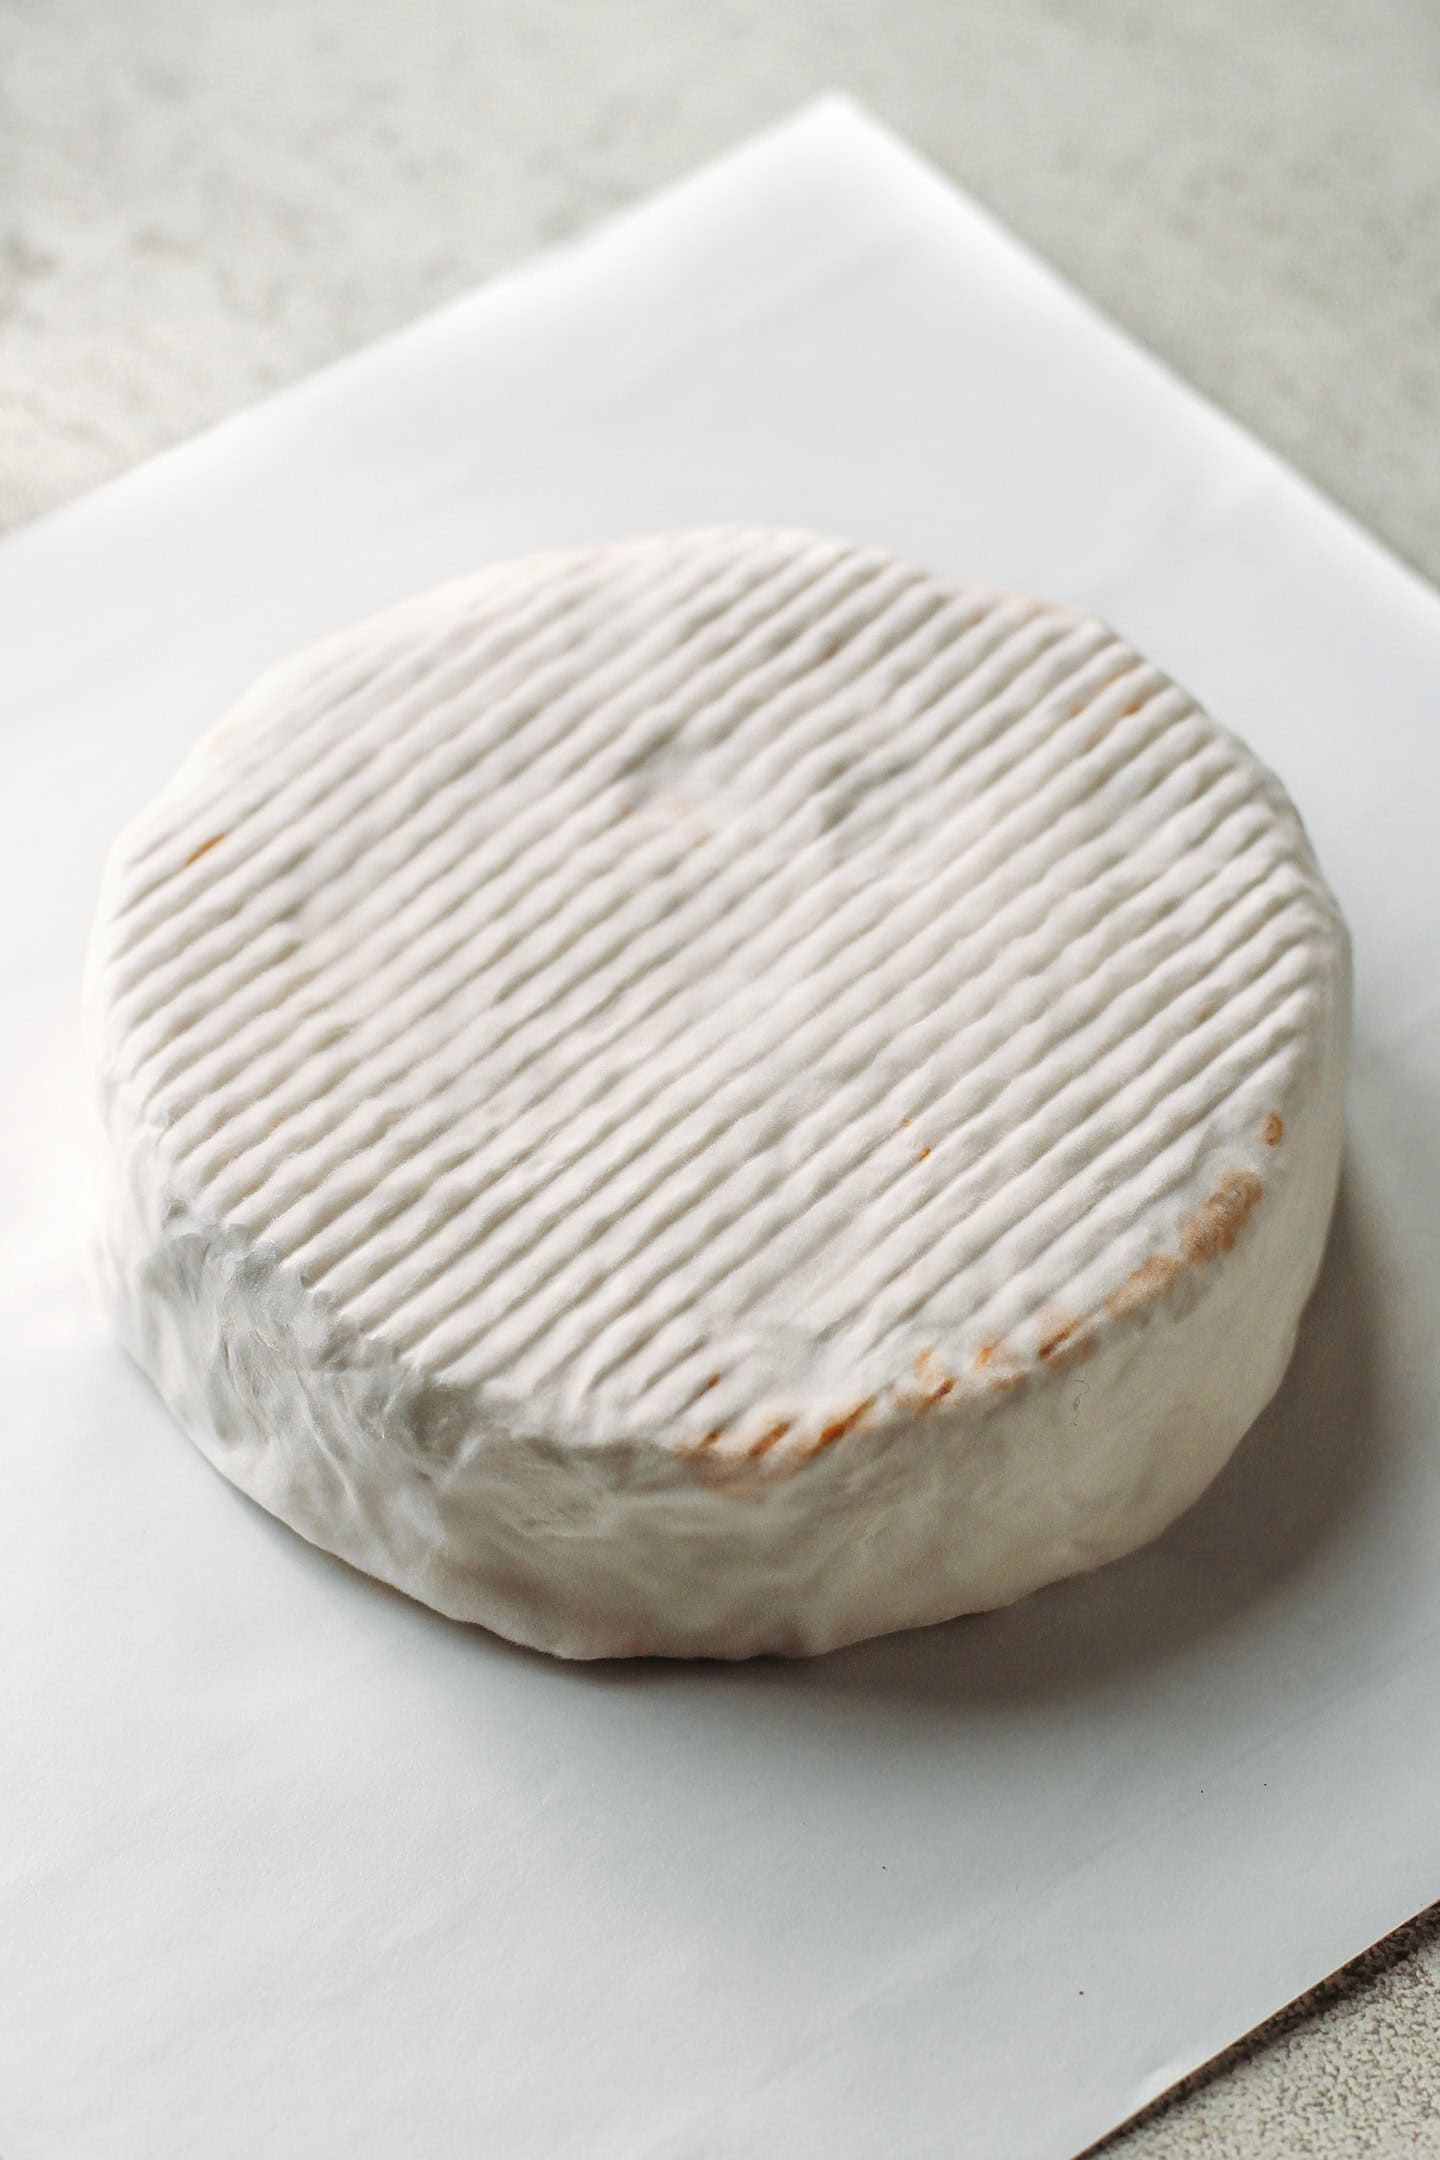
- Wrap them. Once the cheeses are completely coated with a layer of white mold, wrap them in parchment paper or cheese paper and place them in the refrigerator for at least 5 days. The longer you let them age in the refrigerator, the stronger the taste. They are then ready to be enjoyed!

📔 Tips
Use clean tools and utensils.
Hygiene is extremely important in cheese making. The cleaner your tools and utensils are, the better your chances of not seeing bad mold. One more thing: to increase your chances of success, I highly recommend using gloves while handling the cheeses.
Keep the cheeses covered.
You should always keep the cheeses inside a container or covered with a bowl or glass container. By covering the cheeses, you keep enough moisture to allow the white mold to grow. If you don’t cover the cheeses, the exterior will dry too quickly, and the mold will never appear.
🥖 What to Serve It With
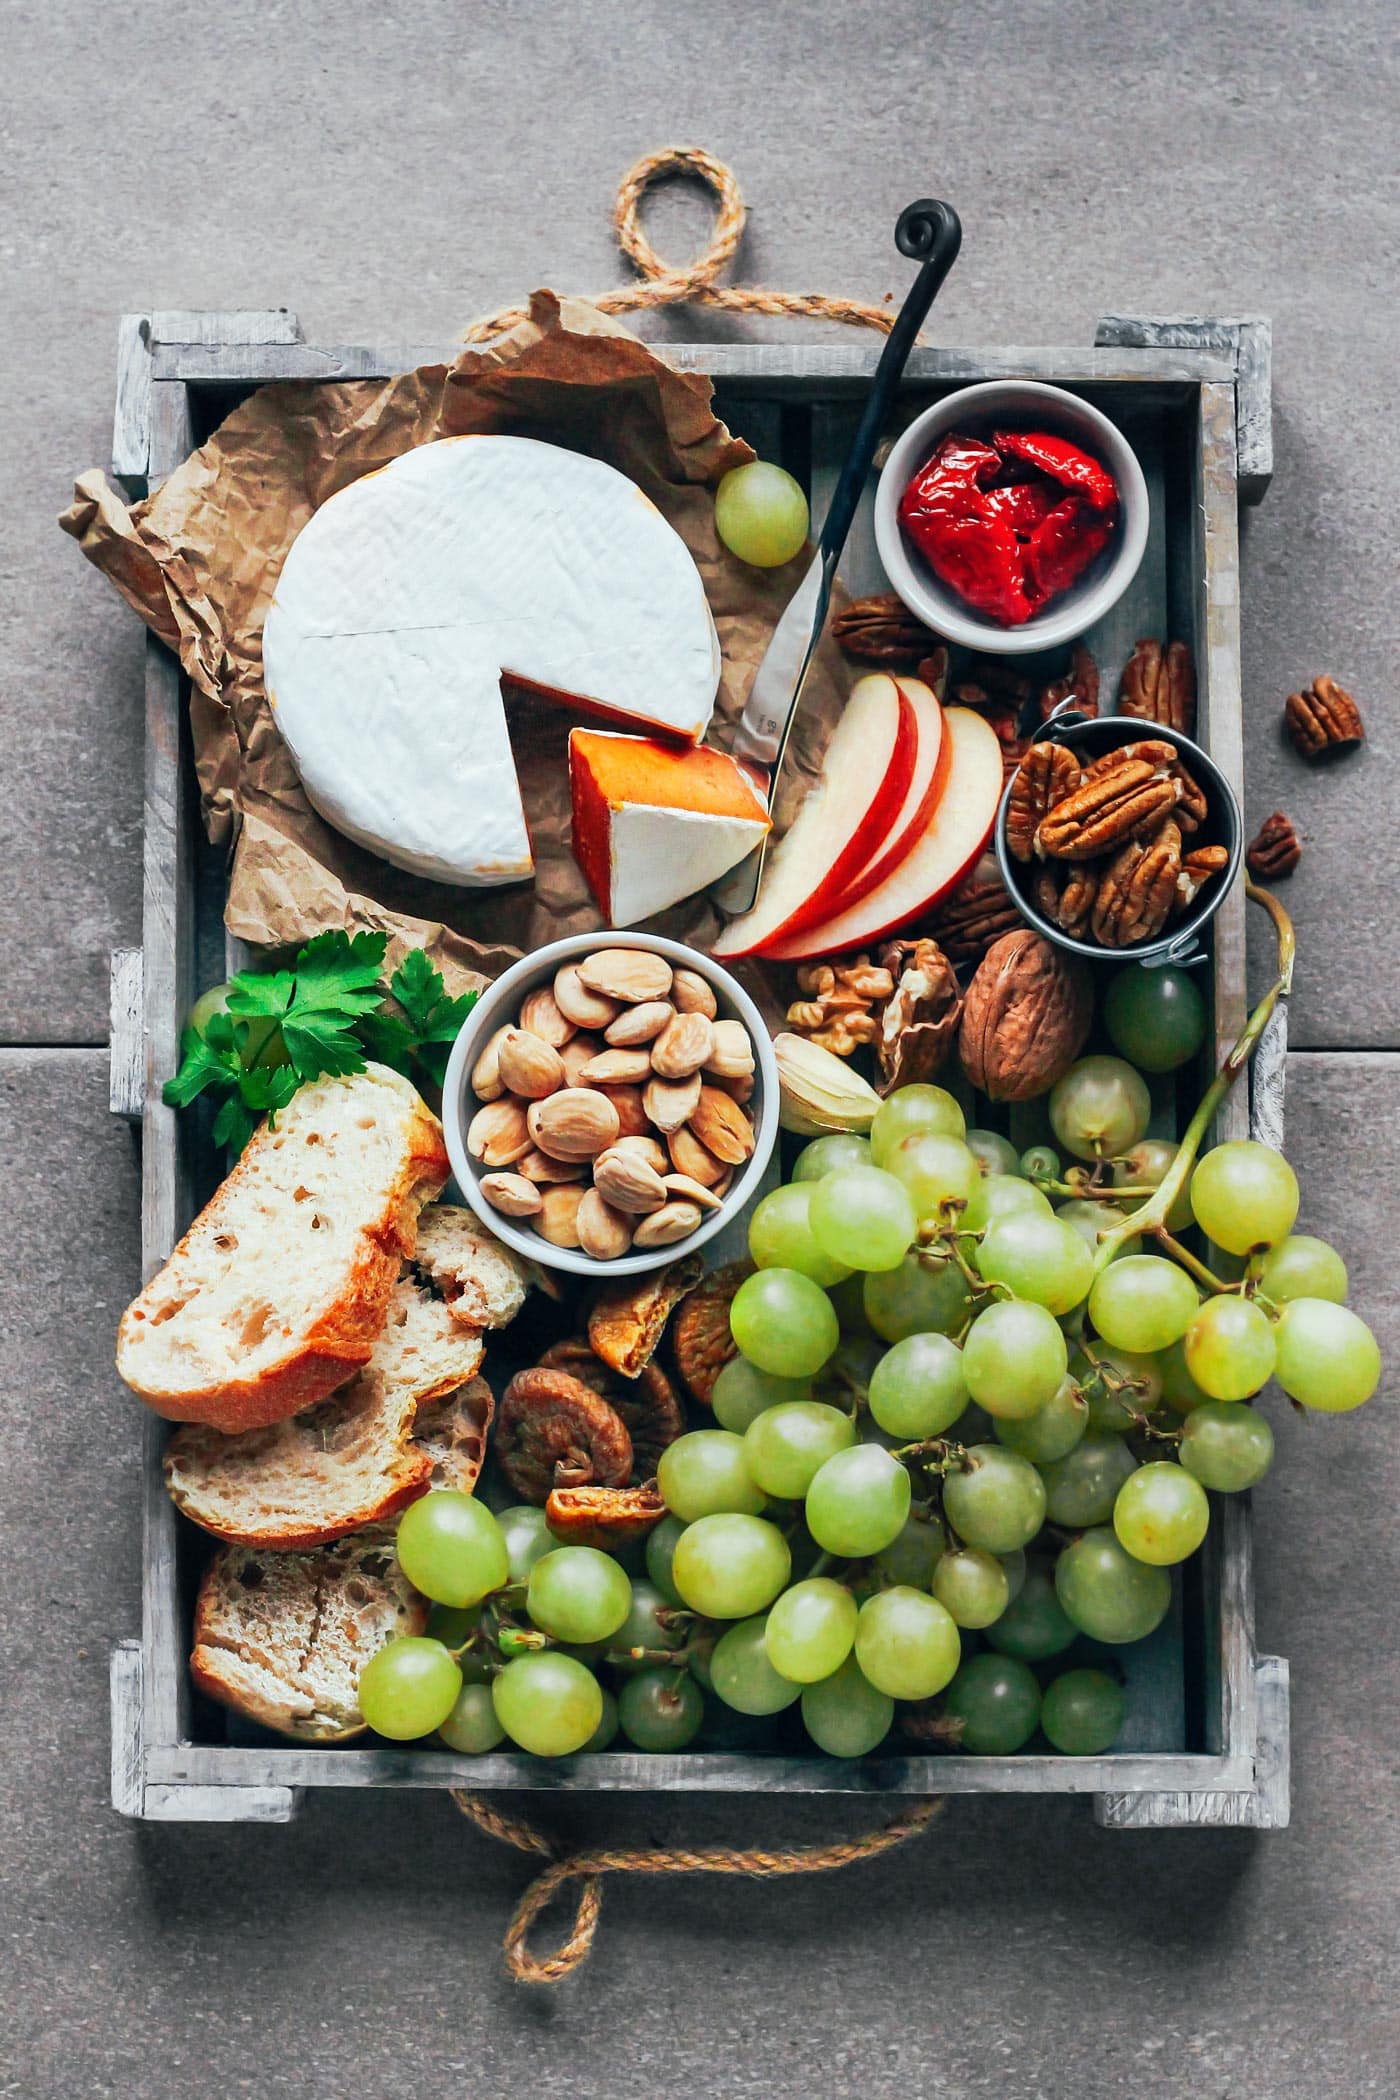
You can enjoy this dried tomato camembert in the most simple way, or should I say the French way, with baguette and a glass of wine – or serve it on a cheese platter with nuts, crackers, grapes, and dried fruits!
It can also be blended with some vegan cream to make a luscious pasta sauce or diced into chunks to incorporate into casseroles!
❄️ Storing and Freezing
- To store: You can store this cheese for up to 1 month after the aging process.
- To freeze: Wrap it with plastic wrap and freeze for up to 3 months. Thaw overnight in the refrigerator.
💬 FAQ
Probiotics and Penicillium Candidum are essential to this recipe. They cannot be omitted.
I do not advise trying to age the cheeses at room temperature as bad mold would grow, and your cheeses would turn bad.
Sure! Don’t stress it if you are away and can’t flip the cheeses for 2-3 days. It’s completely fine.
You should scrape off the bad mold using a sharp knife and add a pinch of salt to the area you scraped. If there is really too much bad mold, then your only option is to start again and ensure your utensils and container are as clean as possible.
Whether you’re just starting out with vegan cheese making or have been at it for years, you’re going to love this recipe! This vegan tomato camembert is a fun project to do during the holidays, and the result will surely wow your guests!
🧀 More Vegan Cheese Recipes




⭐️ Did you like this recipe? Let us know in the comments below, and tag us on Facebook, Instagram, or Pinterest!
Note: This recipe was first released in November 2017 and updated with new process shots and detailed instructions in November 2024.

Save this recipe!
Enter your email below and I’ll send it to your inbox!
Plus, you will receive new recipes every week!
Vegan Sun-Dried Tomato Camembert
Ingredients
Dried Tomatoes
- 10 fresh large tomatoes
- 1 tbsp olive oil
- 1/4 tsp thyme
- 1/4 tsp oregano
- 1/8 tsp salt
Camembert
- 4 cups raw cashews soaked overnight
- 3/4 cup packed dried tomatoes (drained if stored in oil)
- 1 tbsp nutritional yeast
- 1 and 1/2 tsp garlic powder
- 1 tsp onion powder
- 5 tbsp water
- 6 capsules acidophilus or 1/8 tsp mesophilic culture
- 1/16 tsp penicillium candidum
- salt for salting the cheeses
- optional: 1/4 cup chopped dried tomatoes to incorporate into the cream cheese
Instructions
Dry the tomatoes
- Preheat the oven. Start by preheating your oven to 200°F (94°C). Line a baking sheet with parchment paper and set aside.
- Prepare the tomatoes. Rinse the tomatoes under cold water and pat them dry using kitchen paper towels. Cut the tomatoes into quarters and remove the core. Scoop out the seeds and pulp and discard them.
- Season them. Transfer the quartered tomatoes to a mixing bowl. Add the olive oil, thyme, oregano, and salt. Toss to coat.
- Transfer to a baking dish. Arrange the tomatoes on the baking sheet, cut-side up. Make sure to leave space between each one. You don’t want them to touch each other. Note: Depending on the size of your oven, you might have to use two baking sheets.
- Bake. Bake the tomatoes for 4 hours or until they have reduced in size by about half. Remove from the oven and let them cool completely.
- Note: If you don’t plan to use the dried tomatoes right away (or if you have made a double batch), you can transfer them to a glass container and cover them with canola or sunflower oil. Dried tomatoes can be stored in the refrigerator for up to 6 weeks. Pat them with kitchen paper towels to remove the oil before using them.
Blend the cashew mixture
- Optional: Drain the soaked cashews and place them in a large glass bowl. Bring a large pot of water to a boil. Pour the boiling water over the cashews and allow them to sit for 1-2 minutes before draining them again and letting them cool down. This extra step will kill possible harmful bacteria.
- Combine all of the ingredients. Place the soaked and drained cashews, dried tomatoes, nutritional yeast, garlic powder, onion powder, and two tablespoons of water in a blender.
- Blend. Blend on high speed, scraping down the sides from time to time. This step might take about 10 minutes, depending on your blender. You want a very smooth yet thick texture. If needed, add 1 tablespoon of water at a time until smooth. Do not add too much water, or the cheeses will be very hard to handle during the aging step.
- Add the cultures. Open the probiotic capsules and add the powder to the bowl. You can use a mesophilic culture starter instead if you prefer (both work). Add the Penicillium Candidum as well. Blend for another few seconds.
- Transfer to a bowl. Once your mixture is smooth, transfer it to a clean bowl. At this step, you can stir in some chopped dried tomato pieces if you want more texture. Cover the bowl with plastic wrap touching the mixture – this will prevent the top from drying.
- Let it ferment. Let the cashew cream ferment at room temperature for 12-36 hours. After about 12 hours, taste the cashew cream. It should have a slightly sour taste, like fresh cream cheese. If it doesn’t and still has a strong cashew flavor, let it sit on the counter for another 12 hours.
- Chill. Once cultured, place the bowl in the refrigerator for at least 4 hours, preferably overnight. Once cold, the cashew cream will be slightly firmer and easier to work with.
Shape the cheeses
- Prepare the pans. Cut strips of parchment paper and lay them into three 4-inch (10 cm) springform pans to cover the sides and bottom. The goal is to prevent the cream cheese from touching and sticking to the metal. Alternatively, you can use food rings like these to shape the cheeses. No parchment paper? Simply use cling film.
- Fill pans with the cream cheese. Fill the pans with the cashew cream and press it down using plastic film so it doesn’t stick to your hands. Try to make the top as flat as possible (it will result in a nicer shape).
- Refrigerate. Cover each springform pan with plastic wrap touching the cream cheese, and refrigerate overnight.
Age them
- Salt the cheeses. Line a deep container with parchment paper. Carefully remove the wheels of cheese from the springform pans and place them inside the container. Sprinkle about 1/4 tsp of salt over the top of each cheese, flip them, and sprinkle another 1/4 tsp on the other sides. Rub with your finger to distribute the salt evenly on each face and on the sides. Close the container containing the cheeses and place it in the refrigerator.
- Flip the cheeses. Every day for the next 3 days, carefully flip the cheeses. In the beginning, the cheeses will still be very soft, like cream cheese, which makes them a bit difficult to handle. Don’t worry, they will be easier to work with after a few days. Always place the container back inside the refrigerator after flipping the cheeses.
- Age them. Continue to flip the cheeses every day for the next two weeks, leaving them in the container inside the refrigerator all the time. Always use clean hands or work with plastic film to ensure you are not touching the cheeses. The mold will start to appear on days 8-10, depending on the humidity and temperature of your fridge. Once the mold has started to appear, you can transfer the cheeses to a plastic grid or bamboo mat or put them on top of chopsticks to allow the mold to grow better (still leaving them in the refrigerator, covered). After another week or so, the cheeses should be fully covered with white mold!
- Wrap them. Once the cheeses are completely coated with a layer of white mold, wrap them in parchment paper or cheese paper and place them in the refrigerator for at least 5 days. The longer you let them age in the refrigerator, the stronger the taste. They are then ready to be enjoyed!
- Enjoy with bread, crackers, pesto, nuts, or even jam. You can store the cheeses for up to 1 month after the aging process.
Notes
Use clean tools and utensils.
Hygiene is extremely important in cheese making. The cleaner your tools and utensils are, the better your chances of not seeing bad mold. One more thing: to increase your chances of success, I highly recommend using gloves while handling the cheeses.Keep the cheeses covered.
You should always keep the cheeses inside a container or covered with a bowl or glass container. By covering the cheeses, you keep enough moisture to allow the white mold to grow. If you don’t cover the cheeses, the exterior will dry too quickly, and the mold will never appear. Note: Nutritional information is an estimate.Nutrition

About the Author
Thomas Pagot is the founder, photographer, and recipe developer behind Full of Plants. He created the blog in 2016 as a personal cookbook for vegan recipes. Through years of recipe development, Thomas has successfully grown Full of Plants into a trusted resource for plant-based recipes.
Leave a Comment