
This post may contain affiliate links. Please read our disclosure policy.


This vegan blue cheese is simply mind-blowing! Naturally cultured and prepared with just 5 ingredients, it makes use of traditional cheese-making techniques. The result is a sharp, creamy, and rich vegan blue cheese like you have never tried before!
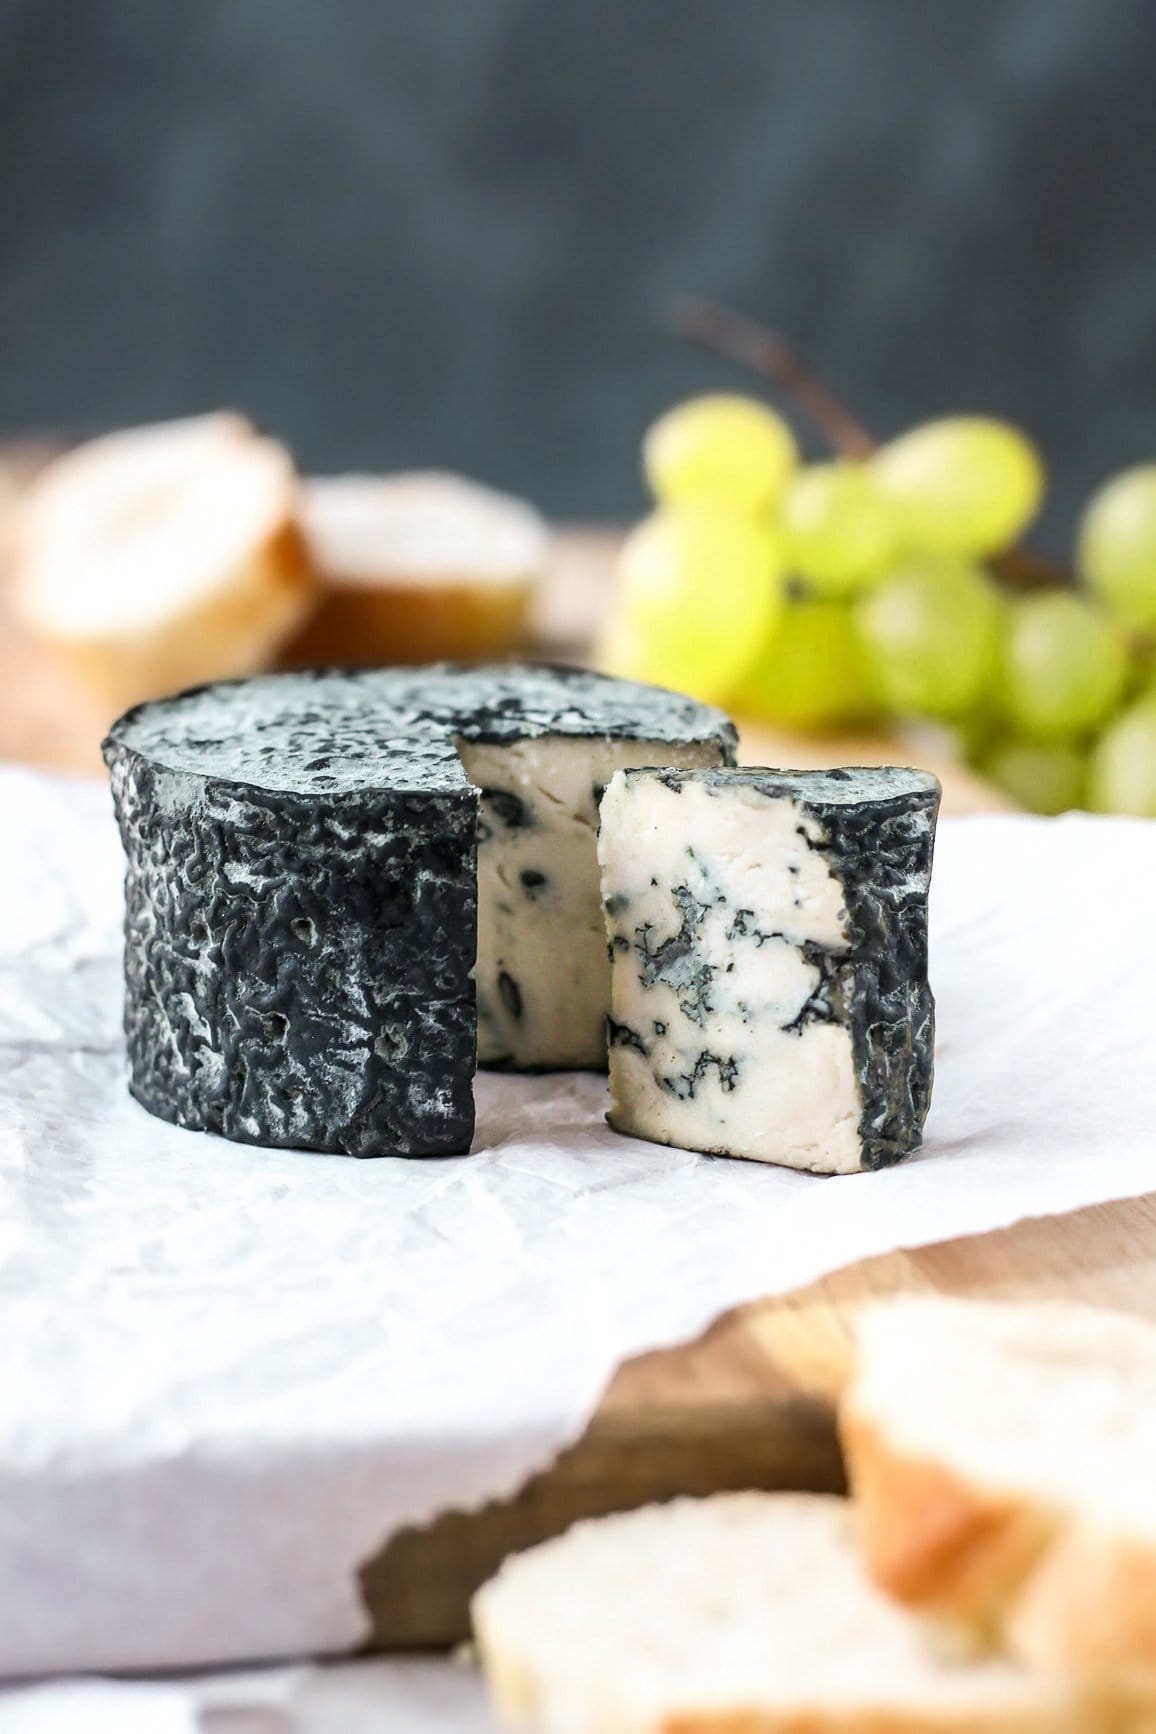
IT IS HERE. The vegan blue cheese recipe is finally here, friends!
I’m really, really excited about this recipe. First, because I have been working on it for several months, and second, because it tastes exactly like dairy cheese!
Shortly after releasing my vegan camembert recipe, I started to work on making a vegan blue cheese. Let me tell you, it was not an easy task! The real struggle was to get the blue veins – the essence of blue cheese. I first tried pricking the cheese like they usually do on the dairy ones, but the result was not as I expected. Although it was not a complete failure, it didn’t have prominent blue veins and lacked sharpness.
See, the blue mold, responsible for the pungent aroma of blue cheese, needs air to grow. Traditionally, the process consists of draining curds before transferring them to molds and allowing them to drain. The curds are not pressed, allowing for some holes inside the cheese. Those holes allow the blue mold to grow, creating veins inside the cheese. Unfortunately, this is not possible with cashew cream as it cannot be drained into curds.
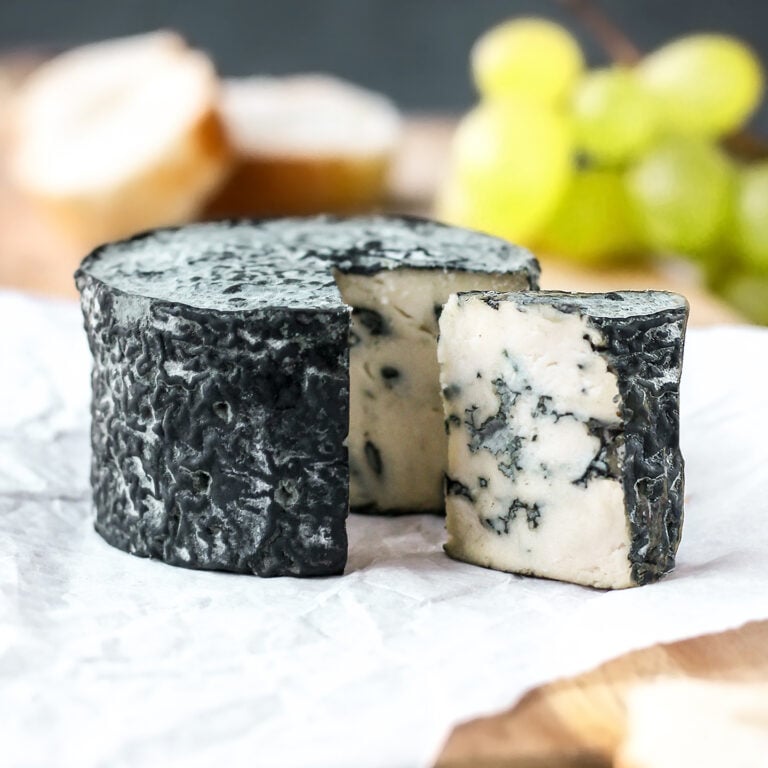
Fast forward several months later and tens of tests, I finally found a way to create those beautiful blue veins. Eureka! One day, an idea came to mind. What if I age the cheese for a few weeks to make it slightly dryer, scramble it, and reassemble it while leaving some small holes inside? Well, it worked beautifully! As you can see in the photos on this page, my vegan blue cheese has plenty of nice blue veins, and I have to admit that I’m pretty proud to have developed this technique!
⭐️ Why You Should Try It
Blue cheese finally made vegan!
You read it right! To my knowledge (and I’ve looked around a lot), this is the first vegan blue cheese made with real cultures and a traditional aging process! This results in an appearance and taste that is simply unmatched.
Perfect texture with a rich and intense aroma.
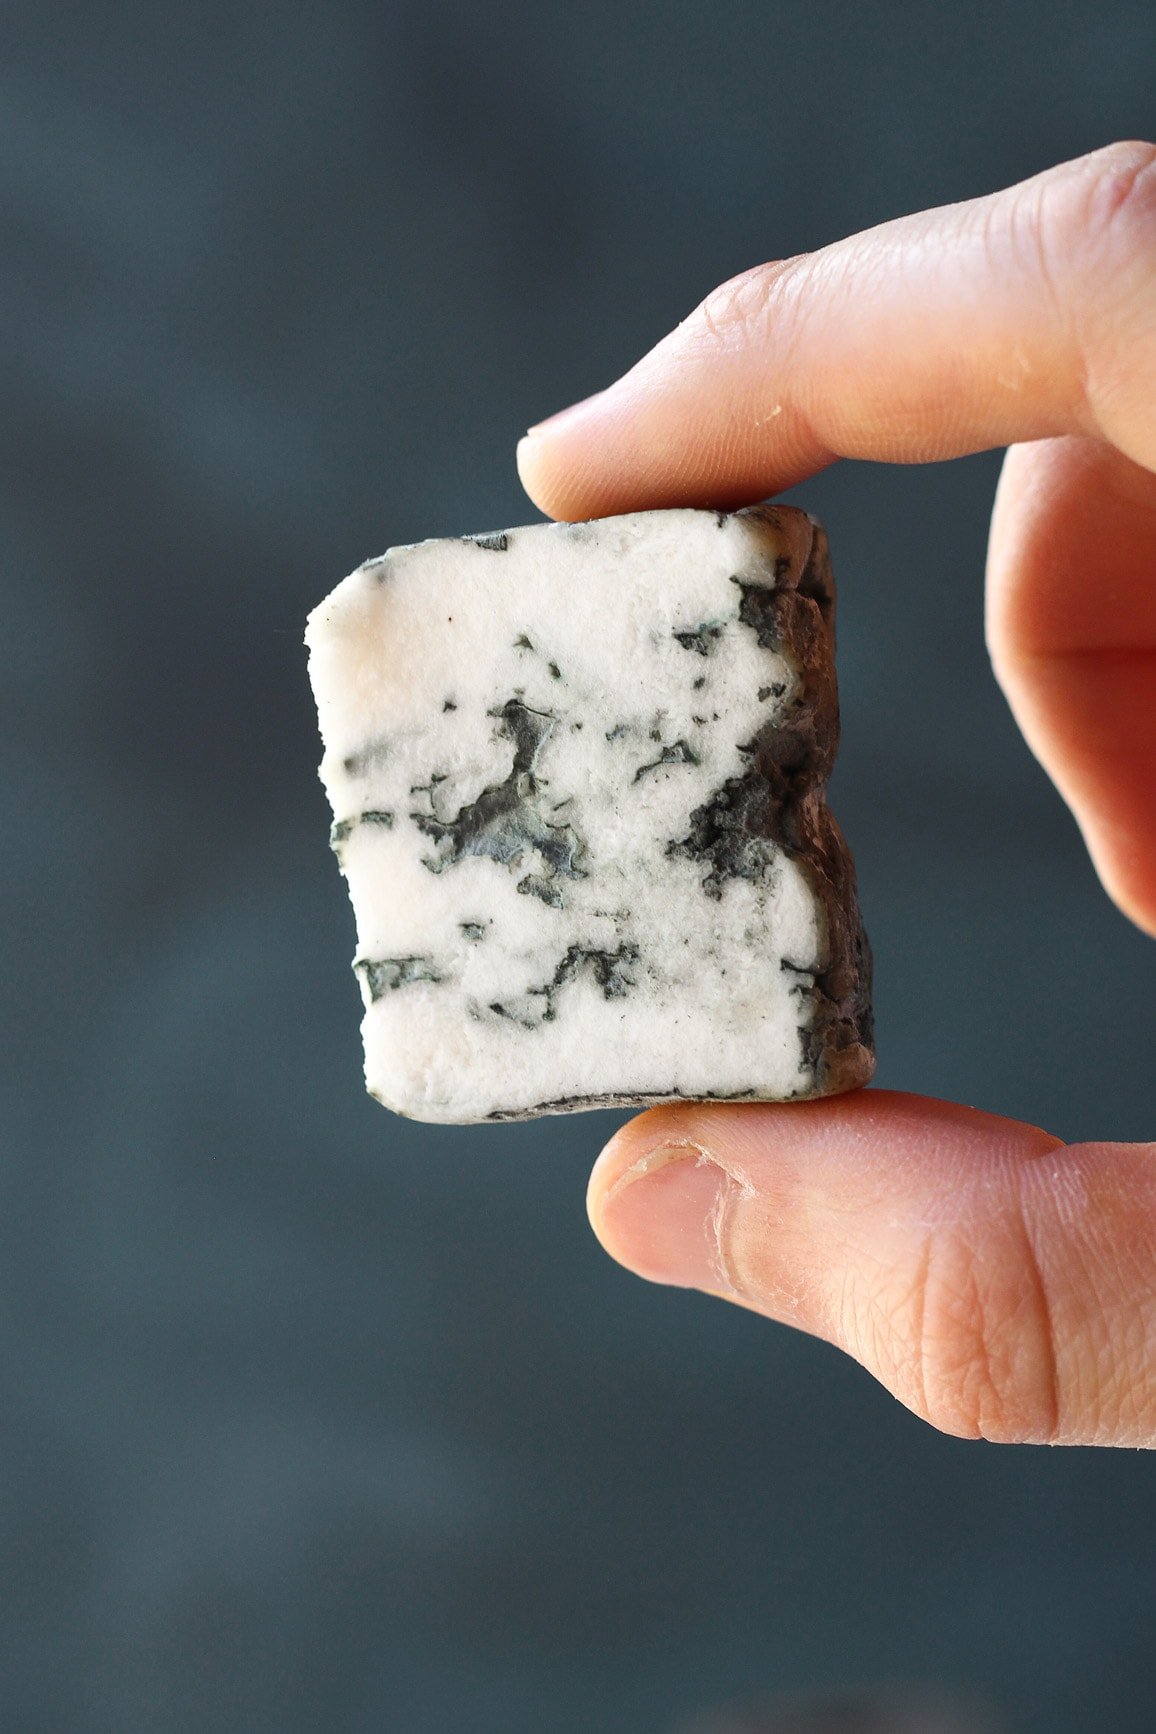
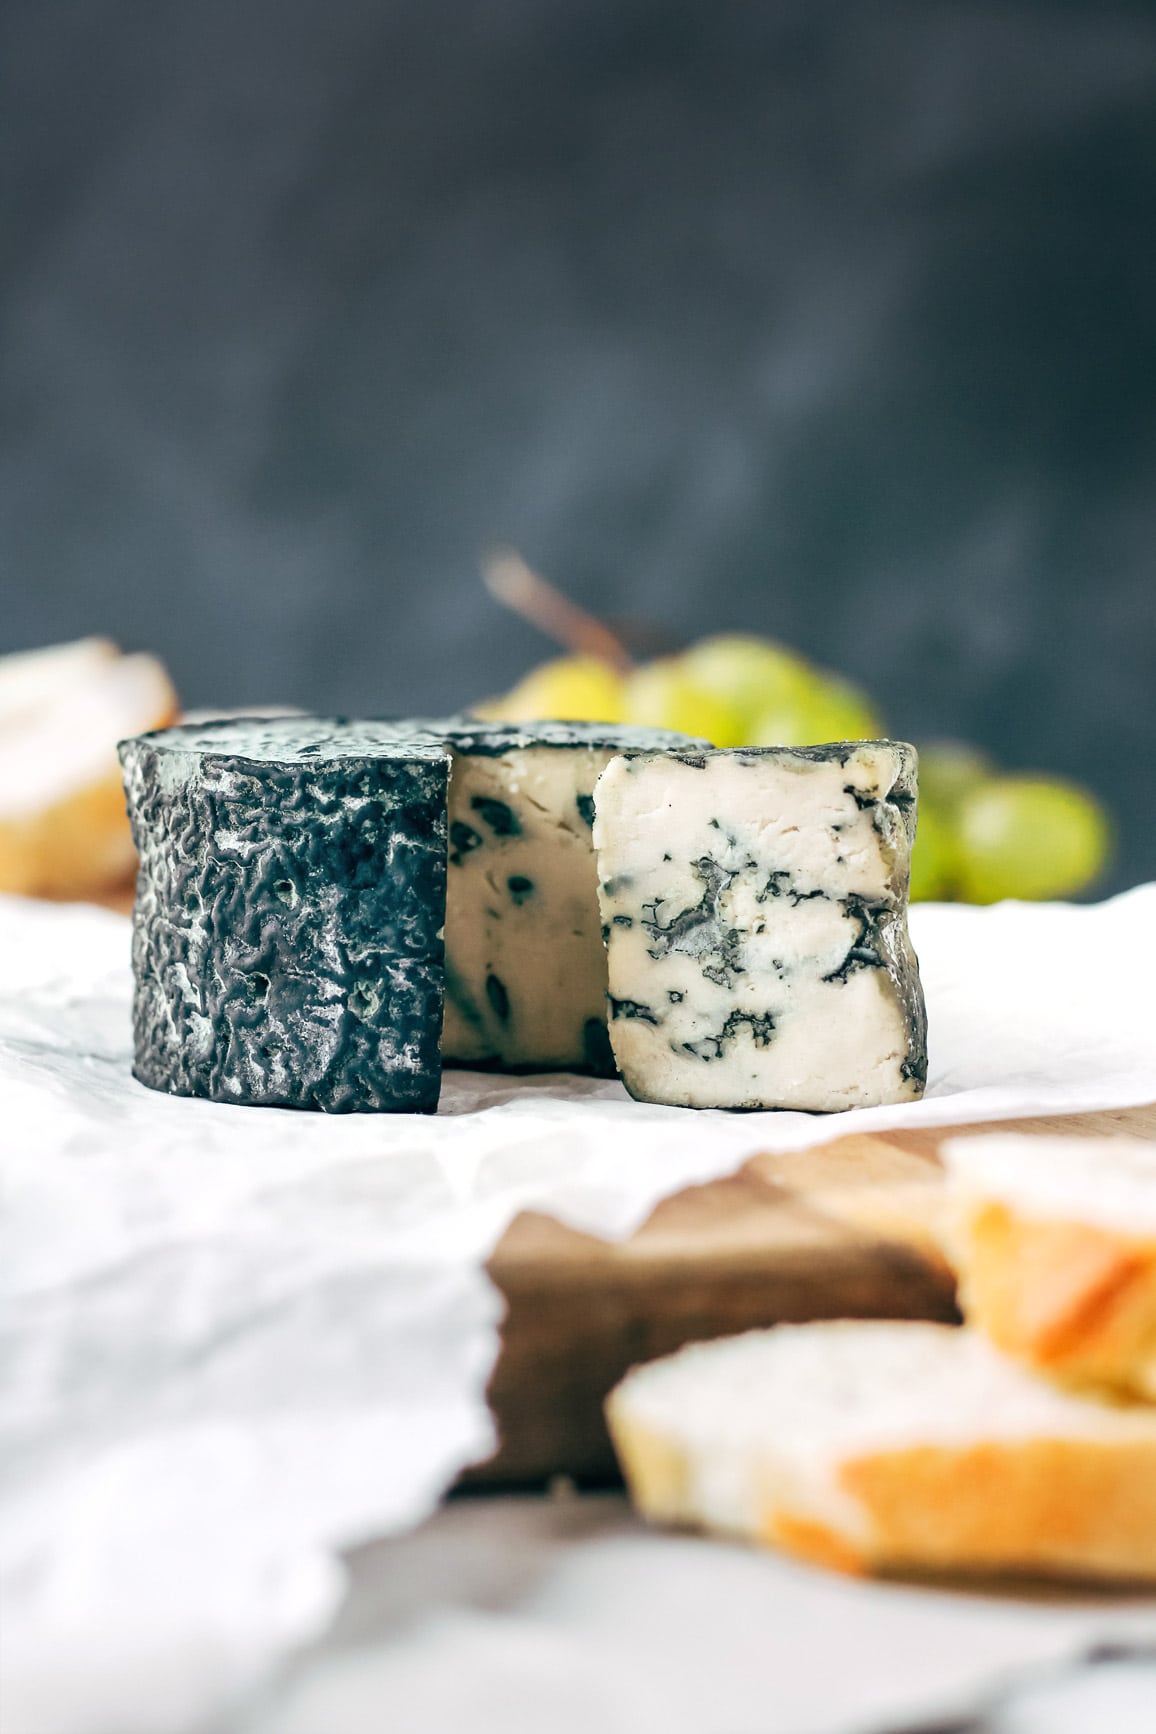
My blue cheese is so creamy that you can spread it easily on a slice of bread but firm enough to cut it into slices. Plus, it has those natural blue veins that are so characteristic of this type of cheese.
When it comes to the taste, it’s everything you would expect from a blue cheese. It’s salty, slightly earthy, and has sharp, almost spicy notes. I served this cheese to non-vegans, and they could not believe it was not “real” blue cheese!
It’s a fun experiment.
Whether you are new to vegan cheese making or made some before, the process of making this blue cheese is interesting and exciting at the same time. You will see the mold slowly grow over a few weeks, and the flavors develop!
Readers love it.
With over 250 ★★★★★ ratings, this recipe is a must-try! Here is what some readers have to say about it:
Helen said: “My diet is 100% plant-based, and I’ve been making Thomas’ Blue Vein, Camembert, and Hickory Smoked Cheeses for a couple of years now. The blue vein is truly delicious – creamy and bitey at the same time. My latest batch is ready to be eaten now, and it takes every bit of willpower I have to stop myself from eating too much of it at once.”
James said: “Just tasted my first batch of this. It is, quite simply, the best vegan cheese I have ever made. All thanks to you Thomas – another epic recipe.”
Joseph said: “Kudos to you for creating this recipe. I’ve been missing a piece of blue since I converted to veganism about 40+ years ago. Now, thanks to you, I am eating blue cheese nearly every day. A second batch is being prepared.”
📘 What Is Blue Cheese
Blue cheese is a type of semi-soft cheese that is made with Penicillium Roqueforti cultures. This edible mold not only creates a sharp and piquant flavor, but it is also responsible for the blue/green veins inside and outside the cheese.
Historians say that Gorgonzola is one of the oldest types of blue cheese, appearing around AD 879.
🥛 Ingredient Notes
Cashews
Just like my other cheese recipes, I use raw cashews as a base. They bring the perfect amount of creaminess and richness. On top of that, mold grows very well on cashew-based cheeses.
Note: It’s crucial that you use raw cashews, not the roasted kind.
Starter culture
You will need a starter culture to trigger the fermentation process and give your cheese its tangy flavor. This type of culture is different from the ripening culture as it’s only responsible for the tanginess, not the blue veins/flavor.
Which culture to pick: I recommend using either Acidophilus or Mesophilic. You can get Acidophilus capsules online or at most pharmacies. The ones I use are Advanced Acidophilus Plus from the brand Solgar, which contains 500M microorganisms per capsule.
Regarding the Mesophilic, it’s a type of culture specifically made for cheese-making. Hence, you will only be able to find it in cheese-making supply stores or online.
To conclude, both work great, but I personally prefer using Mesophilic as it yields a superior, more buttery flavor.
Ripening culture
The ripening culture I use to allow the cheese to develop blue veins is a mold called Penicillium Roqueforti. It’s typically used on cheeses such as Roquefort, Gorgonzola, Stilton, etc.
Where to buy it: You can buy Penicillium Roqueforti online or in most cheese-making supply stores. It’s usually sold in a powdered or liquid form. Although it might seem a little bit expensive, a little goes a long way. For 4 pieces of cheese, you will only need about 1/8 tsp.
How to store it: You can store Penicillium Roqueforti in the freezer for several months. If it’s in liquid form, thaw for 15-20 minutes on the counter before using.
Coconut oil
Coconut oil adds creaminess and helps the cheese stay slightly firmer when chilled. I recommend using deodorized coconut oil so it doesn’t impart any coconut flavor to your cheese.
Note: Coconut oil is optional, and this recipe will still work without it.
Salt
Salt not only enhances the flavor but also prevents bad mold from growing.
🥣 How to Make It
The recipe is actually pretty easy to make. The hardest part is to be patient since the whole process will take you over a month.
1. Prepare the cashew cream
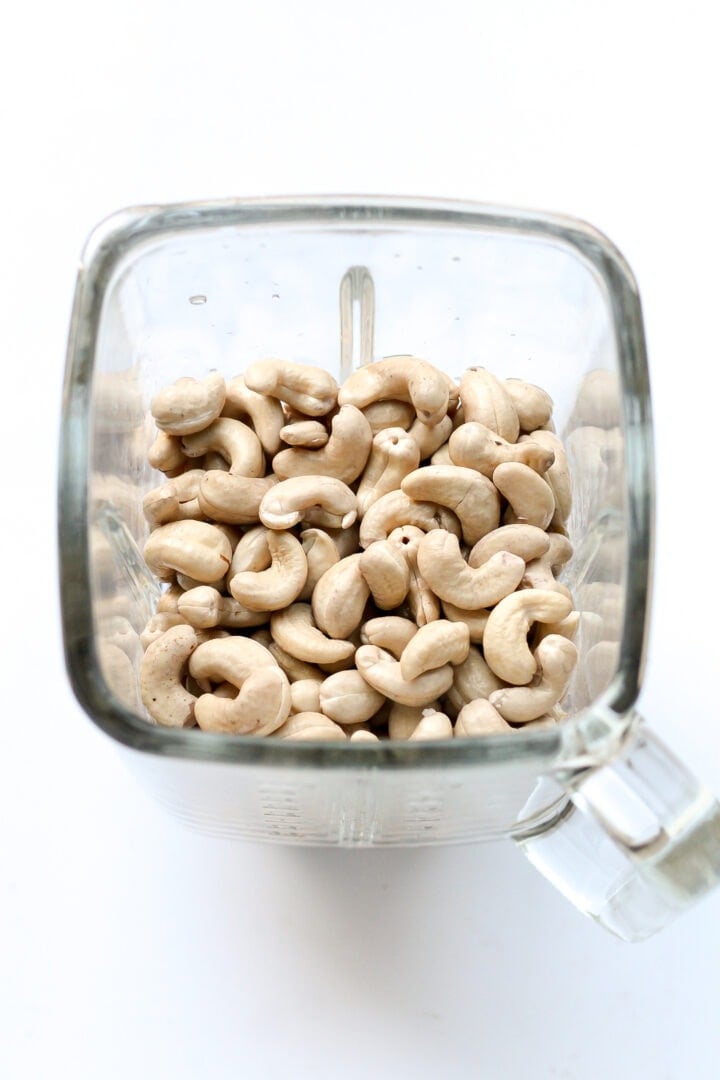
- Soak the cashews. Start by soaking the cashews in water for at least 5 hours or preferably overnight.
- Kill bacteria. Drain the cashews and place them in a large glass bowl. Bring a large pot of water to a boil. Once boiling, pour the water directly onto the cashews. Let sit for 1-2 minutes, and drain the cashews again. This step will help kill possible bacteria and prevent bad mold from growing. After draining, allow the cashews to cool down for about 30 minutes.
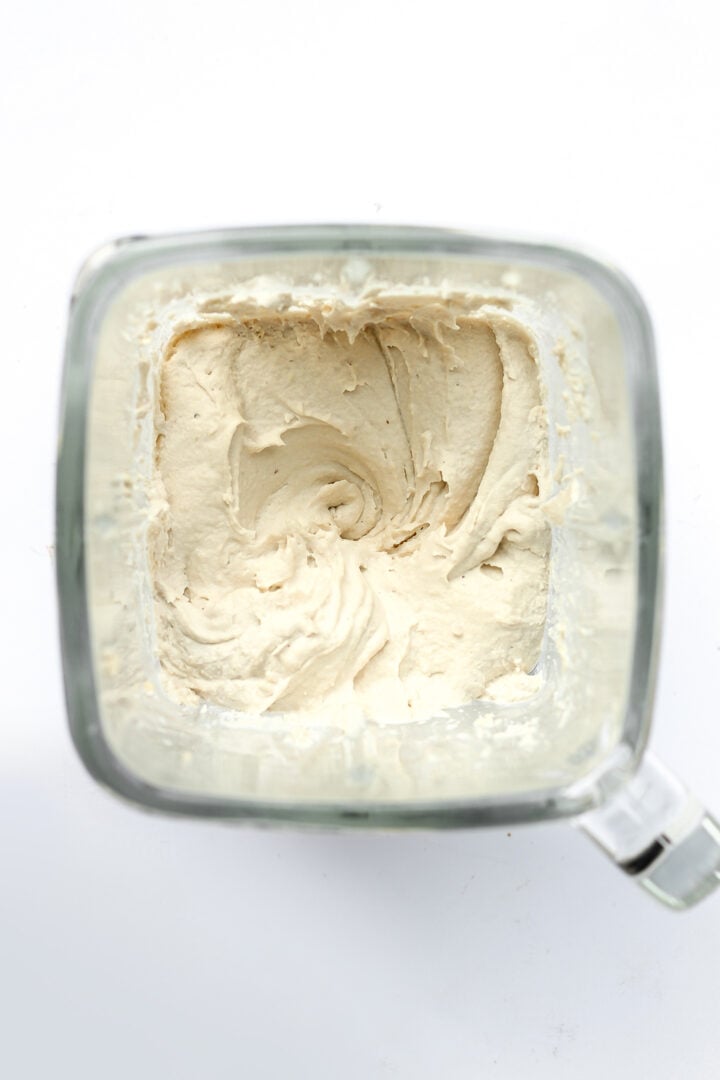
- Blend into a cream. Transfer the cashews to the bowl of a high-speed blender or food processor. Add the coconut oil and 5 tablespoons of filtered water. Blend on high speed, scraping down the sides from time to time until it forms a smooth and thick cream. This step might take about 10 minutes, depending on your blender.
- Add the cultures. If using Acidophilus, open the probiotic capsules and add the powder to the blender. Otherwise, add the mesophilic powder to the blender. Next, add the Penicillium Roqueforti and blend for another 10-15 seconds.
Note: The cashew cream should be smooth but quite thick. If needed, add 1 tablespoon of water at a time until smooth. Do not add too much water, otherwise the mixture will be too liquid.
- Transfer to a bowl. Transfer the cashew cream to a clean bowl and cover it with plastic film, touching the top of the cashew cream (this will prevent the top from drying). Let sit at room temperature in a dark place for about 24h-48h. This step will kick start the fermentation process, giving the cheese its tangy flavor.
2. Shape the cheeses
Once your cashew cream has a tangy smell and taste, it’s time to shape it into wheels!
Note: Before starting, I just want to let you know that you do not have to use the exact pastry rings I recommend below. Any size or shape will work so feel free to use what you have on hand.
- Refrigerate the cashew cream. Place the bowl containing the cashew cream in the refrigerator for about 4 hours. This will make the mixture easier to work with.
- Prepare a container. Line the bottom of a food storage container with parchment paper. I use a 12×8 inches (30x20cm) one but any container with a similar size will work. This type of container, for example, works great.
- Line pastry rings. Place four 3×1.75 inches (7.5×4.5cm) pastry rings inside the container. Cut strips of parchment paper measuring 9.5×1.75 inches (24×4.5cm) and arrange them inside the pastry rings to cover the inside sides. Alternatively, you can use plastic film if you prefer. The goal is to prevent the cashew cream from touching the metal.
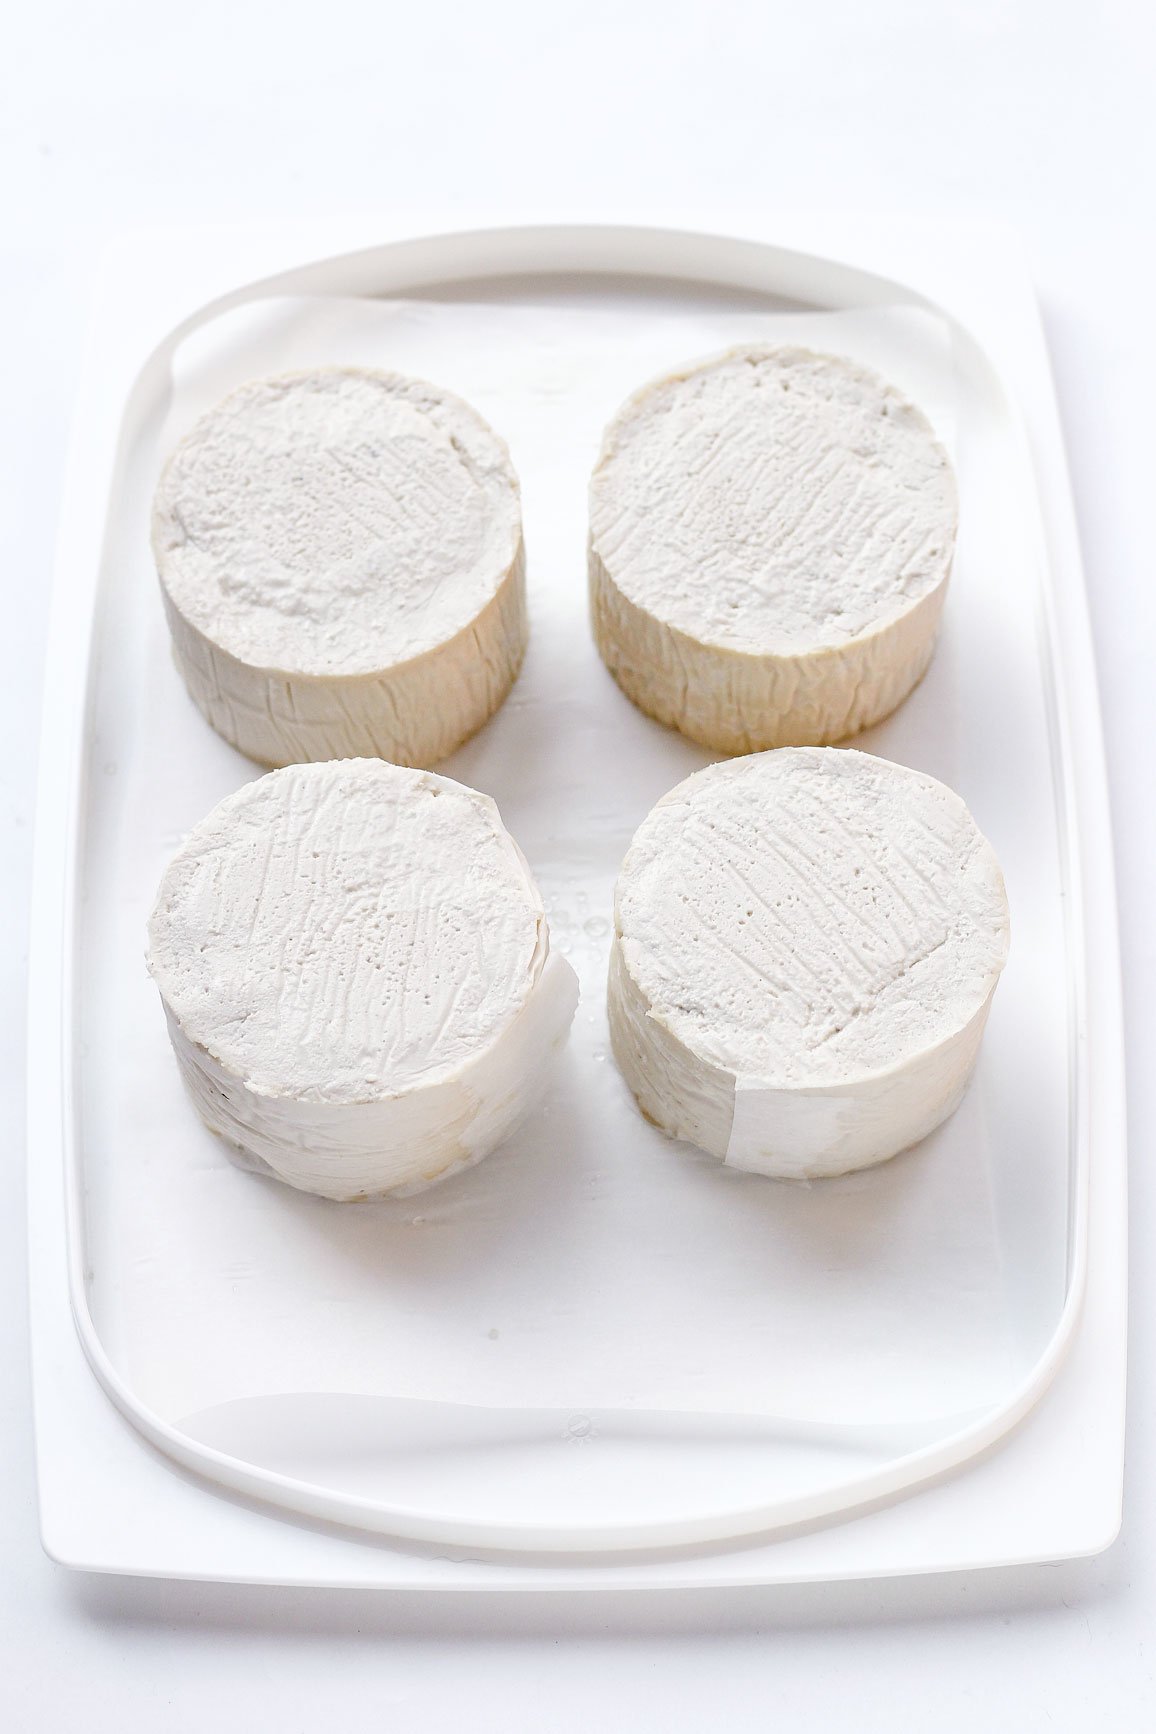
- Shape the cheeses. Fill each pastry ring to the top with the cashew mixture. Cover the tops with plastic wrap.
- Refrigerate. Close the container and transfer it to the refrigerator. Refrigerate overnight.
3. Salt the cheeses
The next day, it’s time to remove the cheeses from the pans and salt them. Salt will help with mold growth, so it’s essential.
- Sprinkle salt. The next day, remove the container from the refrigerator. Remove the plastic wrap from the top of the wheels. Sprinkle about 1/4 teaspoon of salt over the top of each wheel. Lightly rub the salt with clean hands to distribute it evenly.
- Flip the wheels. Carefully flip the wheels using a small plate lined with parchment paper. Transfer the wheels back to the container, non-salted side up. Sprinkle another 1/4 teaspoon of salt over the other side of the wheels. Rub some salt on the sides of each wheel as well. Note: The cheeses will still be very soft. This is normal. In a few days, they will firm up and be easier to work with.
4. Age the cheeses
- Refrigerate. Close the container and transfer it to the refrigerator or to a room or cheese cave with a temperature of about 47-52°F (8-11°C). Note: You can age your cheeses at a slightly colder temperature, but the mold will take longer to grow.
- Flip. Every day, carefully flip the cheeses. I recommend using very clean hands or working with gloves (or plastic wrap) to make sure you are not touching the cheeses.
- See the blue mold grow. After 7-10 days, you should start to see some light blue/green mold spots – it’s a good sign! Continue the flipping process for another 7 days. Remember that the mold will be slightly darker or lighter depending on the humidity and temperature of your fridge.
5. Crumble and re-shape
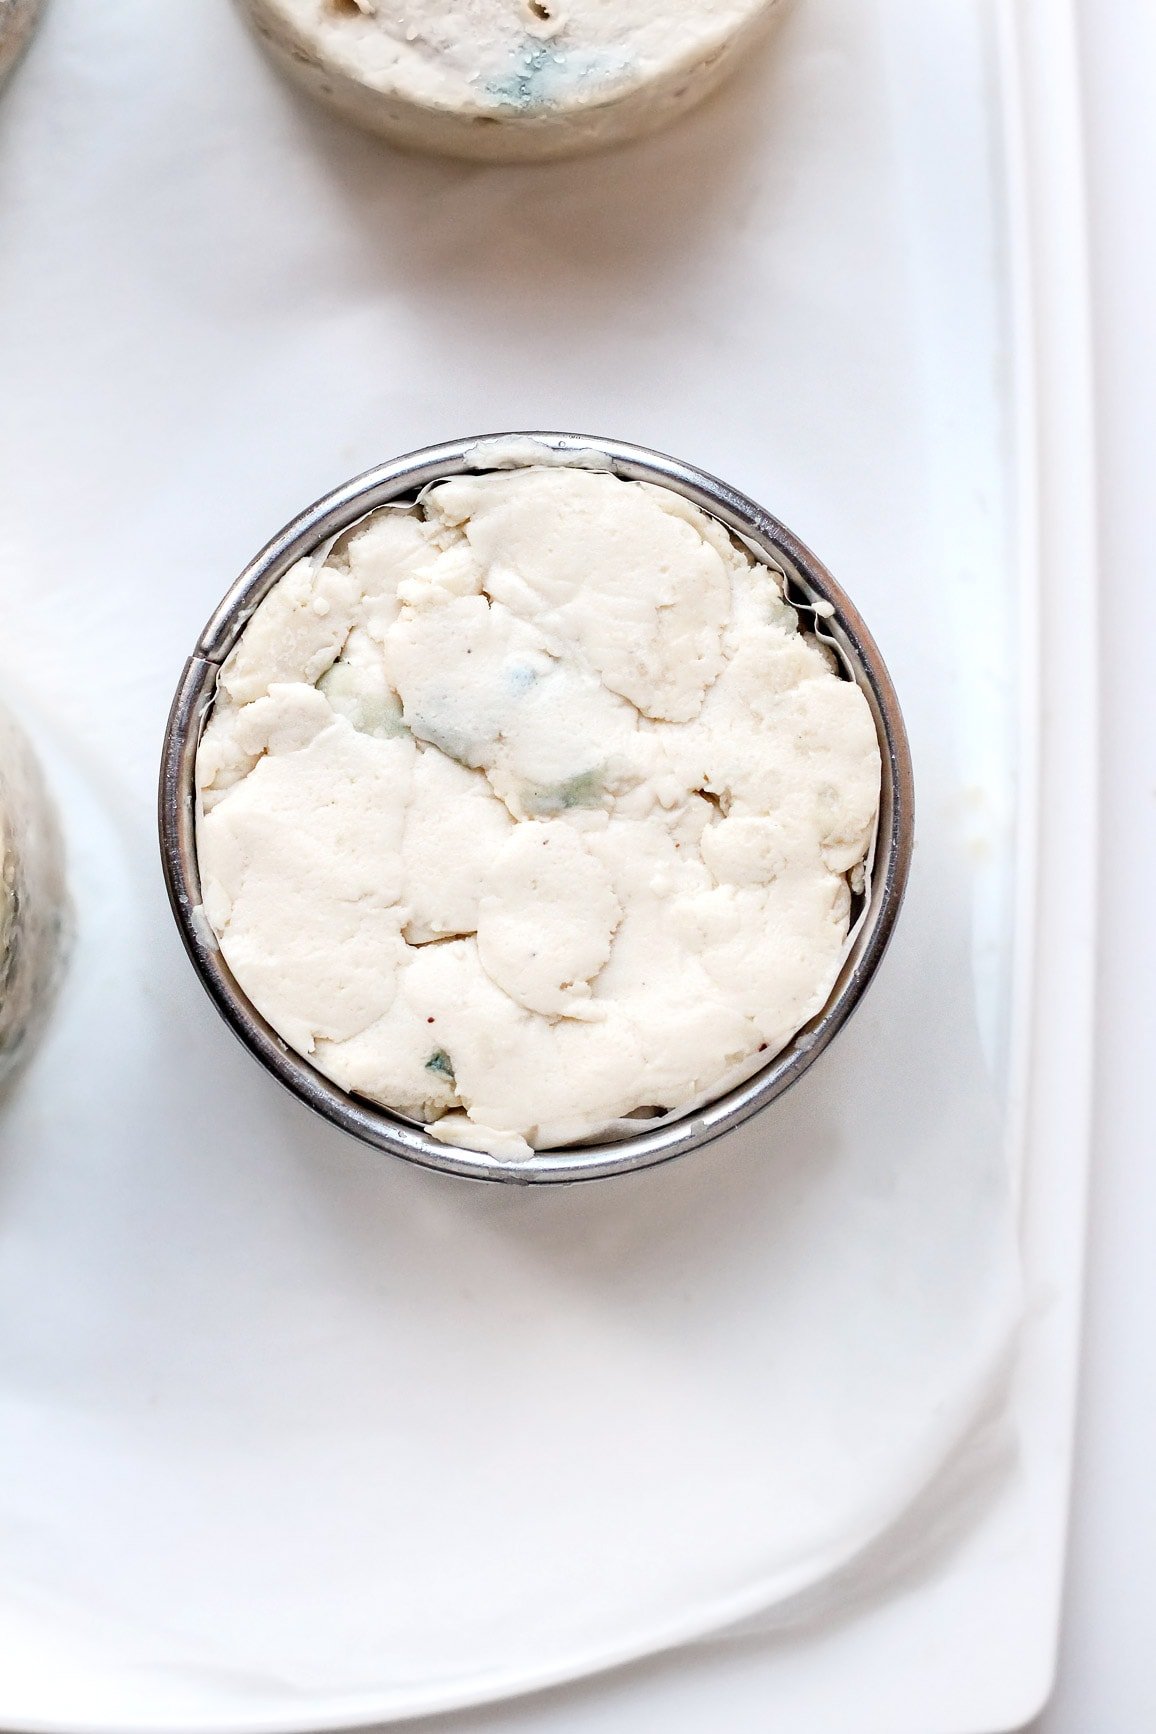
After a total of 14 days, your cheeses should be a bit firmer and almost completely covered with blue mold! It’s now time to crumble them to create the veins.
Why crumble the cheeses?
It’s the blue mold that gives the cheese its characteristic flavor. The problem is that the mold needs to be in contact with the air to grow, so you need to have many small openings inside the cheese for better mold growth. Regular blue cheeses are often pierced several times with a skewer to make holes. I tried this way but with no success. After several tries, I thought of scrambling the cheese into little pieces and then forming it again without pressing too much to leave large holes inside it. It worked!
- Scramble the cheeses. Using disposable gloves or very clean hands, scramble your cheeses (just like when you scramble tofu) into little pieces of about 1 inch (2.5cm) and transfer them to a clean bowl. The cashew mixture will still be quite soft, it’s normal.
- Re-shape them. Just like you did the first time, place four pastry rings inside a container and line them with parchment paper. Next, fill each pastry ring with the scrambled cheese without pressing too much to leave large holes on the inside. This step is essential to create a nice veining inside the cheese as the mold needs to be in contact with air to grow. You can remove the pastry rings right after shaping the wheels. Place the container back in your refrigerator or aging room.
- Flip. Continue to flip the cheeses every day for the next 3 weeks, always using clean hands or gloves. That’s fine if you miss a day or two.
- Wrap the cheeses. After a total of 5 weeks, the inside and the outside of your cheeses will be covered with blue mold. They will be ready to eat soon! Wrap each cheese in cheese paper or aluminum foil and wait another 3-7 days. The longer you let them age in the refrigerator, the stronger the taste!
📔 Tips
Age the cheeses in a container during the whole aging process.
Mold needs humidity to grow. That’s why you need to keep the cheeses in a small box or container in your refrigerator. If you were to let the cheeses uncovered, they would dry out before the mold gets a chance to grow.
Do not omit any ingredient.
This recipe is not versatile, so I do not recommend substituting or omitting any ingredient.
Use disposable gloves.
By using gloves each time you handle the cheeses, you reduce your chances of seeing bad mold growing. Disposable gloves are pretty cheap and come in large boxes, so do not hesitate to get yourself a box.
If you are making vegan camembert at the same time:
I recommend you keep them in two separate boxes. Mold can transfer very easily, and you could end up with white mold on your blue cheese or blue mold on your camembert.
Regarding the appearance of the cheese.
The rind of this blue cheese is dark blue because I didn’t scrape the sides. Be aware the rind is edible, but if you prefer the exterior to be white, you can gently scrape the mold using a clean knife every two weeks. I prefer to leave the rind because it looks cooler, and after about a month, it will become a little bit firmer. Creamy inside + firm rind = perfect cheese to me.
🥖 What to Serve It With
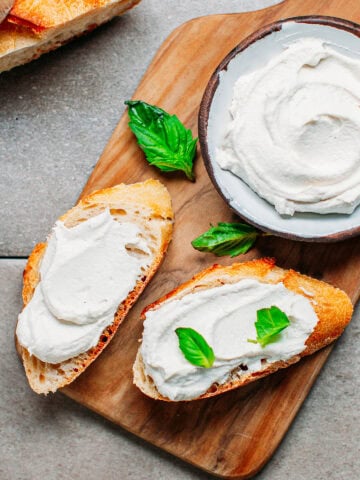
My favorite way to enjoy this blue cheese is with a fresh baguette! You can also serve it on a vegan cheese platter alongside vegan camembert, onion chutney, and grapes.
Crumbled, it makes a great topping to potato leek soup or butternut squash soup. You can even use it to make a delicious blue cheese dressing!

❄️ Storing and Freezing
- To store: You can store this cheese for about 1 month in the refrigerator. It will become firmer and sharper.
- To freeze: Wrap the cheeses in plastic wrap and freeze for up to 3 months. Thaw overnight in the refrigerator.
💬 FAQ
Yes, Penicillium Roqueforti is completely safe to eat!
It’s very easy to tell if a cheese has gone bad: just smell it. If it smells like rotten eggs, you should trash it. If there is some pink or black fuzzy mold, it’s not good either.
Roquefort is a type of blue cheese that is only produced in a specific area of France. It is a protected designation of origin.
No, this vegan blue cheese does not melt. It will only become softer once heated.
No, it won’t work. Yogurt starter is a thermophilic bacteria that works best at warmer temperatures (above 30°C or 90°F) as opposed to mesophilic bacteria that works at lower temperatures.
Disclaimer
- Links: The links I provide on this page for Penicillium Roqueforti may not redirect to a fully vegan product, as Amazon sellers change product references frequently. Just for your information, non-vegan cultures are grown on lactose, meaning they contain *traces* of lactose. Considering the amount used, you could still consider your cheese 99,99% vegan if you use a non-vegan culture. It’s up to you to choose which one fits your beliefs best. One more thing: fully vegan Penicillium Roqueforti exists, but you will have to do your own research to locate it.
- Credit: Many people have been making this cheese without giving any credit back and labeling it as their own. I worked really hard to create this recipe from scratch and had to do a ton of experiments before releasing it, so please give credit by tagging @fullofplants on Instagram or linking to this website.
I hope this recipe will prove to you that it’s possible to make everything with plant-based ingredients. If you are not vegan yet, you don’t have to give up on cheese anymore!
Please let me know if you try this recipe, and feel free to ask if you have any questions about the process!
🧀 More Vegan Cheese Recipes


⭐️ Did you like this recipe? Let us know in the comments below, and tag us on Facebook, Instagram, or Pinterest!

Save this recipe!
Enter your email below and I’ll send it to your inbox!
Plus, you will receive new recipes every week!
Vegan Blue Cheese
Equipment
Ingredients
- 3 cups (450 g) raw cashews
- 2 tbsp (30 ml) refined coconut oil optional
- 5 tbsp (75 ml) filtered water
- 1/8 tsp mesophilic culture or 6 capsules vegan probiotics (Acidophilus)
- 1/8 tsp penicillium roqueforti in powdered or liquid form
- sea salt
Instructions
The day before
- Start by soaking the cashews in water for at least 5 hours or preferably overnight.
1. Prepare the cashew cream
- Kill bacteria. Drain the cashews and place them in a large glass bowl. Bring a large pot of water to a boil. Once boiling, pour the water directly onto the cashews. Let sit for 1-2 minutes, and drain the cashews again. This step will help kill possible bacteria and prevent bad mold from growing. After draining, allow the cashews to cool down for about 30 minutes.
- Blend into a cream. Transfer the cashews to the bowl of a high-speed blender or food processor. Add the coconut oil and 5 tablespoons of filtered water. Blend on high speed, scraping down the sides from time to time until it forms a smooth and thick cream. This step might take about 10 minutes, depending on your blender.
- Add the cultures. If using Acidophilus, open the probiotic capsules and add the powder to the blender. Otherwise, add the mesophilic powder to the blender. Next, add the Penicillium Roqueforti and blend for another 10-15 seconds.Note: The cashew cream should be smooth but quite thick. If needed, add 1 tablespoon of water at a time until smooth. Do not add too much water, otherwise the mixture will be too liquid.
- Transfer to a bowl. Transfer the cashew cream to a clean bowl and cover it with plastic film, touching the top of the cashew cream (this will prevent the top from drying). Let sit at room temperature in a dark place for about 24h-48h. This step will kick start the fermentation process, giving the cheese its tangy flavor.
2. Shape the cheeses
- Refrigerate the cashew cream. Place the bowl containing the cashew cream in the refrigerator for about 4 hours. This will make the mixture easier to work with.
- Prepare a container. Line the bottom of a food storage container with parchment paper. I use a 12×8 inches (30x20cm) one but any container with a similar size will work. This type of container, for example, works great.
- Line pastry rings. Place four 3×1.75 inches (7.5×4.5cm) pastry rings inside the container. Cut strips of parchment paper measuring 9.5×1.75 inches (24×4.5cm) and arrange them inside the pastry rings to cover the inside sides. Alternatively, you can use plastic film if you prefer. The goal is to prevent the cashew cream from touching the metal.
- Shape the cheeses. Fill each pastry ring to the top with the cashew mixture. Cover the tops with plastic wrap.
- Refrigerate. Close the container and transfer it to the refrigerator. Refrigerate overnight.
3. Salt the cheeses
- The next day, it’s time to remove the cheeses from the pans and salt them. Salt will help with mold growth, so it’s essential.
- Sprinkle salt. The next day, remove the container from the refrigerator. Remove the plastic wrap from the top of the wheels. Sprinkle about 1/4 teaspoon of salt over the top of each wheel. Lightly rub the salt with clean hands to distribute it evenly.
- Flip the wheels. Carefully flip the wheels using a small plate lined with parchment paper. Transfer the wheels back to the container, non-salted side up. Sprinkle another 1/4 teaspoon of salt over the other side of the wheels. Rub some salt on the sides of each wheel as well. Note: The cheeses will still be very soft. This is normal. In a few days, they will firm up and be easier to work with.
4. Age the cheeses
- Refrigerate. Close the container and transfer it to the refrigerator or to a room or cheese cave with a temperature of about 47-52°F (8-11°C). Note: You can age your cheeses at a slightly colder temperature, but the mold will take longer to grow.
- Flip. Every day, carefully flip the cheeses. I recommend using very clean hands or working with gloves (or plastic wrap) to make sure you are not touching the cheeses.
- See the blue mold grow. After 7-10 days, you should start to see some light blue/green mold spots – it’s a good sign! Continue the flipping process for another 7 days. Remember that the mold will be slightly darker or lighter depending on the humidity and temperature of your fridge.
5. Crumble and re-shape
- After a total of 14 days, your cheeses should be a bit firmer and almost completely covered with blue mold! It’s now time to crumble them to create the veins.
- Scramble the cheeses. Using disposable gloves or very clean hands, scramble your cheeses (just like when you scramble tofu) into little pieces of about 1 inch (2.5cm) and transfer them to a clean bowl. The cashew mixture will still be quite soft, it’s normal.
- Re-shape them. Just like you did the first time, place four pastry rings inside a container and line them with parchment paper. Next, fill each pastry ring with the scrambled cheese without pressing too much to leave large holes on the inside. This step is essential to create a nice veining inside the cheese as the mold needs to be in contact with air to grow. You can remove the pastry rings right after shaping the wheels. Place the container back in your refrigerator or aging room.
- Flip. Continue to flip the cheeses every day for the next 3 weeks, always using clean hands or gloves. That’s fine if you miss a day or two.
- Wrap the cheeses. After a total of 5 weeks, the inside and the outside of your cheeses will be covered with blue mold. They will be ready to eat soon! Wrap each cheese in cheese paper or aluminum foil and wait another 3-7 days. The longer you let them age in the refrigerator, the stronger the taste!
- You can store this cheese for about 1 month in the refrigerator. It will become firmer and sharper.
Notes
Age the cheeses in a container during the whole aging process.
Mold needs humidity to grow. That’s why you need to keep the cheeses in a small box or container in your refrigerator. If you were to let the cheeses uncovered, they would dry out before the mold gets a chance to grow.Do not omit any ingredient.
This recipe is not versatile, so I do not recommend substituting or omitting any ingredient.Use disposable gloves.
By using gloves each time you handle the cheeses, you reduce your chances of seeing bad mold growing. Disposable gloves are pretty cheap and come in large boxes, so do not hesitate to get yourself a box.If you are making vegan camembert at the same time:
I recommend you keep them in two separate boxes. Mold can transfer very easily, and you could end up with white mold on your blue cheese or blue mold on your camembert.Regarding the appearance of the cheese.
The rind of this blue cheese is dark blue because I didn’t scrape the sides. Be aware the rind is edible, but if you prefer the exterior to be white, you can gently scrape the mold using a clean knife every two weeks. I prefer to leave the rind because it looks cooler, and after about a month, it will become a little bit firmer. Creamy inside + firm rind = perfect cheese to me.Nutrition

About the Author
Thomas Pagot is the founder, photographer, and recipe developer behind Full of Plants. He created the blog in 2016 as a personal cookbook for vegan recipes. Through years of recipe development, Thomas has successfully grown Full of Plants into a trusted resource for plant-based recipes.
Leave a Comment