This post may contain affiliate links. Please read our disclosure policy.
Learn more about taro roots! What it is, how to cook it, its health benefits, plus a round-up of recipes that make use of this uncommon root vegetable!
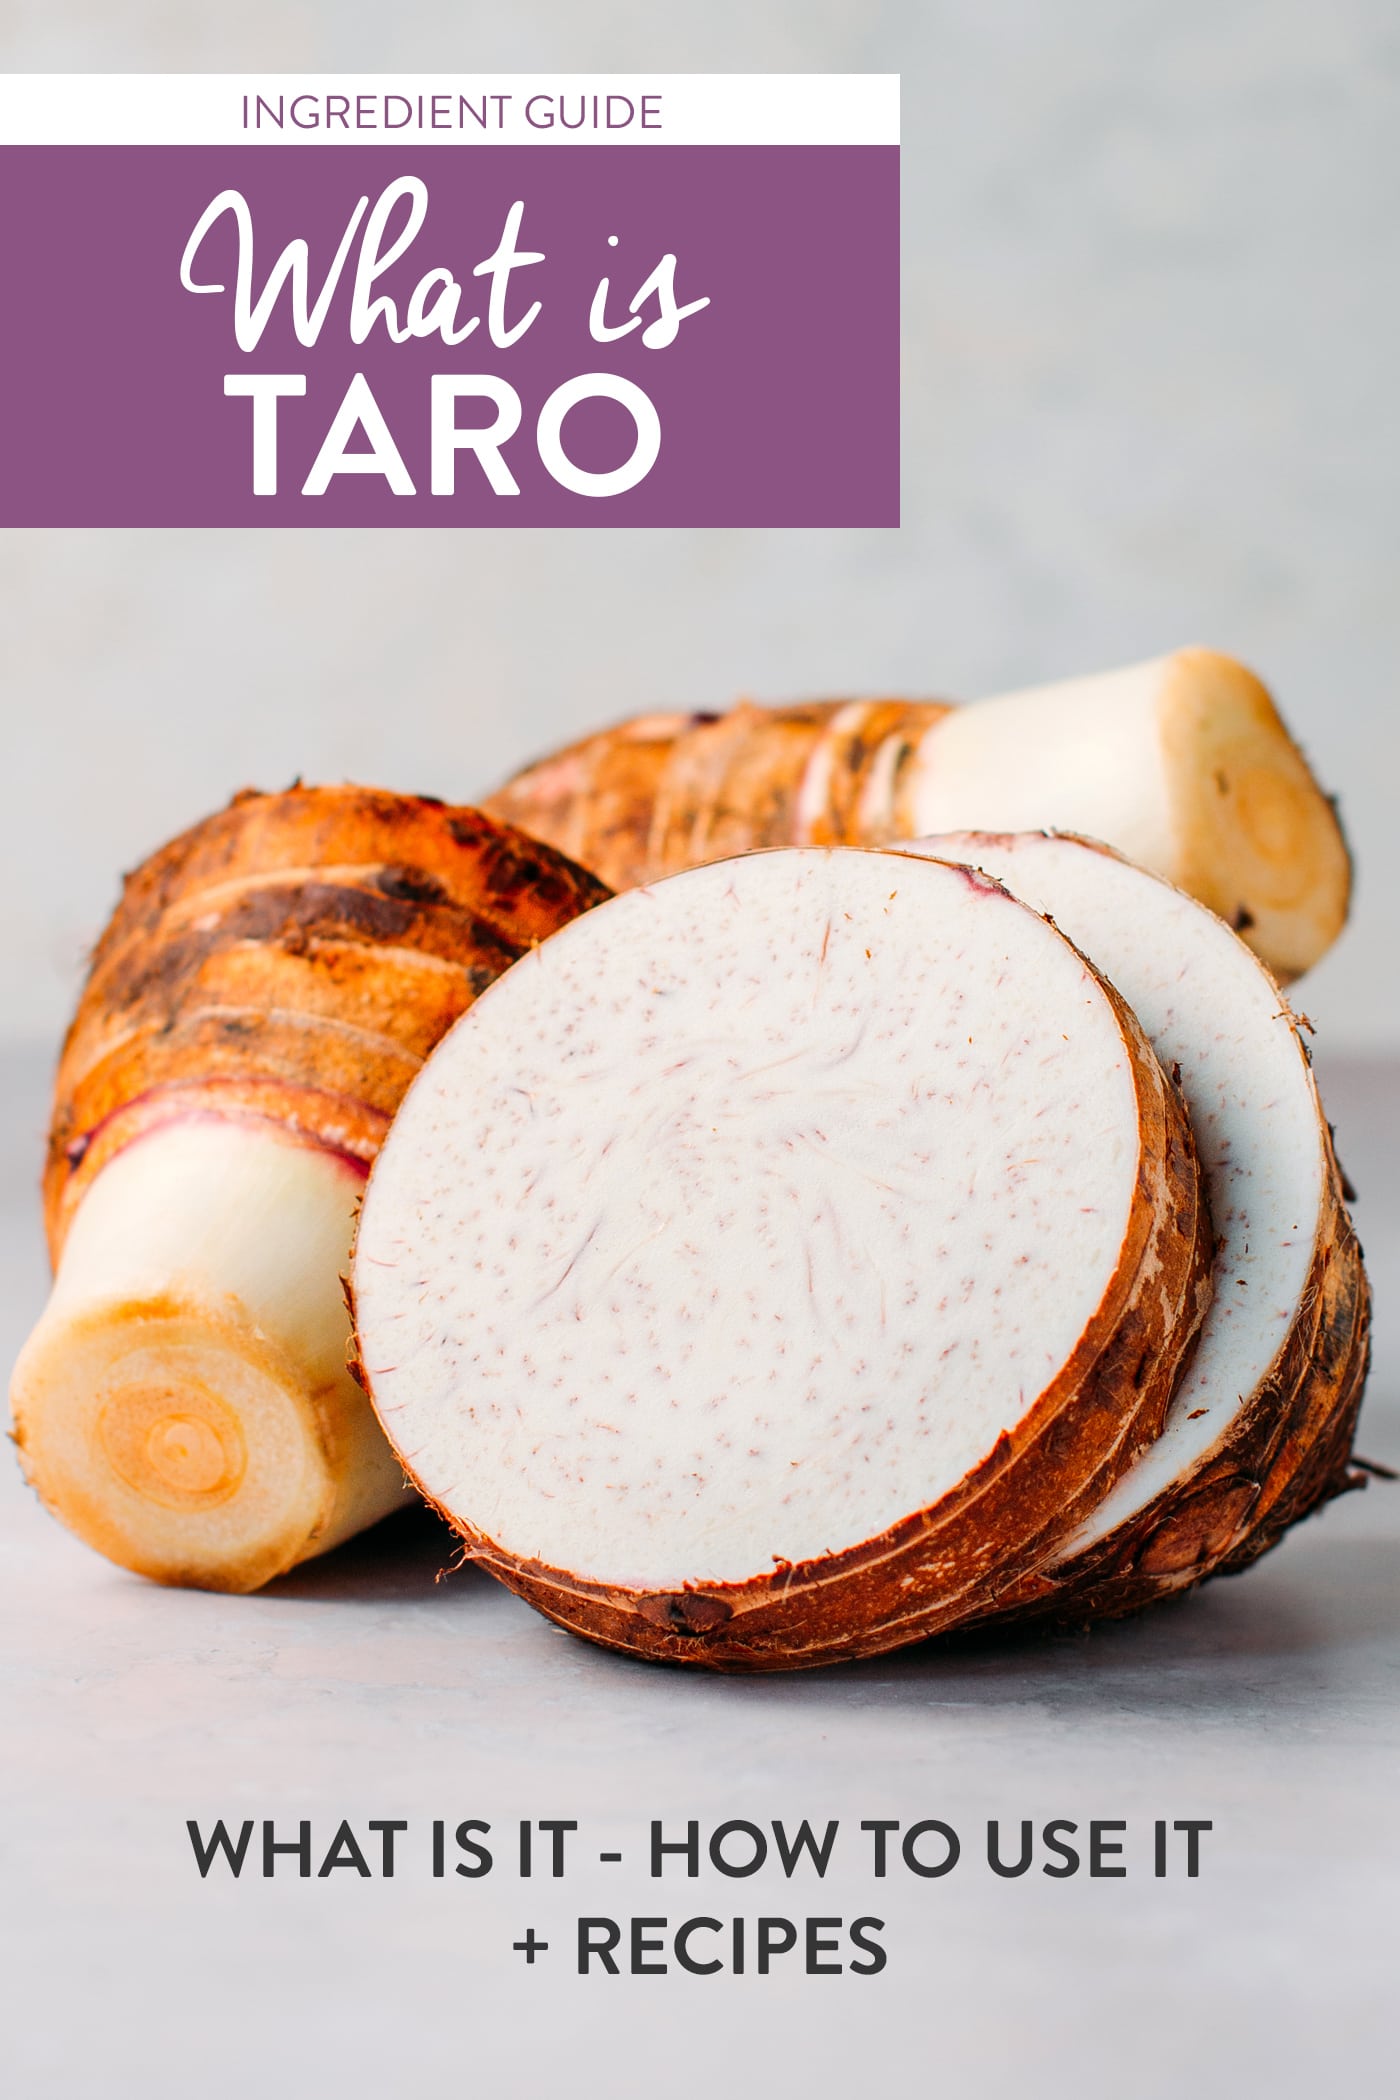
If you have ever felt intimidated by this mysterious vegetable, don’t worry. I will be telling you all about it here! In this article, I will go in-depth about what taro is, how to pick fresh roots, and how to cook them. Plus, I’m sharing a few recipe ideas so you can try to experiment with them!
The first time I had taro was at my Vietnamese mother-in-law’s. She served us the most delicious curry I’ve ever had, and there was that vegetable in it that I couldn’t pinpoint. It looked like potatoes but had a denser texture and a sweeter taste. I learned it was a root vegetable called taro (“khoai môn” in Vietnamese). Later on, I bought a few roots at the local market and started to experiment with it.
Saying my first try cooking taro was a disaster is an understatement, and that’s why I’ve decided to create this guide to spare you from making the same mistakes I have made!
📘 What Is Taro?
Taro, scientifically known as Colocasia esculenta, is a tropical plant that is grown mainly for its edible tubers in Africa, Oceania, and South Asia (just like sweet potatoes and yams). While its corms are primarily used for cooking, its leaves are also edible. Moreover, it is said to be one of the earliest cultivated plants on Earth!
Although this starchy root vegetable was originally grown in Asia, it has now become popular in many countries around the world.
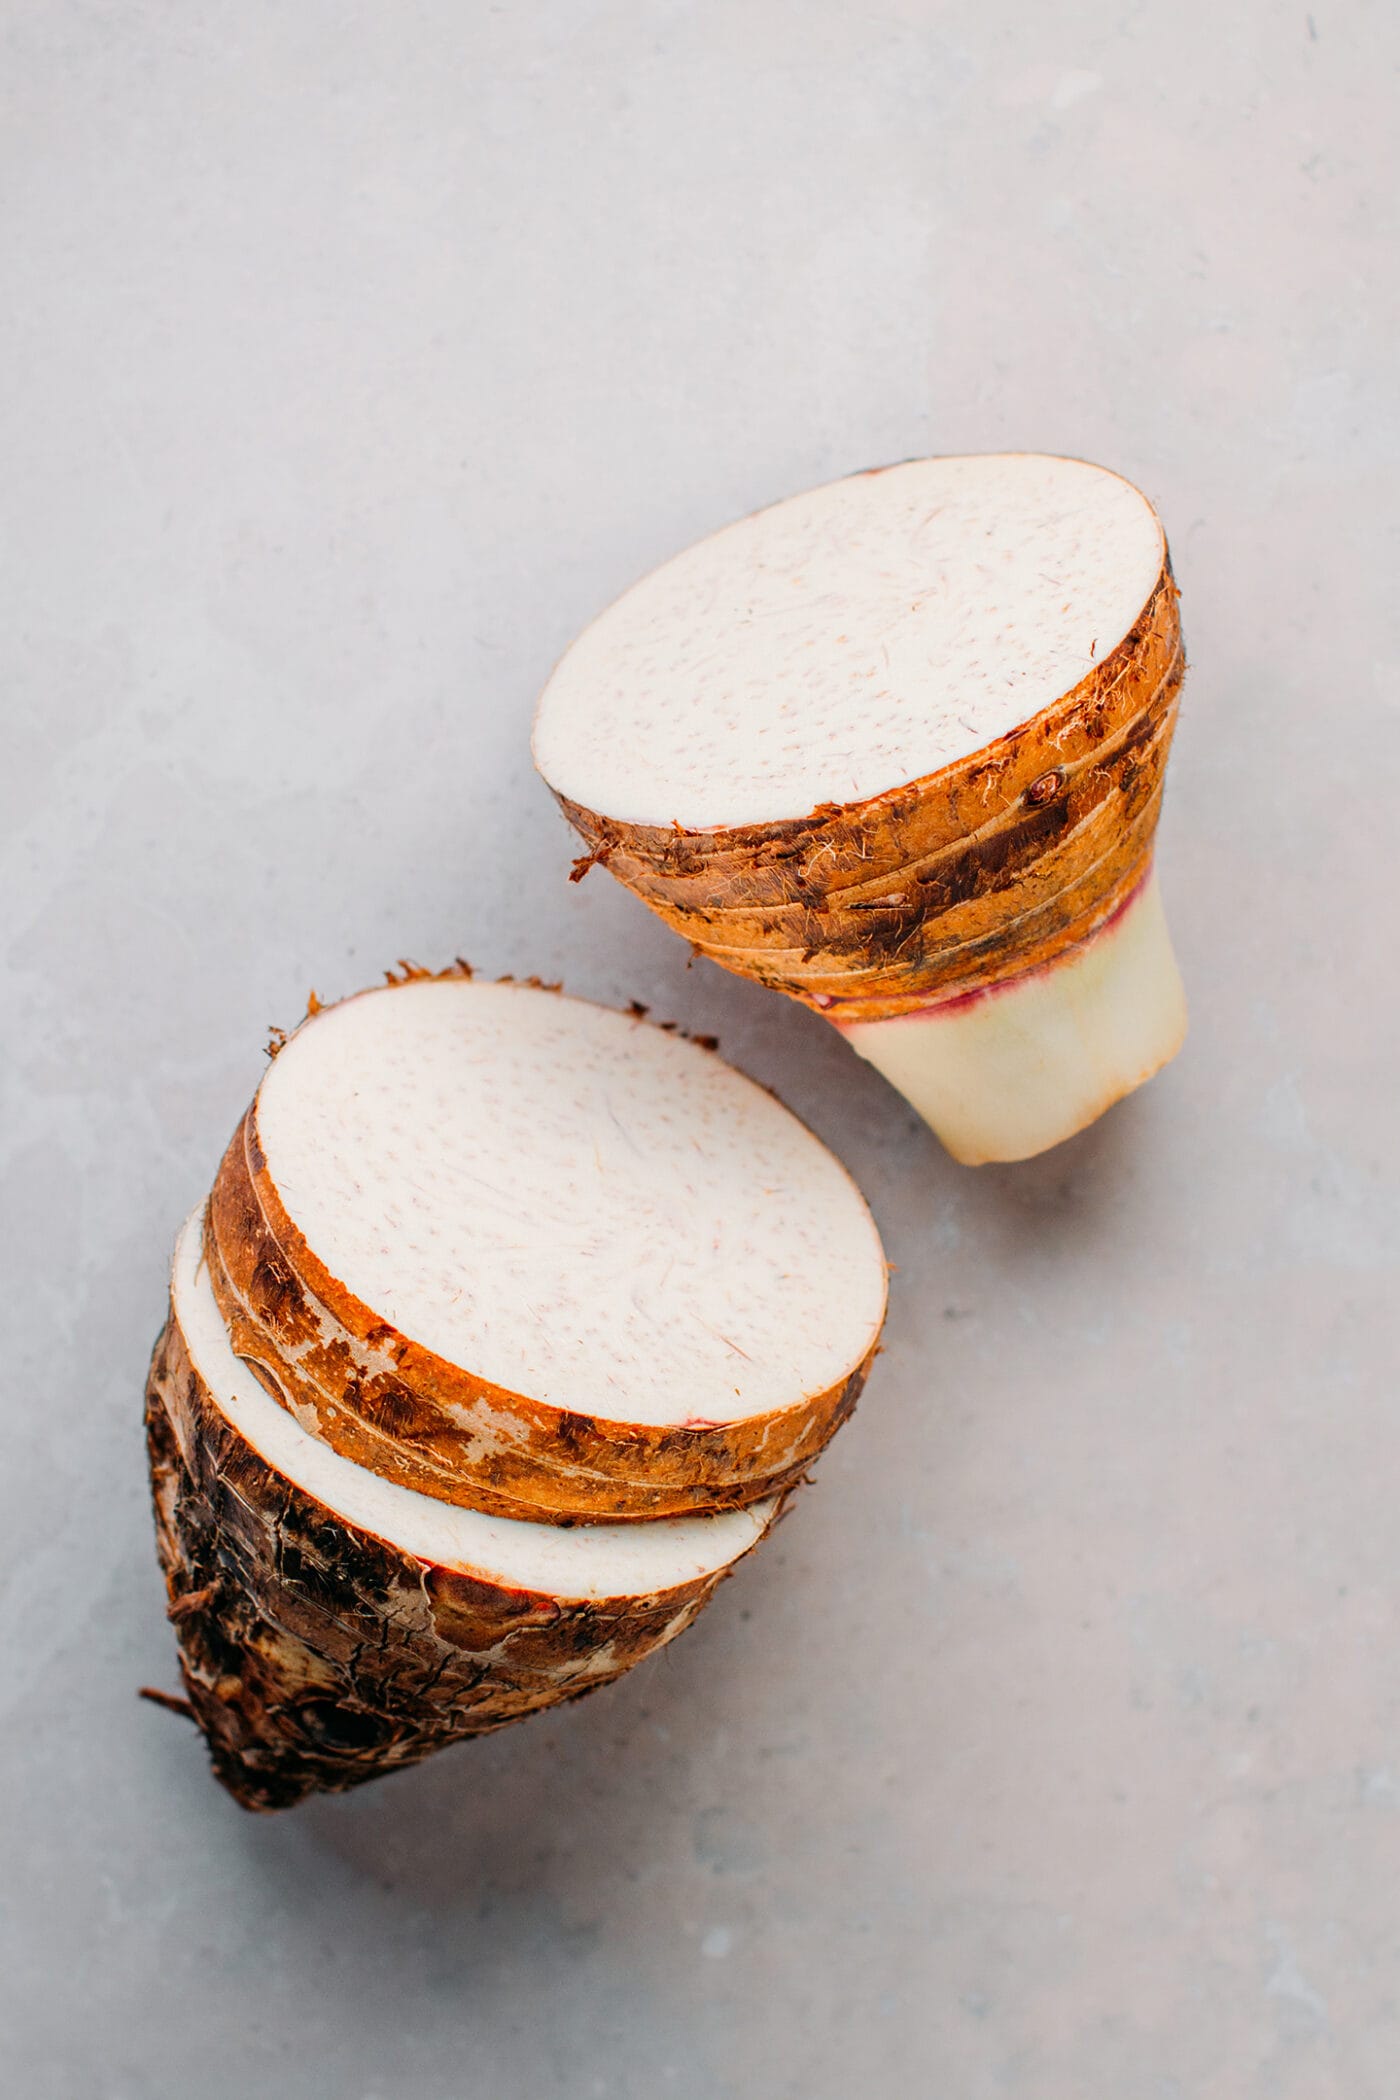
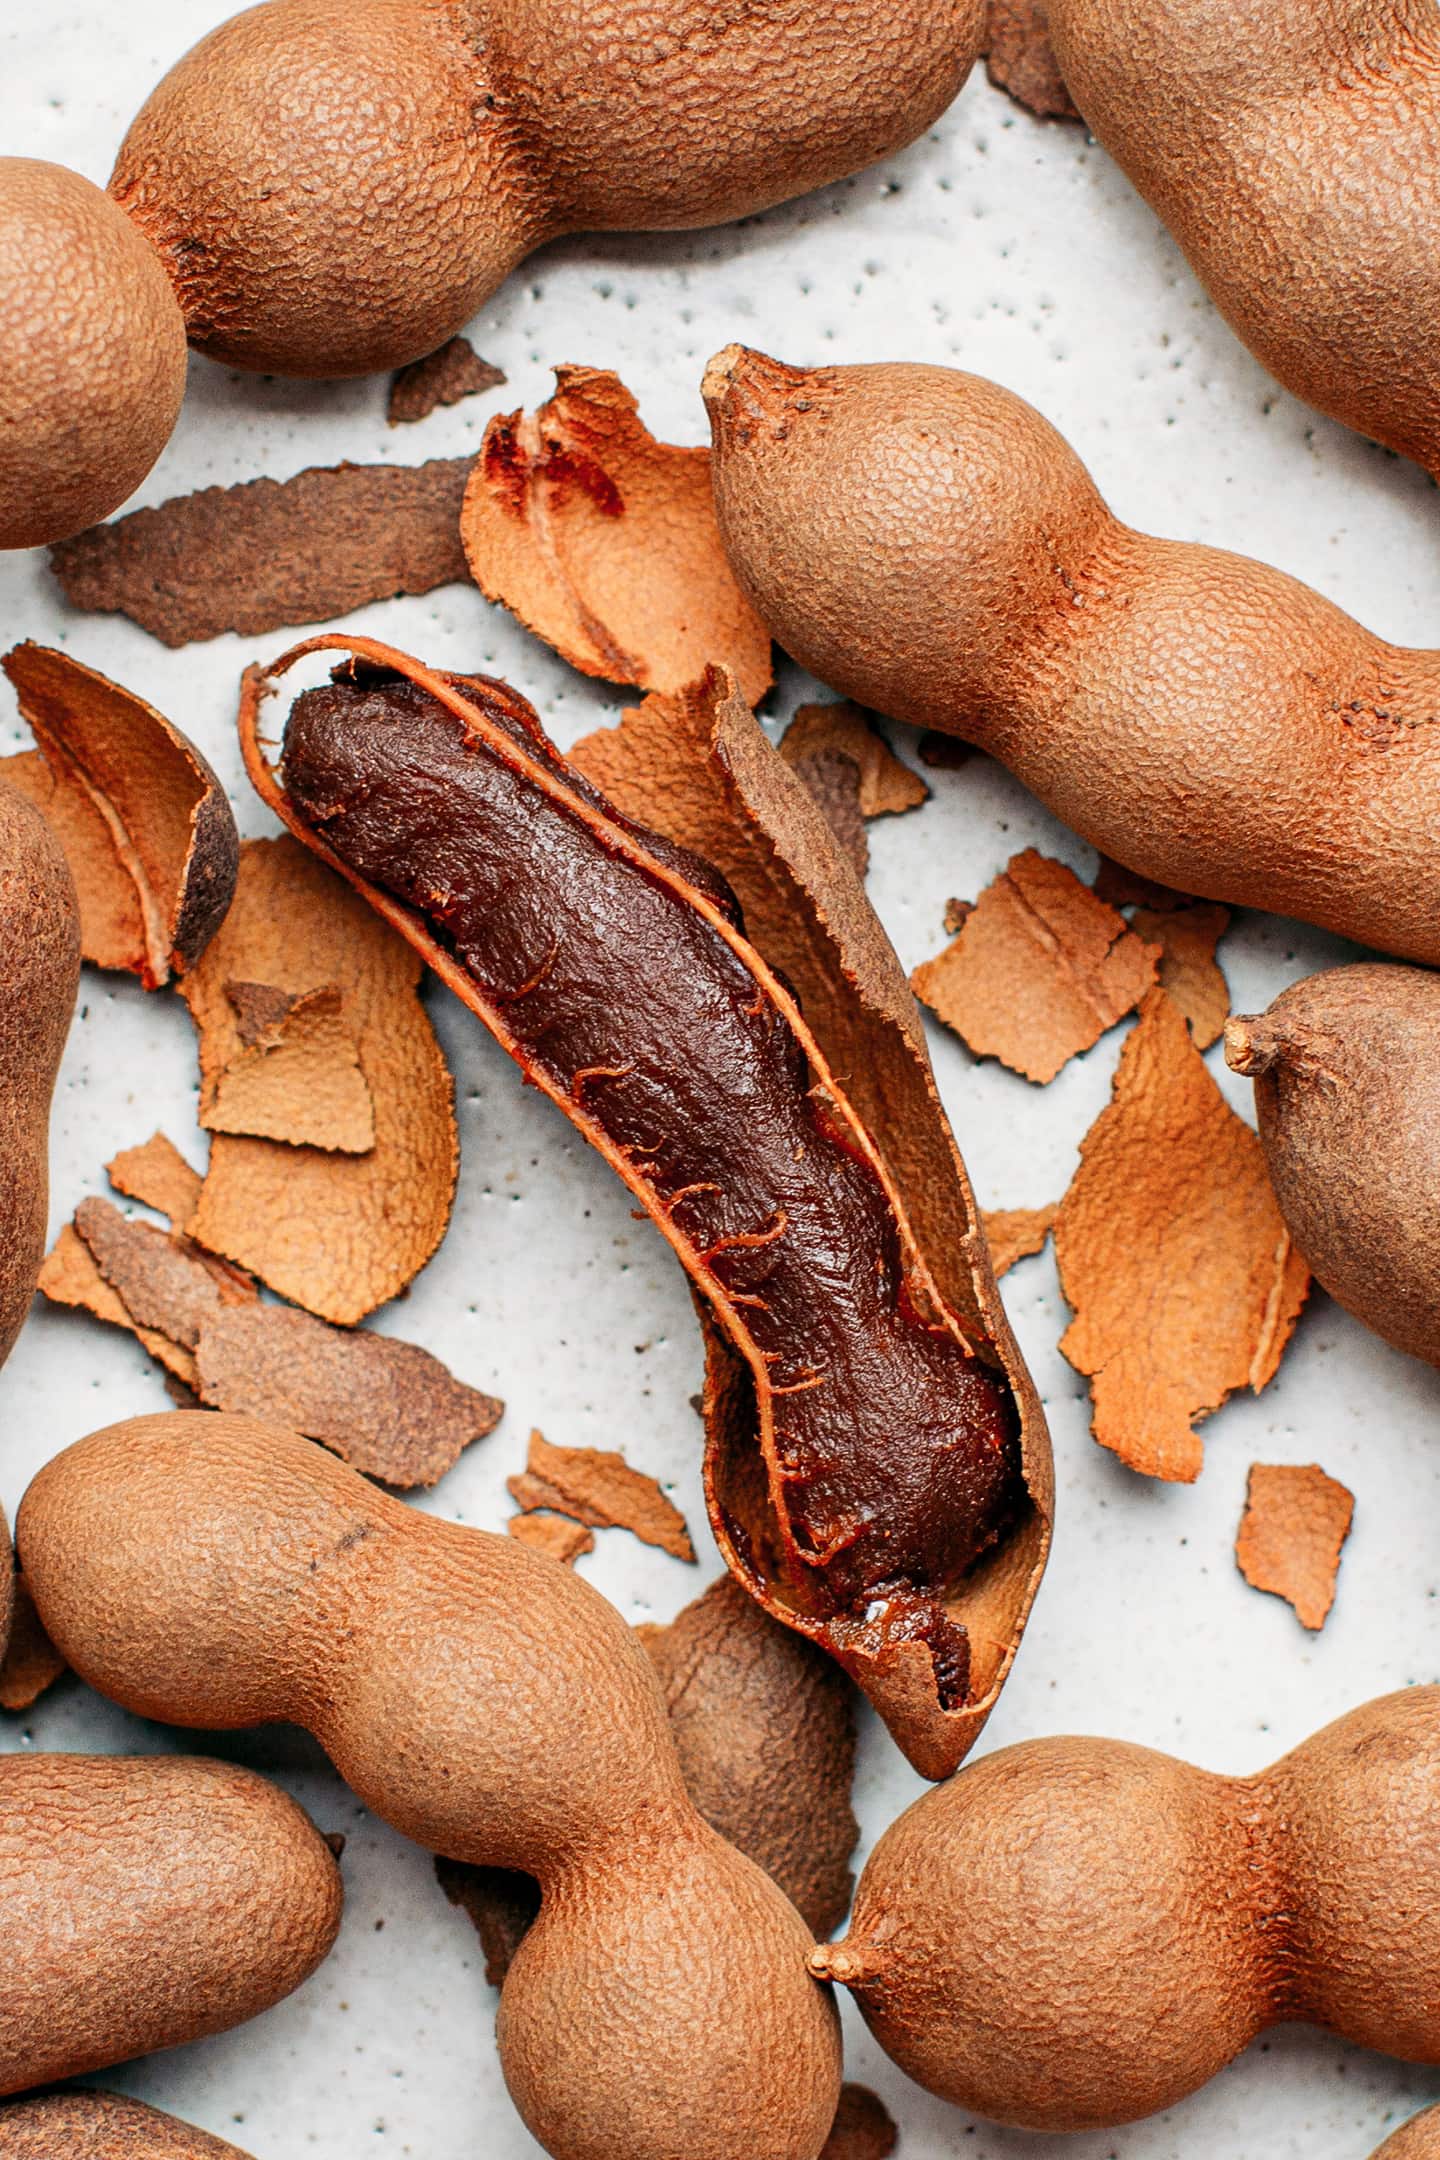
What does taro look like? Taro comes in different shapes depending on the variety. It typically looks like a very large potato with a brown and slightly hairy outer skin. It has a white flesh with purple spots.
What does it taste like? Once cooked, taro tastes mildly sweet and has a texture similar to that of a potato.
📓 Types of Taro
There are many varieties of taro, but only two very different types:
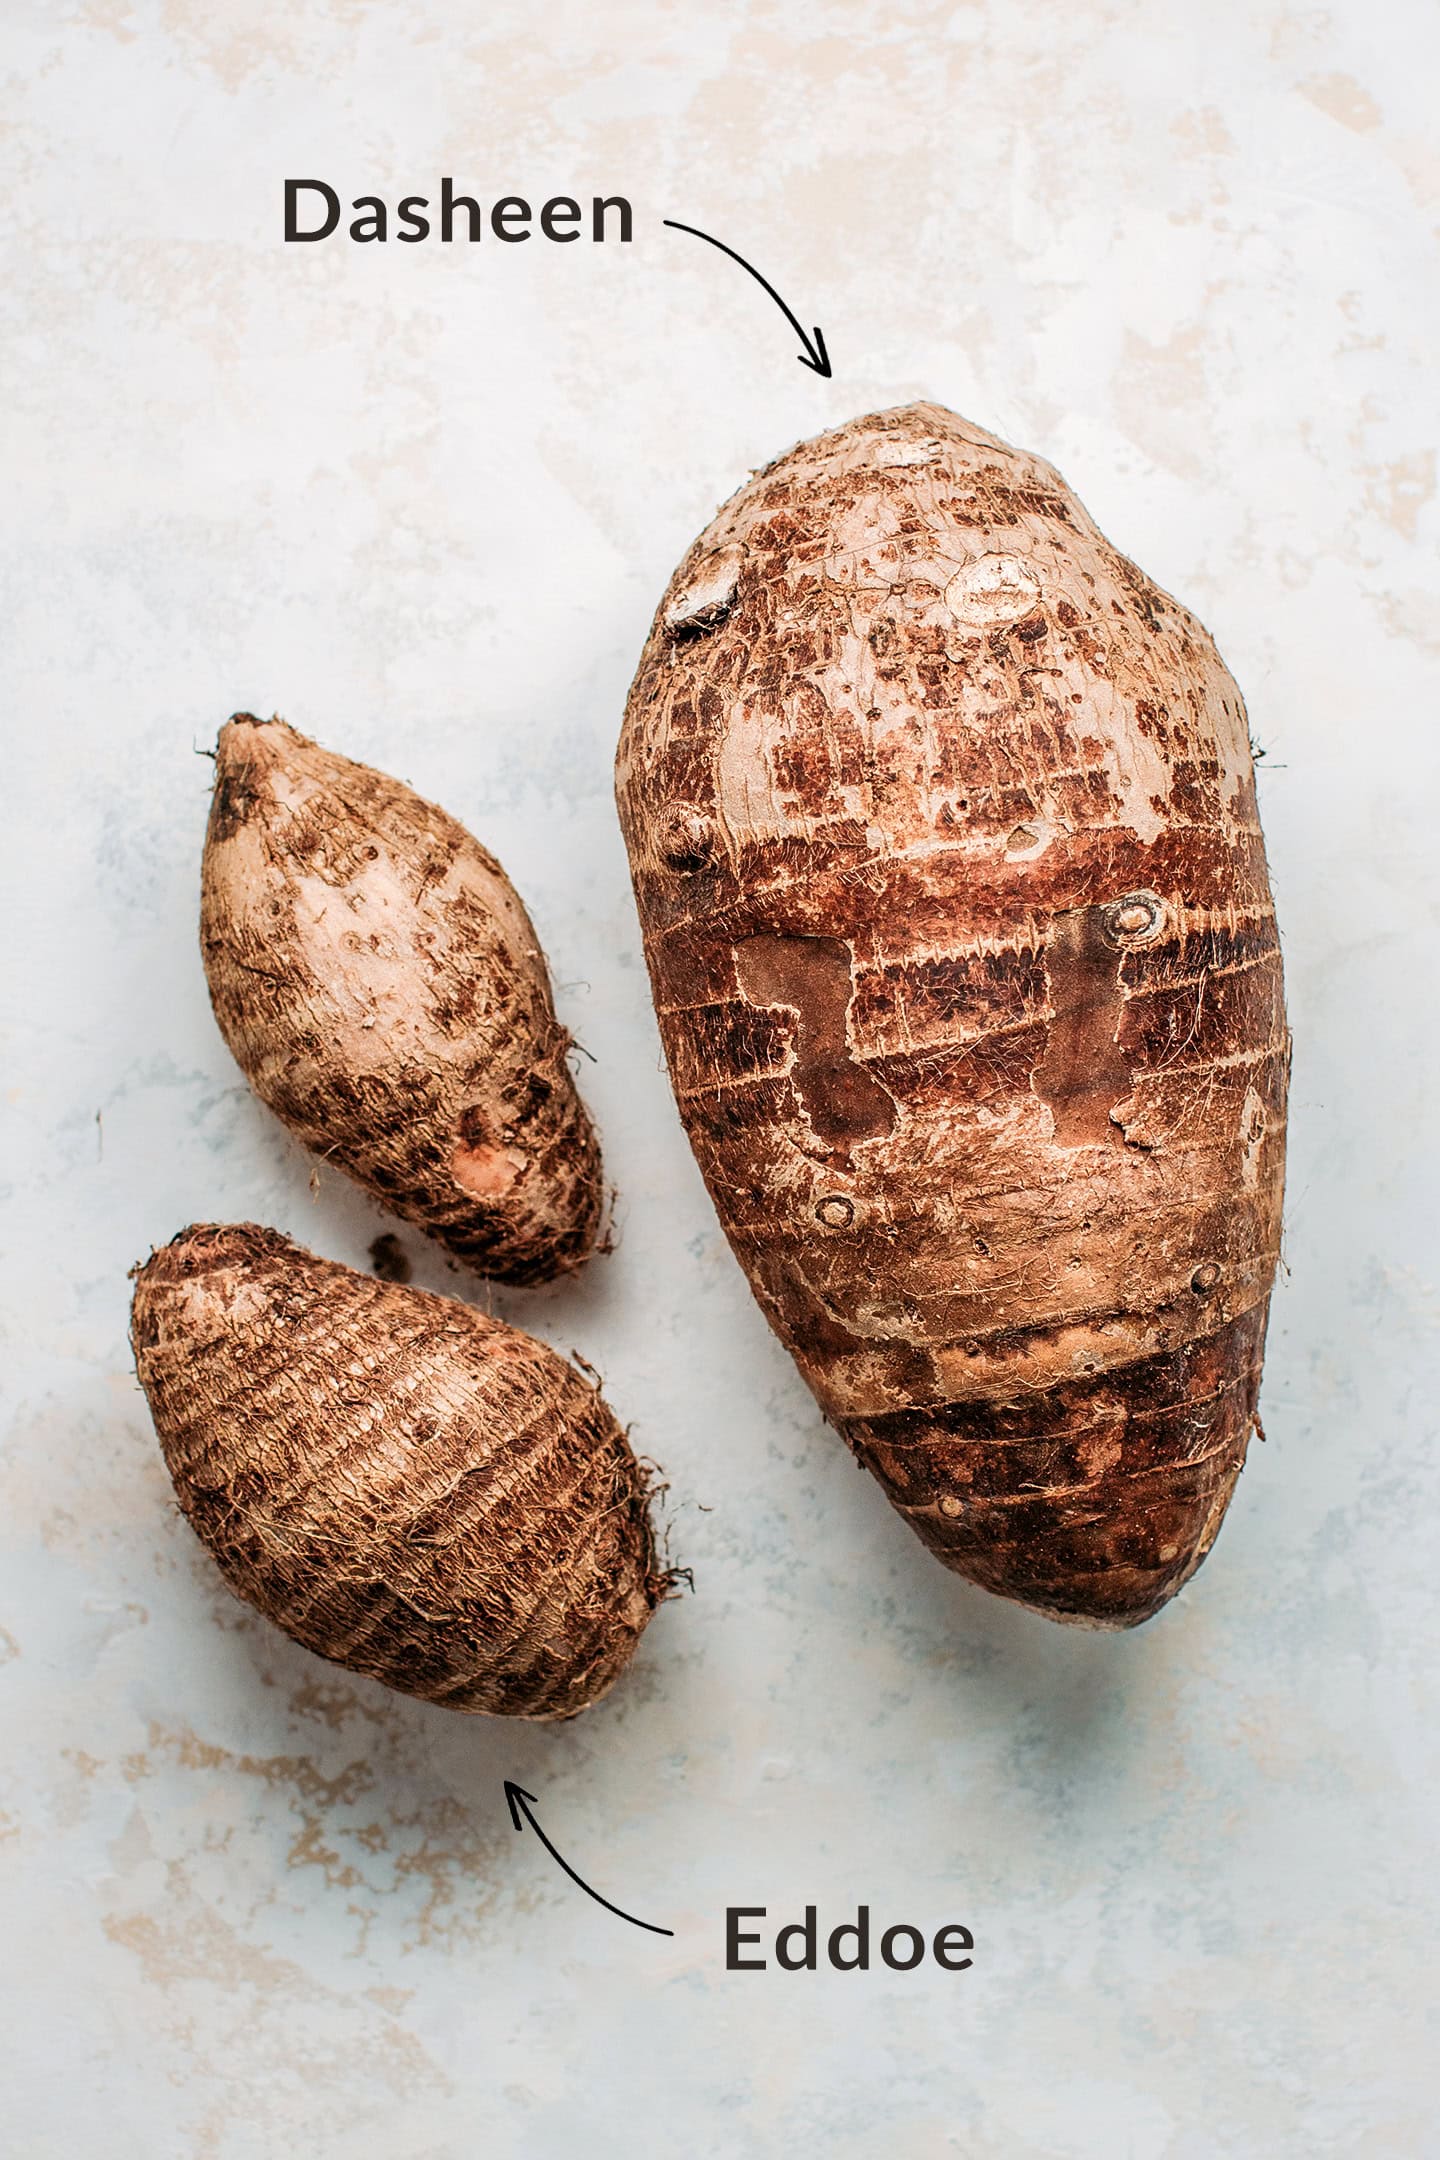
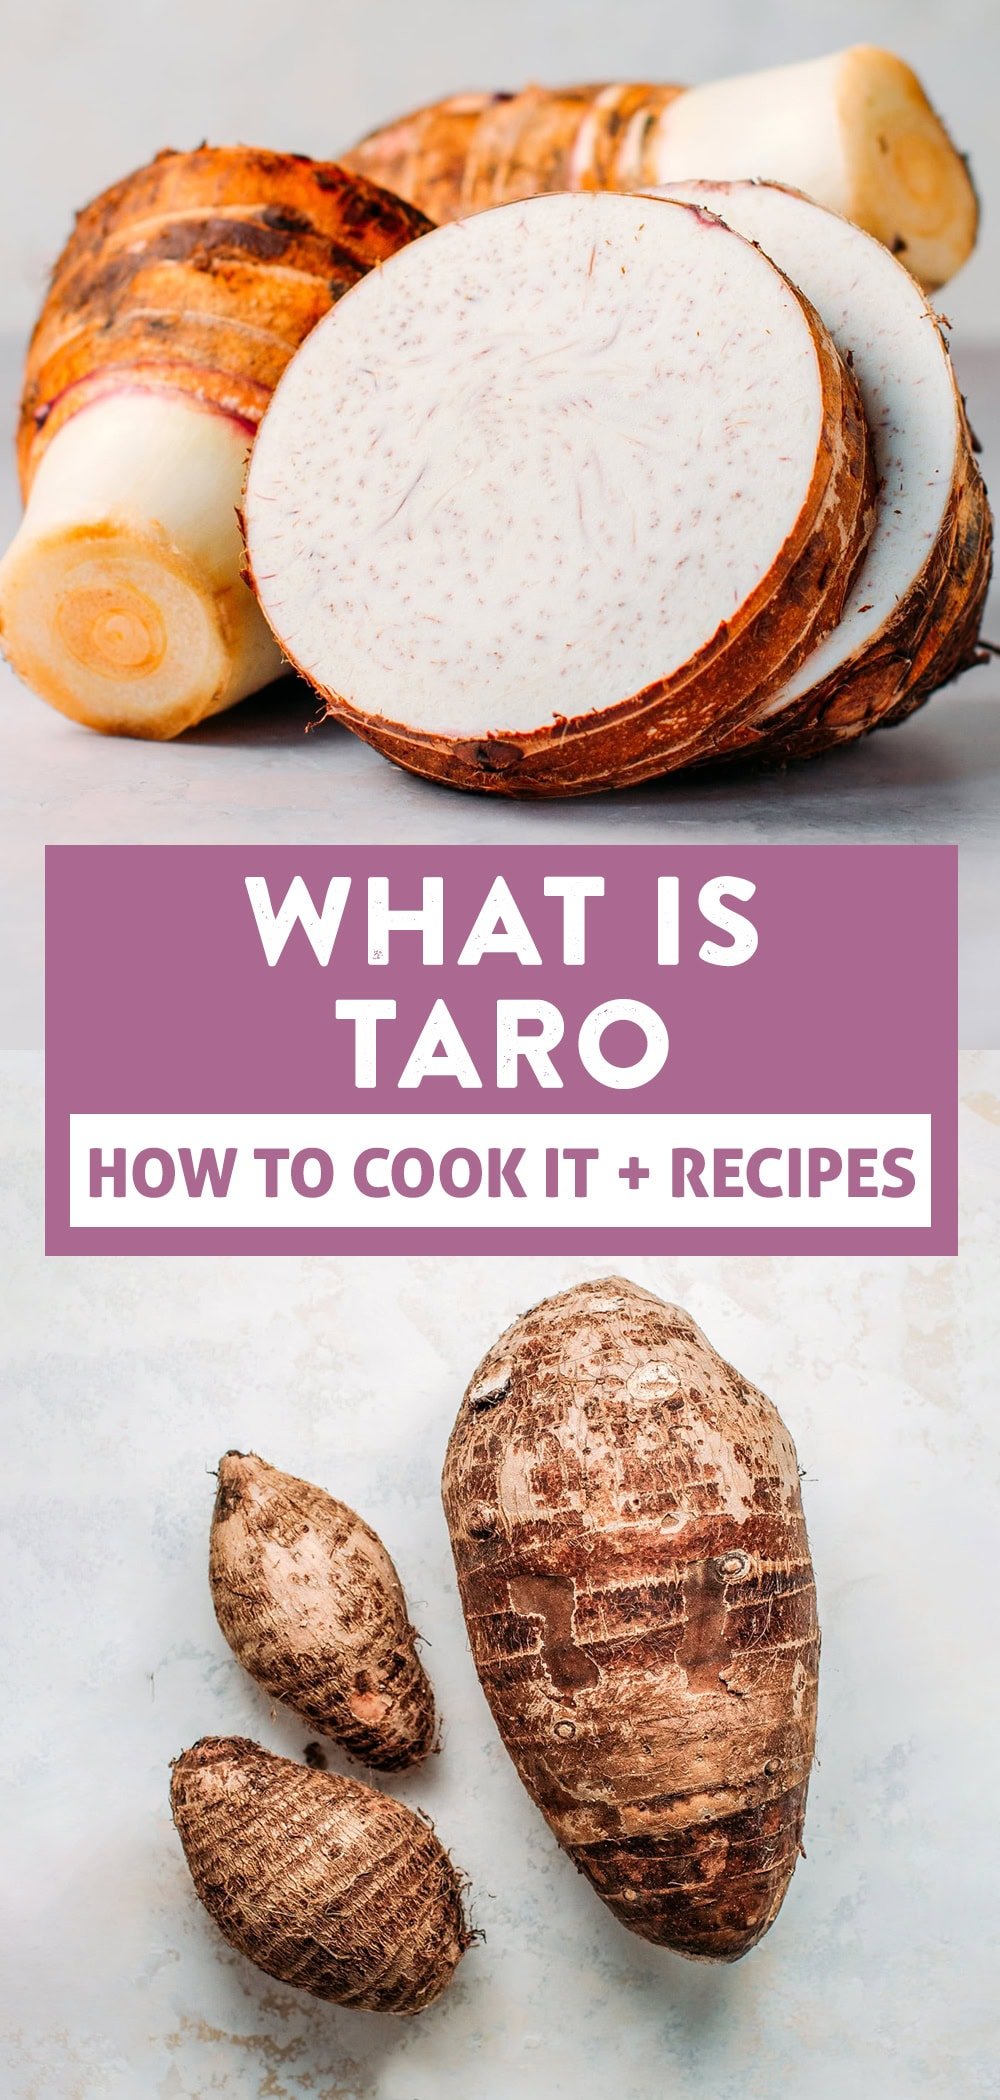
- Small Taro Roots – Also called Eddoe, this variety consists of small tubers of about 150-300 grams. Its skin is light brown with some kind of threads, resembling the shell of a coconut. It has a white flesh and an earthy flavor.
- Large Taro Roots – Sometimes referred to as Dasheen, this type of taro is usually more elongated and heavier (1-2 kg) compared to Eddoe. Its flesh is white as well but with light purple specks. It is sweeter and nuttier.
Are Eddoe and Dasheen interchangeable? Overall, yes, they can be used interchangeably in most recipes. However, you have to remember that Eddoe is much more slimy compared to Dasheen. I personally have a huge preference for the Dasheen variety, which is sweeter, more buttery, and less starchy. To be honest, I rarely, if ever, use Eddoe.
🛒 Where to Buy It
Depending on where you live, you might be able to find taro at your local market, supermarket, or well-stocked Asian supermarkets. If your Asian supermarket doesn’t stock taro, ask them about it. Sometimes, they can order it.
I find mine at a local produce store. Dasheen is available mostly during Winter in Europe/USA, while Eddoe tends to be available year-round.
🥔 How to Pick a Good One?
1. Overall Appearance
Judging whether a taro is fresh just by looking at it can be difficult. However, you can check the outer skin. If there is a lot of wet soil, it means it has just been dug up. If there are any spots of mold, it’s usually not a good sign, and that taro is most probably old.
2. Weight
If you are unsure which root to pick among the ones available, I have a small tip for you! Weight two taro roots of the same size by holding one in each hand. The heavier taro root will have more water inside. Therefore, once cooked, it will usually be tasteless. Pick the lighter one – it will have a more buttery, nuttier flavor once cooked!
3. Flesh
Sometimes, taro can also be found cut in halves in grocery stores, especially when the roots are very large. If this is the case, look at its flesh. If the specks are light purple in color (see the image below), it means that the taro is good. Otherwise, the specks are brown – it means the taro is usually not good.

🔪 How to Prepare It
Now that you know how to pick a good taro root, let’s see how to prepare it! First, you need to wash and peel it as its skin is not edible.
Wash and Peel the Taro
- Wash it. If your taro has a lot of soil around it, run it under cold water to wash it. You can use a small brush to clean the skin thoroughly. Then, drain it well and pat it dry.
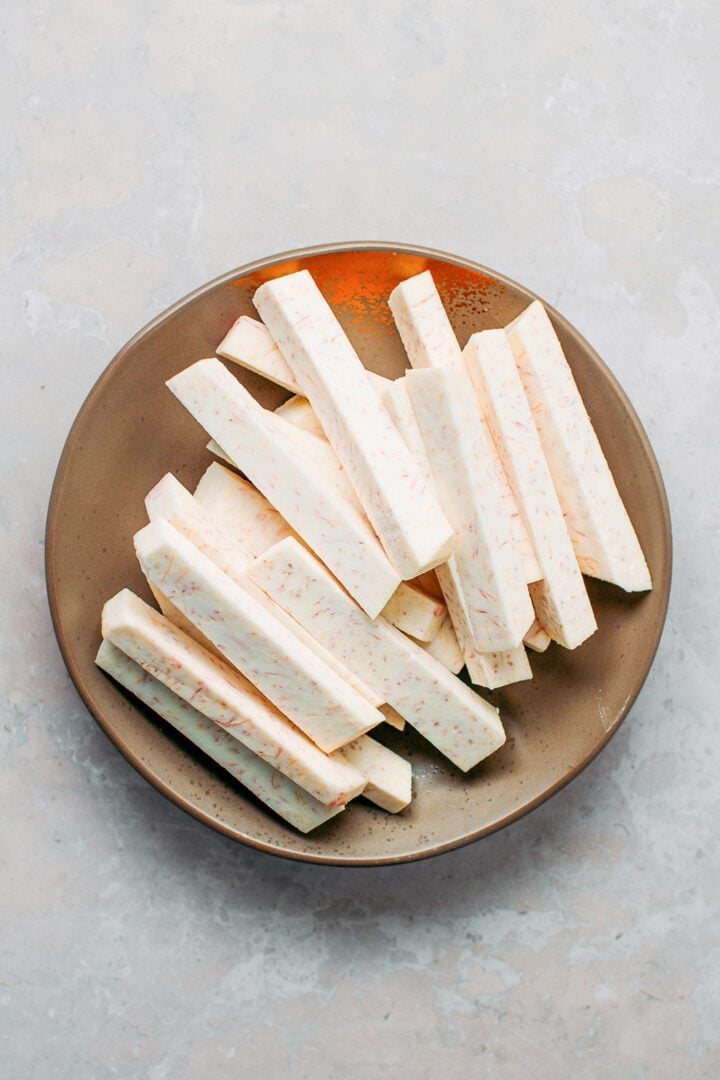
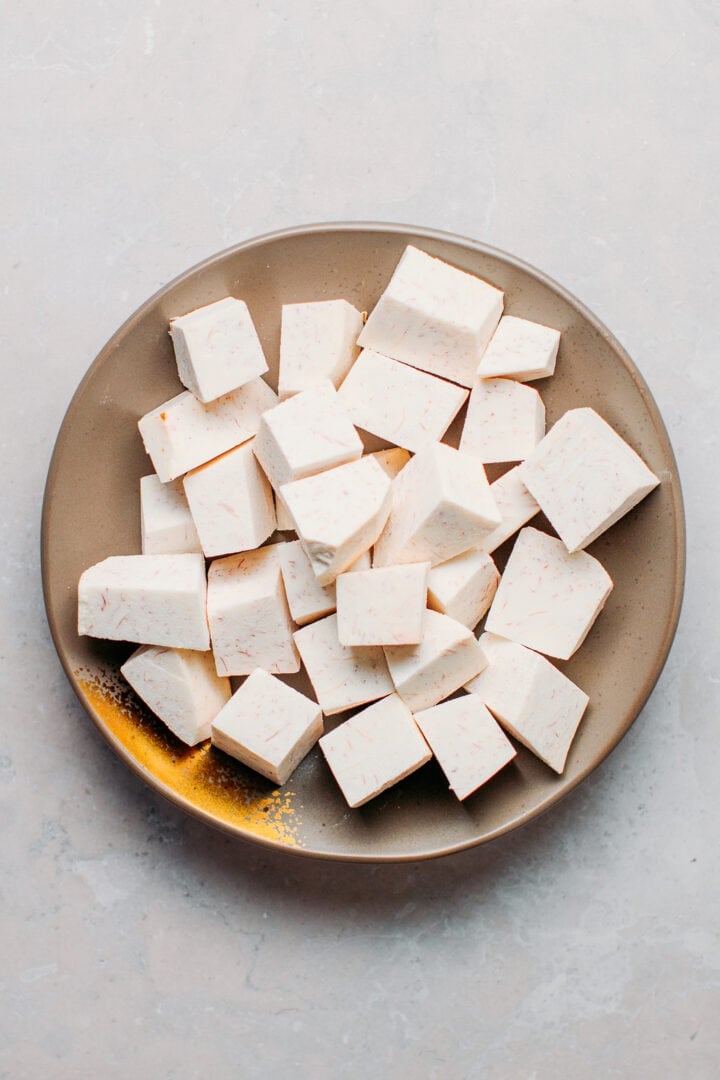
- Slice and peel it. There are different ways to cut and peel the taro. Personally, I recommend starting by slicing it crosswise into 1-inch (2.5 cm) wedges and then peeling the skin using a sharp knife. I find this way easier compared to peeling it whole, but that’s up to you!
Feeling itchy?
Taro can leave your hands feeling itchy. To prevent that, you can use nylon gloves or keep your hands dry during the cutting process. If your hands are already itchy, place them in a bowl of cold water with a few tablespoons of white vinegar for 2-3 minutes.
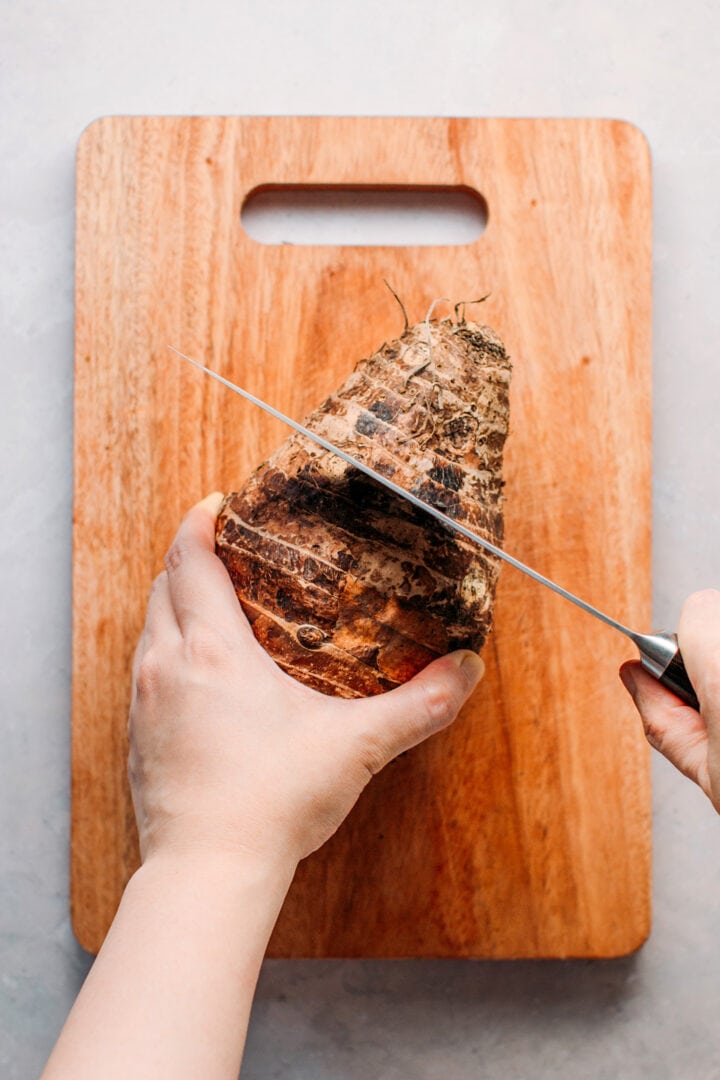
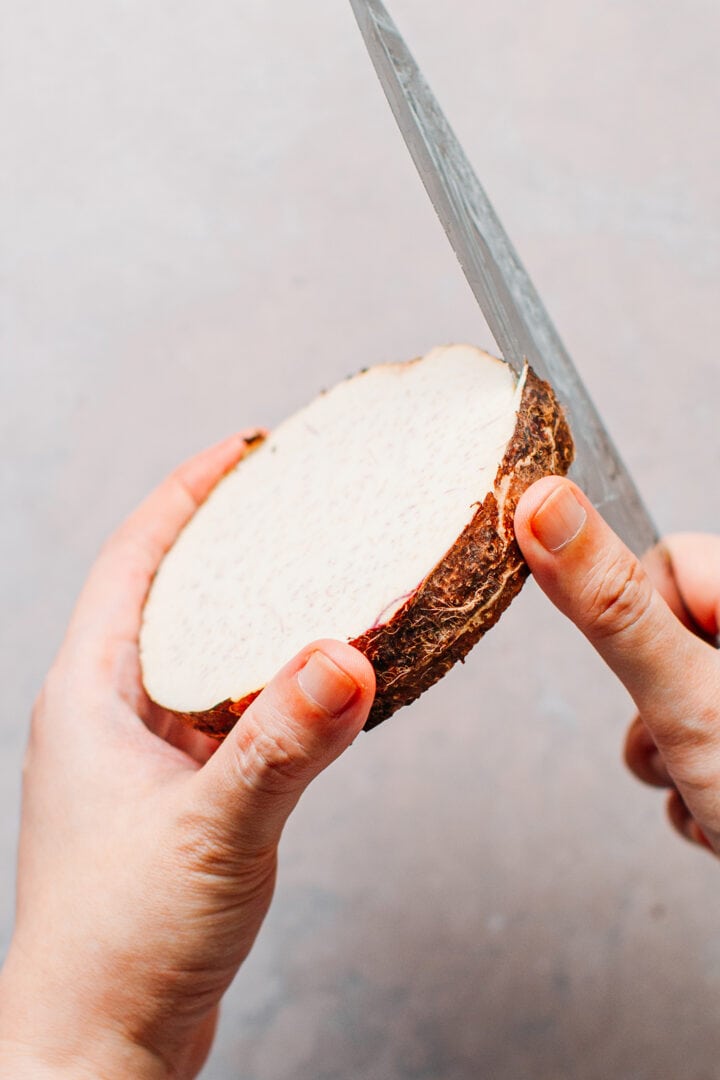
- Soak it. Once your taro is peeled and sliced into the desired shape, it’s best to soak it in salted water for about 15 minutes. Although this step is optional, it helps remove some of the starches.
- Drain it. After soaking, drain the taro using a sieve. The taro is now ready to be cooked!
🥣 How to Cook It
Taro can be used the same way you would use regular white potatoes. It can be sautéed, steamed, boiled, or even deep-fried.
Steaming
- Place in a steamer. Place your taro in either a bamboo steamer basket or a regular steamer (the Instant Pot works great, too!).
- Steam. Next, steam the taro for 15-20 minutes, depending on the size of your taro pieces. The taro should have tender flesh, just like cooked potatoes.
Boiling
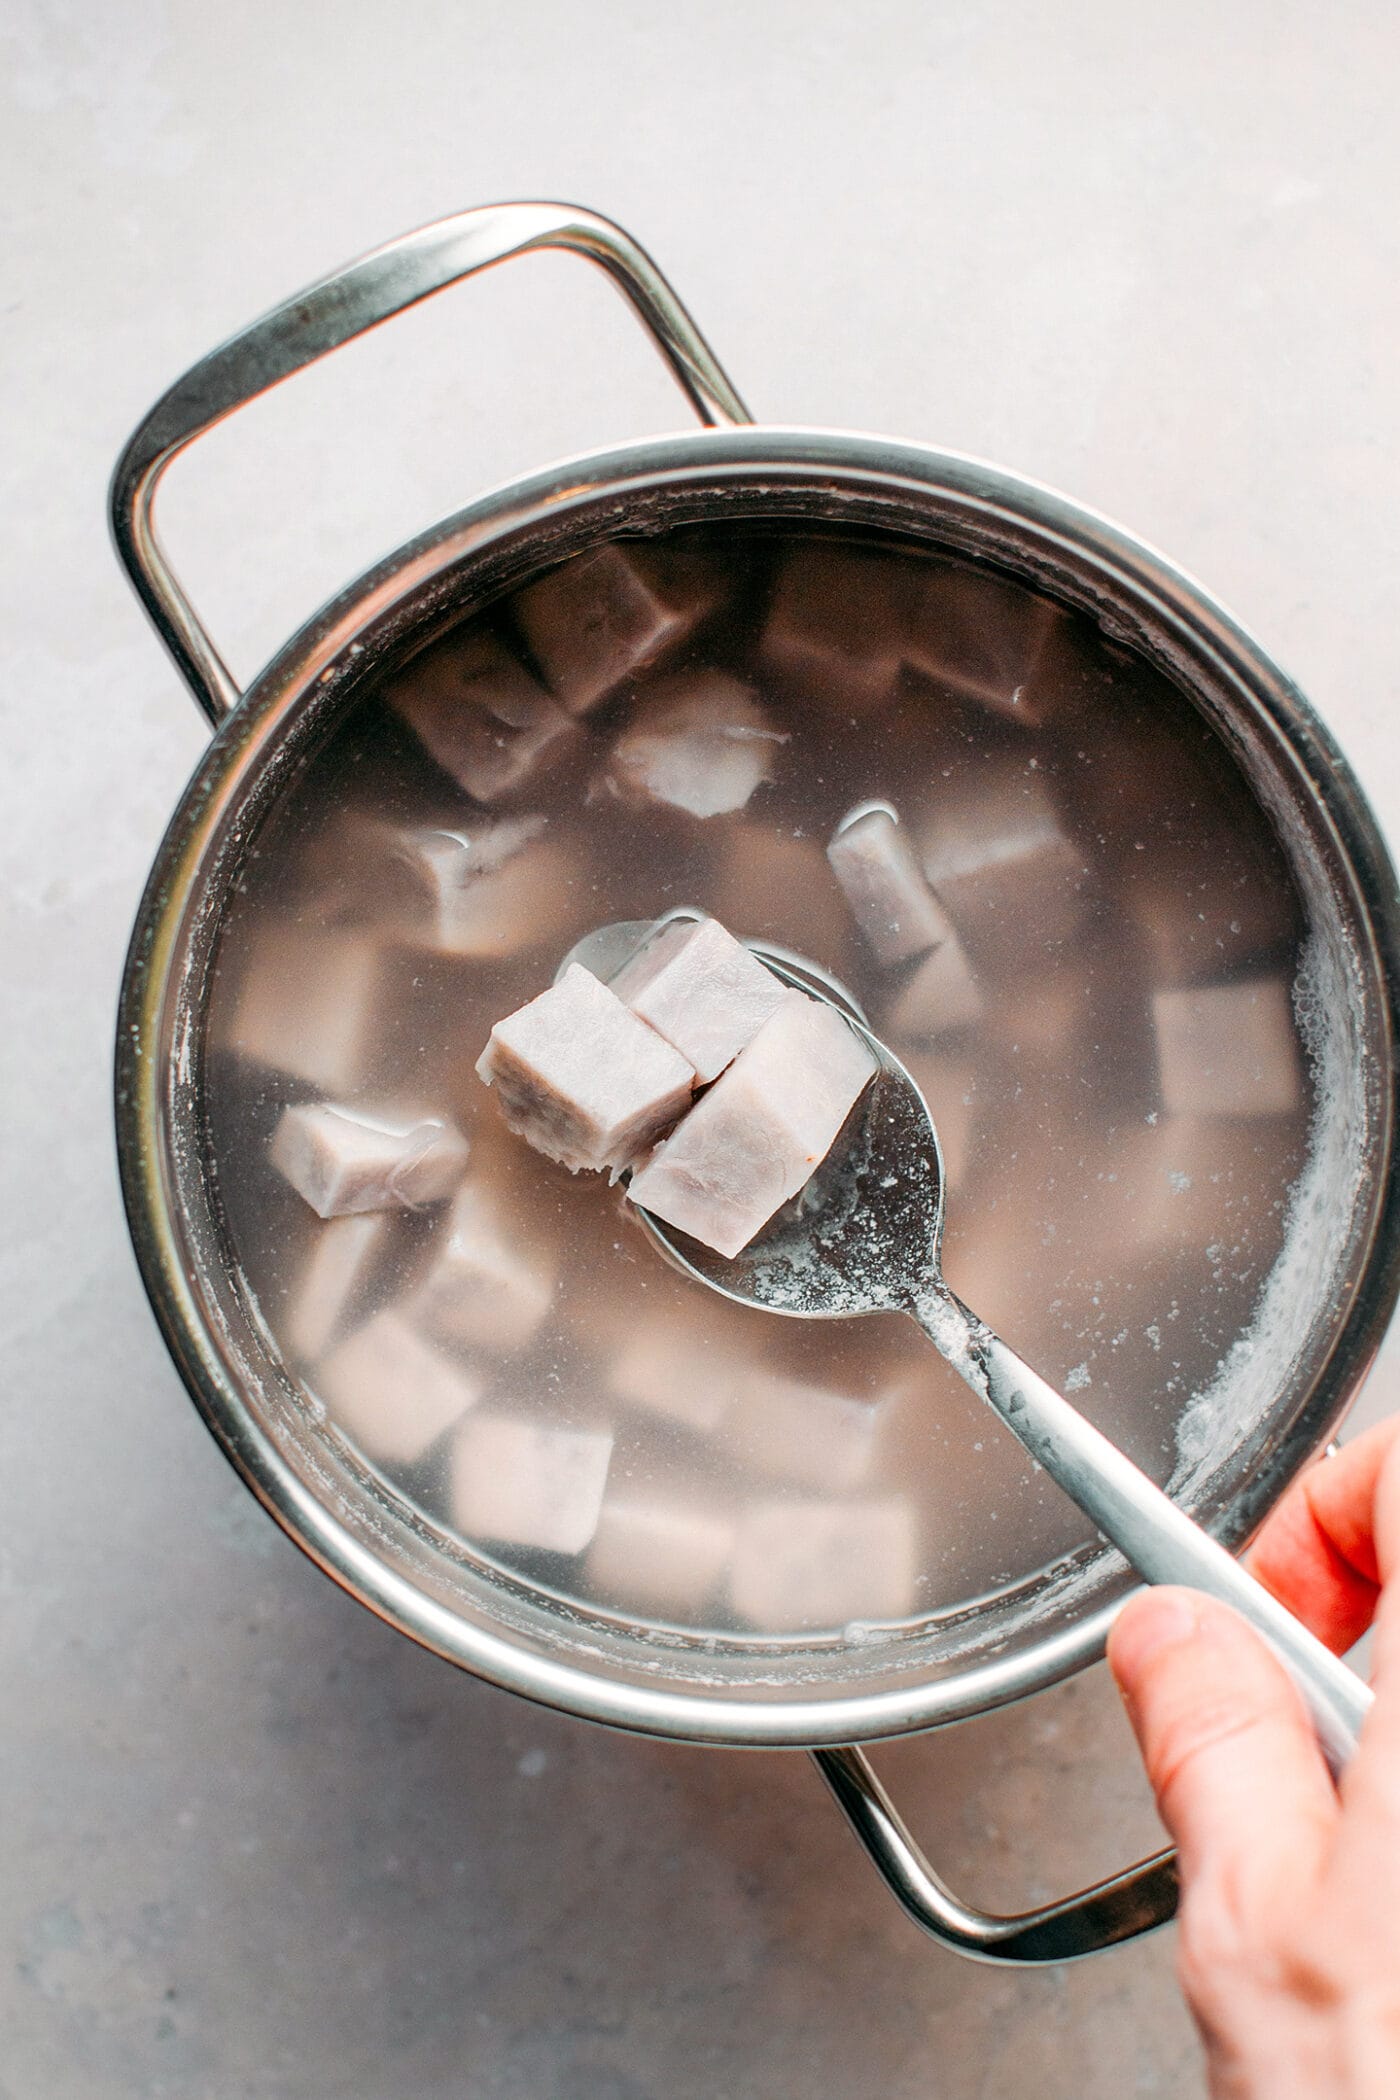
- Add it to a saucepan. Place your diced taro in a large pot and cover it with water to fully submerge it.
- Boil. Bring to a boil and let simmer for 15-20 minutes or until it is soft. Keep an eye on it, as you don’t want to overcook it. It would become too soft and watery.
How to use in curries
If you plan on adding taro to curries, there is no need to cook it beforehand. Simply cut it into 1-inch cubes and let it simmer for 20-25 minutes in the curry.
Frying
If you prefer crispy on the outside and tender on the inside taro, frying is the way to go! To make taro fries:
- Prepare the taro. Peel, wash, and cut your taro into about 3-inch (6-8 cm) long strips with about 1/2-inch (1 cm) in width. Soak them in a bowl of cold water mixed with a generous pinch of salt and a squeeze of lemon juice for about 15 minutes. Then rinse several times and drain well.
- Fry. Heat a sufficient amount of cooking oil in a deep pan. Once the oil is hot, put the taros into the pan and fry on medium heat. If the oil is too hot, your fries might burn before the inside is fully cooked, so be careful about that.
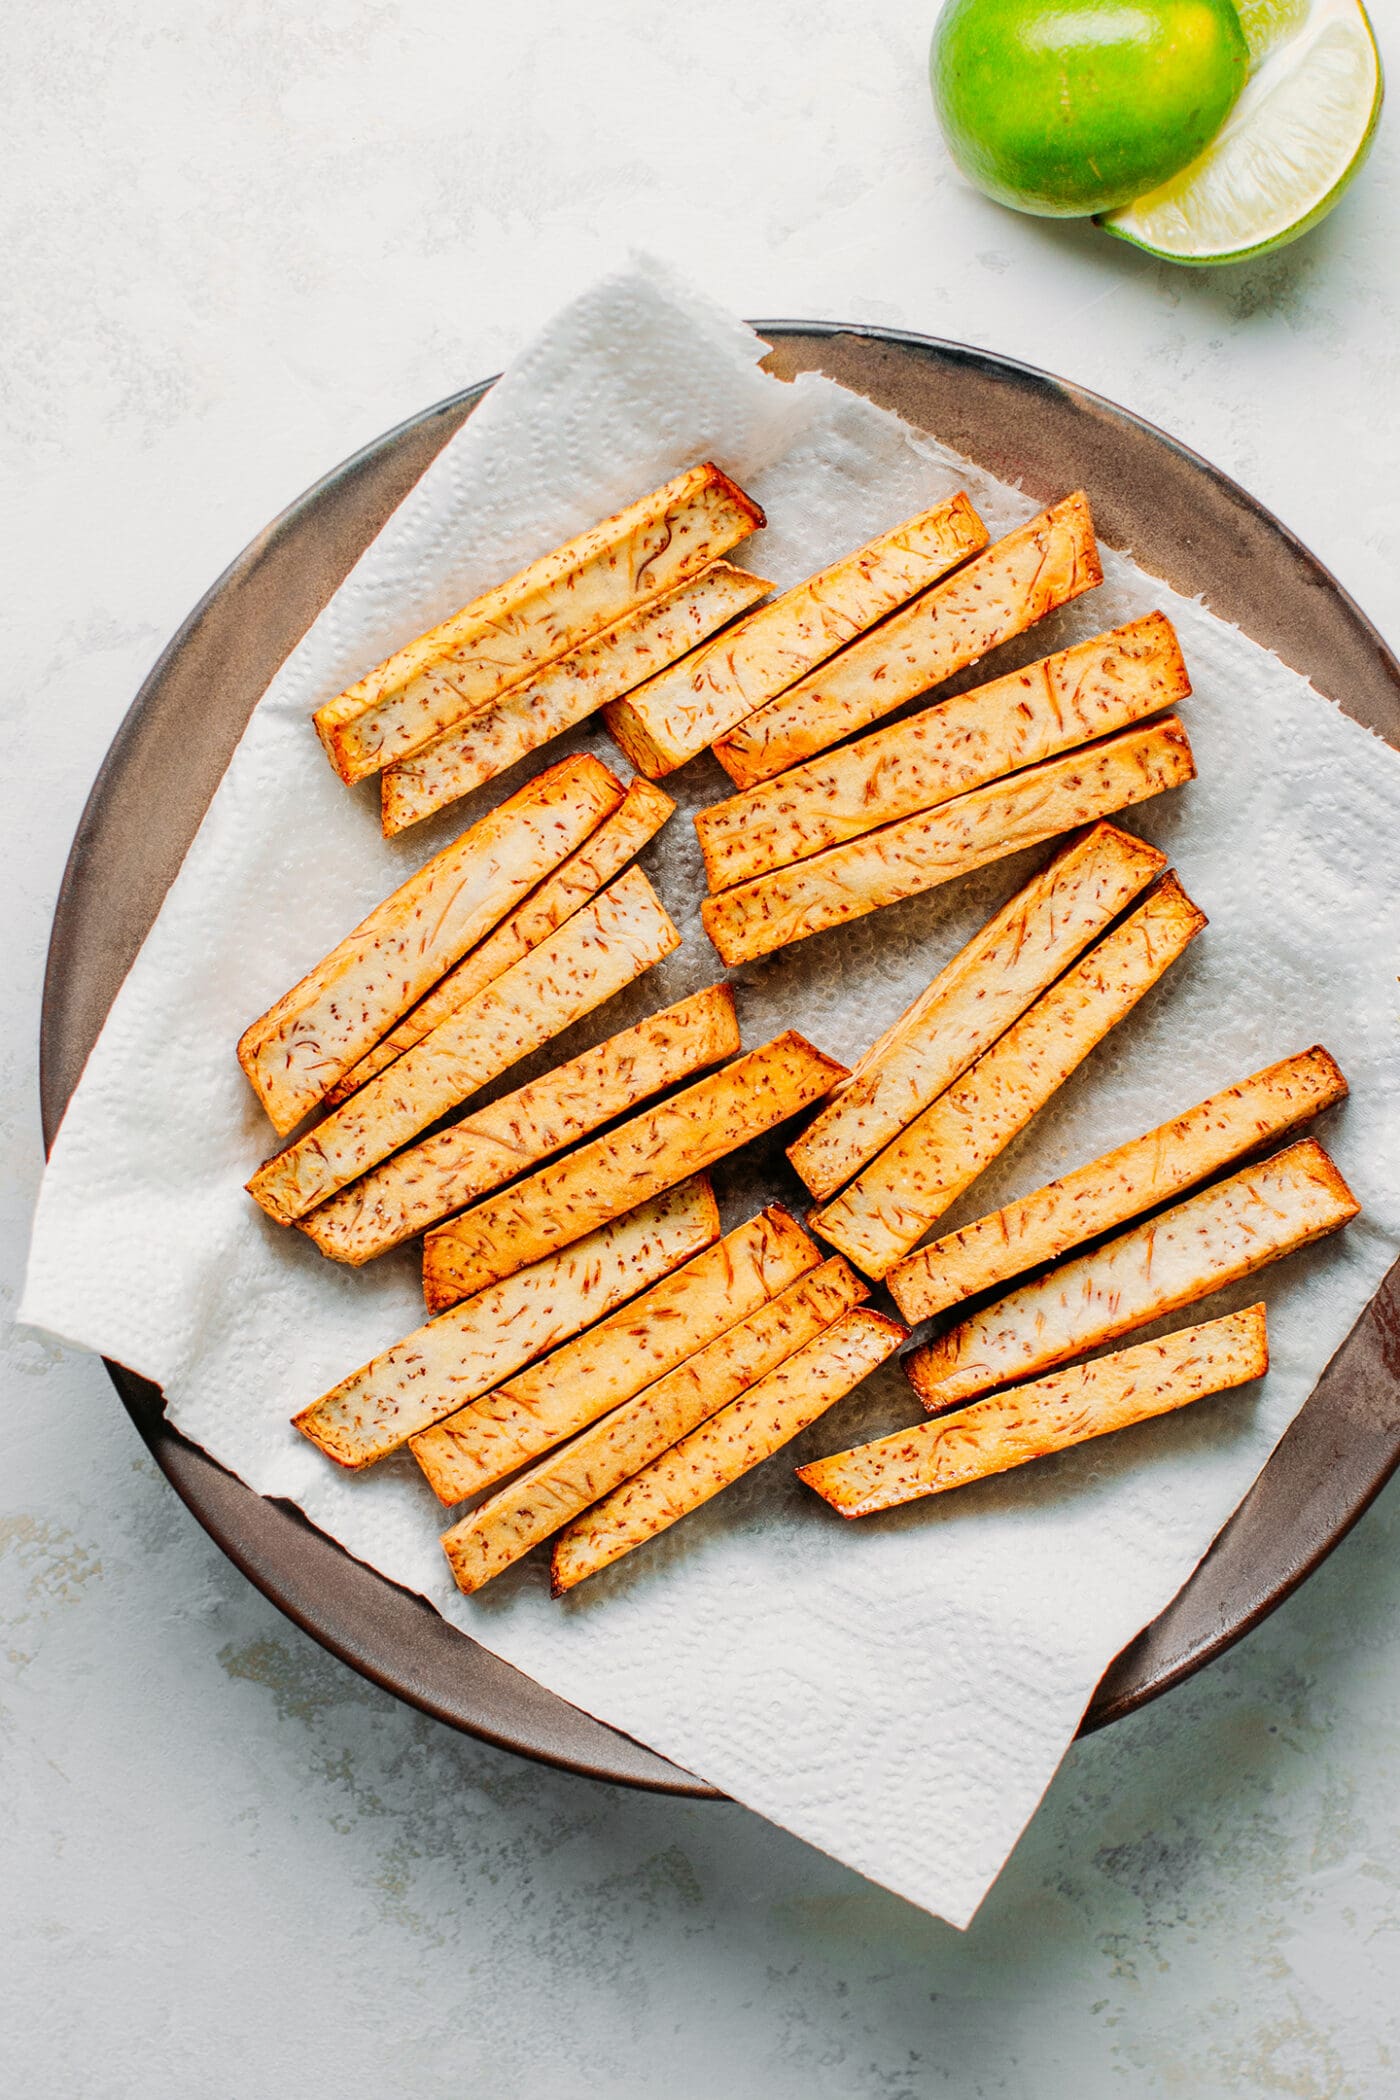
- Remove from the oil. When the taro fries are golden brown on all sides, remove them from the oil using a slotted spoon and place them on a plate lined with kitchen paper towels. Enjoy immediately (otherwise, the fries will get softer after a few hours).
Feel free to check out my in-depth recipe on how to make taro fries.
📙 Nutritional Value
Compared to white potatoes, taro is a little bit higher in calories as it has a denser texture. Here is the nutritional value per 100g of cooked taro:
- 142 calories
- 0.1g of fat
- 34.6g of carbohydrates
- 5.1g of fiber
- 0.5g of protein
🩺 Health Benefits
According to the National Library of Medicine, taro is very rich in nutrients. One portion of it provides 1/3 of your daily recommended amount of manganese, which is good for metabolism and bones and preventing blood clotting.
It also contains many vitamins that are good for the eyes, skin, circulatory, and immune systems.
Moreover, taro also brings other health benefits such as improving digestion, stabilizing blood sugar, reducing your risk of diabetes, preventing your risk of heart disease, preventing cramps, etc.
📔 How to Store Taro
Whole Taro
The best way to store whole taro roots is to keep them in a cool and dry place (just like potatoes). Do not put taro in the refrigerator, or it will soften and quickly rot because of the humidity.
Peeled and Diced Taro
Simply transfer the diced taro to an airtight container and store it for 3-4 days in the refrigerator. It can be stored in the freezer for up to 15 days.
🍲 Taro Recipes


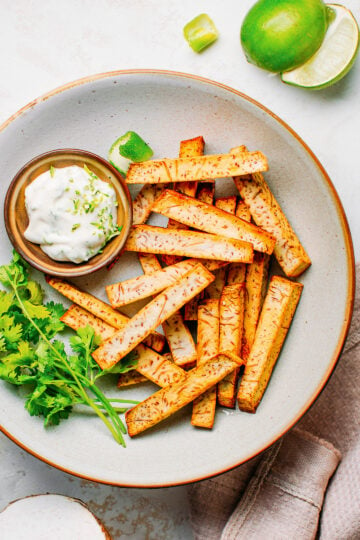
Taro can be used to make both sweet and salty recipes. Not sure where to start? Here is a selection of plant-based taro recipes:
- Easy Vegan Egg Rolls: Traditionally, Vietnamese egg rolls often use shredded taro as a base for the filling. This recipe is based on authentic Vietnamese recipes and yields egg rolls that are super crispy on the outside and tender on the inside.
- Creamy Taro Milk: Learn how to make delicious taro milk tea at home! Prepared from scratch with just 5 ingredients, this nutty and creamy drink is vegan and 100% natural!
- Taro Fries: Learn how to make taro fries! Crispy on the outside and tender on the inside, these taro fries come with a zesty cilantro mayo. Only 5 ingredients and 45 minutes are required!
- Vietnamese Curry: I use taro roots to make this hearty and flavorful one-pot Vietnamese curry! It is infused with aromatics like lemongrass, ginger, and garlic and loaded with other veggies such as eggplant, carrots, and mushrooms!
- Taro Fritters: Perfectly crispy fritters made with grated taro, carrots, garlic, and green onions. They are delicious served with a sweet chili sauce!
You can also use taro in stews and soups. It will soak up the flavors of the broth!
💬 FAQ
As you can see in the photos, taro just has a very light and subtle purple color with some darker specks. It gets a darker shade of purple once cooked, especially when steamed.
Taro powder refers to cooked taro that has been dried and ground into a powder. Do not confuse natural taro powder with taro milk powder, which contains flavorings, sugar, and colorings. Sometimes, ube powder, which has a deep purple color, is sold as “taro powder.” However, ube powder is made from a variety of purple yams, not taro.
Taro can be grown all year round in frost-free weather conditions. It can be found year-round in most produce stores as well (Dasheen tends to be available only during Fall/Winter in the USA/Europe).
Taro should never be eaten raw, as it would be toxic. It contains a chemical compound known as calcium oxalate, which can damage kidneys. Worry not. Once cooked, taro is completely safe to eat!
Taro has a milder flavor compared to potatoes. It is just slightly sweeter and a bit more earthy.
While taro and ube are both root vegetables, they are very different. Ube is a type of purple sweet potato. It is much sweeter and has a very bright purple flesh.

Want to Save This Recipe?
Enter your email below & we’ll send it straight to your inbox! Plus, you will receive new recipes every week!
I’d like to receive more tips & recipes from Full of Plants.
This site is protected by reCAPTCHA and the Google Privacy Policy and Terms of Service apply.

What is Taro (And How to Cook It)
Ingredients
- 1 large taro root
- 2 cups oil if frying
Instructions
Prepare the taro
- Wash it. If your taro has a lot of soil around it, run it under cold water to wash it. You can use a small brush to clean the skin thoroughly. Then, drain it well and pat it dry.
- Slice and peel it. There are different ways to cut and peel the taro. Personally, I recommend starting by slicing it crosswise into 1-inch (2.5 cm) wedges and then peeling the skin using a sharp knife. I find this way easier compared to peeling it whole, but that’s up to you!
- Soak it. Once your taro is peeled and sliced into the desired shape, it’s best to soak it in salted water for about 15 minutes. Although this step is optional, it helps remove some of the starches.
- Drain it. After soaking, drain the taro using a sieve. The taro is now ready to be cooked! To cook the taro, you have different options: steaming, boiling, or frying.
Steaming
- Place in a steamer. Place your taro in either a bamboo steamer basket or a regular steamer (the Instant Pot works great, too!).
- Steam. Next, steam the taro for 15-20 minutes, depending on the size of your taro pieces. The taro should have tender flesh, just like cooked potatoes.
Boiling
- Add it to a saucepan. Place your diced taro in a large pot and cover it with water to fully submerge it.
- Boil. Bring to a boil and let simmer for 15-20 minutes or until it is soft. Keep an eye on it, as you don’t want to overcook it. It would become too soft and watery.
Frying
- Heat the oil. Heat a sufficient amount of cooking oil in a deep pan. Once the oil is hot, put the sliced taro into the hot oil and fry on medium heat. If the oil is too hot, your fries might burn before the inside is fully cooked.
- When the taro fries are golden brown on all sides, remove from the oil using a slotted spoon and place them on a plate lined with kitchen paper towels. Enjoy immediately with your favorite sauce!
Notes
How to Store Taro:
For whole taro: The best way to store whole taro roots is to keep them in a cool and dry place (just like potatoes). Do not put taro in the refrigerator, or it will soften and quickly rot because of the humidity. For peeled and diced taro: Simply transfer the diced taro to an airtight container and store it for 3-4 days in the refrigerator. It can be stored in the freezer for up to 15 days.Nutrition

About the Author
Thomas Pagot is the founder, photographer, and recipe developer behind Full of Plants. He created the blog in 2016 as a personal cookbook for vegan recipes. Through years of recipe development, Thomas has successfully grown Full of Plants into a trusted resource for plant-based recipes.


Leave a Comment
Just tried it. A new taste for me. Thank you.
Great work! This is so interesting and informative. Where I live, we don’t use taro for cooking. So, except for the name and the shape, I knew little about it. Thank you so much for your hard work!!!
You are welcome Jane!
My favorite way to eat taro root is to bake just as one would bake a potato. Very delicious and easy to prep. I take a plastic scrubber and brush harshly to remove all the stringy outer brown “hair”. The scrubbed root will be smooth, yet, slightly natural bumps. That is just the nature of the root. Bake till you can give it a squeeze with hot mitt so you don’t get burnt. Take out of oven to eat. I usually put some butter or dribble some olive oil over the white flesh and maybe a pinch of salt. Absolutely delicious!
Baked taro sounds delicious! Thanks for sharing Marigael!
How long do u bake it for? What temperature please?
Thanks for this i never had and use taro before cant wait to make all recipes soon for me btw cant wait to make your other recipes soon for me love your recipes as always brightens up my day everyday after work
Sorry pl delete my comment Thanks for this i never had or use taro before btw cant wait to make your recipes soon for me love your recipes as always brightens up my day everyday after work