
This post may contain affiliate links. Please read our disclosure policy.


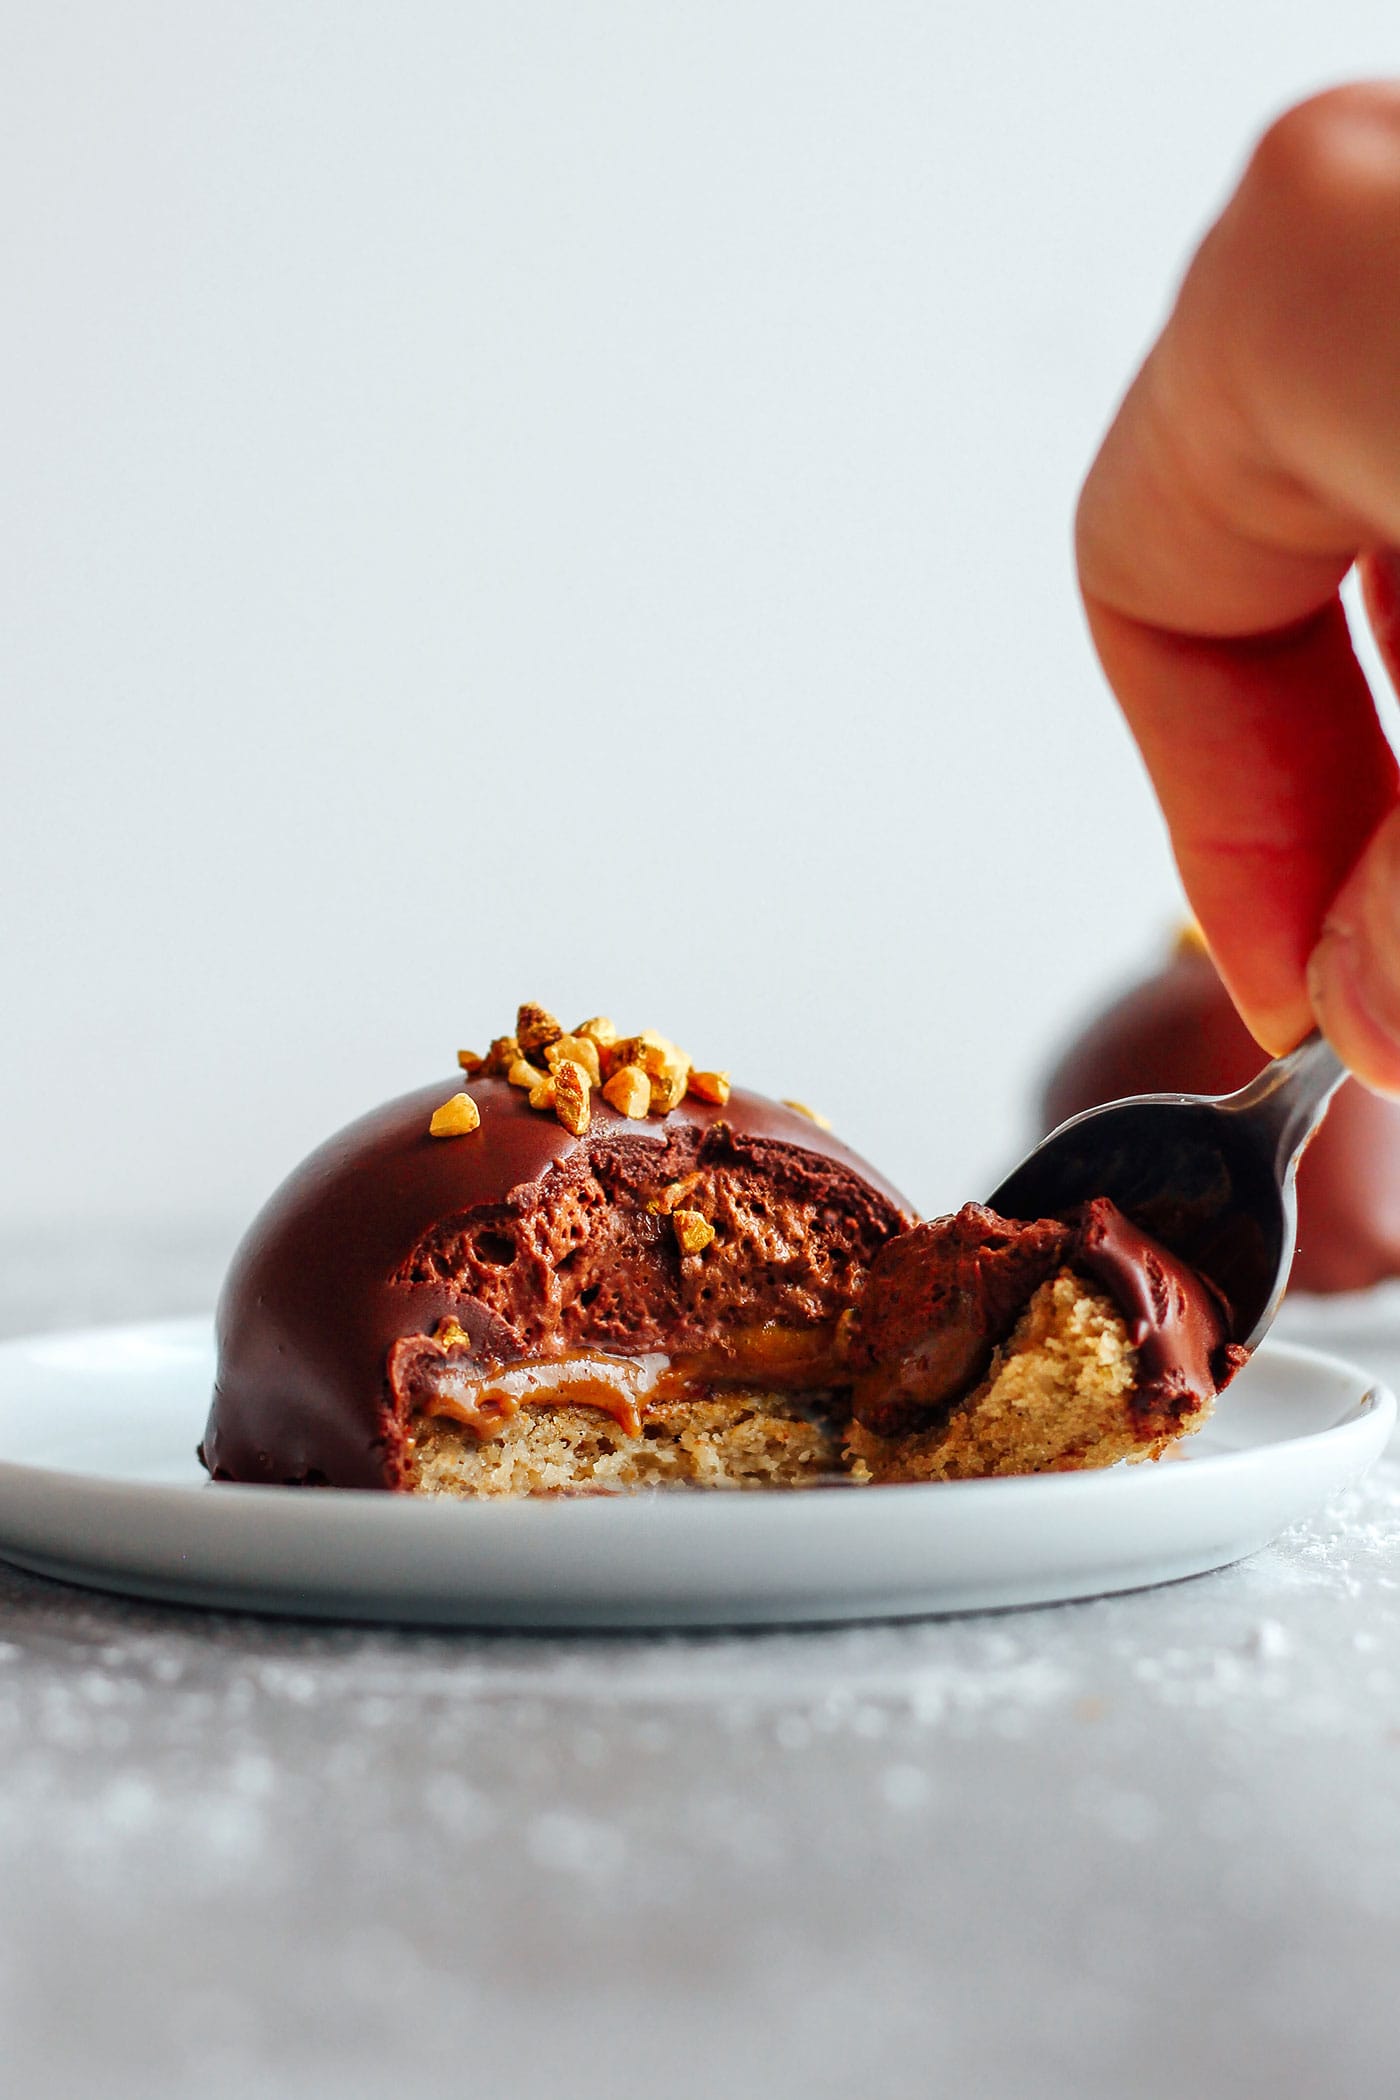
Let me introduce you to one of the most decadent vegan chocolate desserts: Dark Chocolate Mousse Praline Domes!
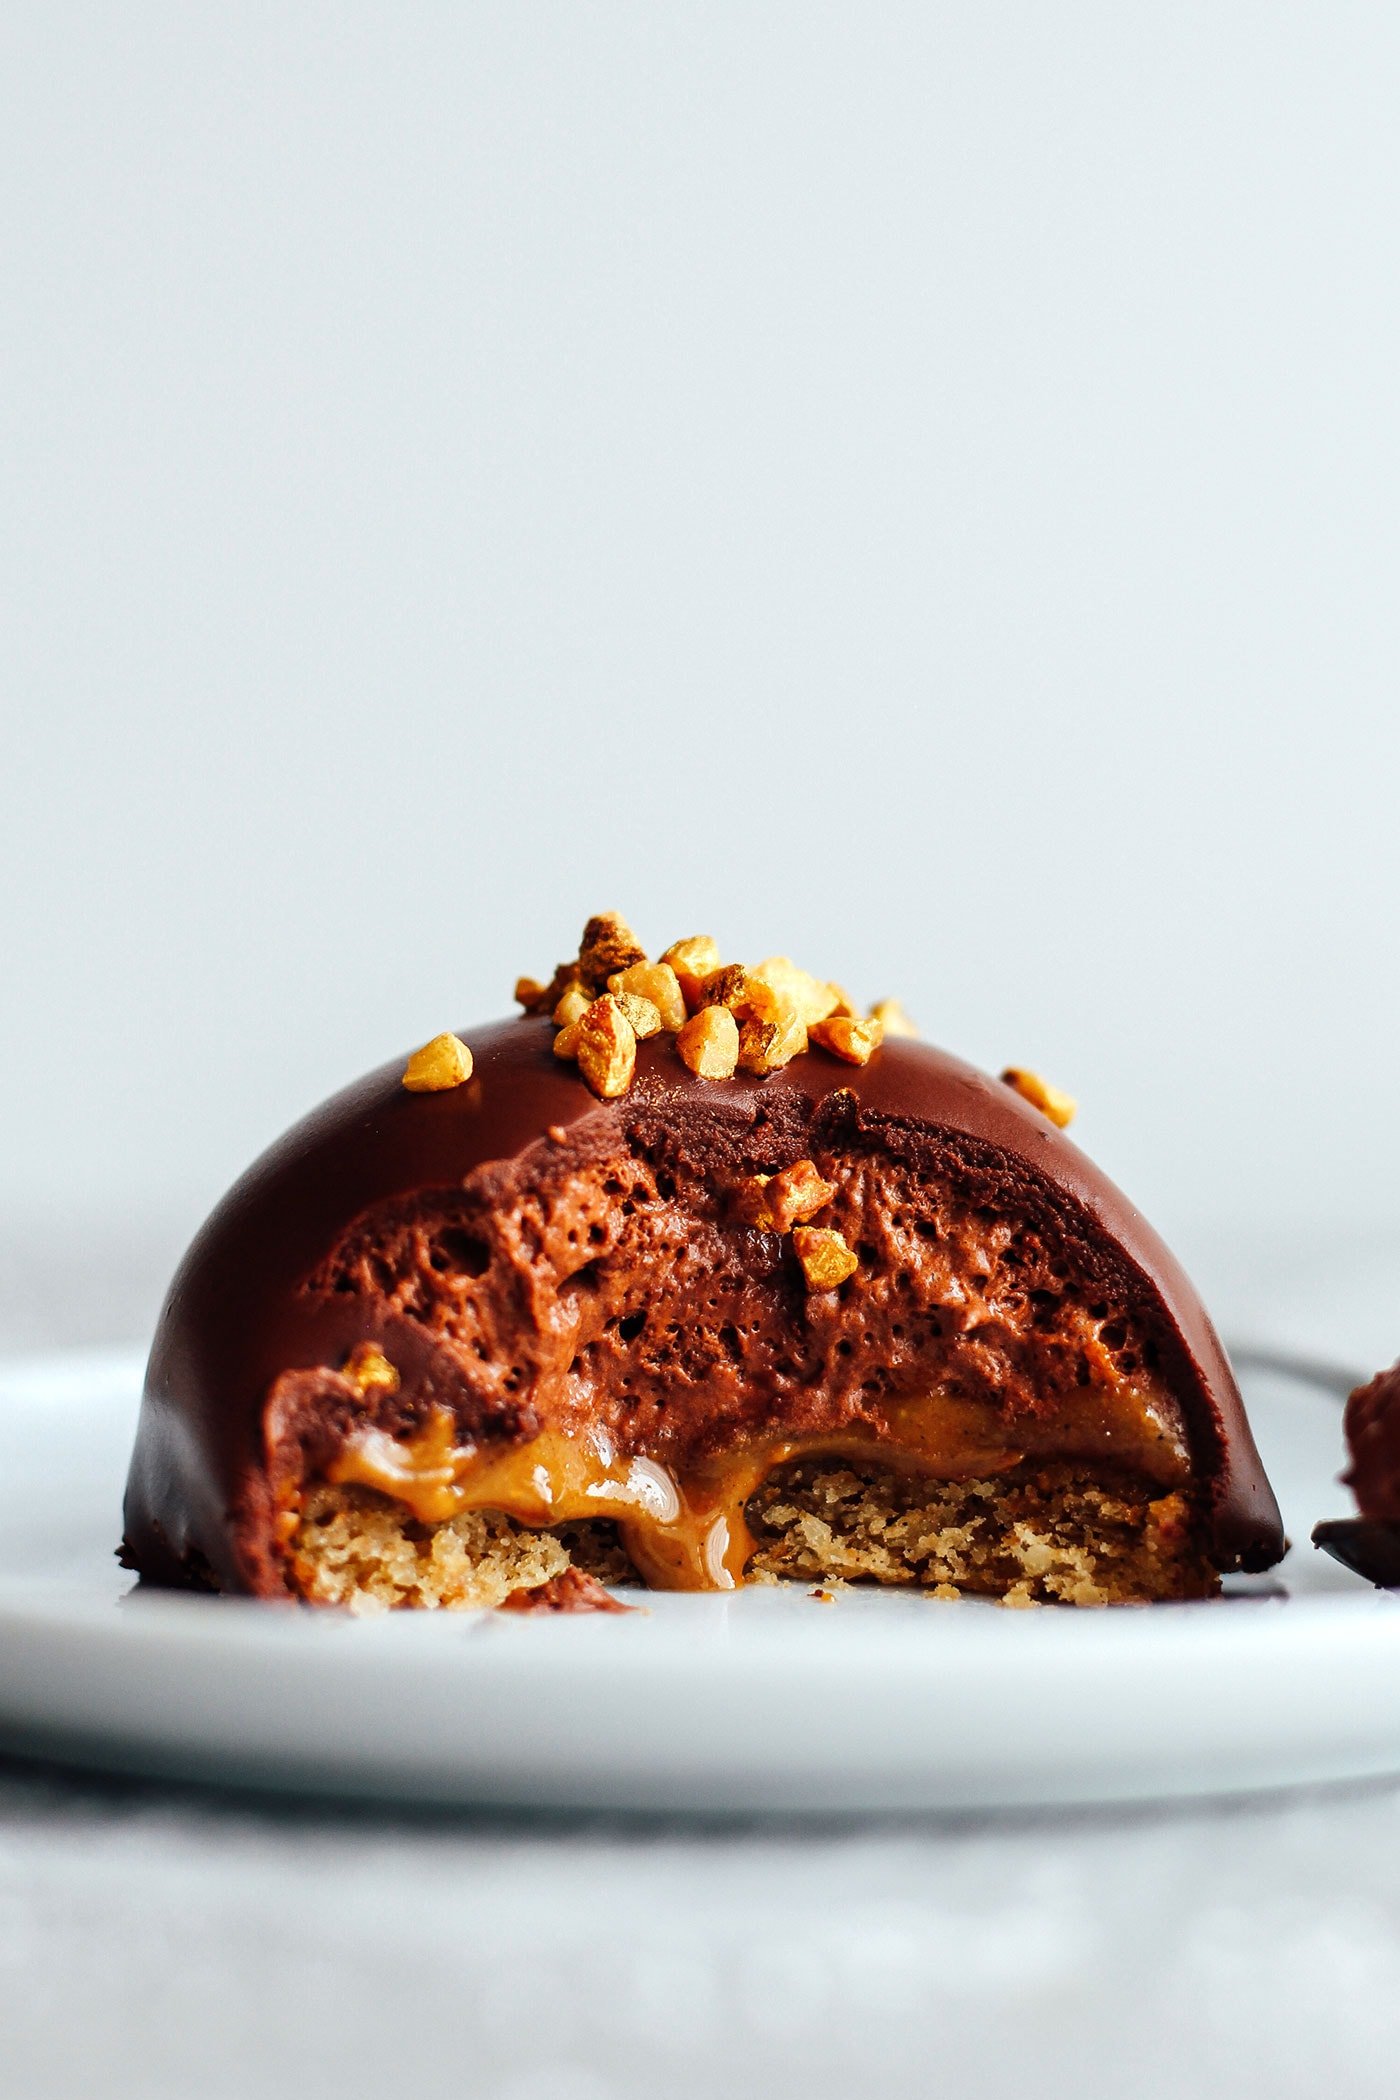
These domes are airy and super light in texture. It consists of a delicious dark chocolate mousse, a creamy layer of hazelnuts and almonds praline, and a spongy vanilla cake. Plus, it’s glazed with a soft dark chocolate ganache!
I hope you are ready for a ton of photos! I wanted to show the process as much as possible and show you all the yumminess of this dessert! Because seriously, this dessert is the bomb.

These chocolate mousse praline domes (or bombes) might look fancy and difficult to make, but they are actually quite easy! It’s a 4-step process:
- Make the aquafaba chocolate mousse and fill a silicon mold to the 3/4. Freeze until firm.
- In the meantime, you prepare the vanilla sponge cake that will make the base of the domes. Cut with a cookie cutter to the size of your domes and set aside.
- Dollop a tablespoon of praline butter on top of the frozen chocolate mousse. Top with a round of vanilla cake, and freeze until firm.
- Finally, you prepare a two-ingredient ganache and pour it over the domes to glaze. Then you can keep it in the refrigerator until ready to serve!

The chocolate mousse requires only two ingredients: aquafaba and dark chocolate. Aquafaba is the magical ingredient that gives the mousse its light texture. You start by whipping it to stiff peaks using an electric mixer and then fold in the melted dark chocolate. Whipping the aquafaba can take up to 5-6 minutes, so be patient! I recommend adding a pinch of xanthan gum or cream of tartar before whipping. It usually speeds up the process.
If you live in Europe and/or have access to tonka beans, feel free to add a pinch of ground tonka (about 1/16 tsp) to the chocolate mousse. It adds a delicate almond and vanilla flavor with hints of caramel. I know tonka bean is illegal in the US, so I’m not responsible if you get caught trying to get it on the black market. You’ve been warned. Anyway, here is a substitute: use 1/8 tsp almond extract and 1/4 tsp vanilla extract. This is totally optional; don’t worry if you leave it out.
Once your chocolate mousse is fully combined, you transfer it to the mold. I used two 6-cavity half spheres silicon mold. I don’t recommend using a metal mold, as you will have trouble unmolding the domes.
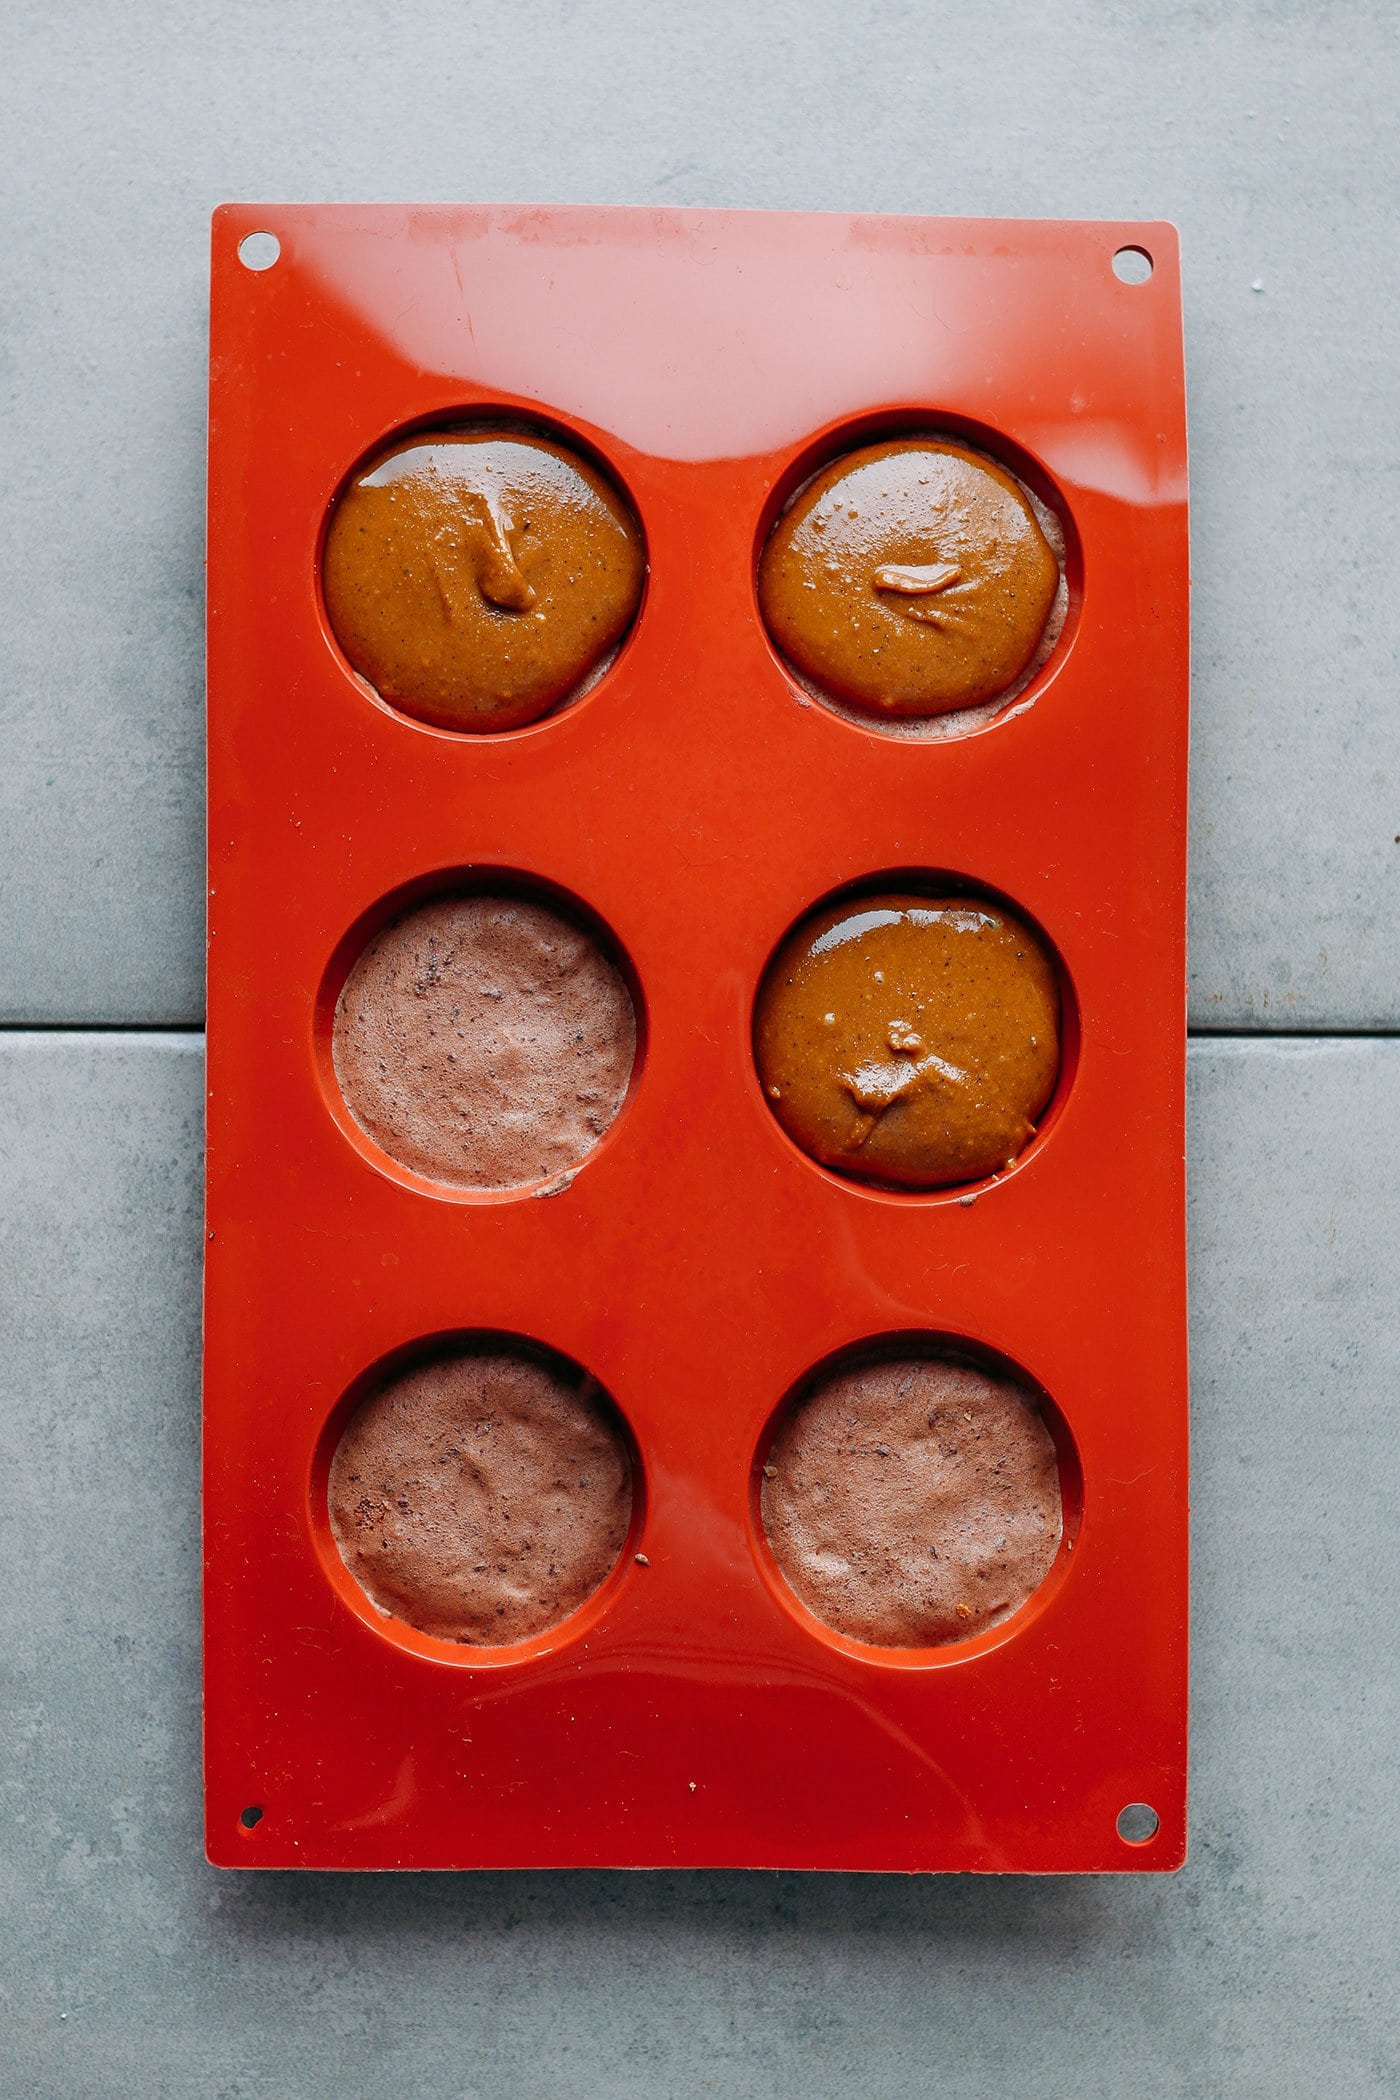
Then, freeze until firm, about 2 hours. In the meantime, we will prepare the vanilla cake that will make the base of our domes. The vanilla cake is gluten-free, moist, and very soft thanks to the main ingredient: almond flour. It adds another layer of texture to this dessert.
The batter is easy: combine the dry ingredients, pour the wet ingredients, and mix until combined. To bake, you can pour the batter into a 10-inch round cake, or simply spread it into a circle of the same size on a baking sheet lined with parchment paper. Bake for about 20 minutes before cutting into discs.
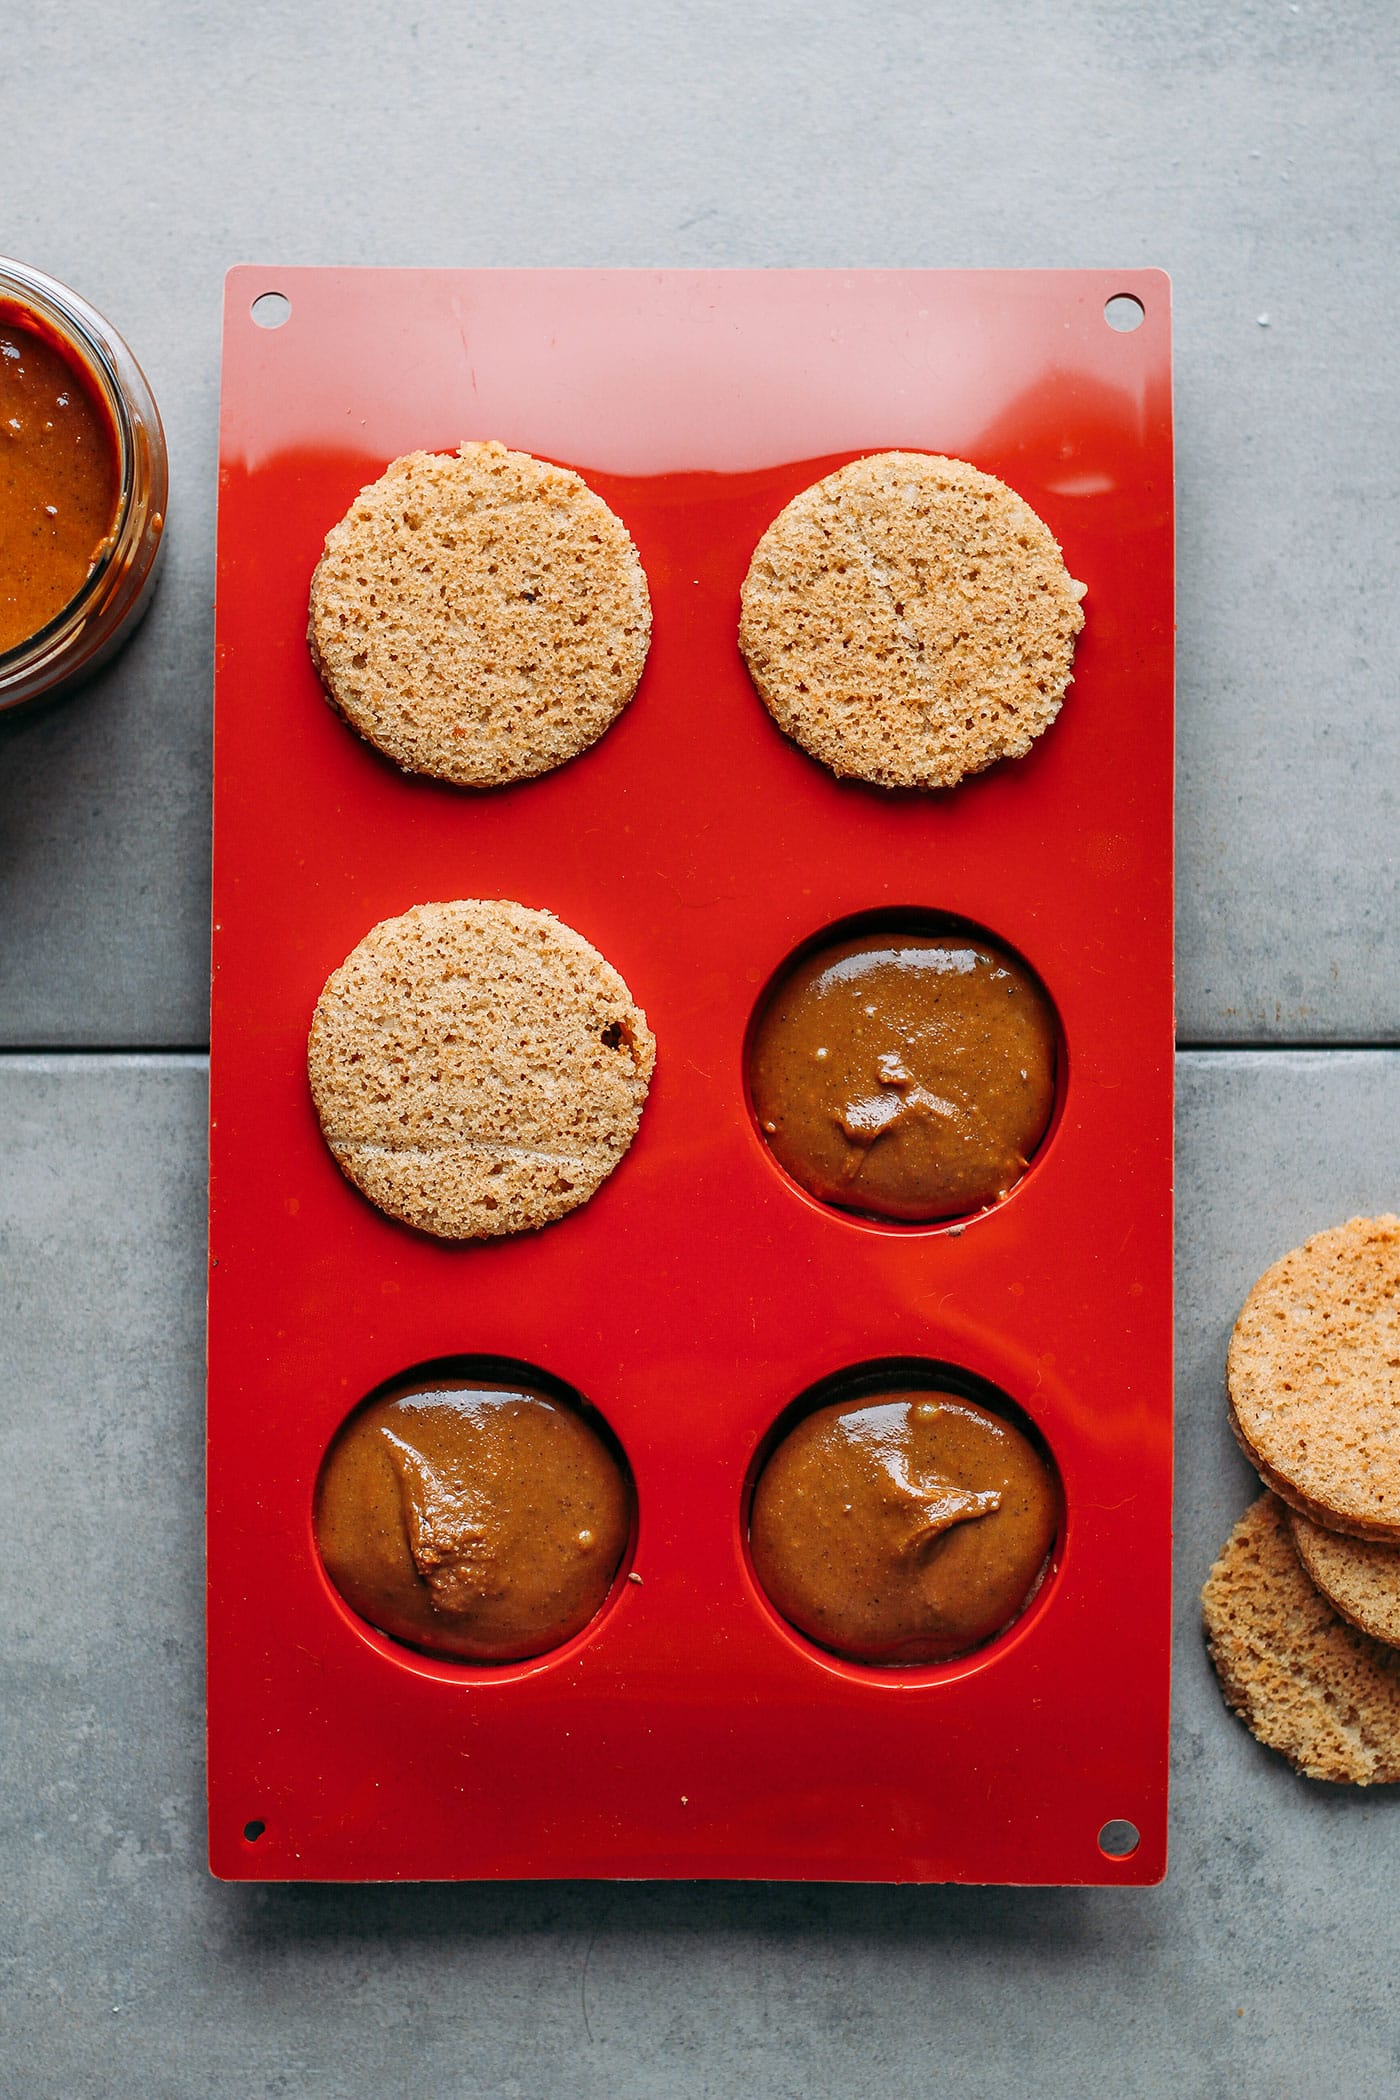
Once your chocolate mousse domes are frozen, it’s time to top them with a generous dollop of praline butter. I knew this Maple Praline Butter was not going to stay in my cupboard for long. If you have never tried praline paste/butter, it has a consistency similar to peanut butter but tastes just like caramelized nuts with a delicate vanilla flavor.
To close our domes, we will top the praline butter with a disc of vanilla cake, press down slightly, and freeze again for another 2 hours.
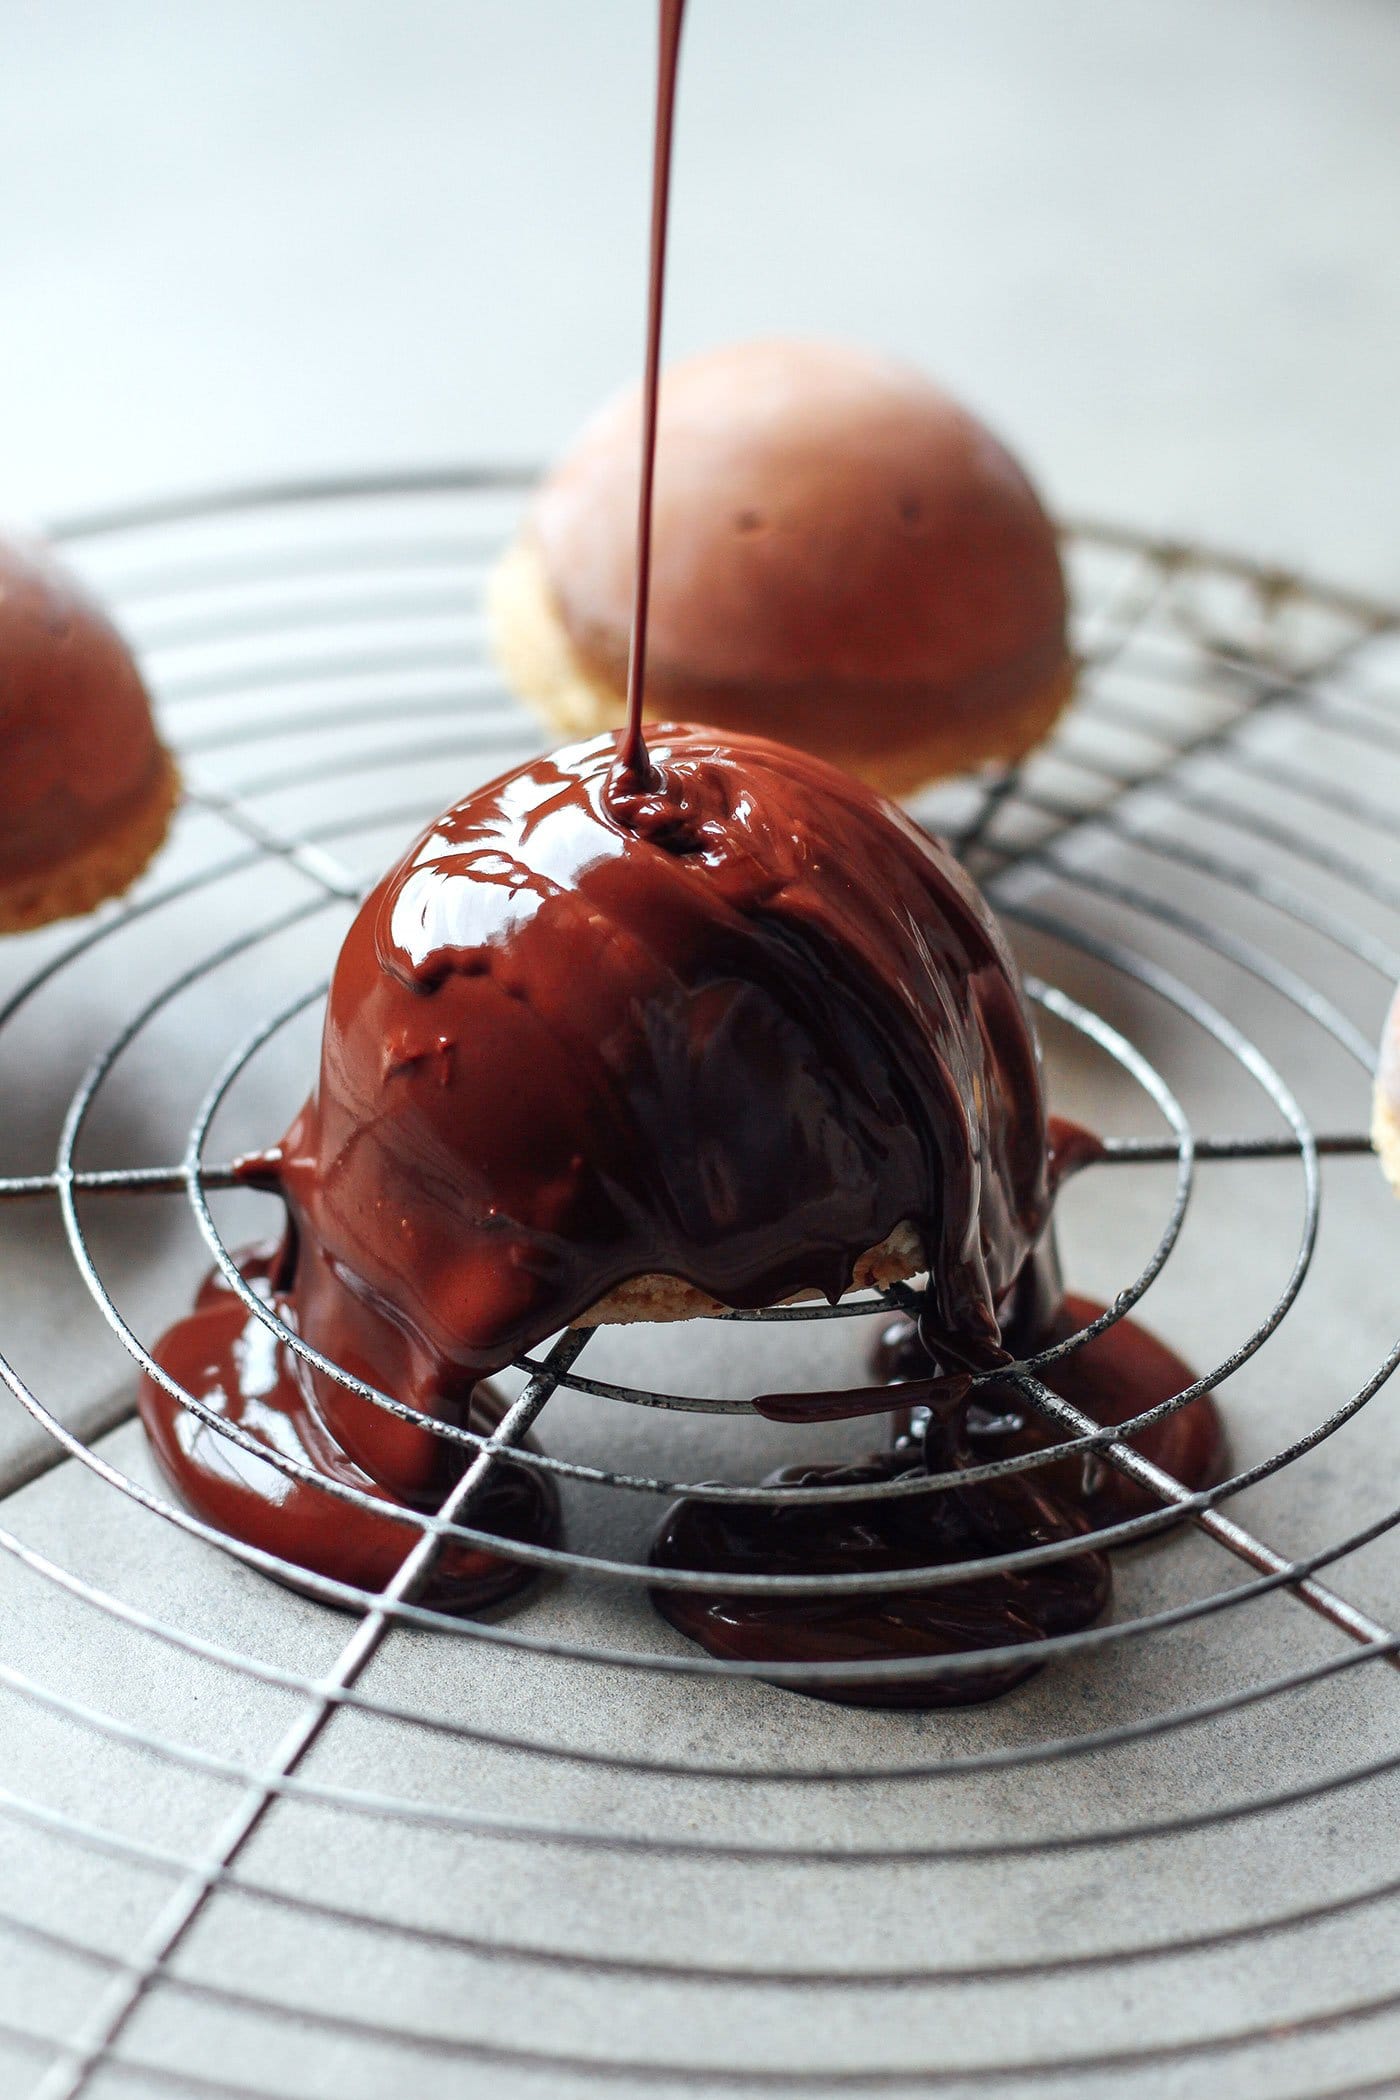
Finally, once the domes are frozen and completely firm, you glaze them with a two-ingredient chocolate ganache. The glaze just requires almond milk and dark chocolate and will firm up as soon as it hits the frozen domes, so work fast! Your chocolate mousse bombes are now done. For the decoration, you can top the domes with chopped nuts, chocolate shavings, or sprinkles!
Refrigerate at least 2 hours before serving to make sure the chocolate mousse is firm enough.
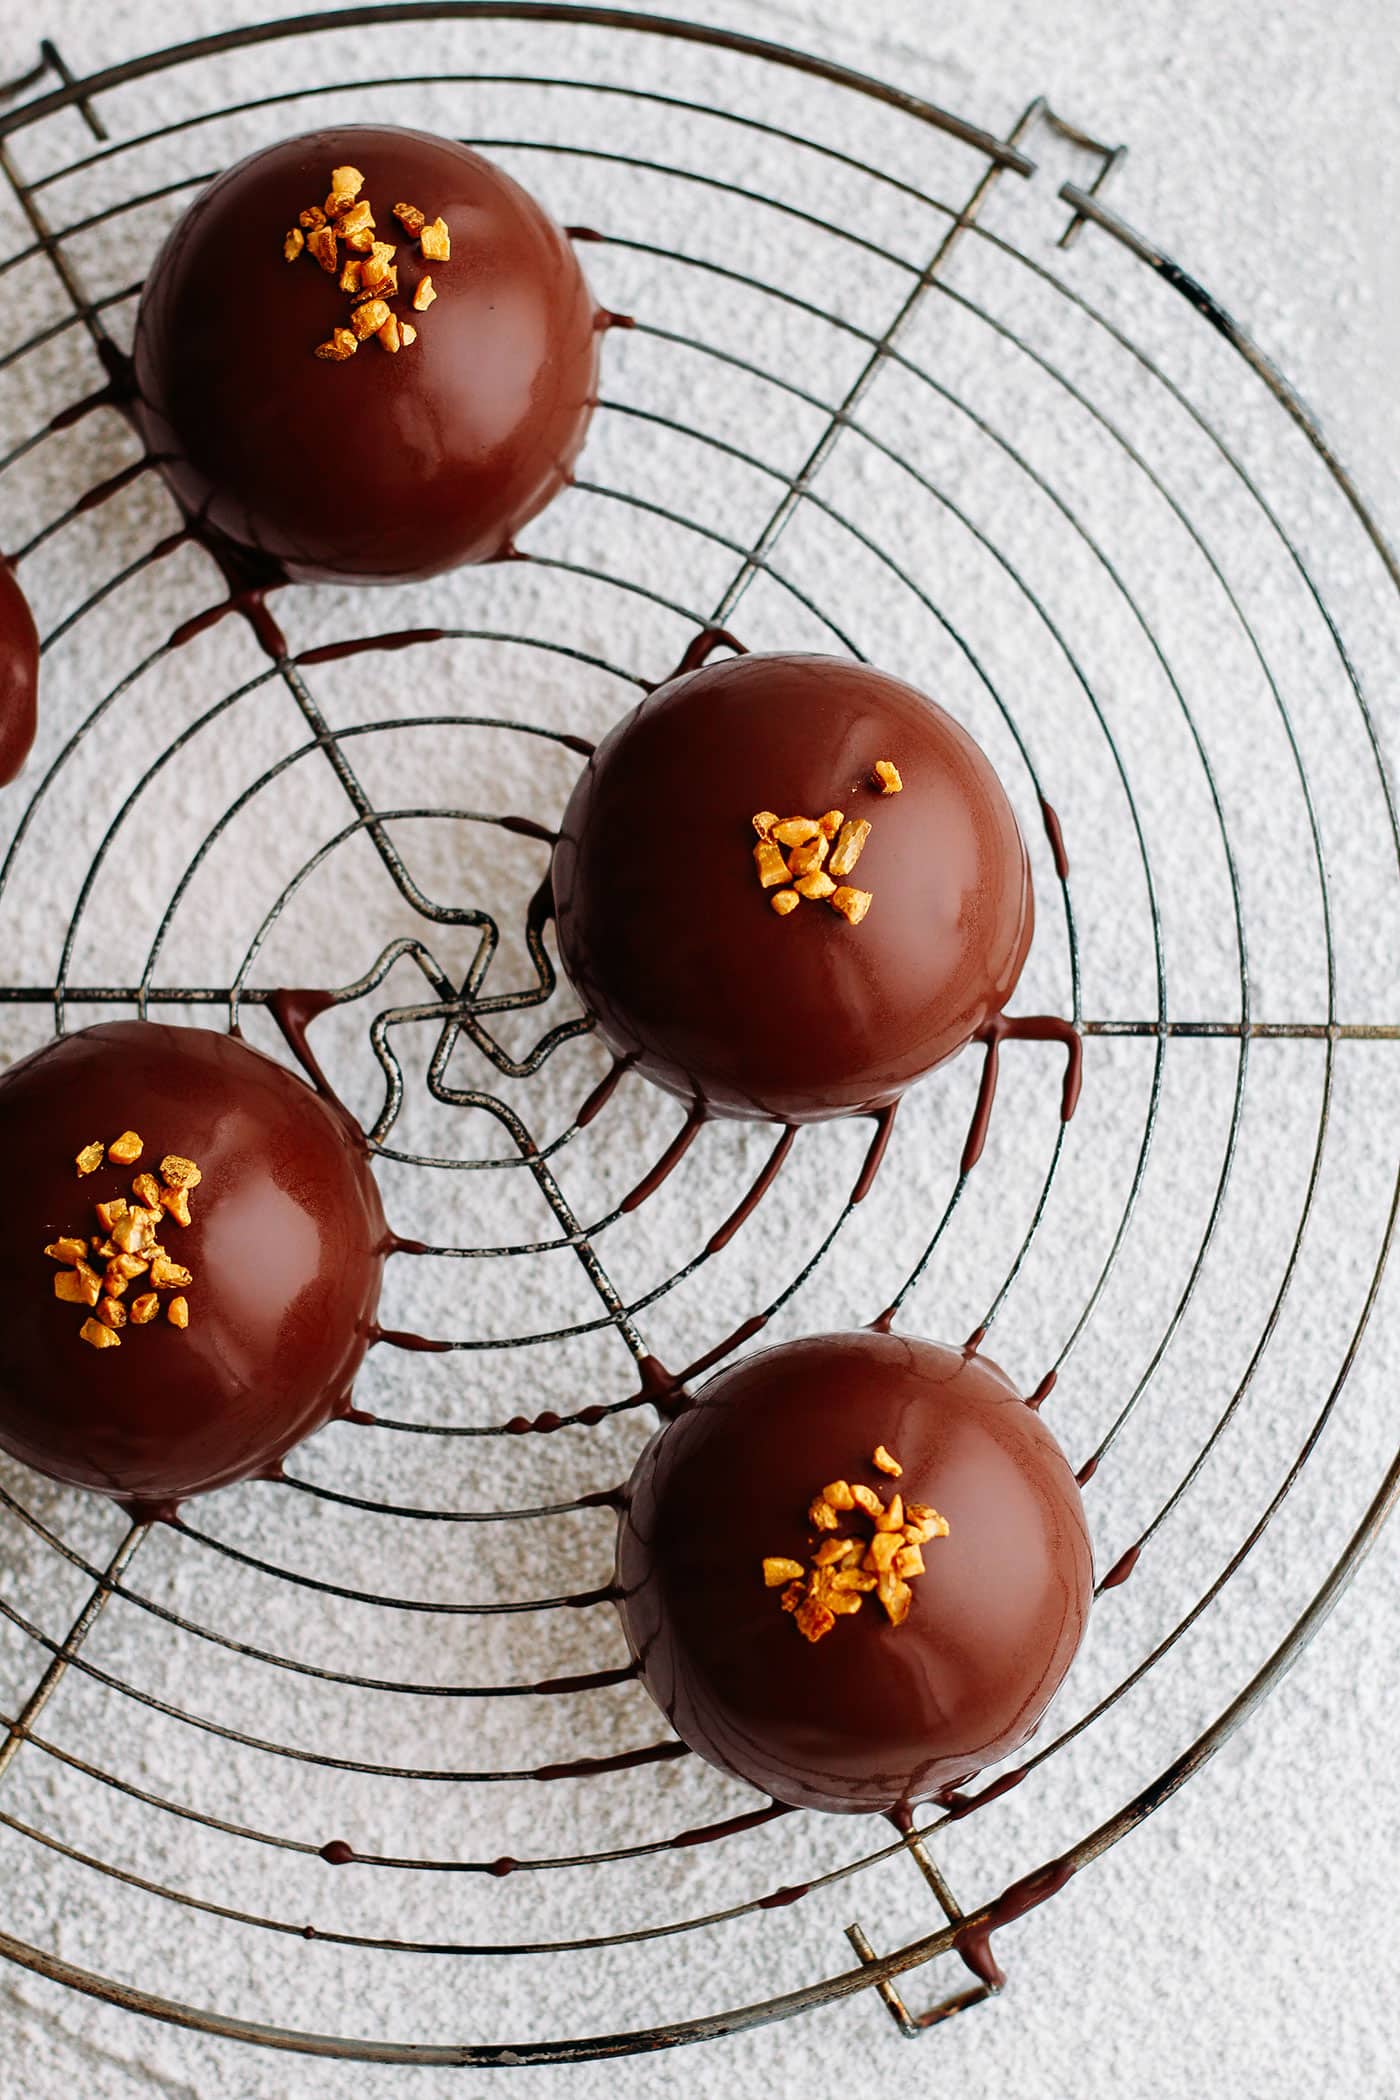

These chocolate mousse domes are so light and airy that they will disappear in no time! They make the perfect dessert for a date night, and I swear your guests won’t believe it’s vegan!
Let me know in the comments if you try this recipe!


Save this recipe!
Enter your email below and I'll send it to your inbox!
Plus, you will receive new recipes every week!

Chocolate Mousse Praline Domes (Vegan + GF)
Ingredients
Chocolate Mousse
- 1/2 cup (150 g) aquafaba (from one 15-ounce can chickpeas)
- 3/4 cup (150 g) dark chocolate chips
- 1/8 tsp xanthan gum or cream of tartar, optional
- optional add-ins: 1/8 tsp almond extract, 1/4 tsp vanilla extract
Praliné
- 10-15 tbsp (150-200 g) praline paste
Vanilla Cake
- 1 cup (96 g) almond flour
- 1/3 cup (40 g) tapioca starch
- 1/4 cup (41 g) brown rice flour
- 3 tbsp (36 g) coconut sugar
- 1/4 tsp baking soda
- 1/4 tsp baking powder
- 1/2 cup (120 ml) almond milk
- 2 tbsp (30 ml) melted coconut oil
- 1 tbsp (15 ml) maple syrup
- 1 flax egg (1 tbsp ground flax seeds mixed with 3 tbsp water)
- 1 tsp vanilla extract
Chocolate Glaze
- 1 cup (200 g) dark chocolate chips
- 3/4 cup (175 ml) almond milk
Instructions
Chocolate Mousse
- Melt the chocolate chips over a double boiler. Once fully melted, remove from heat and let cool about 5 minutes.
- If you haven't already, drain the chickpeas from the can and reserve the juice (aquafaba). Place the aquafaba into a large mixing bowl. Add the xanthan gum and optional add-ins: almond and vanilla extract. Using an electric whisk, whip the aquafaba on high speed until stiff peak forms, about 3-5 minutes. You should be able to turn the bowl upside down without the aqufaba losing its shape.
- Pour the melted chocolate on the whipped aquafaba. Using a spatula, carefully fold the melted chocolate into the aquafaba until fully combined. Do not overmix, stop as soon as it's combined and no white parts remain.
- Fill the cavities of two half circles silicone molds 3/4 full, you will fill about 10 cavities (see notes if you have only one mold). Use the back of a spoon to slightly flatten the top. Transfer to the freezer and freeze until hard, at least 2 hours. You will have chocolate mousse batter left, just transfer it to ramequins and place in the refrigerator. Dessert bonus. In the meantime, prepare the vanilla cake.
Vanilla Cake
- Preheat oven to 350°F (175°C). Line a 10-inch cake pan (or springform pan) with parchment paper. As an alternative, you can simply line a baking sheet with parchment paper.
- In a mixing bowl, mix together the almond flour, tapioca starch, brown rice flour, coconut sugar, baking soda and baking powder.
- Add the almond milk, melted coconut oil, maple syrup, flax egg, and vanilla extract. Mix until well combined.
- Transfer the batter to the cake pan. If you are using a baking sheet, pour it in the middle and slightly flatten to make a round of about 10-inch.
- Bake for 20 minutes and let cool completely. Cut cake discs the same size of the domes and set aside.
Assemble
- Remove the silicon mold from the freezer, don't remove the domes from the mold yet.
- Dollop about 1 to 1 and 1/2 tablespoon of praline butter on top of the frozen chocolate mousse. Top with a disc of vanilla cake and press down slightly. Repeat with the remaining discs. Place in the freezer for another 2 hours.
- After two hours, prepare the chocolate ganache glaze: Place the chocolate chips in a small bowl and set aside. Heat the almond milk in a saucepan over medium heat. Once very hot (just before boiling), remove from heat and pour over the chocolate chips. Let sit 1-2 minutes and whisk until fully combined.
- Remove the mold from the freezer and unmold the frozen domes. Place them on a grid or rimmed baking sheet.
- Pour the chocolate glaze over the domes to coat them completely. Top with chopped nuts, or dark chocolate shavings. Wait 5 minutes and carefully transfer the domes to serving plates. Refrigerate at least 2 hours before serving.
- Chocolate mousse domes will keep for up to 3 days in the refrigerator or up to 2 months in the freezer. Thaw overnight in the refrigerator.
Notes
Nutrition

About the Author
Thomas Pagot is the founder, photographer, and recipe developer behind Full of Plants. He created the blog in 2016 as a personal cookbook for vegan recipes. Through years of recipe development, Thomas has successfully grown Full of Plants into a trusted resource for plant-based recipes.
Leave a Comment