Illustrated Recipes
Illustrated Recipes
Welcome to our illustrated recipes! We strongly believe that cooking should be fun, and that’s why we have created those colorful illustrations of our most popular recipes. They are also great to introduce your kids to cooking!
Print those to put in your recipe binder or hang on your fridge! You can also save them on your phone or tablet to check them later!
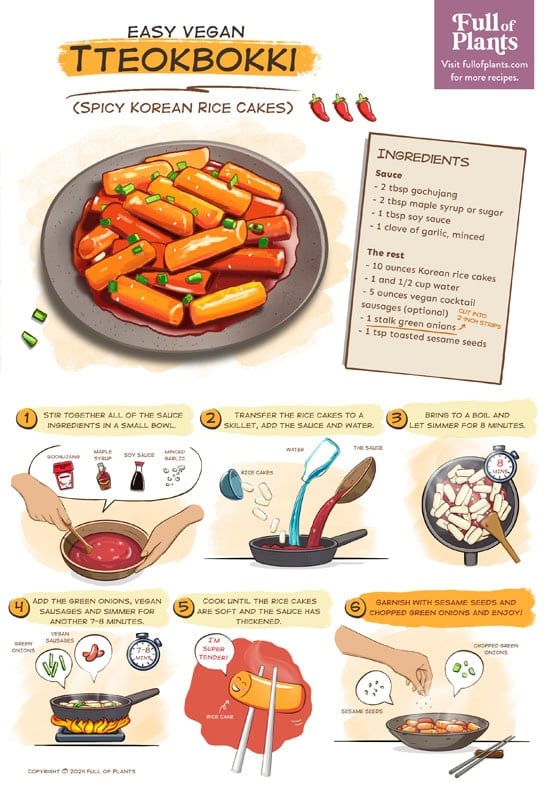
Vegan Tteokbokki
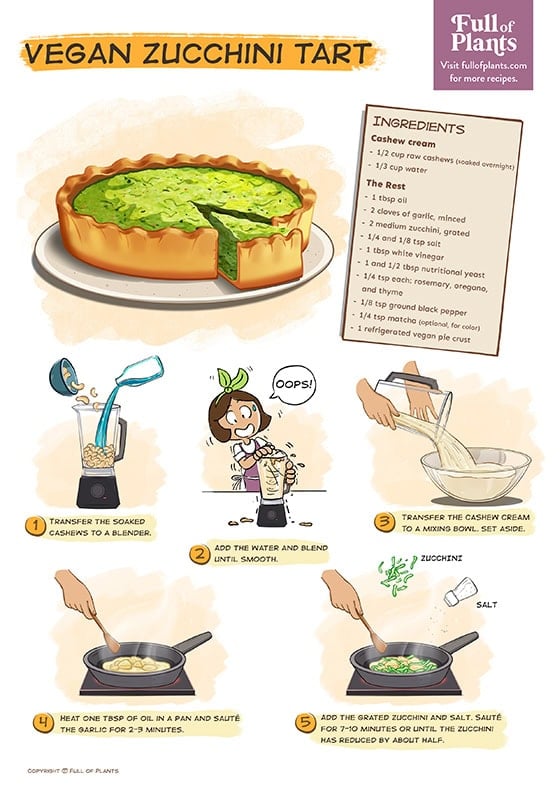
Vegan Zucchini Tart
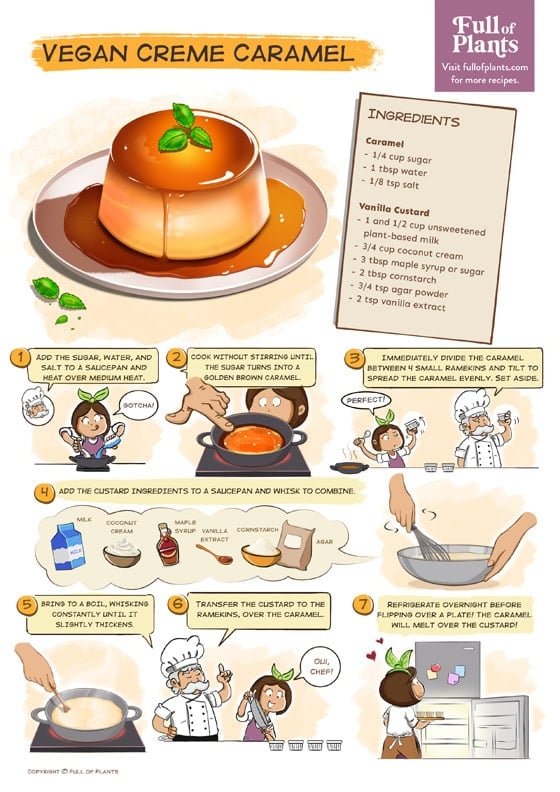
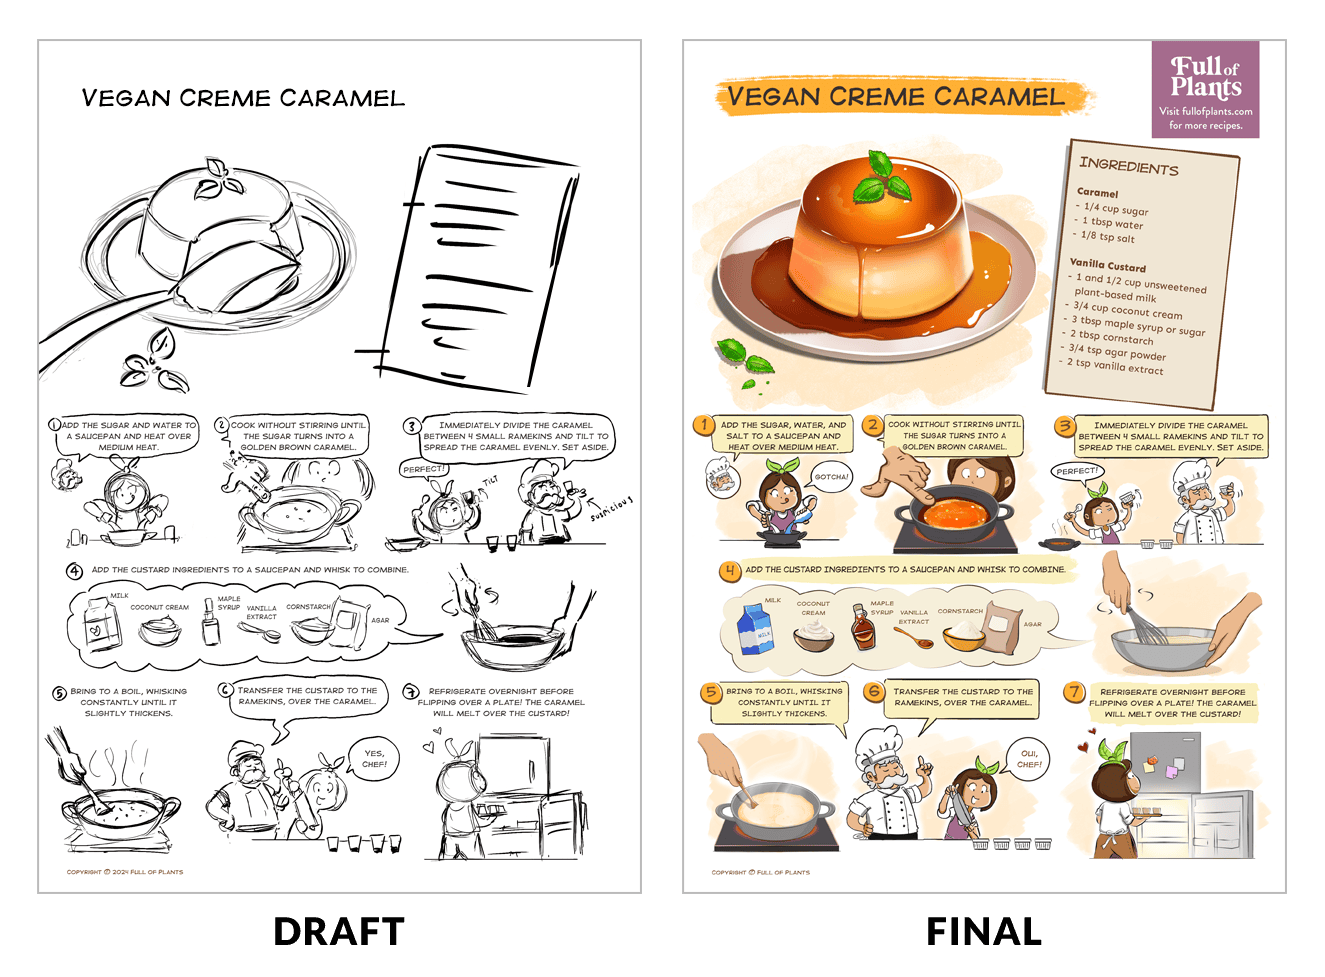
Creme Caramel
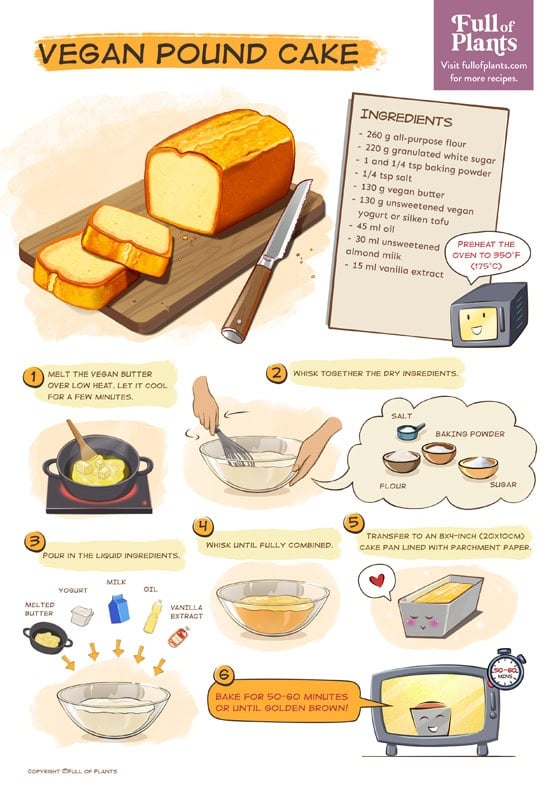
Vegan Pound Cake
We have more illustrated recipes coming soon. Stay tuned!
ABOUT THE ILLUSTRATIONS
We are so happy to introduce you to our newest project: illustrated recipes! The idea came to mind after hanging one of our printed recipes on the fridge. Although it was convenient, it didn’t exactly add to our kitchen aesthetics. That’s when we thought that it would be awesome to have colorful illustrations instead!
Our illustrated recipes transform the traditional recipe card into a colorful experience. With charming artwork and an engaging step-by-step guide, cooking becomes fun! These illustrations are perfect for food enthusiasts, comic lovers, or anyone who’d like to add a splash of color to their recipe binder or fridge!
We drew inspiration for the food illustration style from a few beloved childhood comics and anime such as Ghibli movies. You can learn a bit more about the process of bringing these illustrations to life below.
Our Process
All of our illustrated recipes are hand-drawn by my wife’s cousin, Quân, and his colleague, Tâm. The process is as follows. We first start by picking a recipe that fits our criteria. This means the recipe should have great ratings and require a few steps and ingredients. We try to pick recipes that can fit on a maximum of two pages.
Once that is done, we write a quick script with each crucial step that must be included in the illustration and send it to our illustrators, who will start working on a draft.
After the draft has been slightly reworked and validated, our illustrators will work on refining the strokes and doing the coloring.
How to Print
You have two options for printing the illustrated recipes. You can print each on a whole sheet of paper (Letter or A4) and put them in your recipe binder. The second option is to print two recipes on one page, which you can then cut in half. This size is ideal for hanging on your fridge using cute magnets!
Printing Two Recipes on One Page
Mac
- Open both PDFs in Preview. On one window, click on the “Choose sidebar display” button in the top left corner. Select “Thumbnails.” You should now see a sidebar on the left. Repeat this step with the second window. Drag one of the thumbnails from one sidebar to the other. Your illustrations should now be combined into a single file.
- Once that is done. Click on File > Print. Then, go to Show Details > Layout > Pages Per Sheet and set that option to 2. Ensure the format is set to Landscape. You can then print your recipes!
Windows
- Open Acrobat. Next, click “Tools” and select “Combine Files.” Click “Add Files” and select the two recipe PDFs that you want to print.
- Next, select “Print this file.” Under the option “Page Sizing & Handling,” select “Multiple” and input “2” pages per sheet. Ensure the format is set to Landscape and hit print!
Tip: Use Photo Paper!
I recommend printing those on matte photo paper for optimal quality and sharpness. Remember to set the print settings to “photo” and quality to “high.”