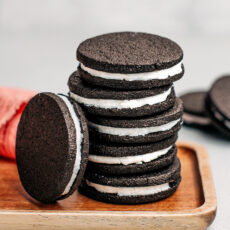
Homemade Oreo Cookies (Vegan)
Relive your childhood memories with these homemade Oreo cookies! These school snack classics are simple to prepare, require just a few ingredients, and come out perfectly crispy every time! They are dark and chocolatey and generously filled with sweet vanilla filling!
Ingredients
Cookies
- 1/2 cup (120 g) vegan butter at room temperature
- 1/2 cup (122 g) granulated sugar
- 6 tbsp (48 g) unsweetened cocoa powder
- 2 tbsp (16 g) unsweetened dark cocoa powder
- 1/4 tsp baking powder
- 1/2 tsp salt
- 1 cup (125 g) all-purpose flour
- 2 tbsp (30 ml) almond milk
- 1/4 tsp vanilla extract
Vanilla Cream Filling
- 3 tbsp (41 g) deodorized coconut oil not melted
- 1/2 cup (62 g) powdered sugar
- 1/4 tsp vanilla extract
Instructions
Cookies
- Cream the butter. Add the diced butter and sugar to a stand mixer fitted with the flat beater attachment. Cream the butter with the sugar on medium speed for about 2 minutes or until fully combined.
- Add the cocoa powders. Next, add both types of cocoa powder, baking powder, and salt. Cream for another 20-30 seconds.
- Add the flour. Add the flour, almond milk, and vanilla extract. Knead for another 30 seconds. At this point, the dough should have the texture of cookie dough.
- Flatten. Transfer the dough to a piece of parchment paper. Top with another layer of parchment paper and flatten the dough into a 1/8-inch (3-4mm) thickness using a rolling pin. Try to make the dough as even as possible.
- Chill. Place the flattened dough on a baking sheet or flat plate and chill it in the refrigerator for about 2 hours. You can speed up this process by freezing it for about 20 minutes.
- Preheat the oven to
 325 °F (160°C).
 - Cut out cookies. Using a 2-inch cookie cutter, cut out cookies and place them on a baking sheet lined with parchment paper. There is no need to leave much space between each as they will not spread much.
- Bake. Bake the cookies for about 11 minutes. After removing the cookies from the oven, let them cool completely before garnishing them with the vanilla filling.
Assemble
- Prepare the vanilla cream. Add the room-temperature coconut oil (it should be soft, not melted), powdered sugar, and vanilla extract to a stand mixer fitted with the flat beater attachment. Cream the coconut oil for 15-20 seconds or until it is fully combined with the sugar. Note: If the filling appears too dry, add more coconut oil.
- Fill the cookies. Scoop out about 1 teaspoon of the vanilla cream. Shape it into a ball and slightly flatten it into a disc in your hand. Place the disc of vanilla cream on a chocolate cookie and carefully press it onto it. Finally, top with another cookie and slightly press it onto the cream to create a sandwich cookie. Repeat with the remaining cookies and filling, and enjoy!
- You can keep the cookies for up to 10 days in an airtight container at room temperature.
Notes
- Adjust the amount of black cocoa powder. Not all brands of black cocoa powder are equal, so you might have to slightly adjust the amount to get the desired color.
- Do not omit chilling the flattened dough. Make sure to chill the dough before cutting out the cookies, as skipping this step can make it difficult to cut them out. After chilling, the dough is firmer and easier to work with. If the dough is still too soft, place it in the freezer for 10-15 minutes.
- Use an embossed rolling pin. To decorate your cookies and give them even more texture, feel free to use an embossed wooden rolling pin!
- Do not overbake. As these cookies are very dark in color, you won't be able to tell if they are done judging by their color. Hence, I recommend baking a small batch and giving them a taste test. The cookies must be crispy all the way through and not bitter.
- Let the cookies cool. Do not try to fill the cookies if they are still warm, as the filling will melt.
Nutrition
Serving: 1 oreo | Calories: 146 kcal | Carbohydrates: 19.6 g | Protein: 1.6 g | Fat: 8 g | Saturated Fat: 3.9 g | Sodium: 123 mg | Potassium: 70 mg | Fiber: 1.5 g | Sugar: 11.5 g | Calcium: 6 mg | Iron: 1 mg
