
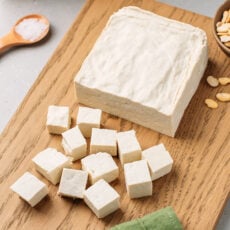
Soy-Free Tofu (Made From Fava Beans!)
Learn how to make soy-free tofu from fava beans! Made with just two ingredients – fava beans and nigari – it curdles just like traditional tofu! It has a firm, sliceable texture similar to soy tofu, making it perfect for frying, baking, or marinating. If you’ve never made tofu before, don’t worry, I walk you through the whole process step-by-step!
Ingredients
- 2 and 1/2 cups (500 g) dehulled, split fava beans
- 12 cups (2.8 liters) water
- 1 tsp (2 g) nigari flakes
Instructions
- Soak the fava beans. Add the beans to a large mixing bowl and cover them with water. Let them soak overnight at room temperature.
Make the fava bean milk
- Rinse and drain the beans. Rinse the beans 3-4 times under cold water or until the water runs almost clear. Drain them well.
- Blend them. Transfer about half of the soaked beans to a blender and pour in 6 cups of water. Blend for about 30 seconds. Note: I blend the beans in two batches, as 12 cups of water don't fit in my blender.
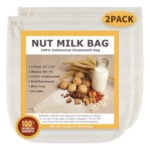
- Strain the milk. Place a nut milk bag over a large glass mixing bowl. Next, pour the blended mixture into a nut milk bag. Use your hands to squeeze the bag and extract as much liquid as possible. Discard the pulp.
- Repeat. Transfer the remaining beans to a blender and add the remaining 6 cups of water. Blend again for 30 seconds and strain the milk using the same nut milk bag.
- Let the milk sit. Next, cover the bowl of milk with plastic wrap and let it sit undisturbed for about 2 hours. This step allows the starch to settle at the bottom of the bowl.
- Scoop out the milk. Once you can see the starch at the bottom of the bowl, use a measuring cup or a ladle to scoop out the milk and transfer it to a large pot or saucepan (I use my Instant Pot liner). Be careful: You only want to scoop out the milk, leaving the starch in the bowl.
Make the tofu
- Bring to a boil. Bring the milk to a boil, then reduce the heat and simmer for 8-10 minutes, stirring constantly.
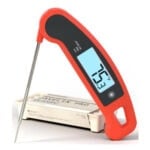
- Let it cool. Remove the pot from the heat and allow the milk to cool down to 167°F (75°C). I highly recommend using a kitchen thermometer for this step.
- Prepare the nigari. In the meantime, add the nigari flakes to a small bowl. Pour in 1/4 cup of warm water (at about 140°F / 60°C) and stir until the nigari is completely dissolved.
- Add the coagulant. Once the milk has reached the recommended temperature, slowly pour in the dissolved nigari while stirring. Gently stir a few more times using a wooden spoon or spatula to distribute the coagulant.
- Let it curdle. Allow the milk to curdle for 20-25 minutes. Do not stir during this step. The milk will separate into curds and whey.
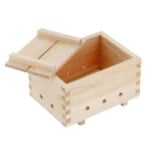
- Prepare your tofu press. Slightly wet the cheesecloth and arrange it in your tofu press. Place the press inside a large baking dish so the whey can drain.
- Transfer to the press. Using a fine-mesh sieve, scoop out the curds and transfer them to the tofu press. Fold the cheesecloth over the curds.
- Press until the curds form a block. Place the top lid over the cheesecloth. Then, place three 15-ounce cans on top of the lid. Leave the tofu in the press for about 2 hours.Remove the lid and check your tofu. If it's not firm enough for your liking, press it for another 2 hours. Your tofu is now ready!
- Store the fava bean tofu in the refrigerator for up to 5 days.
Notes
Soak the beans. There's no way around it. You'll have to be patient and soak the beans overnight.
Don't pour the starch into your sink. Instead, transfer it to a freezer bag, tie it tightly, and throw it in the trash. It's better for your plumbing.
Stir constantly. To prevent the milk from sticking to the bottom of the pot, stir it constantly with a wooden spoon when it simmers.
Adjust how long you press the tofu. Depending on how firm you want your tofu, you can adjust the pressing time. I like to press mine for 2 hours using 3 stacked cans, for a total weight of about 45 ounces (1.2 kg). This yields firm tofu. For extra-firm tofu, press it for 4-5 hours.
